My (Prunus) air layering tutorial video is posted on YouTube.

Hi everybody,

just to let you all know that my tutorial video: Layering a big old two-trunk Prunus mahaleb Yamadori to get two single-trunk pre-Bonsai. Is posted on YouTube! 

I hope you enjoy it?!

Cheers,

Hans van Meer.

Info: karamottobonsai@hotmail.com

—————————————————————————————-

Part II of the story of the “Elephant” my big Yamadori Larch Bonsai is online!

Hi, everybody!

Finally, after trying it in vain for more than a week, I managed to post the last of only two saved copies of the originally produced video! I was finally able to do it with NCH VideoPad…this was the sixth one I had downloaded to solve this problem! The first program Cyberlink power director 12 that came with my computer had all kinds of for me unsolvable problems and crashed several times! And one of the 2 copies of the original finished video that I could save from them capt on showing up flipped after posting it on youtube?! Even after flipping it over with a downloaded program it still showed up wrong?! No help could be found on or from youtube…so I was glad that I was finally able to post this second copy with the help of VideoPad!!! Although the sound on this only left good version is not too good, I still hope that it is enjoyable for the Bonsai lovers out there?! It brought me a lot of headaches and frustrations …bud it thought me to only work with good devices and programs and most of all: SAFE MORE THAN ONE COPY !!!

More videos will be uploaded soon (if all goes well that is)! 😉

Cheers,

Hans van Meer.

https://youtu.be/C9lWi3Gcz-k

Part I of the story of “the Elephant” my big Yamadori Larch is online.

Hi, everybody,

I am happy and relieved to tell you all that last night I finally posted Part I of the story of “the Elephant” onto YouTube! It took me 6 days and late at night to do it right…but I finally was happy enough with the result to post it!!! It took me this long because I had to go through many hundreds of pictures on 2 computers and 3 external hard drives to find the best ones! Then I had to improve most of them to finally be able to load them from my old computer onto my new computer, where I had to make a film of them with a for me totally new and unknown program named: CyberLink PowerDirector…..and that was not that easy…to say the least!!! It has been some years since I cursed that much!!! 😉 But I have to say that the final result is very satisfying…so I hope you like it too?! Tonight I will start to work on Part II which is all video and covers the massive repotting I did this spring, when after living for 10 years in a wooden box, “the Elephant” was finally planted in its first real Bonsai pot! I hope to upload that in a week or so?! For now, I hope you enjoy this first part?!

Cheers,

Hans van Meer.

Oops! I forgot my baby Yew in my earlier post!

Hi, everybody,

I just discovered that I forgot to show and discuss my baby Yamadori in my earlier Yew maintenance post! This Taxus baccata Yamadori was some 10 years ago given to me by my dear old Bonsai friend Terry Foster when I was a guest in his welcome home in the North of England. Terry and his lovely wife Charlotte took me in as one of their own every time I was one of the instructors at Tony Tickle’s “BURRS” weekend extravaganzas! And as if that was not enough…I always left with some sort of wonderful gift! Such a shame that we live so far apart! They both feel like family to us!

Below: November 2008. “Little Terry” as we named it, just after cleaning the wood and the deadwood (Jin and Shari) and treating it with Lime sulphur and wiring and styling it! Height: This 21 cm/ 8.5 Inch high. Such a little gem! 🙂

Below: Just before I pruned it. Last year it was allowed to grow freely for a whole season to recover from a bad winter! Pot: Brian Allbright. (UK)

Below: After cutting the new shoots and pinching the old needles. The too-long branches will be cut back as soon as new buds or shoots have appeared!

I hope you enjoyed this late entry to the Yew maintenance post?! Little Terry became a bit jealous! 🙂

Cheers,

Hans van Meer.

Info: karamottobonsai@hotmail.com

——————————————————————————————————

Approuch graft on my Prunus mahaleb Yamadori.

Hi, everybody,

it has been a while …I know! But believe me, a lot has happened in my normal and in my, Bonsai life! I have over 60 trees to take care of in a very limited and crowded garden space (10 x 5 meters) and that makes it very hard to get around and to work on them! And taking decent pictures of it all, or these days videos is even harder to do! I am proud to say that in my normal life I have spent the last 6 mounts successfully detoxifying from 10 years of heavy neuropathic pain medication and 20+ years of antidepressant medication! And by cutting down on sugar and carbohydrates I have overcome my recently discovered diabetes and lost some 20 kilos! So you see…I have been busy! 😎 I am currently finishing the video of my big Yamadori Larch “The story of the Elephant” part I for youtube and it will be posted in a few days! Part I is all pictures and words, simply because I did not have a video camera in those early days! So watch this space! Part II is all video and shows the compleat story of the massive undertaking of repotting it from the big wooden box where it lived for 10 years, and into its first real Bonsai pot! And it shows “the Elephant” later on with new fresh green foliage….doing just fine! I hope to finish and post this part II in the next few weeks?! So again….watch this space!!!!

And what more? I have been busy with my workshop group and that is very fulfilling to do! Not a lot of styling has been done up to now, but I did do a lot of maintenance these last couple of mounts! And I will show some of that later on, but first I want to share some approach grafts that I made on one of my old Yamadori Prunus mahaleb from Slovenia!

Below: Remember this picture showing the marcot (air-layering) that I was planning to make on this big old Prunus mahaleb?! Well, the left bottom branch that you see in this picture grows from just below the stump (red drawing) that was left when it was separated from the rest of the tree. On this, by now thick remaining branch, I made 3 approach grafts to get some new branches closer up to the trunk!

Below: the marcot after separation.

Below: a year later in full bloom.

Below: (red arrows) With an sharp and clean curved chisel I made tiny wounds in both the mother branch and in the small sucker branches that grow from way down low on the trunk. These unwanted sucker branches would normally be removed constantly from anywhere on the trunk. Because they leave behind ugly scars if you let them grow too long….and Prunus mahaleb’s make a lot of them all through the growing season! Sometimes so much that when they just appear, I use my small burner to get rid of them!

Below: (red arrows) left one shows the one that I made first. The right one shows the second one that’s like the first one tight down securely with the help of a tie-wrap and then is sealed with cut paste to prevent drying out!

Below: red arrow points at the third one that I made. Behind that arrow, you can see the big deadwood stump that needs some more shaping!

Now it is waiting for en hoping that they will fuse together properly so that I can create better ramifications in the desired design for this promising future Bonsai. If so, then I can shorten the thick mother branch you can see in the above picture by some 25 cm or more! So fingers crossed! I hope you enjoyed this little update on the life of this old Yamadori?!

The next post is about pruning and pinching my Yew Yamadori Bonsai…so watch this space!

Cheers,

Hans van Meer.

———————————————————————————————————

After a long time: finally some work I have don last month!

Hi, again everybody,

it’s has been a while (again), sorry for that…but I had some serious health problems to face and get through over the last couple of months so blogging or Bonsai work was on hold during that time! But things are a lot better now and I have already done a lot of Bonsai work that I would like to share with you all again from now on! I repotted a lot of my trees, even one very big one (the elephant Larch) after being 10 years in his wooden box! But that will be shown in a video story that I am currently working on to be posted on youtube soon! So watch this space if you are interested!!! For the guy’s who were so kind to comment over the last couple of months: I just saw them for the first time and will react as soon as I finished this post!!!

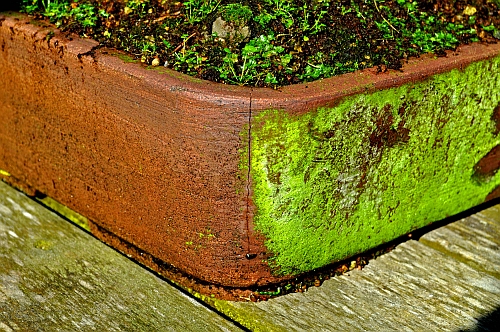
After a very mild winter, I was taking out my trees from the winter shelter in the back of my small garden so that I could check them out, remove weeds and clean their pots. I was very surprised to find out that one of the (expensive) custom-made pots was cracked on its four corners! This is very strange because we had hardly any frost this winter and these pots suppose to be frost prove?! And to be honest: it has never happened with any pots I have in my collection from many other potters?! This is the second one by these potters that I lost because of this….so I won’t be buying another one from them!

Bellow: the frost cracks.


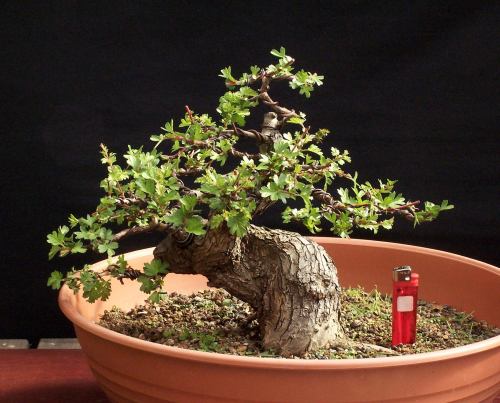
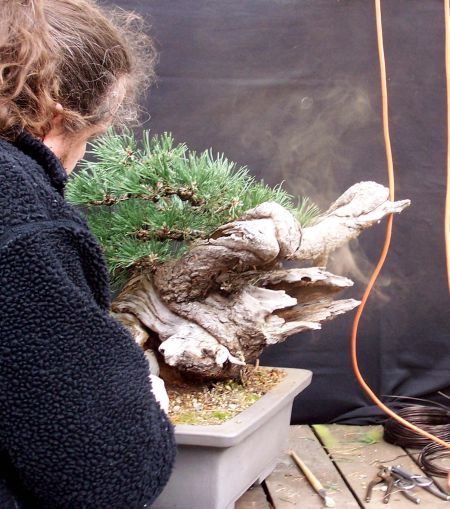
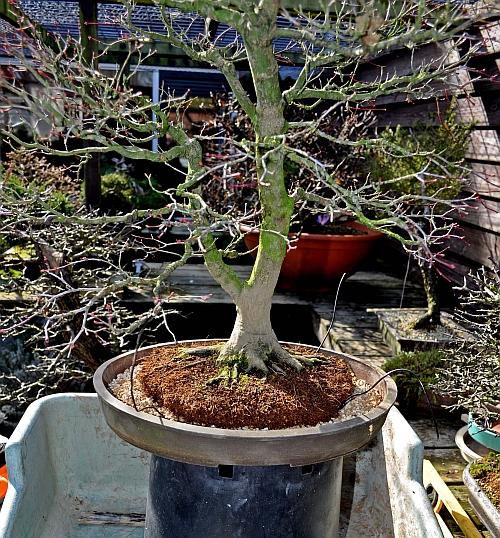
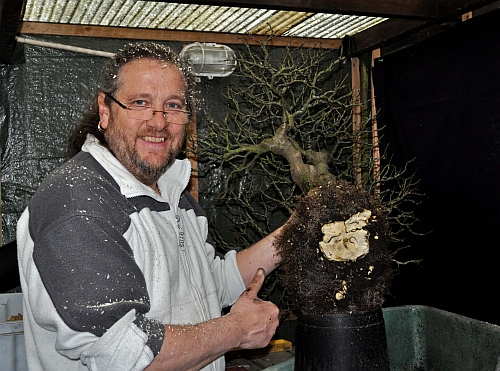
Below: So I had to make an unexpected repotting and the only pot I had that would fit this large Dutch Crataegus Yamadori, was this (too big) Tokoname pot! But it would do for now and the tree has more room to grow quickly this way!

Below; The tree was removed from the broken pot. Now I could start to carefully remove the old soil.

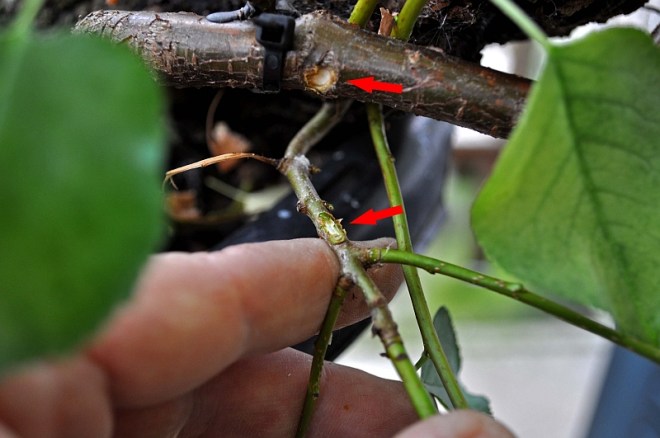
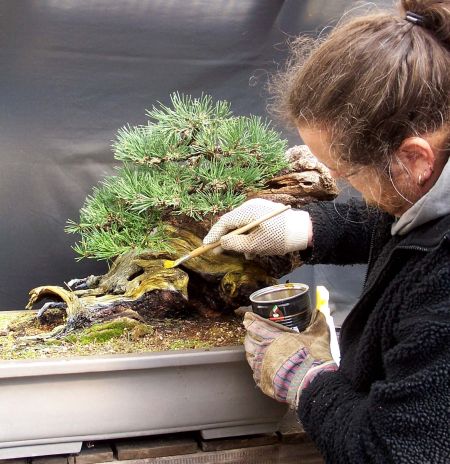
Below: Thick roots that were left during the last repotting, were now shortened to just before where there were small healthy roots growing out from it!

The old soil was removed as much as possible and the smaller roots were shortened sufficiently so that the tree could grow strongly again for some years!

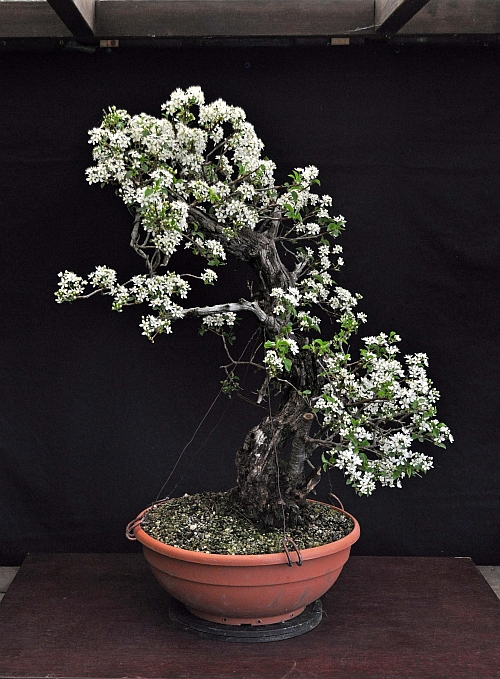
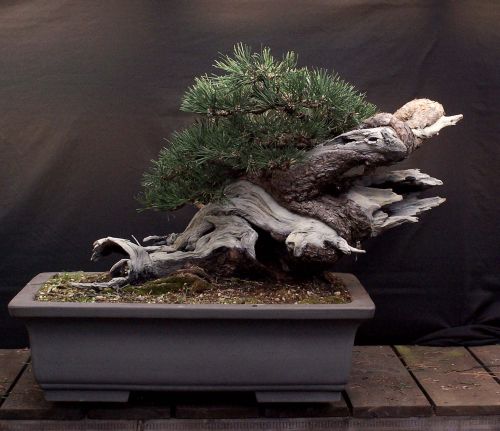
Below: The tree in its temporary new pot. This Dutch Hawthorn Bonsai was well over 2 meters when I collected it and is pretty rare because of its natural deadwood all along its trunk line! It takes forever to create a proper branch structure…but I am not going anywhere and neither is the tree…so who cares?! 🙂

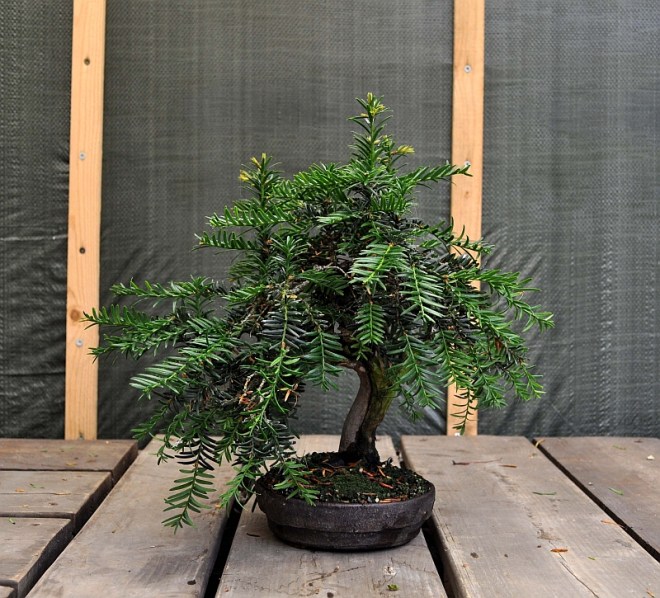
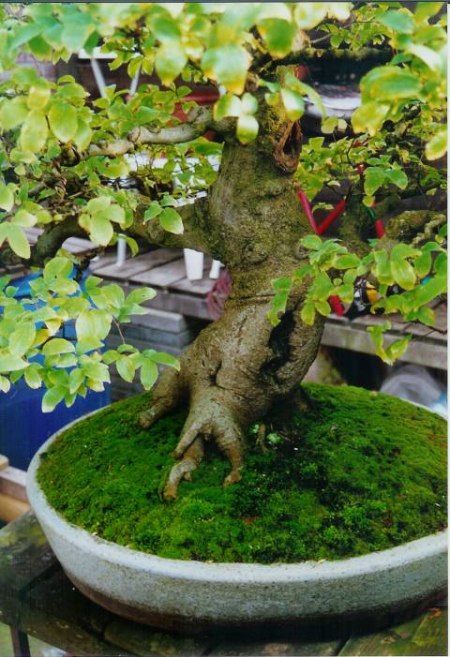
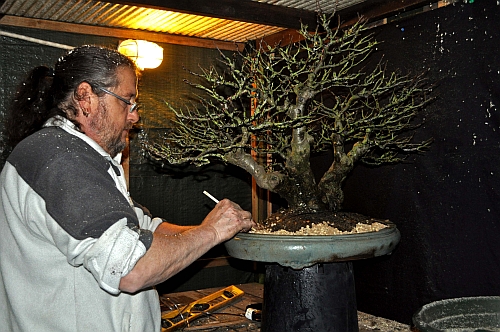
Below: This Acer palmatum “deshojo” is one of my first Bonsai and is in my collection for well over 25 years now! It has grown almost twice in size and the root base is completely created during that time!

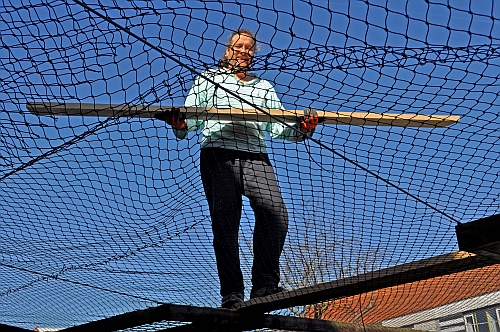
In my element! After suffering yet another #*X## sparrow attack on the roots and old flaky bark of many of my defenceless trees, I decided enough is enough!!! So I bought a birdcage net online and covered my whole garden with it! This was hard and somewhat dangerous work and I must have climbed up and down a ladder a hundred times! But after 2 days of work, my garden was finally bird-proof! No more exposed roots, loss of moss or bark destruction!

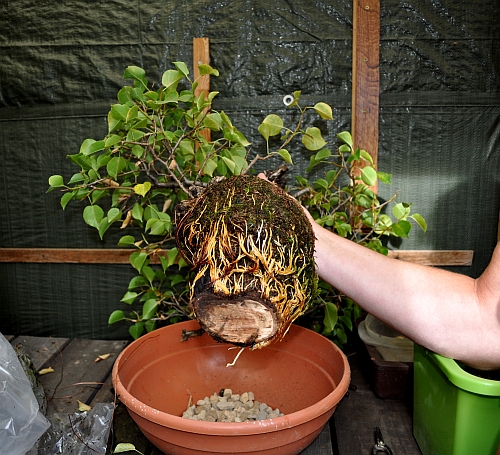
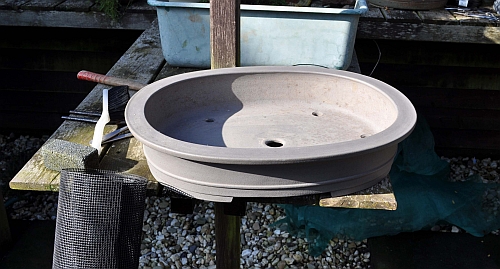
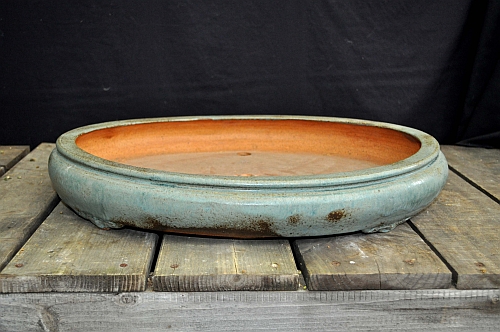
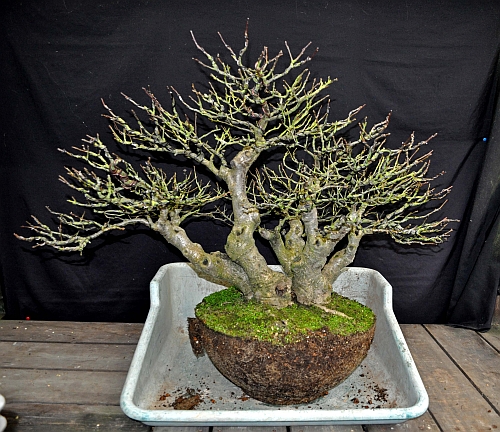
Repotting my Ilex vertillata. This is 50 years+ Dutch urban Yamadori in the multiple trunk style “Kabudachi”. Right from the start, I realised that this would be a difficult repotting, because, from an earlier repotting into its present plastic container,  I had discovered that the roots consisted mostly of one big massive root clump! But I still wanted to plant it into the beautiful early “Isabelia” Bonsai pot that I bought especially for it, out of the pot collection from my dear old friend Danny Use from the Bonsai centre “Ginkgo” in Belgium.

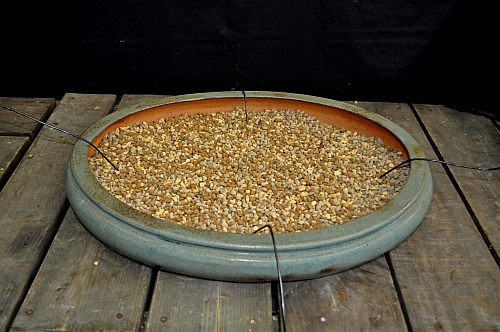
Below: The beautiful pot.  

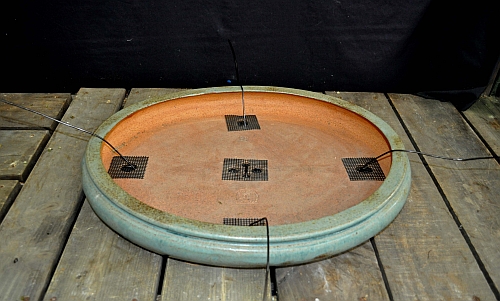
Below: Prepare the pot with plastic gauze covering the draining holes and aluminium wire to secure the tree tightly into its new home.

Below: A layer of Bonsai soil containing Akadama, Kiryu and Bims is placed onto the bottom of the pot.

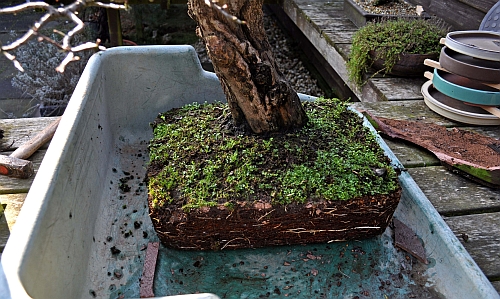
Below: The tree was relieved from its old home.

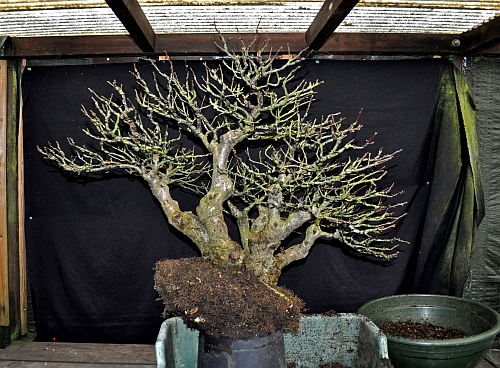
Below: The old top and bottom soil are removed and all fine roots are shortened. As you can see here: this will never fit into the shallow new pot?!

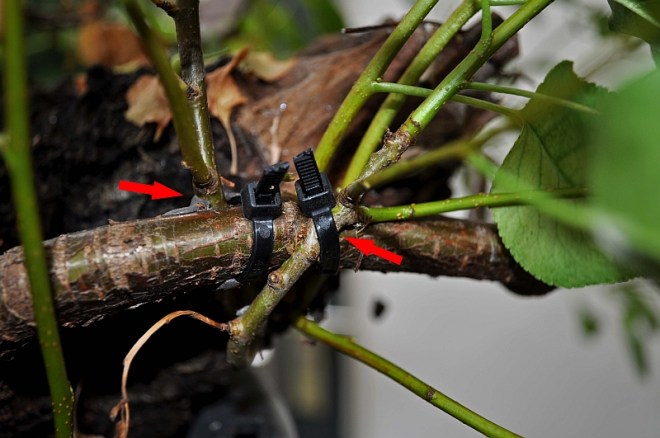
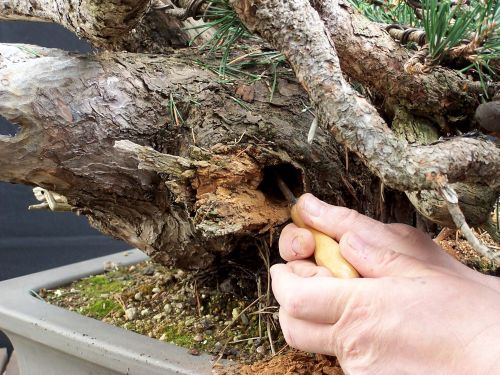
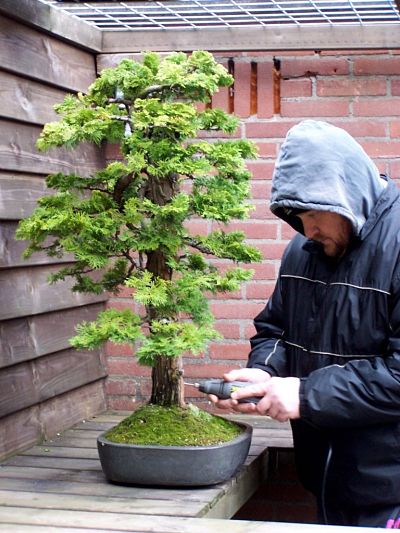
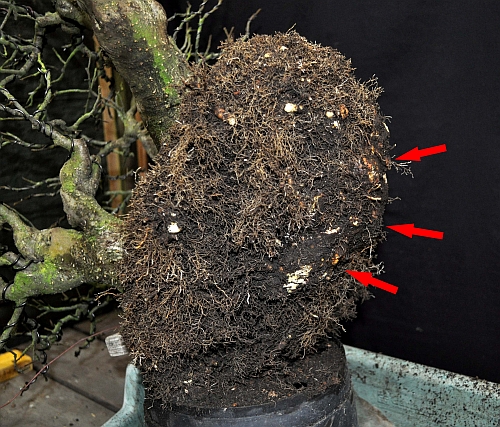
Below: All thick roots were shortened as far as possible. But the red arrows point at the huge massive root ball that was still sticking out at least 6 to 7 cm too far! I was able to remove some of it with an electric saw and with concave cutters, but this was as far as  I could get with those?! So it was time to get out my trusty Bosch power tool with my largest-size cutter in its mouth!

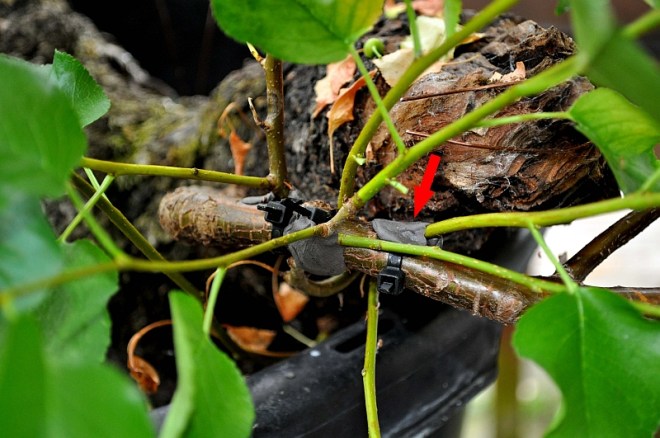
Below: Car fully carving away the centimetres of excess wood, constantly checking if I had done enough!

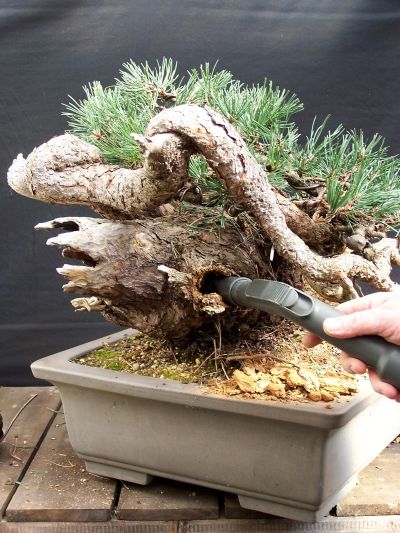
Below: Happy me! It was not easy to hold the heavy tree with one hand and to carve with the heavy bouncing power tool! That’s why it took me more than 20 minutes to safely remove enough to fit the tree into its new home!

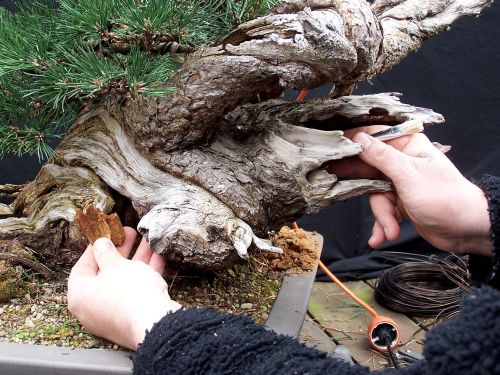
Below: Carefully pushing in the soil into the roots with the help of a chopstick. Making sure that no air pockets remain! Almost finished! I am so glad that the tree is finally in its new pot! And now it is cleaning time and then of to the shower!

Now a few weeks after this repotting, I am glad to say that this tree is doing just fine and it has new foliage on all its branches! So no harm was done! I am even thinking of showing it in the next Noelanders trophy….but that’s for later! 😉

Hope you enjoyed these little stories? More to come in the next couple of days! So watch this space!

Cheers,

Hans van Meer.

——————————————————————————-

PRUNNING MY SMALL “HAWTHORN”.

Hi, everybody,

today I removed some wire from this small “Hawthorn” (below) before it would dig into these delicate new branches. I shortened and removed branches were necessary. If you wait too long, the branches will have grown, too long and thick, to use in a small tree design like this. I am really happy with the fast progress this little tree made in just 3 years after I collected it in Wales. Hope you like it so far!?

Regards,

Hans van Meer.

21-04-2009-hawthorn-shohin-035-web-hans-van-meer


Info: karamottobonsai@hotmail.com

———————————————————————————————————-

GROMING THE “SWAN” MY OLD MUGO PINE YAMADORI.

Hi, everybody,

here are some pictures of the deadwood work I did this afternoon. This work was mostly aimed at removing as much rotted wood from the inside of the tree. And then treating the deadwood with lime sulphur. Enjoy the pictures!

29-3-2009-085-web-hans-van-meer

29-3-2009-091-web-hans-van-meer

29-3-2009-103-web-hans-van-meer

                                 Like sucking the eye out off a moose! Hi-hi!

29-3-2009-113-web-hans-van-meer

          Poking from the right entrance and removing from the middle one!

29-3-2009-137-web-hans-van-meer

A very intimate view of the cave-like inside of the “SWAN”.  Preventing this fragile section from further decay will be my main worry in the future. As long as I can control that, the tree will outlive me by fare! 🙂

29-3-2009-156-web-hans-van-meer

When I was cleaning the inside from the hole in the middle front, the wood dust disappeared from the right side exhaust pipe, like a genie from his lamp!

29-3-2009-172-web-hans-van-meer

Although it is with pain in my heart, I do have to protect this deadwood every now and then In the future, to keep things under control. And after I had tasted, the lime sulphur I am applying here, multiple times on the deadwood of this pine, I discovered that this terrible pearly white deadwood will lose it’s unnatural glow very quickly. And I also have some Trix up my sleeve to hurry that proses a little bit more.

29-3-2009-240-web-hans-van-meer

                            Happy… happy happy! Happy….. happy happy! 🙂

Hans van Meer.

Info: karamottobonsai@hotmail.com

————————————————————————————–

—————————————————————————————————


THOSE WERE THE DAYS! OLD PICTURES OF MY CELTIS SINENSIS NAMED “THE LION CRUSHER” (SIGH).

Hi, everybody,

I came across this picture from 1994. It is me repotting (alone) my huge Celtis chinensis. This tree "THE LION CRUSHER" was once a proud part of my growing collection those days. I loved this tree, because it was, a tree! You felt dwarfed, when you looked at it from close by. It gave me the feeling that I use to feel when I was a little child, playing under need a big tree in the forest. But I had to let it go to warmer places, it was struggling to much in my cold climate! Showing this difficult species at the "Ginkgo Award" was a highlight for me and the tree. I still miss the feel off this real tree!
I came across this picture from 1994. It is me repotting (alone) my hudge Celtis Chinensis. This tree “THE LION CRUSHER” was once a proud part of my growing collection those days. I loved this tree, because it was, a tree! You felt dwarfed when you looked at it from close by. It gave me the feeling that I use to feel when I was a little child, playing under need a big tree in the forest. But after 6 years, I had to let it go to warmer places (Frans), it was struggling too much in my cold climate! Being able to show this difficult species at the “Ginkgo Award” was a highlight for me and the tree. I still miss the feel of this real tree in my small garden!
Here is a other one. Can you tell why this tree is named "THE LION CRUSHER" ? Yes or no? Look harder!
Here is another one. Can you tell why this tree is named       “THE LION CRUSHER”? Yes or no? Look harder!

Regards,

Hans van Meer.

Info: karamottobonsai@hotmail.com

—————————————————————————-

SOME LAST WORK IN FREEZING WEATHER!

Hi, everybody,

Today finally, after more than two weeks of temperatures below freezing here in Holland, the temperature reached above O! At last, I could open the winter shelter and let some fresh air in there. I am so happy for this spell of warmer weather, now I was finally able to do some last touch ups on the 2 trees I am showing in the “NOELANDERS TROPHY” this coming weekend. Because of all the trees that are jammed in close together in this small shelter, I had not much room to move around. So I had to be careful not to knock anything over, while I worked on “BIG RON” my Mugo pine! But I managed to adjust some of the deadwood with hand and power tools. Then, with the help of a straw, I had to blow away all the sawdust from the bark, branches and foliage in the interior of the tree. This is a very effective way when you cant reach into the branches anymore, but it makes you quite dizzy after a while! 🙂

Then I managed to get my Chamaecyparis out of the shelter, so I could clean it up and replace some thick guide wires, with 0,3 mm copper wires. They are almost invisible and placed in a way that they are hidden by foliage or branches. With a copper brush on a small power tool, I removed the hard whitish resin that this Chamaecyparis produces on the edges of where the bark meets the deadwood and rolls/grows over it, like a slow flow of lava. Although this resin is perfectly natural, it doesn’t look too good. It is like lumps of dried up lime sulphur on the beautiful bark. So I cleaned it all off and next to the deadwood I cleaned just a fraction deeper to reveal the deep red colour a Chamaecyparis bark has just under need it’s rough dark brown outer shell. Now the line between the weathered deadwood and the live bark becomes more prominent, showing the struggle, but also the perseverance of this strong and proud tree! The rest of the beautiful old and rough bark I live untouched to show the true age of this tree. Then I replaced some weathered moss and tried out some different accents for the first time. Then I called it a day, even do it was above zero, the very strong wind made me feel way colder than I felt during the last couple of weeks! Who said that Bonsai was only fun? Just kidding, this is all part of this beautiful art form. Just a few more days until the show. I can’t wait!

Regards,

Hans van Meer.

Info: karamottobonsai@hotmail.com

—————————————————————-


Regards,

Hans van Meer.

Info: karamottobonsai@hotmail.com

————————————————————————————————