I have made a start to improve and/or adjust 7 of my Bonsai videos on youtube. Some were shakey and others had copyright issues and that bothered me so I bought a much better professional video editing program and have just reposted the first two remastered Bonsai videos back on youtube! It is the “KEI BONSAI KAI” Bonsai exhibition video Part I and II that I shot in May 2016 in the famous Bonsai centre “GINKGO” in Laarne Belgium. Don’t forget to visit the second edition of this amazing Bonsai extravaganza on the 26th of May this year!!! Believe me that you won’t be disappointed, so I hope to see you all there?! More improved and/or adjusted videos will be reposted during the next couple of days, so watch this space!!!
GREAT NEWS!!! On Saturday 26 May 2018 Danny & Ingrid Use from the Bonsai centre “GINKGO” in Laarne Belgium will stage the second edition of the amazing “KEI BONSAI KAI” TEN and TEN “DANNY USE & FRIENDS” in Laarne Belgium!!! First of all, there is Danny’s huge world-class private collection to see and like in the first very amazing edition in 2016 Danny and his loyal students from “KEI BONSAI KAI” will show literally hundreds of their best Bonsai in amazing arrangements throughout the whole “Ginkgo” Bonsai centre! And like if that would be not enough?! Just like before Danny also invited many of his old Bonsai friends from the famous and legendary “GINKGO BONSAI AWARDS” series to show their best work!!! And I am once again very honoured and proud to say that I am one of them! 🙂 This great news was told to me last week when after a too long time I finally was able to visit my old and dear friends Danny and Ingrid again in their wonderful Bonsai centre!
As always we were warmly welcomed as lost friends and during a cordial conversation and coffee, Danny told me about his plans for the new Show and invited me to be a part of it again. Well, I wholeheartedly say YES!!! I WOULD LOVE TO!!! Even if this upcoming edition is half the success and the fun of the first one…well then I would still love to be a part of it all!!! If you love Bonsai? Well, then you simply can’t afford to miss out on this opportunity to visit this amazing “GINKGO” Bonsai centre where everything you ever need or want in Bonsai is for sale + the chance to see hundreds of some of the best Bonsai in Europe!!! Oh, and did I mention that there is a huge indoor rebuilt wooden American roadhouse bar for drinks and snacks!!! 😉 I hope to see and meet you all there!
Here you can see two video’s that I shot during the first edition in 2016:
I can clearly remember the day that Danny User asked me to demonstrate at his 2007 “Ginkgo award”! He called me (which he never those) at work and asked if I had something to do in September of next year? And if not, would I like to demonstrate at his next and last “Ginkgo awards”? He knocked me right off my feed and I accepted withafull-hearted YES!!! The “Ginkgo award” holds a special place in my heart and to demonstrate there is and was a dream come true for me, so I could not be any happier!
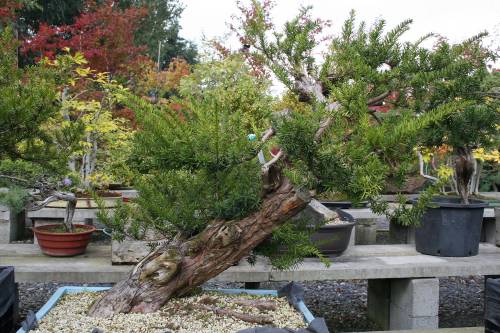
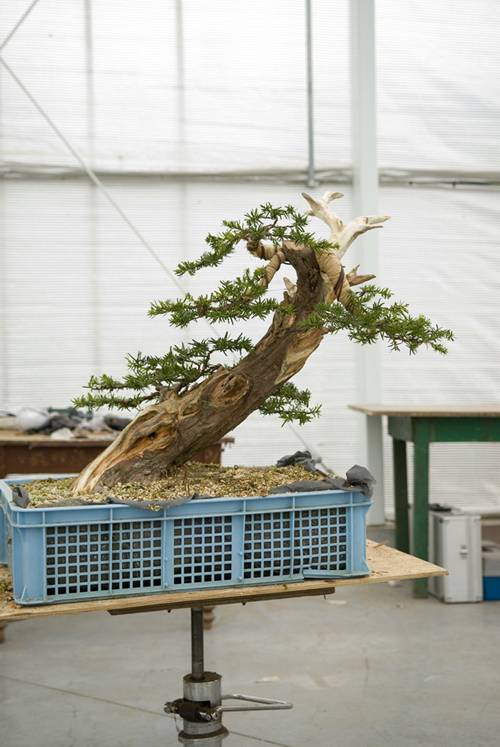
Two days before the event I drove to Danny and Ingrid Bonsai Centre “Ginkgo” in Belgium to bring in my 4 bonsai that were selected for the show, and to find a suitable tree for me to demonstrate on among the literary many hundreds of raw materialsthat you can find there. After I brought my Bonsai to where they were photographed for the commemorative “best Bonsai in Europe” book, I headed outside to look among the many hundreds of trees to find an inspiring tree. But even with this many choices, finding a tree among the many that Danny has in his enormous place is not as easy as it might seem! I searched for the right tree as if I was buying it for my own collection. The tree had to appeal to my taste in Bonsai and tickle my imagination at the same time. My demonstration trees always reflect where I’m at that moment in Bonsai and it must always end up looking the same as when I had styled it in my own garden as a future Bonsai for my private collection! A big part of my Bonsai collection today, still consists of my former demo trees. After a long search, I ended up with two possible candidates! Both Yamadori “Yews” are from Japan. One with a lot of fantastic deadwood to work on with heavy machines, but almost now foliage to work with. And one with a lot of problems to solve, but enough foliage to work with. They both had a good possibility to demonstrate and to become a good pre-Bonsai that reflected my approach, taste and style. Because working on the first tree mend, I had to be doing wood carving for most of the two-day demonstration, making a lot of noise with my power tools, and bothering the other demonstrators and the stand workers that were all in the same big greenhouse with me! So I chose the second tree, it was more challenging for me anyway, with a lot more nice Yamadori problems to solve or incorporate into the design that I envisioned when I first looked at this lovely tree. The tree gave me lots of good Bonsai vibes!
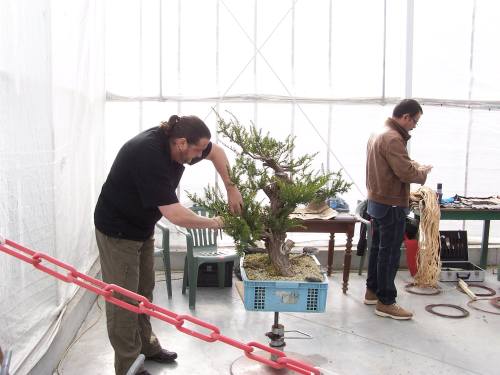
Picture 1: shows the chosen front of the tree.
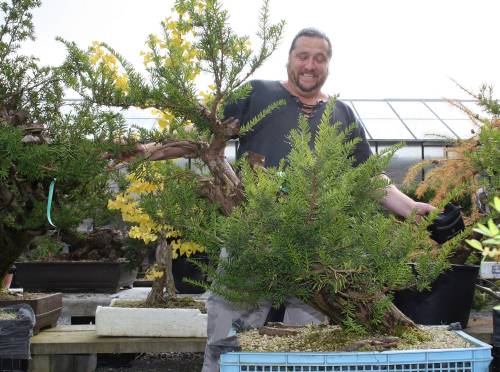
Picture 2: shows me when I just discovered my demo tree.
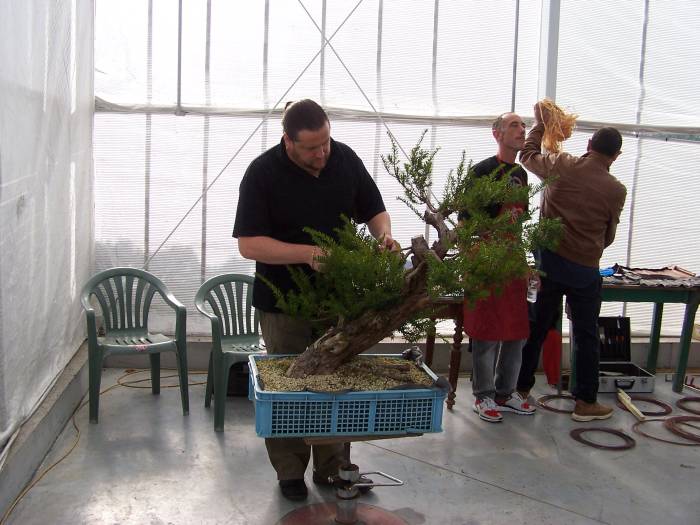
Picture 3: shows the very hot demonstration airier. Some big names with on the far right, U can just see William “Bill” Valavanis from the USA, next to him Udu Fisher from Germany, next to him Sandro Signeri from Italy and I’m the one on the left and I’m from Holland.
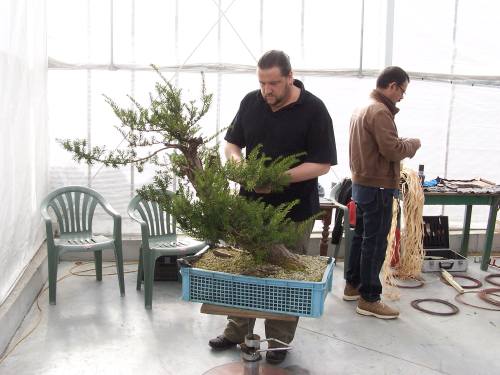
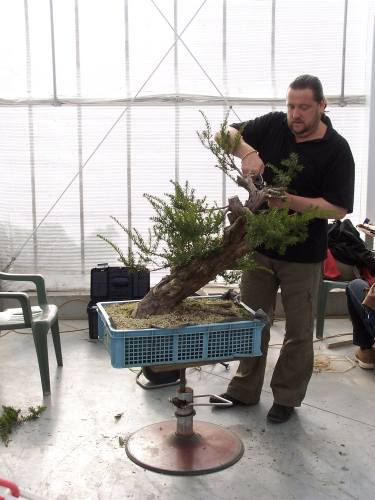
Picture 4,5,6: The start of my demo, Here I am cleaning and plucking the branches to prepare them for wiring.
Picture 7: here you can see me removing the too-longand too-highly-placed top branches. Leaving some stumps that might be useful later, when I start working on the deadwood design!
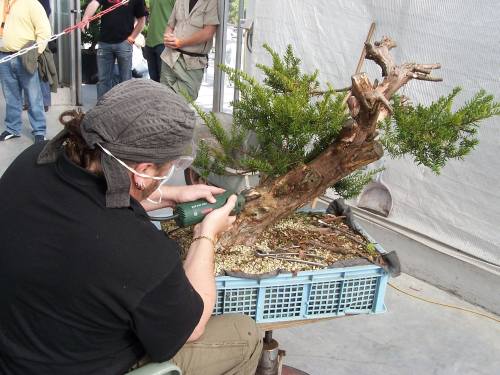
Picture 8: Here I am looking where the all-important live lines of the tree are running. I do this with a small sharp chisel, peeling away the bark until I reach the live parts. In this case that was quite difficult to determent, because of the little difference in colour between the life and the dead part. So needless to say: I had to be very careful.
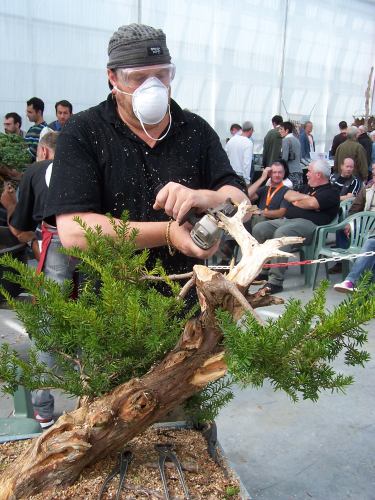
Picture 9: After I was really sure where it was safe to work, I could start working freely, without any fear for the health of the tree in the back of my mind. All I just had to do, was stay between the lines! I worked with both power tools and hand tools to first remove all the rotted wood and other unwanted parts. Then I just started to free flow, taking bits away, discovering a point of interest or beauty, a Little creating or revealing. But always working very carefully, following the grain of the wood. Gradually I worked towards the point where smaller bits were necessary on my power tool, to create, or reveal more detail in the deadwood. It is advisable to always wear Eye protection and always use a mask! The dust from working on a Yew with power tools is irritating to your eyes and can give youbad chest pain and cough for days! BELIEVE ME!!! I know what I’m talking about! (ugh ugh) :).
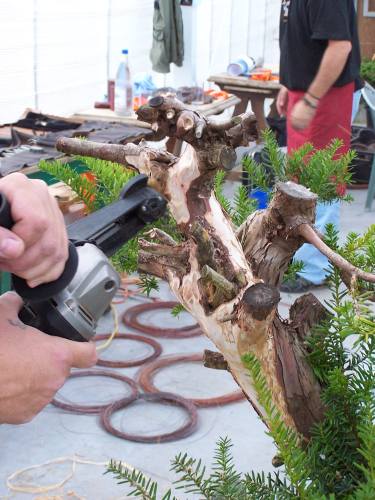
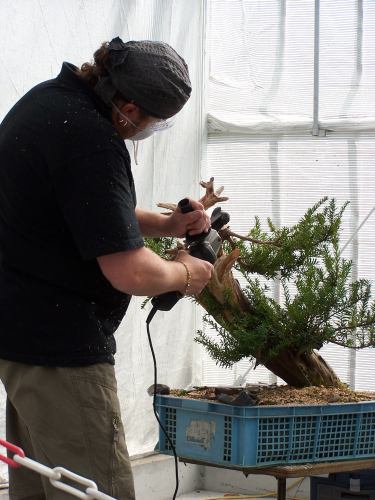
Picture 10, 11,12: My good old friend William van Vlaandre (inventor of the “SAMURAI” power tool bit), gave me one of his specially made power tools, loaded with his biggest “Samurai”, to use on the bigger parts of deadwood at the top of the tree. And it went like a warm knife through butter! Amazing you could make a small canoe out of a big tree in half an hour with this monster! Even the otherwise almost unworkable fresh and therefore wet wood, was no problem! It left a smooth surface! And with some care it was even possible to create more subtle details as well, it worked great! Only both my arms would disagree with these statements, they looked like I had been carrying 3 hedgehogs on fire! LOL! 😬😊
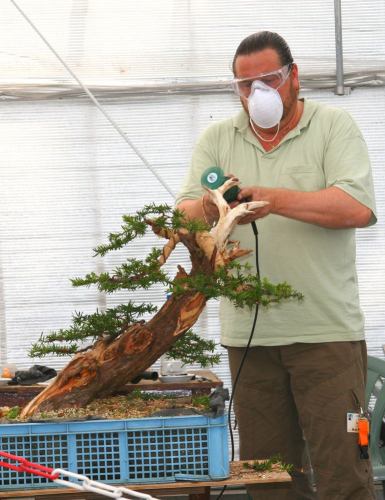
Picture 13: More detailed carving on the top “JIN”.
Picture 14: View of the demonstrating area.
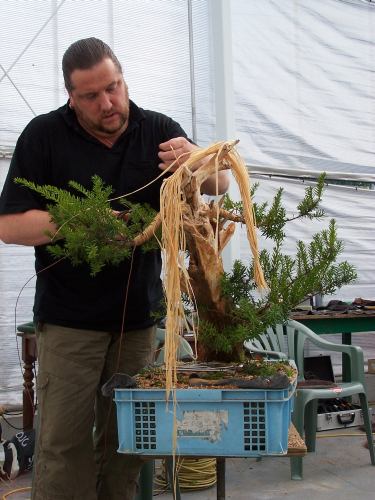
Picture 15: The three top branches that would make up the whole top part of the tree, we’re way too thick to be bent with just wire! So they first had to be protected with tight applied layers of in water-soaked Raffia. Then4 strings of copper wire were placed lengthwise along the part of the branch that needed to be bent. Then another layer of wet Raffia was applied and then some more normal wiring with thick copper wire on top of that layer. Now I was sure that I could bend the branches with minimal risk of harming the tree. It would only need great force!
Picture 16, 17, 18: Now I could safely start, to gradually bend the very tough branches into their desired positions. Taking my time, piece by piece, until I could secure them with the help of some thin copper wire attached to a couple of Jins and one small screw.
Picture 19: After a wild long night playing snooker (pool) with my Bonsai friends and only 4 hours of sleep, I started with the detail wiring of the tree. Trying to keep in pace with the marching band in my head!🥴
Picture 20: Finally the real fun part of styling a tree hat arrived. When I am bringing all the branches into position, I am totally in the zone, I love it, it is magical to almost paint with foliage until I feel it looks good. Trying to create something I like and find beautiful in Bonsai, within the boundaries of what each tree has to offer to me, is always a wonderful experience. To do it on this stage with this valuable material Danny entrusted me with, made it even more elevating and meaningful to me!
Picture 21: Close-up of the basic first deadwood on the back part of the tree and the branches.
Picture 19, 20: Some last detail works on the deadwood using a very hard plastic brush, that left a grain-like texture on the still soft fresh part on the top.
Picture 21: YES! I finished and was drained, but happy with the result and the beer that was waiting on the other side of the camera!
Picture 22: The final result. I hope you liked this little demo story and the final image of this pre-bonsai? It was, as I said before, a great honour to do! Especially because this was the last “Ginkgo award”!It was a very happy and a bit melancholic experience!
Some were in November 2000, and my friends: Teunis-Jan Klein, Carlos van de Vaart and I made the long drive all the way to Milan (Italy) to look for some Yamadori material. After visiting some bonsai friends’ gardens in Milan, we arrived at NIPPON EN bonsai garden. There were some amazing bonsai on display and for sale and the yamadori material they had there was of very high quality! Some were lost among all these super yamadori I discovered the very old “Mugo Pine” of this story.
Pic. 1: In this picture, which is a still shot from a poor video, you can see the amazing “Hawk” like roots of this Pine, which looks as if it is lifting the earth. I fell in love immediately, but was scared of the leg of workable foliage on these almost “Octopus” long branches with only some spare foliage on the end!
Pic.2: Here you can see the backside of the tree. There is not much to work with here either! Only those few long branches you see in picture 1.
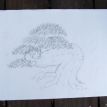
Pic.3: I could not resist the challenge of this massive tree and bought it from the owner of NIPON EN. He told me that it was one of the first yamadori he ever collected. He found it literally on the top of a very high mountain in the Italian Alps. And it stood in his gardens for many years, without much work done to it. And nobody seemed to be interested in buying it, because of the leg of foliage and age on those few branches. As there was no room for this big tree in the car that we came in and I did not have that much money with me as well, so I had to drive all the way back again to Milan Italy in May of the next year to collect it! And I was very excited when I made that long trip again with another old friend in my own (bigger) car. The former owner of this pine asked me to take care of it and I promised him, that I would try my best to make it beautiful! When I finally had the tree in my own garden I made this first drawing of the idea I had in mind for its future. Although (than) I had no idea how to reach it, this is what I saw.
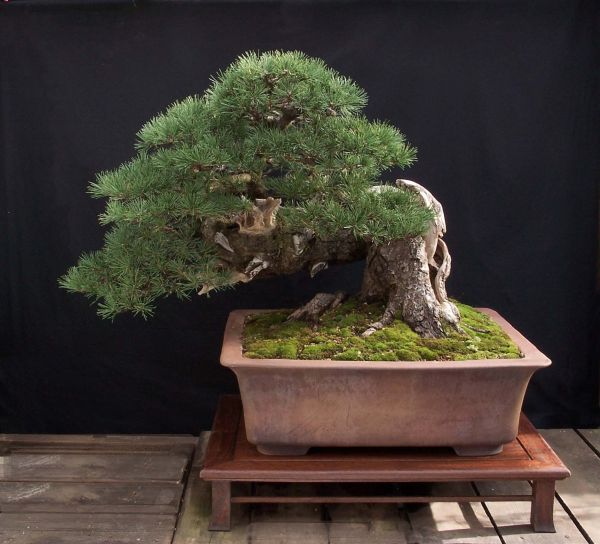
Pic.4: And now just over 6 years later, this is the result. This tree made a big transformation in a very short time, with only one real scare during that whole time. A few years ago the tree lost its beautiful bark on the right side of the tree. I peeled the bark away and my heart almost stopped when I found out that the whole backside of the tree had died. I could easily remove all of the old bark of the already dry wood! I literally burst into tears, because I thought the tree might die and most certainly would never be like I hoped for it to be! After the first shock was over I tried to see what caused this dieback. I discovered then that the whole tree was hollowed out by “Wasps”, all the way true this thick tree, right up to the live bark on the bottom of this tree! I removed all the rotted deadwood with power tools and treated the remaining deadwood with Jinseal and then Wrapped the whole trunk of the tree with a screening cloth to keep the constant returning wasps out for 3 long years. But the tree remained healthy and strong! And looks actually much better with this great-looking deadwood, as if Mother Nature had the brilliant idea to help me with styling! I was tremendously proud to be able to show this old survivor I named “Big Ron” in this last “Ginkgo Awards Show”!
I think this Bonsai came a long way in a short time and I am glad I can finally show it to my friends here on my blog. The complete story of “BIG RON” can be seen on my website in the near future.
Last weekend I did some more refinement work on one of my Yews in preparation for the Ginkgo Award.
Picture 1: Shows the small Shohin Yew before I worked on the ground coverage.
Picture 2: Shows the tree after different fresh mosses were added.
Picture 3: Shows that the second branches on both sides are growing from the same height on the trunk. The branch on the left side was always meant to be removed but was left on the tree to fill the big empty space between the bottom left branch and the top until the branch right above it would have grown enough in length to replace it. Especially on a bonsai this size these obvious folds are an eyesore and should be avoided or solved before you enter the bonsai in any show.
Picture 4: Here the branch is already removed and a small jin is left as a reminder. The branch above the one that is removed is brought down to more or less replace it.