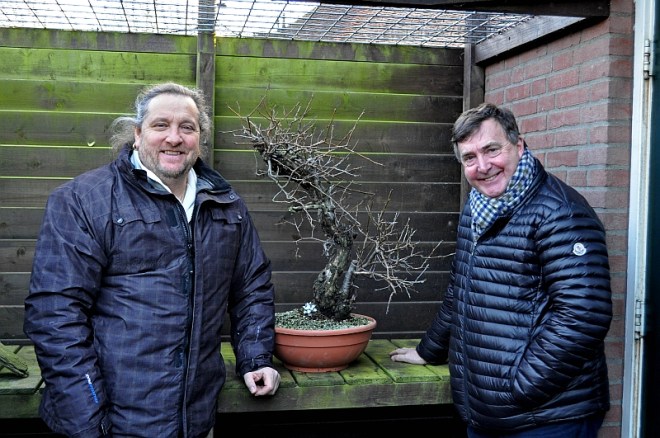
THE DARK SIDE OF BONSAI.

Hi everybody,

this is a sad post concerning a darker side of our great Bonsai hobby, namely the death of one of our beloved and cherished little trees. And when it one time unavoidably happens it makes me, even more, realize that I am working and dealing with living beings that totally depend on me to stay healthy and alive…after all, Bonsai don’t commit suicide! They get sick or even die for a reason and they need us to help them when necessary! But sometimes as in this sad case, I just can’t figure out what happened or went wrong with this precious little Yamadori Japanese black Pine cascade Bonsai of mine?! It has been under my care for almost 25 years and was one of the most precious little Bonsai in my collection! Not only was it rare and beautiful, but it was also a (special for these early days) unique and very expensive birthday present from my beloved mother-in-law and that makes it even more painful! I can only guess what might have gone wrong to make it die so fast in such a short period of time?! So there is not even a lesson learned from it?! Yes, maybe one thing…and that is the realisation that Bonsai are very precious to me and mean much more than just a little tree in a pot! And that it is, although in this case painful, also a very enriching feeling and that makes it even more special than it already was to me!!!

Like I said just a few weeks ago to my dear friend Tomaz in Slovenia:

                                                  “Little trees cause big things!”

Cheers,

Hans van Meer.

Info: karamottobonsai@hotmail.com

—————————————————————————–

DEADWOOD AND WIRING WORK ON MY OLD YAMADORI PRUNUS MAHALEB FROM SLOVENIA.

Hi, everybody,

two weeks ago we had some record-breaking warm weather so it was a great opportunity to do some wiring and deadwood work on one of my favourite Prunus Mahaleb Yamadori’s from Slovenia. This pre-Bonsai is full of naturally burned and sun-bleached deadwood and I want to recreate that in the Jin and Shari where I am going to work. Almost all of the branches of this tree are newly grown by me and need more fine branching and ageing, but I am not in a hurry! I was a bit laid with wiring it almost completely and had to take great care not to break off any of the new growth that was emerging fast because of the sudden warm weather of the last few days! We went from frost in the night to almost 30 degrees during the daytime in one week’s time…really crazy weather!!! After I finished the wiring and styling it, for now, I started to work on the front Jin and Shari with a power tool. The main focus was on reducing the Jin and Shari because there is a reverse taper and bulging section on it that needs to be reduced and shaped as naturally as possible so that it will fit in with the rest of all the natural deadwood on the tree!

Below: The Prunus Mahaleb after I just finished the wiring. Height 67 cm. I kept it as natural looking as possible and preserved the second small trunk on the left bottom side of my design! I allowed it to grow freely to create a for now still young-looking small secondary tree to accompany the larger tree on the right! I guess you could call it a Mother and child design?!

Below; the red arrow points at the deadwood part that is thicker than the section below it. The Jin is too thick and the section below it is somewhat bulging and forms a reverse taper!

Below: Taking my time and enjoying it while I am taking away excess wood and shaping at the same time. I love this fast creating-a-result part of doing Bonsai!

Below: The result is that the Jin is less bulky now and looks like the remains of a large branch/trunk that has been torn off by a storm that created a long wound that runs down through the bark below it. In that way, the reverse taper or bulge is less obvious! Now the fresh deadwood needs to be scorched with a small burner to mimic the crackly image of the originally burned deadwood on this tree.

Below: after carefully burning the fresh deadwood it looks just like the original deadwood of this tree. I will not brush it to preserve the cracks that look just like the ones on the natural deadwood on the right side of it! There is a forecast of rain for the next couple of days so I will bleach it with diluted Lime sulfur to mimic the original lightly bleached deadwood! I will post pictures of it later.

Hope you enjoyed this little story?!

Cheers,

Hans van Meer.

Info: karamottobonsai@hotmail.com

——————————————————————————————-

Breathtakingly spectacular Sierra junipers post by JONAS DUPUICH (US) on his amazing BONSAI TONIGHT website!

Hi everybody,

Here is again a link to a post by Jonas Dupuich on his great educational BONSAI TONIGHT website!!! This time it is a link to his post about his trip to the Sierra Nevada desert where he made some of the most breathtaking pictures of some of the most beautiful trees in existence!!! I discovered this post in the middle of the night and I was literally blown away for a while and moved emotionally by what he had captured so well in his pictures!!! These ancient trees full of unbelievable deadwood are so humbling and exemplary of what we want to create in our Bonsai!!! So I had to reblog the link here so that everybody could enjoy them! I hope you all are impressed by them as I am…I can’t stop looking at them and shake my head in amazement!!! And there are much more articles and pictures to find on his amazing blog so do go and have a long look!!!

Bellow: Jonas Dupuich the author and photographer of the article on one of the mind-boggling Sierra junipers in his amazing article that you must see on his BONSAI TONIGHT website and blog!!!

Juniper

Cheers, 

Hans van Meer.

Info: karamottobonsai@hotmail.com

—————————————————————————————–

SAWING ONE SABINA YAMADORI IN HALF TO CREATE TWO SEPARATE PRE-BONSAI!

Hi everybody,

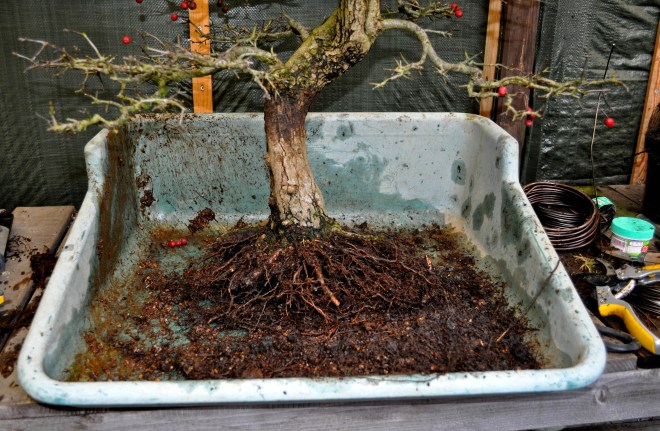
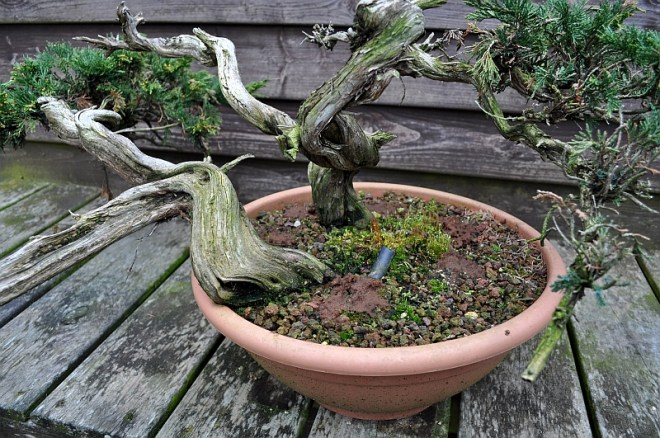
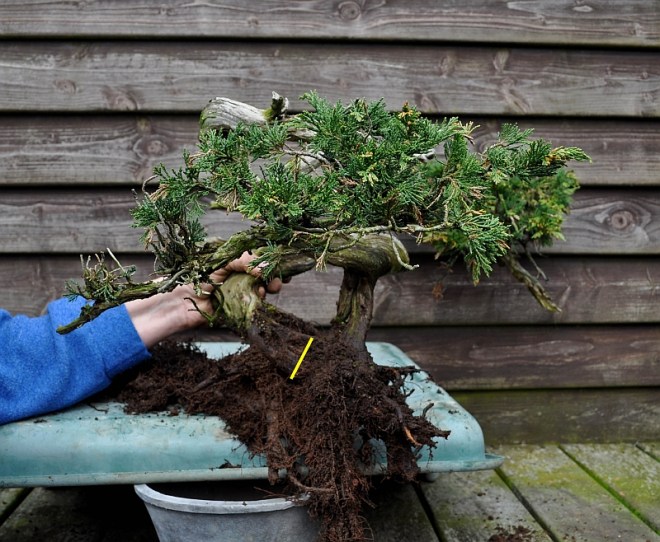
this is the story about the repotting of one Yamadori Sabina that will end up with two?! I bought this nice mid-sized Yamadori a year ago and left it untouched all this time to make sure that it was enough settled and strong enough to repot safely. I acquired it because of its stunning movement with a lot of deadwood and because there was (maybe) the possibility to separate it into two beautiful small trees! Buth early this year I started to see a decline in this little tree’s health and I decided that I would take it out of its plastic container because I wanted to see what caused this?! And now looking back, I am glad that I did because it was planted after collecting in some sort of very compact sticky muddy soil with not much-draining capability?! So with a lot of frightened anticipation, I took it out of its container to find what I was afraid of…poor soil! So even though it was not in a good condition I had to act before the tree would suffer even more, so I decided to free it from all this bad soil and plant it in a proper Bonsai soil mixture in which it could recuperate to become healthy and happy again!

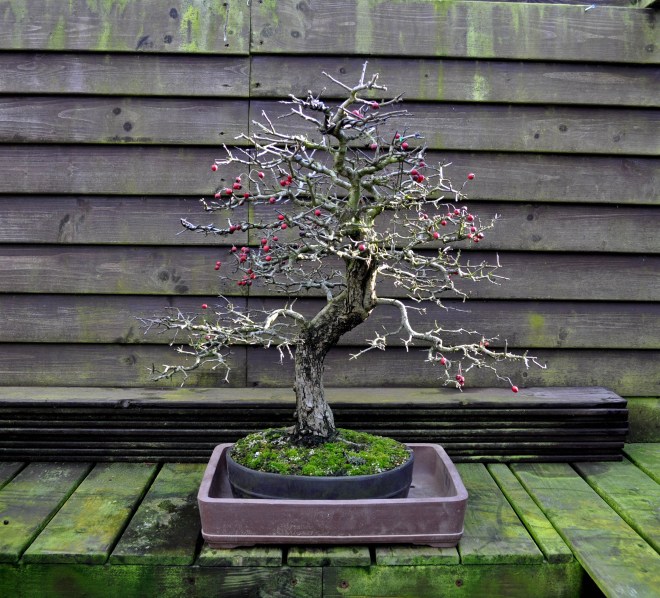
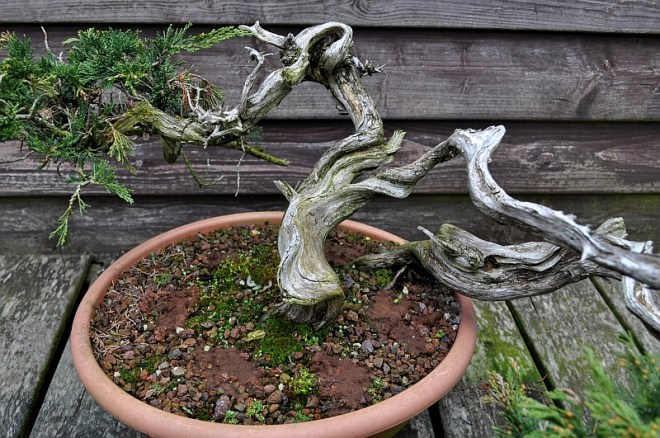
Below: the two trunks of Sabina Yamadori.

sabina-verpotten-april-2018-158-hans-van-meer-org

Below: close-up of two separate trunks. One all twisted and turned with a long twisted Jin and the other one slanting more straight and gently twisting with a foliage crown at the end.

Below: viewed from another angle.

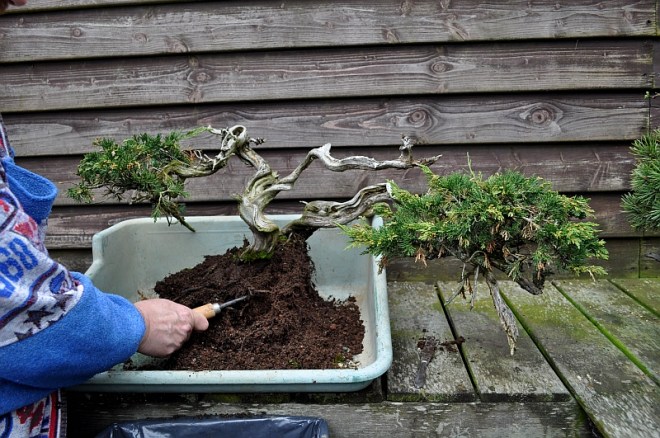
Below: released from its plastic container.

Below: Carefully and anxiously combing out the roots hoping for plenty of healthy roots and for roots on both trunks so that they could be separated from each other without any danger or problems?!

Below: looks promising with plenty of roots!

sabina-verpotten-april-2018-203-hans-van-meer-org

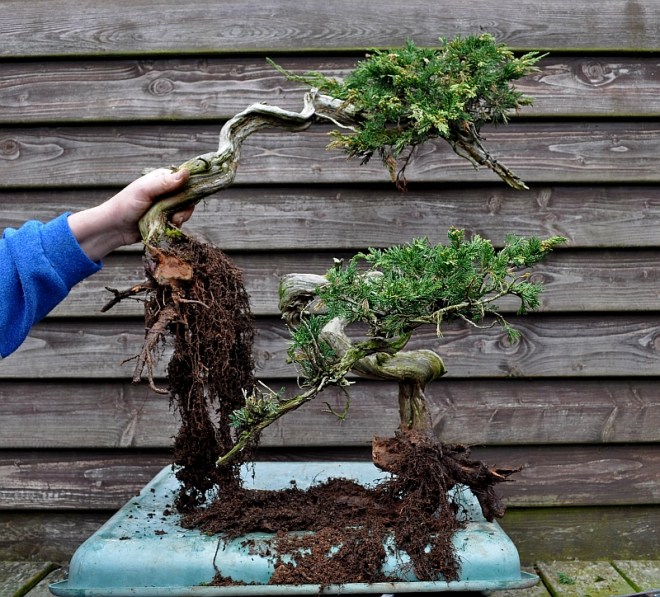
Below: look at all those roots on the left and the right trunk…but is it enough so that the two trunks can be separated?!

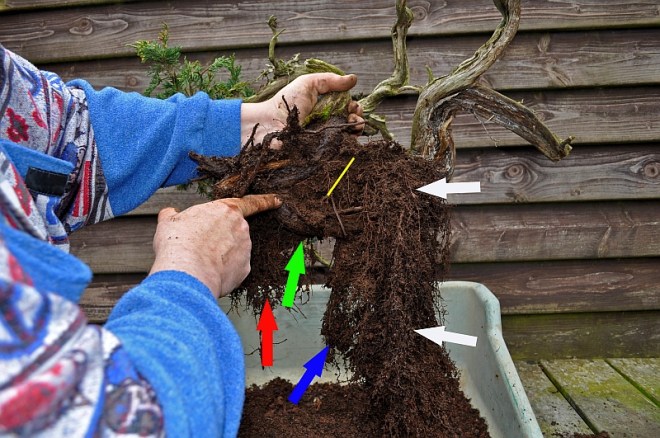
Below: red arrow points to roots growing from the curly trunk. Green arrow points at a thick root that grows to the right from the curly trunk. Blue arrow points to roots that grow from this thick root…so there are more than enough roots to keep the curly trunk alive and healthy when it could be separated from the second straight trunk! The white arrows point at the root mass that grows from that second straight trunk! The yellow line in the middle of the picture shows the spot where the two trunks could be separated from each other!

Below: seen from the other side. Red arrow points at the roots that grow from the end of that thick root that grows from the curly trunk. The yellow line shows the spot where the two trunks will be separated.

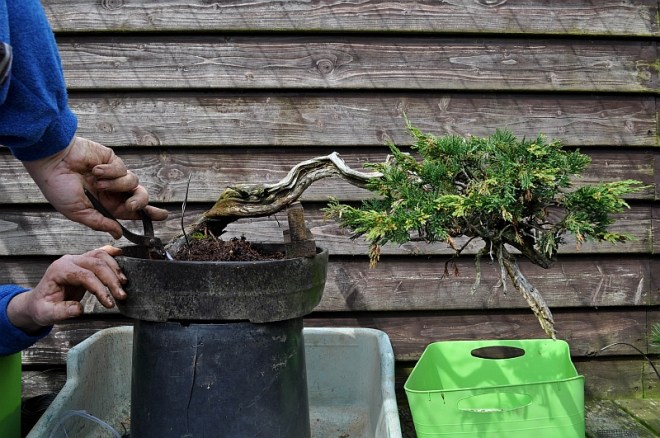
Below: the cut will be made from this side right across that yellow line.

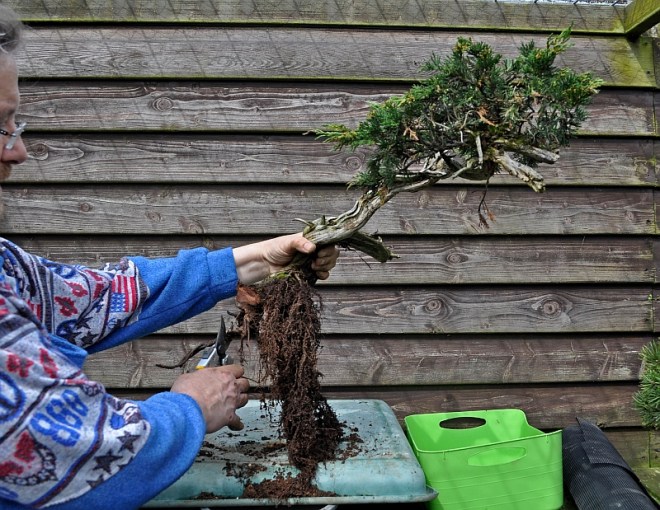
Below: carefully cutting with the help of a power saw.

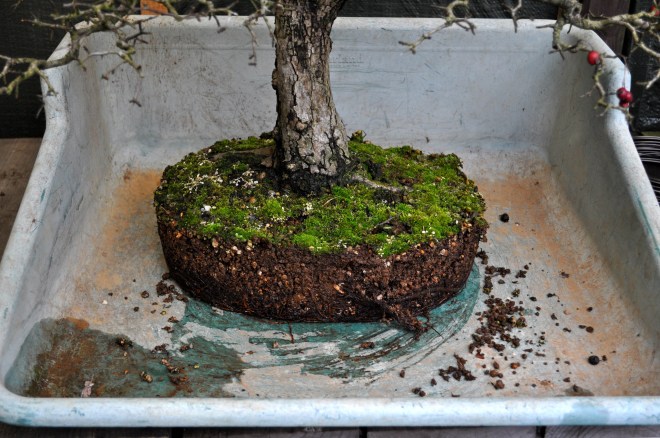
Below: mission accomplished! The two trunks are separated successfully! The straight trunk on the left has more than enough roots. And the right side curly trunk roots are spread out on the plastic green surface and look more than enough…so I am relieved and very happy! Now I have to keep the exposed roots moist of one of them while I plant the other into its new home away from his brother or sister?!

Below: this repotting and separation even reviled a more than welcome unexpected wide root base on the curly tree!!! Making it even better than it already was!!! And this provided a better anchor point to secure it to the pot with wires!

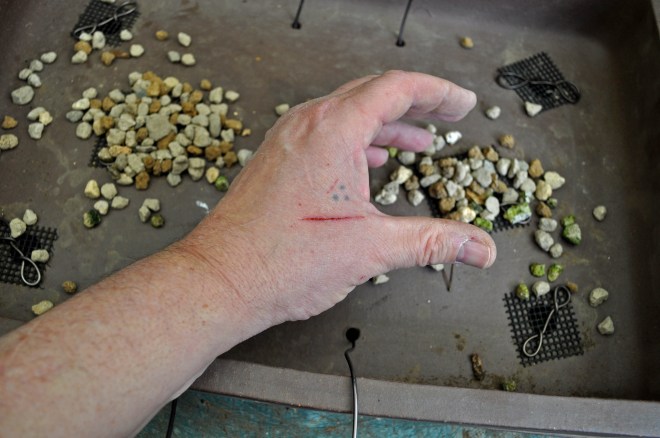
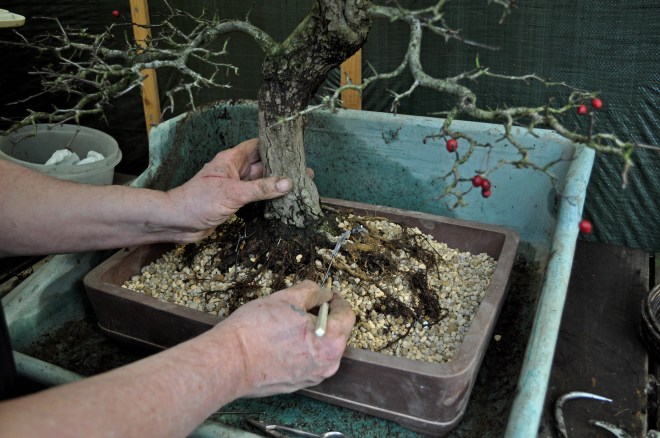
Below: with the help of a chopstick the soil mixture containing Akadama, Kiryu and Bims is pushed in between all the roots, making sure that now are pockets are left!

Below: then the tree is watered thoroughly until the water that runs out of the pot is clear of any dust!

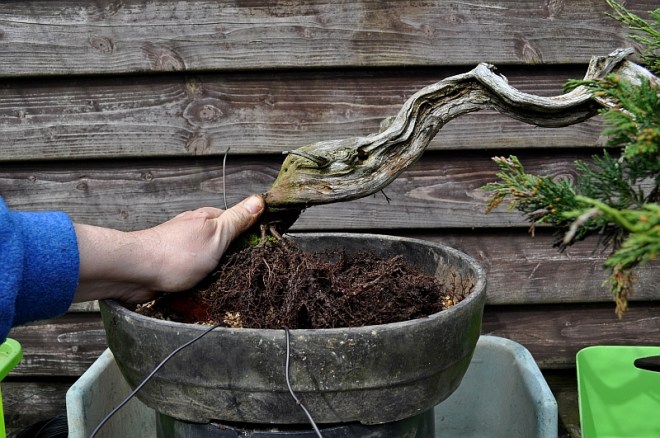
Below: next the straight trunk is prepared to go into its new home. Here a long thick death root is cut off so that it will fit easier in its pot.

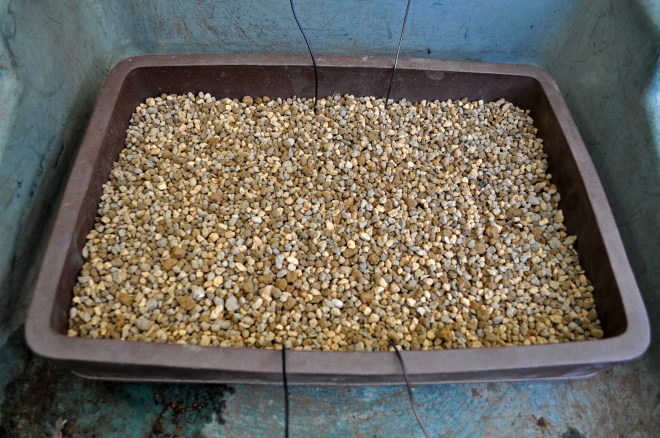
Below: the tree was placed on the bottom layer of large particles of soil for extra drainage. Just look at all those roots that fill almost the whole pot!

Below: two wooden blocks are placed under the right side to support the tree into its new desired position and then it is firmly anchored to the pot with thick wires.

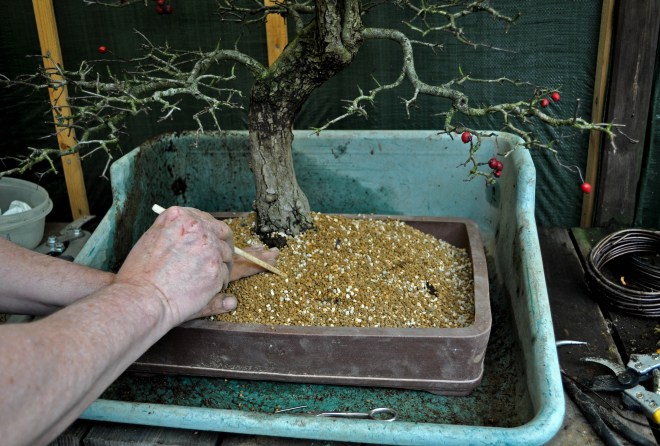
Below: carefully bringing in the soil.

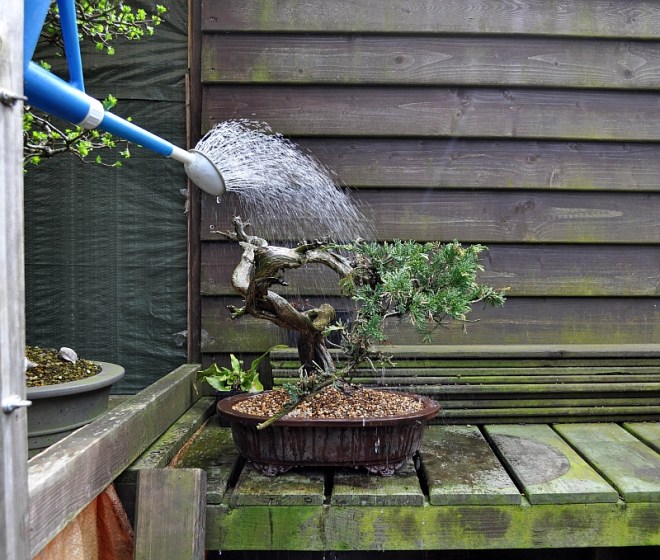
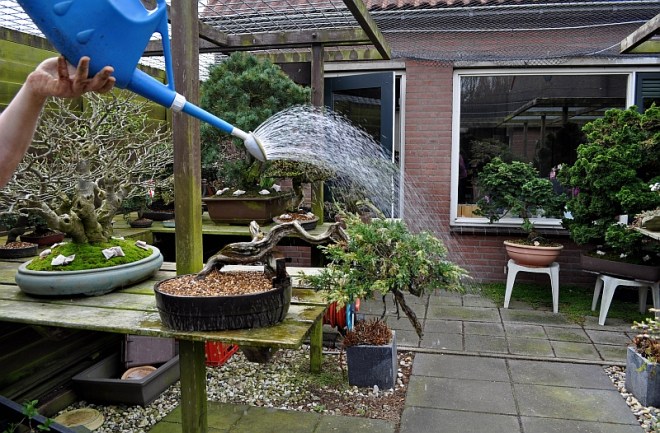
Below: then watering it like before. In the next couple of weeks, the trees will be kept in a warm spot with filtered sunlight and their foliage will be misted a couple of times a day to help them safely through this period

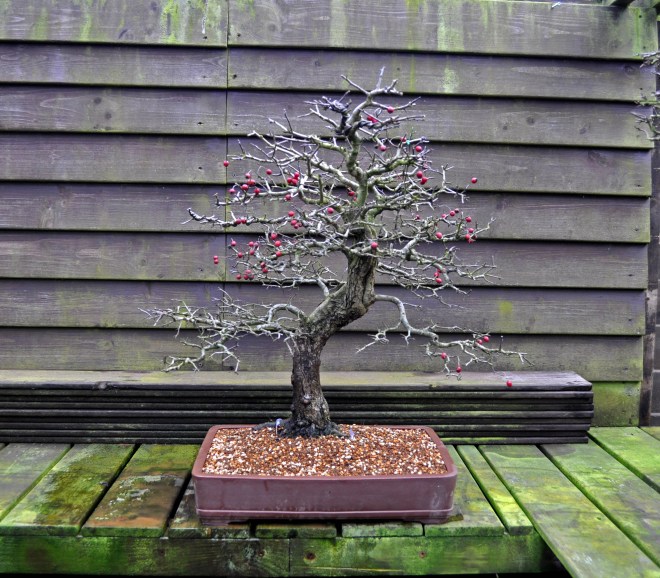
Below: separated but still together they stand here at their start as two future Bonsai.

I hope you enjoyed this little story of one Sabina Yamadori that became two pre-Bonsai with hopefully a bright future ahead of them?!

Cheers,

Hans van Meer.

Info: karamottobonsai@hotmail.com.

——————————————————————————————————

REPOTTING SESSION AFTER THE FROST HAS FINALLY GONE!

Hi everybody,

last week I had finally two repotting sessions after the long abnormal frost period we had for a few weeks and that was about time for most trees that I had to do because the buds on some of them were already opening! First up was my easy-to-repot old Hawthorn Yamadori ( Crataegus monogyna) in his beautiful Dan Barton pot.

Below: Everything that I could possibly need for this repotting is in place and my old Hawthorn is patiently waiting for his haircut and fresh soil.

Below: Out of his pot and ready to remove as much of the old soil from in between the roots as possible and safe! My objective is to remove all downwards growing roots so that I can replant him even lower in its pot!

Below: A layer of my soil mix containing Akadama, Kiryu and Bims is spread out over the bottom of the pot. 

Below: Then a small pile of the same soil mix is made more or less in the middle of the pot on which the tree is pushed down with a turning motion. This way all the cavities in the bottom of the rootball are automatically filled with the soil! Stop with the downwards turning motion when the tree has reached the acquired height in the pot and stands in the right direction and angle etc. 

Below: Then the wires are tightened loosely so that necessary soil can still be brought in under need the roots with chopsticks. 

Below: When that is successfully done the wires are tightened some more to secure the tree firmly in the pot!

Below: Next is this rare Dutch Hawthorn (Crataegus monogyna) that I collected many many years ago in a wet dune forest close to the beach and not far from where we live. It was chopped and all branches and the top that you see in this picture are all later grown completely new. It stands now about 75cm high and it is time to release it from the plastic training pot where it grew happily for the last 6 years! The top will be shortened by some 10cm after the repotting!

Below: The wholes of the new pot are covered by mesh and I am just applying the first layer with large-sized soil mix to the pot when I notice yet another scratch on my hands from one of those ####ing sharp Hawthorn needles that will turn in another inflammation…gggrrr!! 😉

Below: First large particles mix applied.

Below: Second finer soil layer applied.

Below: The Hawthorn freed off its old training pot.

Below: The roots are freed from most of the old soil and the long roots are shortened right up to where finer roots grow from them! Red arrow points at a thick root that was preventing the tree from being potted lower in its new pot so it was removed!

Below: Downwards growing thick roots were also removed.

Below: Even larger ones were cut back to create a flatter root system (Nebari)!

Below: The tree can now already stands on its own with its new flat roots base and that is just what I was aiming for the last 10 years or so!

Below: With the help of a chopstick soil is brought carefully into the roots making sure no air pockets are left behind! Roots that pop up to high are pushed/held down with little upside-down U-shaped pieces of wire to hold them in place.

Below: The final top layer is carefully brought in and is then taped even more in with the palm of my hand so that the last cavities are filled with soil!

Below: Close-up of the root base. The tree is just thoroughly watered until the water that runs out is transparent and free of dust! 

Below: The tree in his new home and I am happy with how it looks in it! The top will be shortened soon and then I will make some more pictures to share here on my blog.

I will post tomorrow the massive repotting of “XL” my big Yamadori Larch so watch this space! I hoped you liked this little post about a long-awaited repotting session?!

Cheers,

Hans van Meer.

Info: karamottobonsai@hotmail.com

————————————————————————————-

TONY TICKLE AND TERRY FOSTER VISITING MY GARDEN AFTER THE NOELANDERS TROPHY.

Hi everybody,

the Monday after this year’s Noelanders Trophy weekend my old and dear friends Tony Tickle and Terry Foster visited my garden before they would get on the boot from Europoort to England. This visit from Tony has become a real annual tradition this last decade or so and it is always something that we all look forward to. But this time was even more special because this time I had a special present waiting for Tony to thank him for all that he has done for me in the past. It was the now well-established air layer that I took 2 years ago from my big old Prunus mahaleb Yamadori. It has wonderful deadwood running all along its trunk and I am sure that Tony will make a stunning Bonsai out of it! It made me feel good to return the pleasure this time and I wish them both a happy future!

Below: Me and Tony and his Prunus mahaleb.

Cheers,

Hans van Meer.

Info: karamottobonsai@hotmail.com

——————————————————————————————————–

JUST POSTED MY SHORT VIDEO ABOUT ME ENTERING MY ILEX VERTICILLATA INTO THE 2018 EDITION OF THE PRESTIGIOUS NOELANDERS TROPHY!

Hi everybody,

I just to let you all know that I just posted the short video that I made of me bringing in my Ilex verticillata into the XIX 2018 edition of the prestigious Noelanders edition! In it, you can see how my Bonsai is photographed for the commemorative book and how I build up my composition in the almost still completely empty enormous exposition hall on the Thursday before the show…to go short: things you don’t often see about a big Bonsai show like this is! So have a look and forgive me for the not-so-good quality of the film…the lighting was still very poor then and I was very tired! But I still hope you like it?!

Cheers,

Hans van Meer.

——————————————————————————————————-

MY VIDEO OF KUNIO KOBAYASHI HIS DEMO AT TEUNIS JAN KLEIN “DESHIMA” BONSAI STUDIO IS ONLINE!!!

Hi everybody,

I just want to let you all know that I posted the video that I made at Teunis Jan Klein’s “DESHIMA” Bonsai Studio (NL) of the amazing demo from Bonsai Master Kunio Kobayashi-san !!! He transforms a big field-grown Pinus thunbergii from China into a wonderful Bonsai! You just got to see it too believe it, just how fast this almost 70 years old Master works with most of the time 3 scissors in one hand?! And still finds time to explain everything and to constantly crack jokes! The quality of the sound and film is sometimes a little bit of…but I still hope you will enjoy this amazing master and the amazing transformation?!

Cheers,

Hans van Meer.


PRUNED AND WIRED MY SMALL PUNICA GRANATUM YAMADORI.

Hi everybody, A few days ago I brought my small Punica granatum indoors to give it its winter pruning and to wire the tiny branches where necessary. This little Bonsai is a Yamadori from France and is 27cm/10.7 Inch high and has been in my care for more than 20 years now. In all these years it has grown from being a small Shohin to its present size and has developed most of its branches new and an amazing Nebari for such a small Bonsai! I think it has a very natural and mature image for such a tinny tree and that’s why I want to show it to you all! The pot is by John Pitt (UK).

I hope you enjoyed this little post?!

Cheers,

Hans van Meer.

Info: karamottobonsai@hotmail.com

——————————————————————————————————

A must see video from BonsaiTalk for all the people with the wrong idea about collecting Yamadori!!!

This a must-see video for all the people with the wrong idea about collecting Yamadori!

Well, don BonsaiTalk!

Cheers,

Hans van Meer.

———————————————————————————————————