SOME LAST WORK IN FREEZING WEATHER!

Hi, everybody,

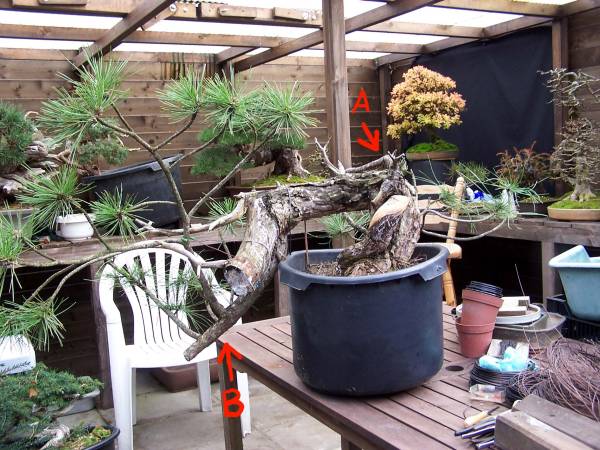
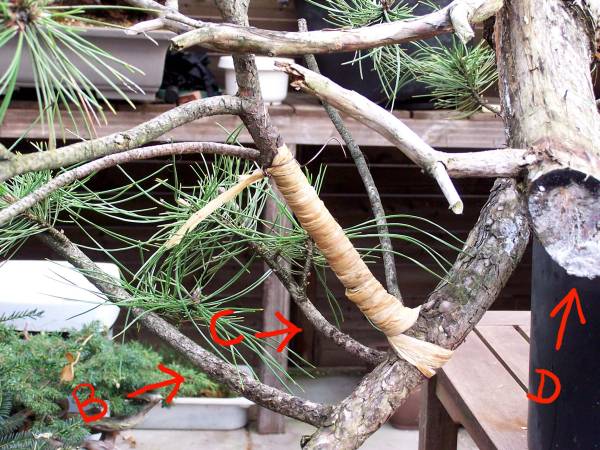
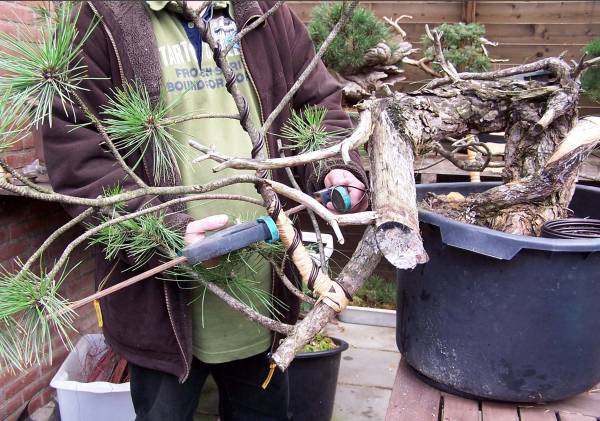
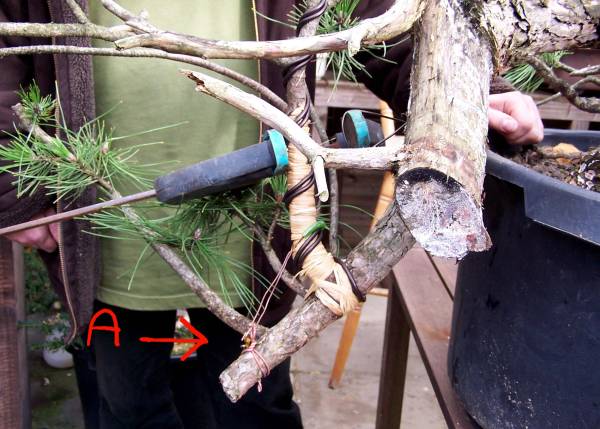
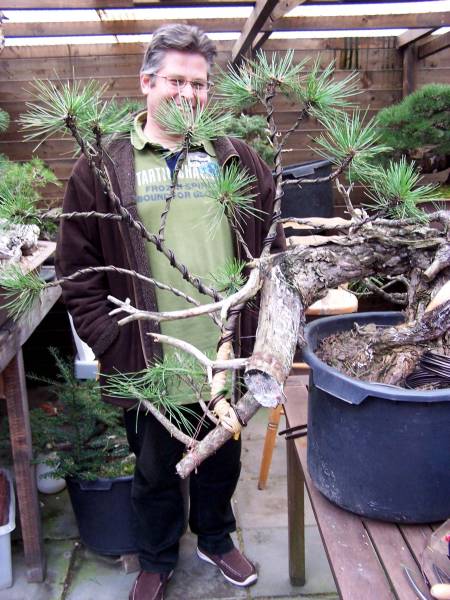
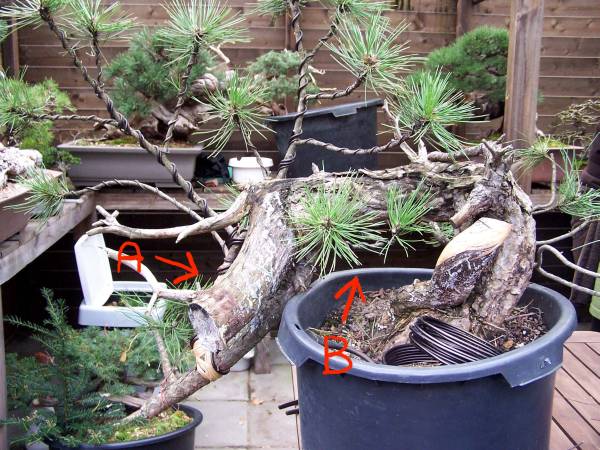
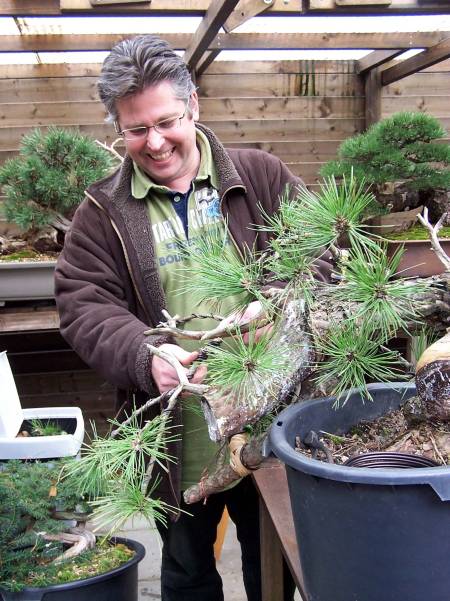
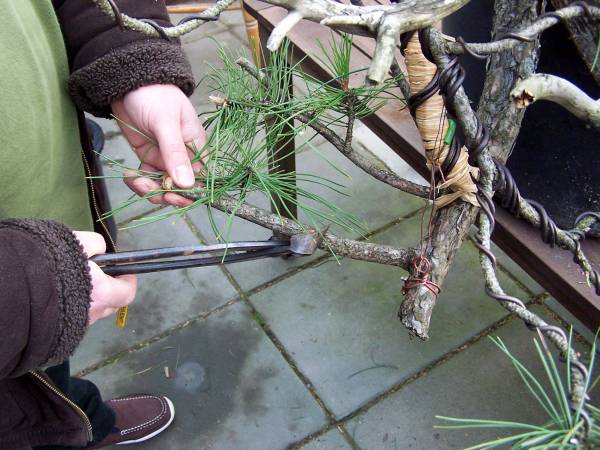
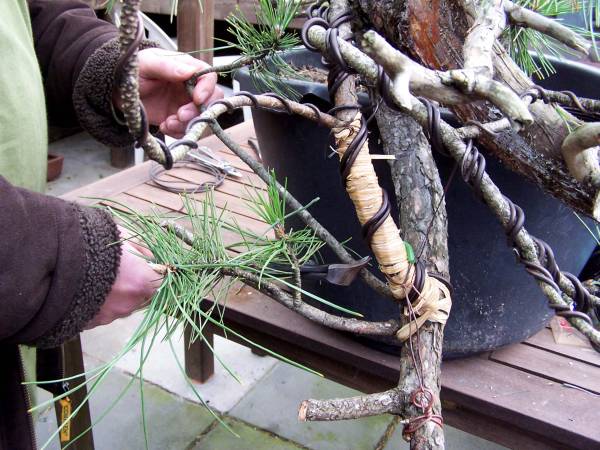
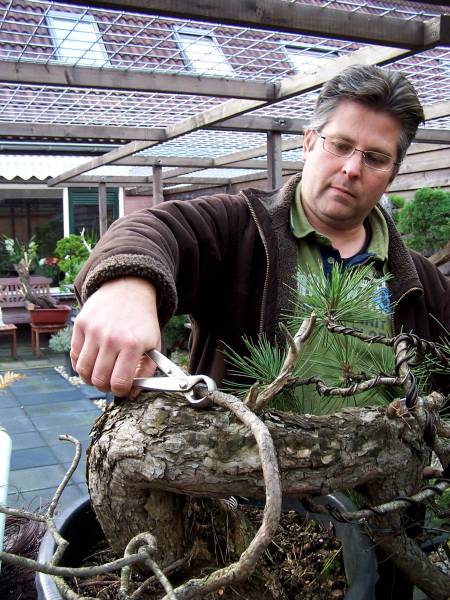
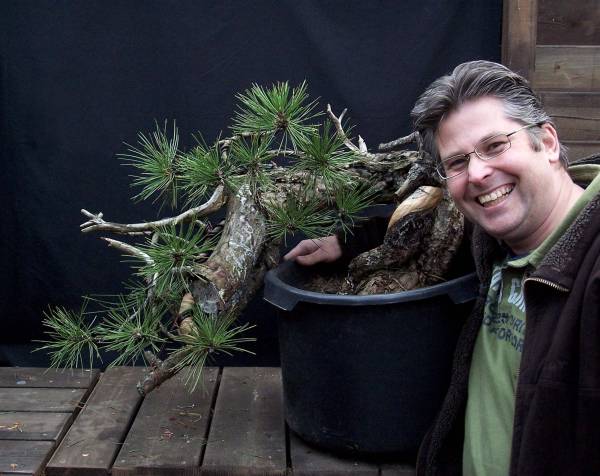
Today finally, after more than two weeks of temperatures below freezing here in Holland, the temperature reached above O! At last, I could open the winter shelter and let some fresh air in there. I am so happy for this spell of warmer weather, now I was finally able to do some last touch ups on the 2 trees I am showing in the “NOELANDERS TROPHY” this coming weekend. Because of all the trees that are jammed in close together in this small shelter, I had not much room to move around. So I had to be careful not to knock anything over, while I worked on “BIG RON” my Mugo pine! But I managed to adjust some of the deadwood with hand and power tools. Then, with the help of a straw, I had to blow away all the sawdust from the bark, branches and foliage in the interior of the tree. This is a very effective way when you cant reach into the branches anymore, but it makes you quite dizzy after a while! 🙂

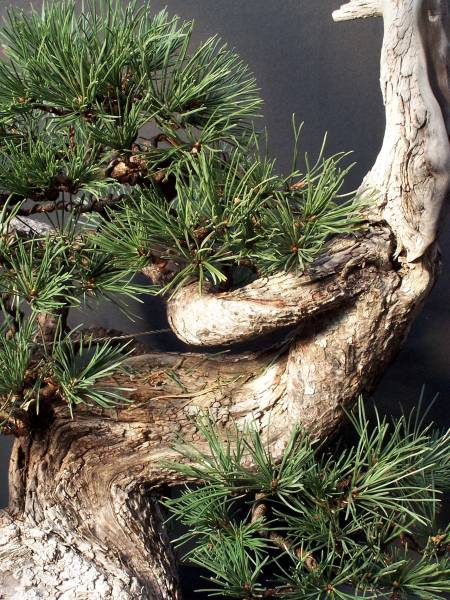
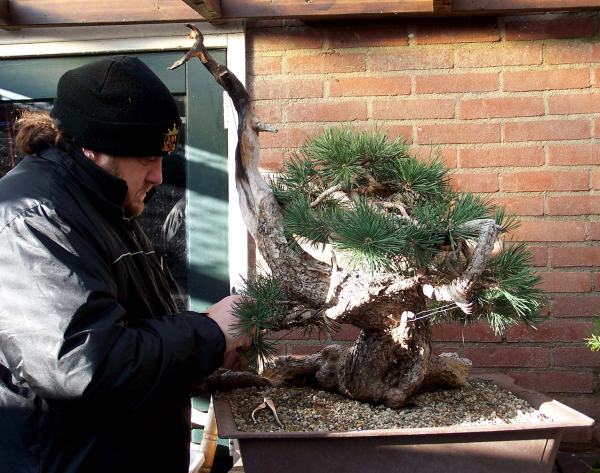
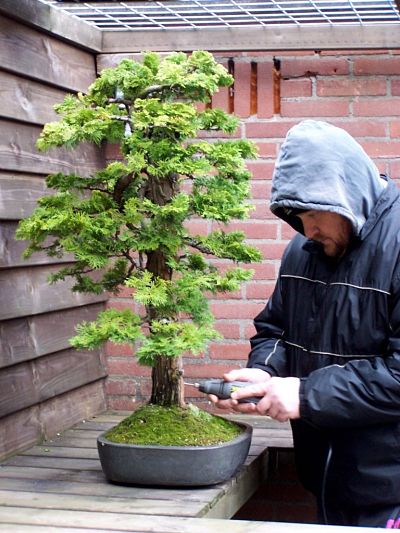
Then I managed to get my Chamaecyparis out of the shelter, so I could clean it up and replace some thick guide wires, with 0,3 mm copper wires. They are almost invisible and placed in a way that they are hidden by foliage or branches. With a copper brush on a small power tool, I removed the hard whitish resin that this Chamaecyparis produces on the edges of where the bark meets the deadwood and rolls/grows over it, like a slow flow of lava. Although this resin is perfectly natural, it doesn’t look too good. It is like lumps of dried up lime sulphur on the beautiful bark. So I cleaned it all off and next to the deadwood I cleaned just a fraction deeper to reveal the deep red colour a Chamaecyparis bark has just under need it’s rough dark brown outer shell. Now the line between the weathered deadwood and the live bark becomes more prominent, showing the struggle, but also the perseverance of this strong and proud tree! The rest of the beautiful old and rough bark I live untouched to show the true age of this tree. Then I replaced some weathered moss and tried out some different accents for the first time. Then I called it a day, even do it was above zero, the very strong wind made me feel way colder than I felt during the last couple of weeks! Who said that Bonsai was only fun? Just kidding, this is all part of this beautiful art form. Just a few more days until the show. I can’t wait!

Regards,

Hans van Meer.

Info: karamottobonsai@hotmail.com

—————————————————————-


Regards,

Hans van Meer.

Info: karamottobonsai@hotmail.com

————————————————————————————————

THE NOELANDERS TROPHY X, 17 & 18 January 2009.

 Noelanders Trophy X,  17 & 18 January 2009.


Hi, everybody,

just one more week to go to the next  “NOELANDERS TROPHY”. And because this will be already the tenth edition of this successful Bonsai event, there will be a special anniversary commemorative book, featuring all the many Bonsai of the show! So I am happy to be selected to enter the show with my Mugo “BIG RON” and my Chamaecyparis nana. And I am even more happy that my student Ed van der Reek has also made it into the final show with his Juniperus itoigawa!

During the show, more than twenty bonsai commercial stands will provide you with every item for our hobby. Several demonstrations will be given during the weekend by the top demonstrators Salvatore Liporace, Kevin Willson and Dana Quattlebaum. As well as my good friend Ivo Saporiti from Italy (European young talent 2008).

I just hope that the weather will get a bit less cold in the next couple of days, so I can do the necessary touch-ups on the trees before the show!

I am looking forward to seeing my Bonsai friend Rune Kyrdalen from Norway again, who is a guest in my house for some 2 days before we drive to the show together and meet up with the other Bonsai lovers and have some beer or 2. 

This is such a friendly event, with very high-quality Bonsai from all over Europe! So if you can find the time to come to Heusden-Zolden in Belgium, you really should go! We all be there for sure!

I will post many pictures of the trees in the show and the rest of the event, right after I get home from the show, so do come back!

Hans van Meer.

Info: karamottobonsai@hotmail.com

———————————————————————————

“WINTER IN HOLLAND”

Hi, everybody,

today very close to where I live, I shoot with my cell phone these lovely and rare images of the sea freezing over. I am living here now for more than 17 years, but I never saw this happen before! These two young swans looked amazing against the setting sun! A lucky moment for me to be able to catch these enchanting winter images.

Hope you like them to?


Cheers,

Hans van Meer.

Info: karamottobonsai@hotmail.com

————————————————————

A WONDERFUL WINTER TREAT!

Hi, everybody,

I hope you like these shots that I made with my cell phone of these semi-wild pony’s, that roam the protected wet dune forest that runs along a big part of the coastline close to my home? After you walked through this beautiful and rare landscape you walk straight onto the beach, where I spent most of my summer free time!


Cheers,

Hans van Meer.

Info: karamottobonsai@hotmail.com

————————————————————————————————

SEASONS GREETINGS!

Hi, everybody,

I shoot this picture with my mobile phone 2 days ago, during a winter storm. I drove up to the sea, to a place where I often spent time to do some soul surging. This place is where the sea meets the lighthouse, at the entrance of the old historical harbour in the small town where I live. Especially the sunsets in winter time are wonderful viewed from this magical place!  And although I was half frozen, I still manage to shoot over a hundred Photographs, so the battery of my cell must have been really low to cause this extreme colours, how else would you explain it? But they sure turned out pretty nice, without any photoshopping by me!

So I used it to make this X-mas cart for all my Bonsai friends who visit my Bonsai blog, It is highly appreciated by me, believe me! My new website will be opened pretty soon as well, so that is exciting stuff as well for me!

Merry X-mas and a very happy and healthy New Year to everybody!

Cheers,

Hans van Meer.

Info: karamottobonsai@hotmail.com

—————————————————————————————————–


My chamaecyparis obtusa “nana gracilis”.


Hi, everybody,


yesterday I finished the final styling of my “Hinoki cypres” Chamaecyparis obtusa ‘Nana Grasciles’ 95 cm/38 inches.
About 12 years ago, I was very lucky to buy 4 or 5 of this old “Hinoki’s” directly from a professional grower in “Boskoop” (Holland). He had planted them together with his father some 50 years ago when he was still a young boy. He seemed to like the idea of having them restyled into Bonsai! All these long years, the small scrubs were used as “Mother plants”, every year all the strong growth was cut off to be used for grafting or as cuttings. So the trees had remained small for all those years and most of the foliage grew close to the trunk. But this was not the case with this tree, it was tall, straight and all the foliage was located in the top part of the tree. So I only had some branches in the top that I had to bend down and let grow for many years. So I had to style the tree in a way, that made those hanging branches believable. This “Hinoki” would be a fantasy tree (they don’t exist as large trees) and styled as an Old Pine/Larch/Picea solitaire, that lost its top section somewhere in the past and all of its bottom growth and all of the branches were forced down by the weight of the winter snow. I have seen examples of those old soldiers on many a high mountainside in the Alps. So, to give the trunk more interest, I made a Shari over the full length of the trunk. And then waited for all these years, until now, for the foliage to grow and the branches to thicken, in the meanwhile the Shari aged very nicely and the bark grew beautifully over the deadwood in some places, making it all look aged and mature. I really love the foliage of these “Hinoki’s”, you can create wonderful foliage pads, without it becoming too overly styled, it looks really natural, like a tree in the distance. I think this fantasy tree gives off a good impression of an aged mountain dweller now and I decided to enter it into the “Noellanders Trophy” next January! Although this species is not so commonly used in Bonsai anymore, I do believe they are wonderful material for good bonsai! Even this, not so good starting material, turned out into a believable old looking tree. This tree has become a good representative of what I seek for in my designs and styling, I hope you like it to?
I found this wooden slab to place it on in the show, do you think it goes well with this tree?
Regards,
Hans van Meer.

*
Info: karamottobonsai@hotmail.com
——————————————————————————————————————-

I FINALLY FINISHED THE WORK ON MY PINUS UNCINATA.


Hi, everybody,

Yesterday I finally had the change to finish the work on my Pinus Uncinata. Although it took me a month or so too long to do it all, I am glad about the outcome of my work. The tree had enough growth and new foliage for me to give the image more height and width, I even removed a major branch from the left bottom branch. There was no more need for heavy wire, every main branch is fixated, more or less, in its right place. I tried to create more layers in the separate foliage pads and more open spaces between the foliage, these details create a whole new feeling when I look at it. The tree, now, looks taller and more like it is growing in the distance. I feel this is very important part of the future process of trying to find some sort of believable balance in this extreme Bonsai design I have in my mind for this Pine! The right Jin on the ground is already half cut to give me a better impression of how it will look in the near future! I left it like this because that part of the Jin that is left on is used to tie down the tree to the rim of the pot to hold it upright and secure!

More to come!


*

*

Above picture: I placed the tree in a virtual pot to get a feel of how it will look, in a more upright position. As you can see, the open spaces increased a lot between the bottom branches and the soil level. And that is something to take along in the next restyling session. This is not a pot I would go for, but it will do for this purpose.

I hope you like this old Pine as much as I do,

Hans van Meer.

Info: karamottobonsai@hotmail.com

———————————————————————————————-


REMOVING NEEDLES, BEFORE WIRING, ON MY PINUS UNCINATA.

Hi, everybody,

A few days ago, during a short sunny dry spell, I removed all of the last years and some of this year’s needles. To control and promote growth and to make it easier to wire the branches.

When I feel up to it, I hope to start to wire the tree! This picture is a rare shot of the backside of this old Pine.

Regards,

Hans van Meer.

Info: karamottobonsai@hotmail.com

————————————————————————————————-


MY ULMUS IN WINTER COLORS.

Hi, everybody,

because of my back problems, I have not been really able to do the major styling I had planned for some of my bigger trees. But I have been able to shoot a nice picture of my “Ulmus” in early winter colours. The light wasn’t perfect to do this really good, but for the last couple of days, we have had some really nasty weather over here! Hope you like it? This is one of the first Bonsai that is still in my collection and I have been taking care of it for some 17 years now!

Regards,

Hans van Meer.

                         Chinees Elm   “Ulmus parvifolia”   November 2008.

Info: karamottobonsai@hotmail.com

—————————————————————————————————–

THE FIRST STYLING OF ED’S PINE.

Hi, everybody,

last Thursday my student Ed van der Reek brought his latest find, a Pinus uncinata, to my garden to give it it’s first styling. This small Pine showed all the typical Yamadori futures we look for in good Bonsai material, But on the other hand, it showed just as many typical Yamadori problems, that needed to be solved, or better yet, incorporated into the overall Bonsai design, in a way that would actually make the tree look better. There is a lot of beauty to be found in imperfection! 

More text to the pics will follow tomorrow!

*


Left picture: Sorry for this poor picture against that bad background. Those two chairs were there for me, I had to go sit down every now and then! Point A:  Shows one of the only 2 branches on the battered Pine. It is a to long branch, that grows from an ugly spot on the back side of the tree. It will be a major problem, to use this weak branch in any design we might come up with! Point B: Shows the second (Cascading) branch. This is a very hard to bend straight and thick branches, from which, way down 3 secondary branches grew. 1 strong and long and 2 smaller and weaker once. Above this branch, you can see a large dead wood stump that needs to be reduced and shaped in the future after the tree has its new image!

Right picture: A: Close up of the weak back branch.


Left picture: Side branches B and C are the weakest 2 of the 3 growing from the main branch, and they are placed to low down. ED uses wet raffia to tightly wrapped the place where the thick branch endures the most pressure when it is brought into the desired position. Than 2 lengths of copper wire are, with the help of pre-cut small pieces of thin wire, placed lengthwise along the side of the outside curve of the branch. The small pieces are there to help you attached the lengths of wire along the side of the branch, even if you work alone. Just hold them in place with one hand and use the other to swing the little piece around the area you are holding and then tighten it by hand and then by pliers. You repeat this process along the rest of the branch, very easy this way and it ensures that the lengths of wire are very tightly bound to the part where the branch needs protection from breaking! Then, as tight as possible, another layer of wet raffia was applied and over that layer normal wire was applied to hold everything tightly into place!

Right picture: A normal wood clamp was used to, very easily, bend the thick branch, bit by bit, into its desired position. The 15 minutes break we took in between the bending of this all-important branch, were used to wire the rest of the smaller branches and to drink some more coffee.


Left picture: Point A: The base of the branch was secured by a piece of copper wire to the dead stump. To prevent it from being torn off at its base! Here you can also clearly see the large deadwood stump that hides most of the main branch. This deadwood needs to be reduced and shaped in the future. In a way that fits the tree design as well as hiding the straightness of that same main branch.

Right picture: WOW! Look how far it has come and without any problems. Ed still can’t believe it! 🙂


Left picture: Side branch B is bent down and appears here from under need the trunk.

Right picture: Here Ed is carefully bending the cascading (side) branch into position.


Left and right picture: The now useless side branches are removed by Ed.


Left picture: without hesitation, Ed removes the useless branch on the right (back) side of the tree. Leaving a stump for a future Jin.

Right picture: After an afternoon of fun, Ed can really smile with the outcome of his work. The deadwood carving will be don later when Ed is more used to the trees new image. He has to charge his fantasy first for a while, so to speak. I am sure this tree will turn out just great in the future!

Most of the times I make a drawing, but this time I made this virtual of this future Bonsai for Ed. There are no back branches visible in this drawing, but there are 3 of those in the real design. Out of experience with my own trees, I have learned, that when the proper technique to stimulate back budding are applied on these Yamadori Pines, a design like this can be visual in 7 to 10 years. I know it sounds like a long time, but every step in the life of a Bonsai is worth taking, believe me!  

Ed is happy so I am very happy, so it was a good Bonsai day again!

Regards,

Hans.

Info: karamottobonsai@hotmail.com

————————————————————–