
Hi, everybody,
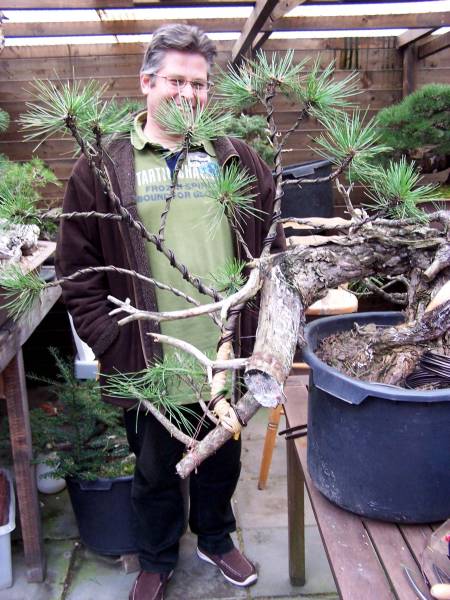
last Thursday my student Ed van der Reek brought his latest find, a Pinus uncinata, to my garden to give it it’s first styling. This small Pine showed all the typical Yamadori futures we look for in good Bonsai material, But on the other hand, it showed just as many typical Yamadori problems, that needed to be solved, or better yet, incorporated into the overall Bonsai design, in a way that would actually make the tree look better. There is a lot of beauty to be found in imperfection!
More text to the pics will follow tomorrow!
*
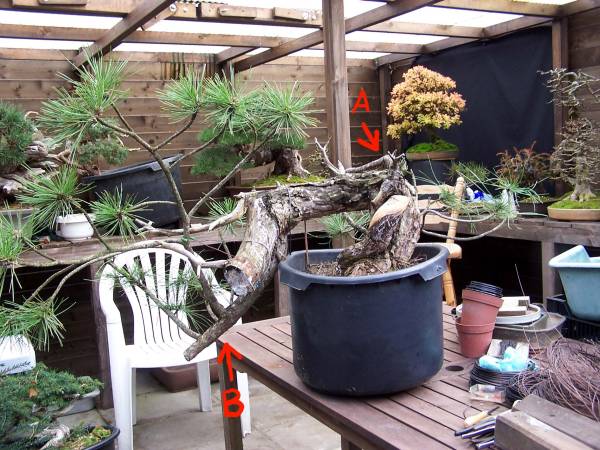

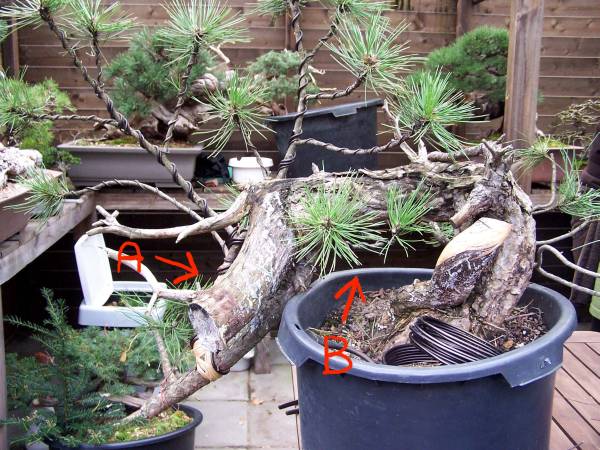
Left picture: Sorry for this poor picture against that bad background. Those two chairs were there for me, I had to go sit down every now and then! Point A: Shows one of the only 2 branches on the battered Pine. It is a to long branch, that grows from an ugly spot on the back side of the tree. It will be a major problem, to use this weak branch in any design we might come up with! Point B: Shows the second (Cascading) branch. This is a very hard to bend straight and thick branches, from which, way down 3 secondary branches grew. 1 strong and long and 2 smaller and weaker once. Above this branch, you can see a large dead wood stump that needs to be reduced and shaped in the future after the tree has its new image!
Right picture: A: Close up of the weak back branch.
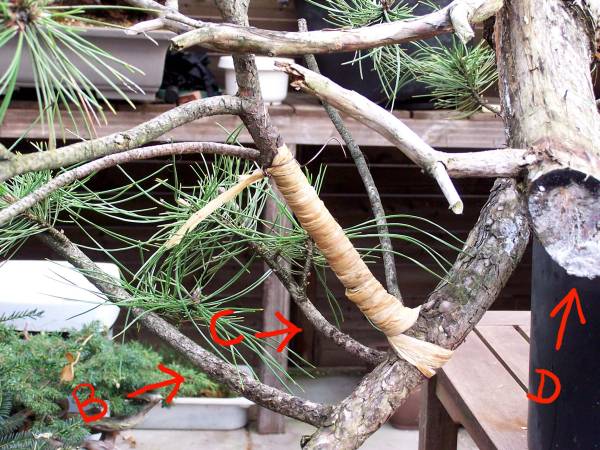
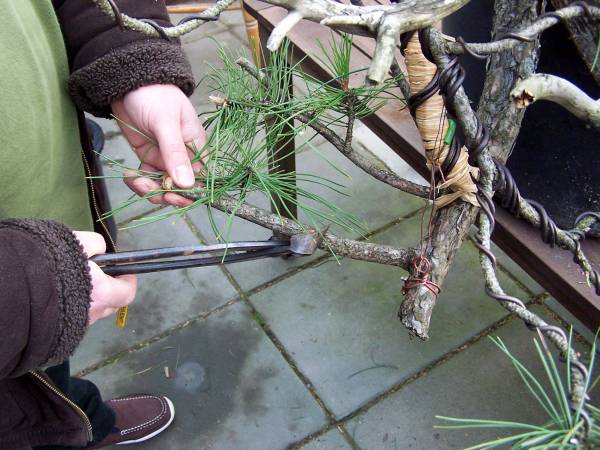
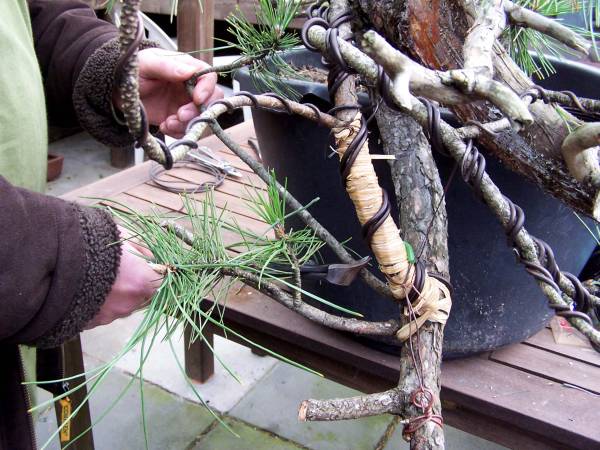
Left picture: Side branches B and C are the weakest 2 of the 3 growing from the main branch, and they are placed to low down. ED uses wet raffia to tightly wrapped the place where the thick branch endures the most pressure when it is brought into the desired position. Than 2 lengths of copper wire are, with the help of pre-cut small pieces of thin wire, placed lengthwise along the side of the outside curve of the branch. The small pieces are there to help you attached the lengths of wire along the side of the branch, even if you work alone. Just hold them in place with one hand and use the other to swing the little piece around the area you are holding and then tighten it by hand and then by pliers. You repeat this process along the rest of the branch, very easy this way and it ensures that the lengths of wire are very tightly bound to the part where the branch needs protection from breaking! Then, as tight as possible, another layer of wet raffia was applied and over that layer normal wire was applied to hold everything tightly into place!
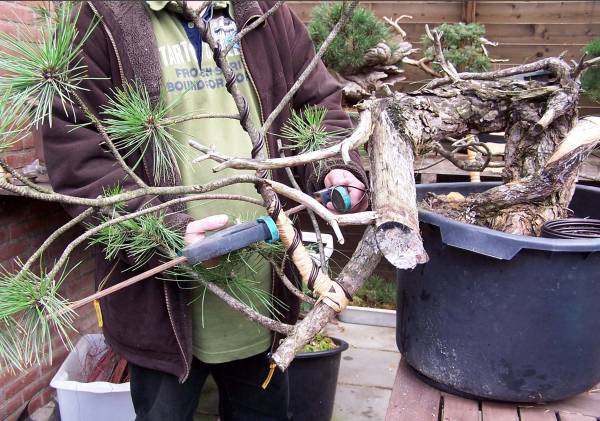
Right picture: A normal wood clamp was used to, very easily, bend the thick branch, bit by bit, into its desired position. The 15 minutes break we took in between the bending of this all-important branch, were used to wire the rest of the smaller branches and to drink some more coffee.
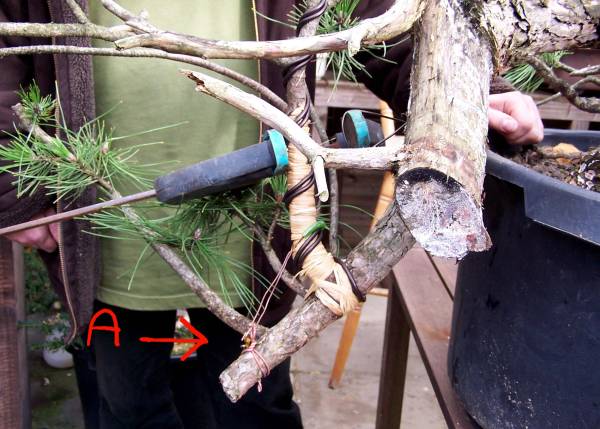
Left picture: Point A: The base of the branch was secured by a piece of copper wire to the dead stump. To prevent it from being torn off at its base! Here you can also clearly see the large deadwood stump that hides most of the main branch. This deadwood needs to be reduced and shaped in the future. In a way that fits the tree design as well as hiding the straightness of that same main branch.
Right picture: WOW! Look how far it has come and without any problems. Ed still can’t believe it! 🙂
Left picture: Side branch B is bent down and appears here from under need the trunk.
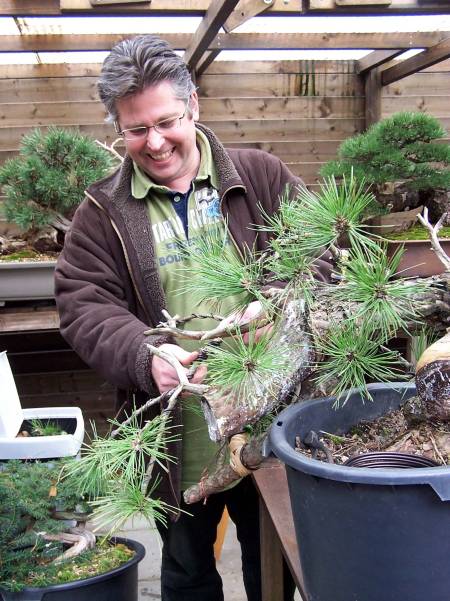
Right picture: Here Ed is carefully bending the cascading (side) branch into position.
Left and right picture: The now useless side branches are removed by Ed.
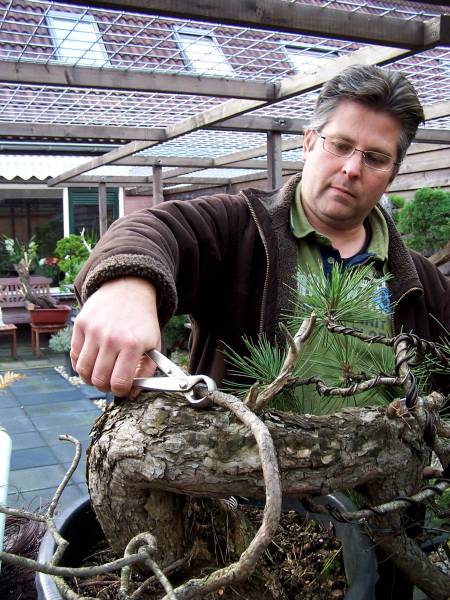
Left picture: without hesitation, Ed removes the useless branch on the right (back) side of the tree. Leaving a stump for a future Jin.
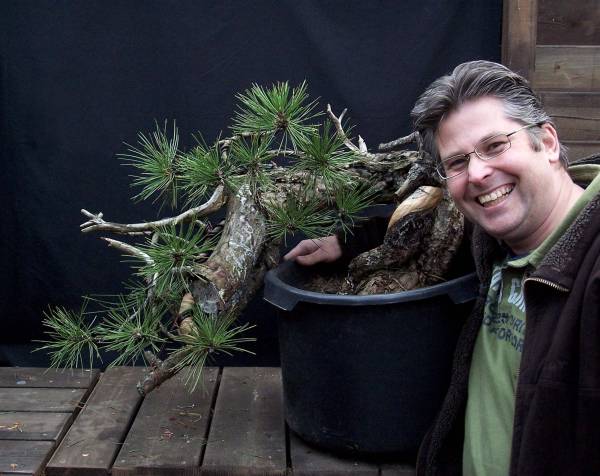
Right picture: After an afternoon of fun, Ed can really smile with the outcome of his work. The deadwood carving will be don later when Ed is more used to the trees new image. He has to charge his fantasy first for a while, so to speak. I am sure this tree will turn out just great in the future!

Most of the times I make a drawing, but this time I made this virtual of this future Bonsai for Ed. There are no back branches visible in this drawing, but there are 3 of those in the real design. Out of experience with my own trees, I have learned, that when the proper technique to stimulate back budding are applied on these Yamadori Pines, a design like this can be visual in 7 to 10 years. I know it sounds like a long time, but every step in the life of a Bonsai is worth taking, believe me!
Ed is happy so I am very happy, so it was a good Bonsai day again!
Regards,
Hans.
Info: karamottobonsai@hotmail.com
————————————————————–
