“MOM’S YEW” DESIGN VIEWS. PART 2

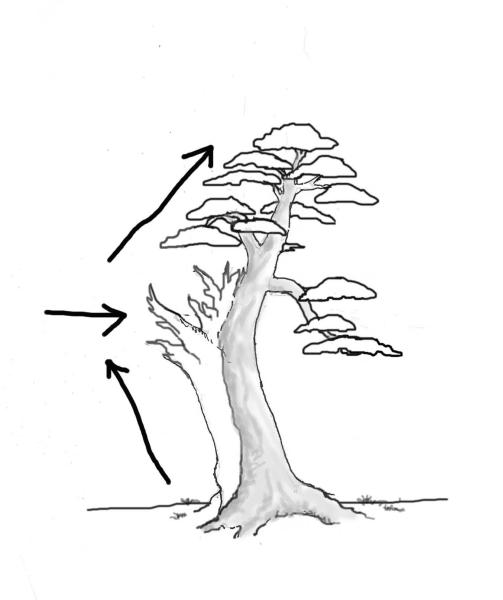
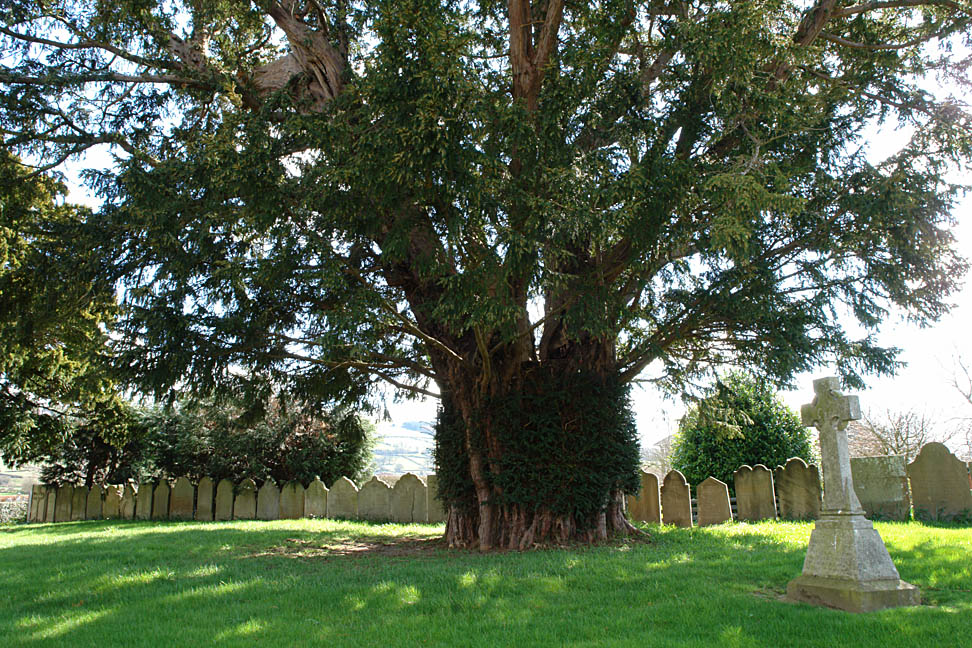
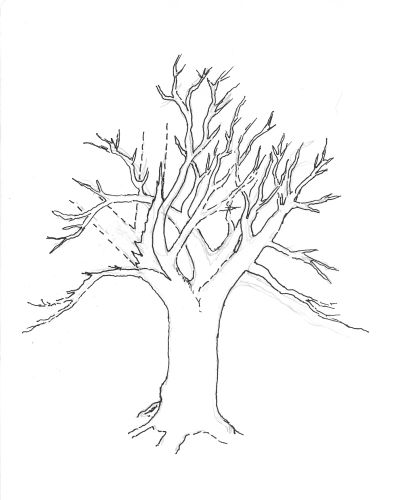
So let’s look at another design option for Irene’s Yew. Again I start with the same drawing of the frame of the tree, without the branches.  

yew-drawing-3.jpg

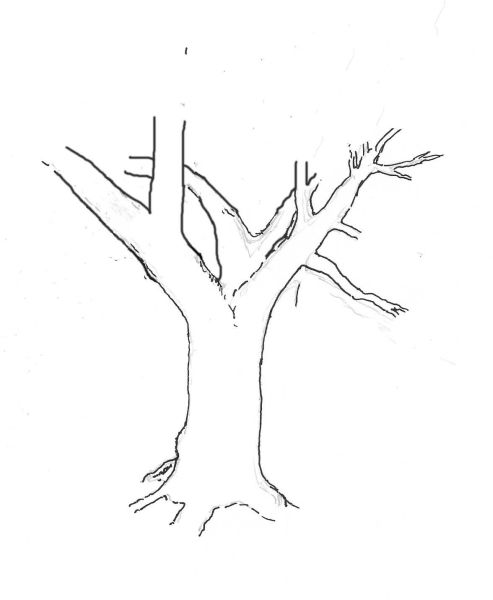
So now I want to try and see if I can get any movement in this straight tree. I plane to use the right branch, it grows at a nice angle from the trunk and has a nice secondary branch growing on an interesting place. So now I will virtual tilt the tree to the left to create some movement and angles to the tree trunk.

yew-drawing-4.jpg

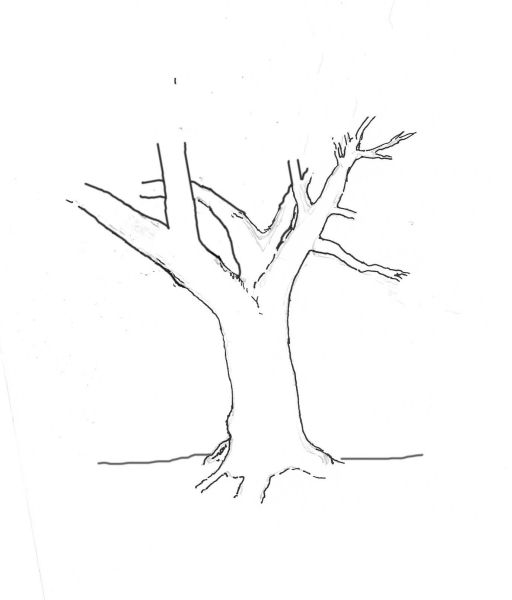
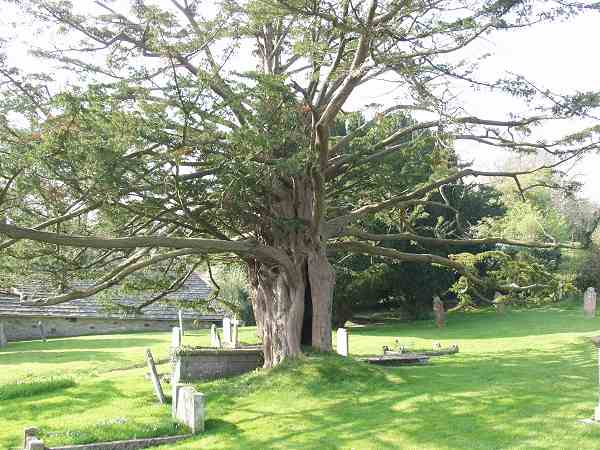
It’s a start, but still not enough movement for my liking!

yew-drawing-5.jpg

Now we are talking! I like to create angles in my designs, and I like to have branches, foliage or Jin’s emphasising the movement these angles create. Let me try to explain: the arrow on the left points at the future corner in my trunk design. This is a point were your eye, when you follow the line of the trunk upwards, turns from going left, to going right. If you emphasize this important point with a branch,  foliage or Jin, you will create a place for the eye to stop at, before it travels further upwards. (second arrow)

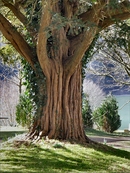
Those two thick trunks on the left are too straight and without any interest (in this design!). So they must be converted into deadwood,  so they are used to benefit the design.

yew-drawing-6.jpg

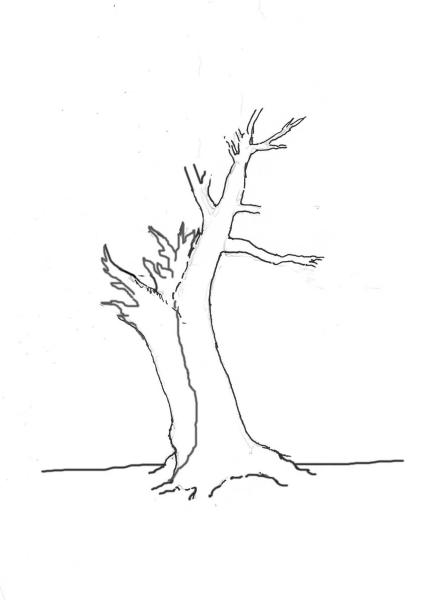
Here you can see how I might shape the Shari and Jins to emphasize that part where the tree changes direction. I also converted the back branches into Jins. Now I’m going to place the foliage in such a way that brings balance to the overall design. But also in a way that again enhances the movements of the tree!

yew-drawing-10.jpg

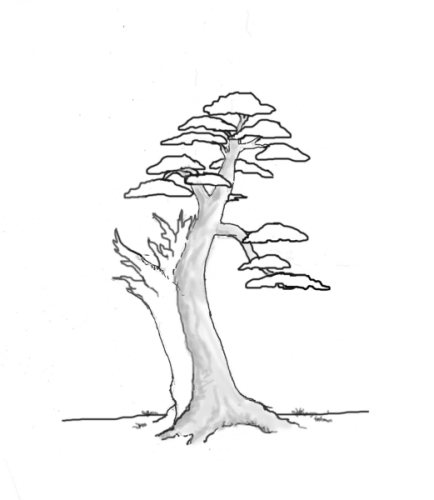
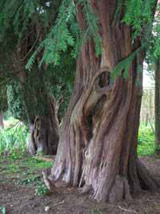
It is not easy to draw a picture with my mouse, but something like this is what I mean. Now the same tree is transformed in a typical bonsai style. That evokes a completely different feeling than the early-er formal broom style I made.

yew-drawing-8.jpg

First, the movement of the tree goes to the left and then where it changes to the right, I created an eye catcher in the form of that Jin. A place for the eyes to stop on there way up the tree and to enhance the change in trunk direction. It also divides the, otherwise to big,    empty space on the left side of the tree, preventing that the tree is being pushed too much to the right and looking unbalanced.

yew-drawing-7.jpg

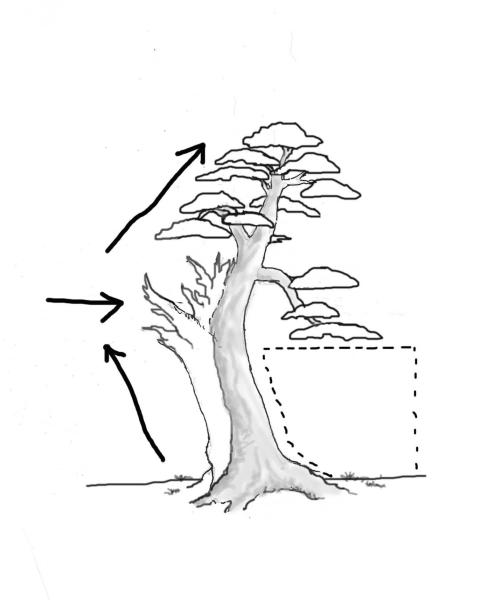
The first branch on the right leans nicely on the empty space that is trapped under-need it (dotted line).  Supporting the tree imaginary, holding it up, and therefore keeping the tree in balance. Empty spaces are one of the most important features for a successful design but are often neglected or misunderstood.

So there you have it, another vision and possibility for “Mom’s Yew”. I will have another idea ready in a few days. We have a lot to think about and a lot of decisions to make! But that is the fun in designing a bonsai.

Cheers,

Hans van Meer.

Info: karamottobonsai@hotmail.com    

—————————————————————————————————

“MOM’S YEW” DESIGN VIEWS.

Irene removed the branch I recommended and mailed the Pictures from the angle I asked for.                                   (see pictures below)

100_9350-1.jpg     100_9351-1.jpg     100_9352-1.jpg

100_9353-1.jpg   100_9355-1.jpg   100_9356-1.jpg

OK, for now, lets use this side as the front.

From this side, the too large root is on the backside and will be (after some reduction), not so much in your face “anymore. The placement of the main branches show possibility’s from this side and there is a nice see through between them, to see the back branches. Creating dept to this broom like tree.

I  think that Irene likes here bonsai to look natural, so I will discuss that option first.

If you look at pictures of old Yews in the wild in Europe, you will see that the most often grow in an almost deciduous tree looking broom style.

yew.jpg     yew-4.jpg     yew-8.jpg

And often with stunning deadwood on there massive trunks.

yew-6.jpg     yew-9.jpg     yew-11.jpg

This next perfect drawing of an English yew, by an unknown artist,  next to the perfect example of an old and free growing broom-style Yew.  Shoot by my wife nearby the town of Santander, North Spain.

Look at the amazing small lifelines on this bettered old survivor.

yew-3.gif         santander-2006-063-kl.jpg

Looking at this fine drawing and picture; I believe that this natural broom style is a  logical and possible option for Irene’s Yew!

Here Tree has the typical straight trunk, that splits up at a certain height into several trunks that grow almost straight up, just like in the drawing.

In the drawing, U can also clearly see the long and thin branches that grow from these multiple trunks.  In there search for light, they bend down under there own weight and length, creating the broom-like appearance.  To create this on Irene’s Yew, we must first stimulate the tree into new growth lower on the trunks. But that’s for later. First, lets look at one of the possibilities I see to create Irene’s  tree into a believable broom style bonsai. Using Irene’s last picture (see below), I made a drawing. I only just the outlines of the bare trunk to show you what could be done to create this style.

100_9351-1.jpg     yew-drawing-1-kl.jpg     yew-drawing-2-kl.jpg

In the first drawing (dotted line), you can see where the two thick branches were cut and made into a Jin and Shari. This point depends of course on where the new growth will appear, but this is only an example of how I think when looking at a tree and what I might do to style it. I drew the tree with more or less (not too good I must admit) bonsai like foliage layers, so you might get an idea of how it could look as a bonsai. In the real live bonsai, the foliage layers would be closer together and heavier than in my drawing. But it is just to show you that this tree in this style, could be nice and believable as bonsai. And even more important, doable.

I’ll Be back with more soon!

Hans.

Info: karamottobonsai@hotmail.com    

——————————————————————————-

MORE YEW WORK

Hi, everybody,

Last weekend I did some more refinement work on one of my Yews in preparation for the Ginkgo Award.

Picture 1: Shows the small Shohin Yew before I worked on the ground coverage.

Picture 2: Shows the tree after different fresh mosses were added.

Picture 3: Shows that the second branches on both sides are growing from the same height on the trunk. The branch on the left side was always meant to be removed but was left on the tree to fill the big empty space between the bottom left branch and the top until the branch right above it would have grown enough in length to replace it. Especially on a bonsai this size these obvious folds are an eyesore and should be avoided or solved before you enter the bonsai in any show.

Picture 4: Here the branch is already removed and a small jin is left as a reminder. The branch above the one that is removed is brought down to more or less replace it.

Cheers,

Hans van Meer.

Info: karamottobonsai@hotmail.com    

——————————————————————————————————————————-

Welcome, all to my new Bonsai blog!

                              A close-up picture of my old Mugo Pine  “Big Ron”.

———————————————————————————————————————————

Welcome to my bonsai blog!

Here I will keep you updated with my bonsai work, my yamadori trips, my demos and workshop and everything else that has something to do with bonsai I come across!    

Have fun,

Hans van Meer.  

Info: karamottobonsai@hotmail.com     

—————————————————————————————-