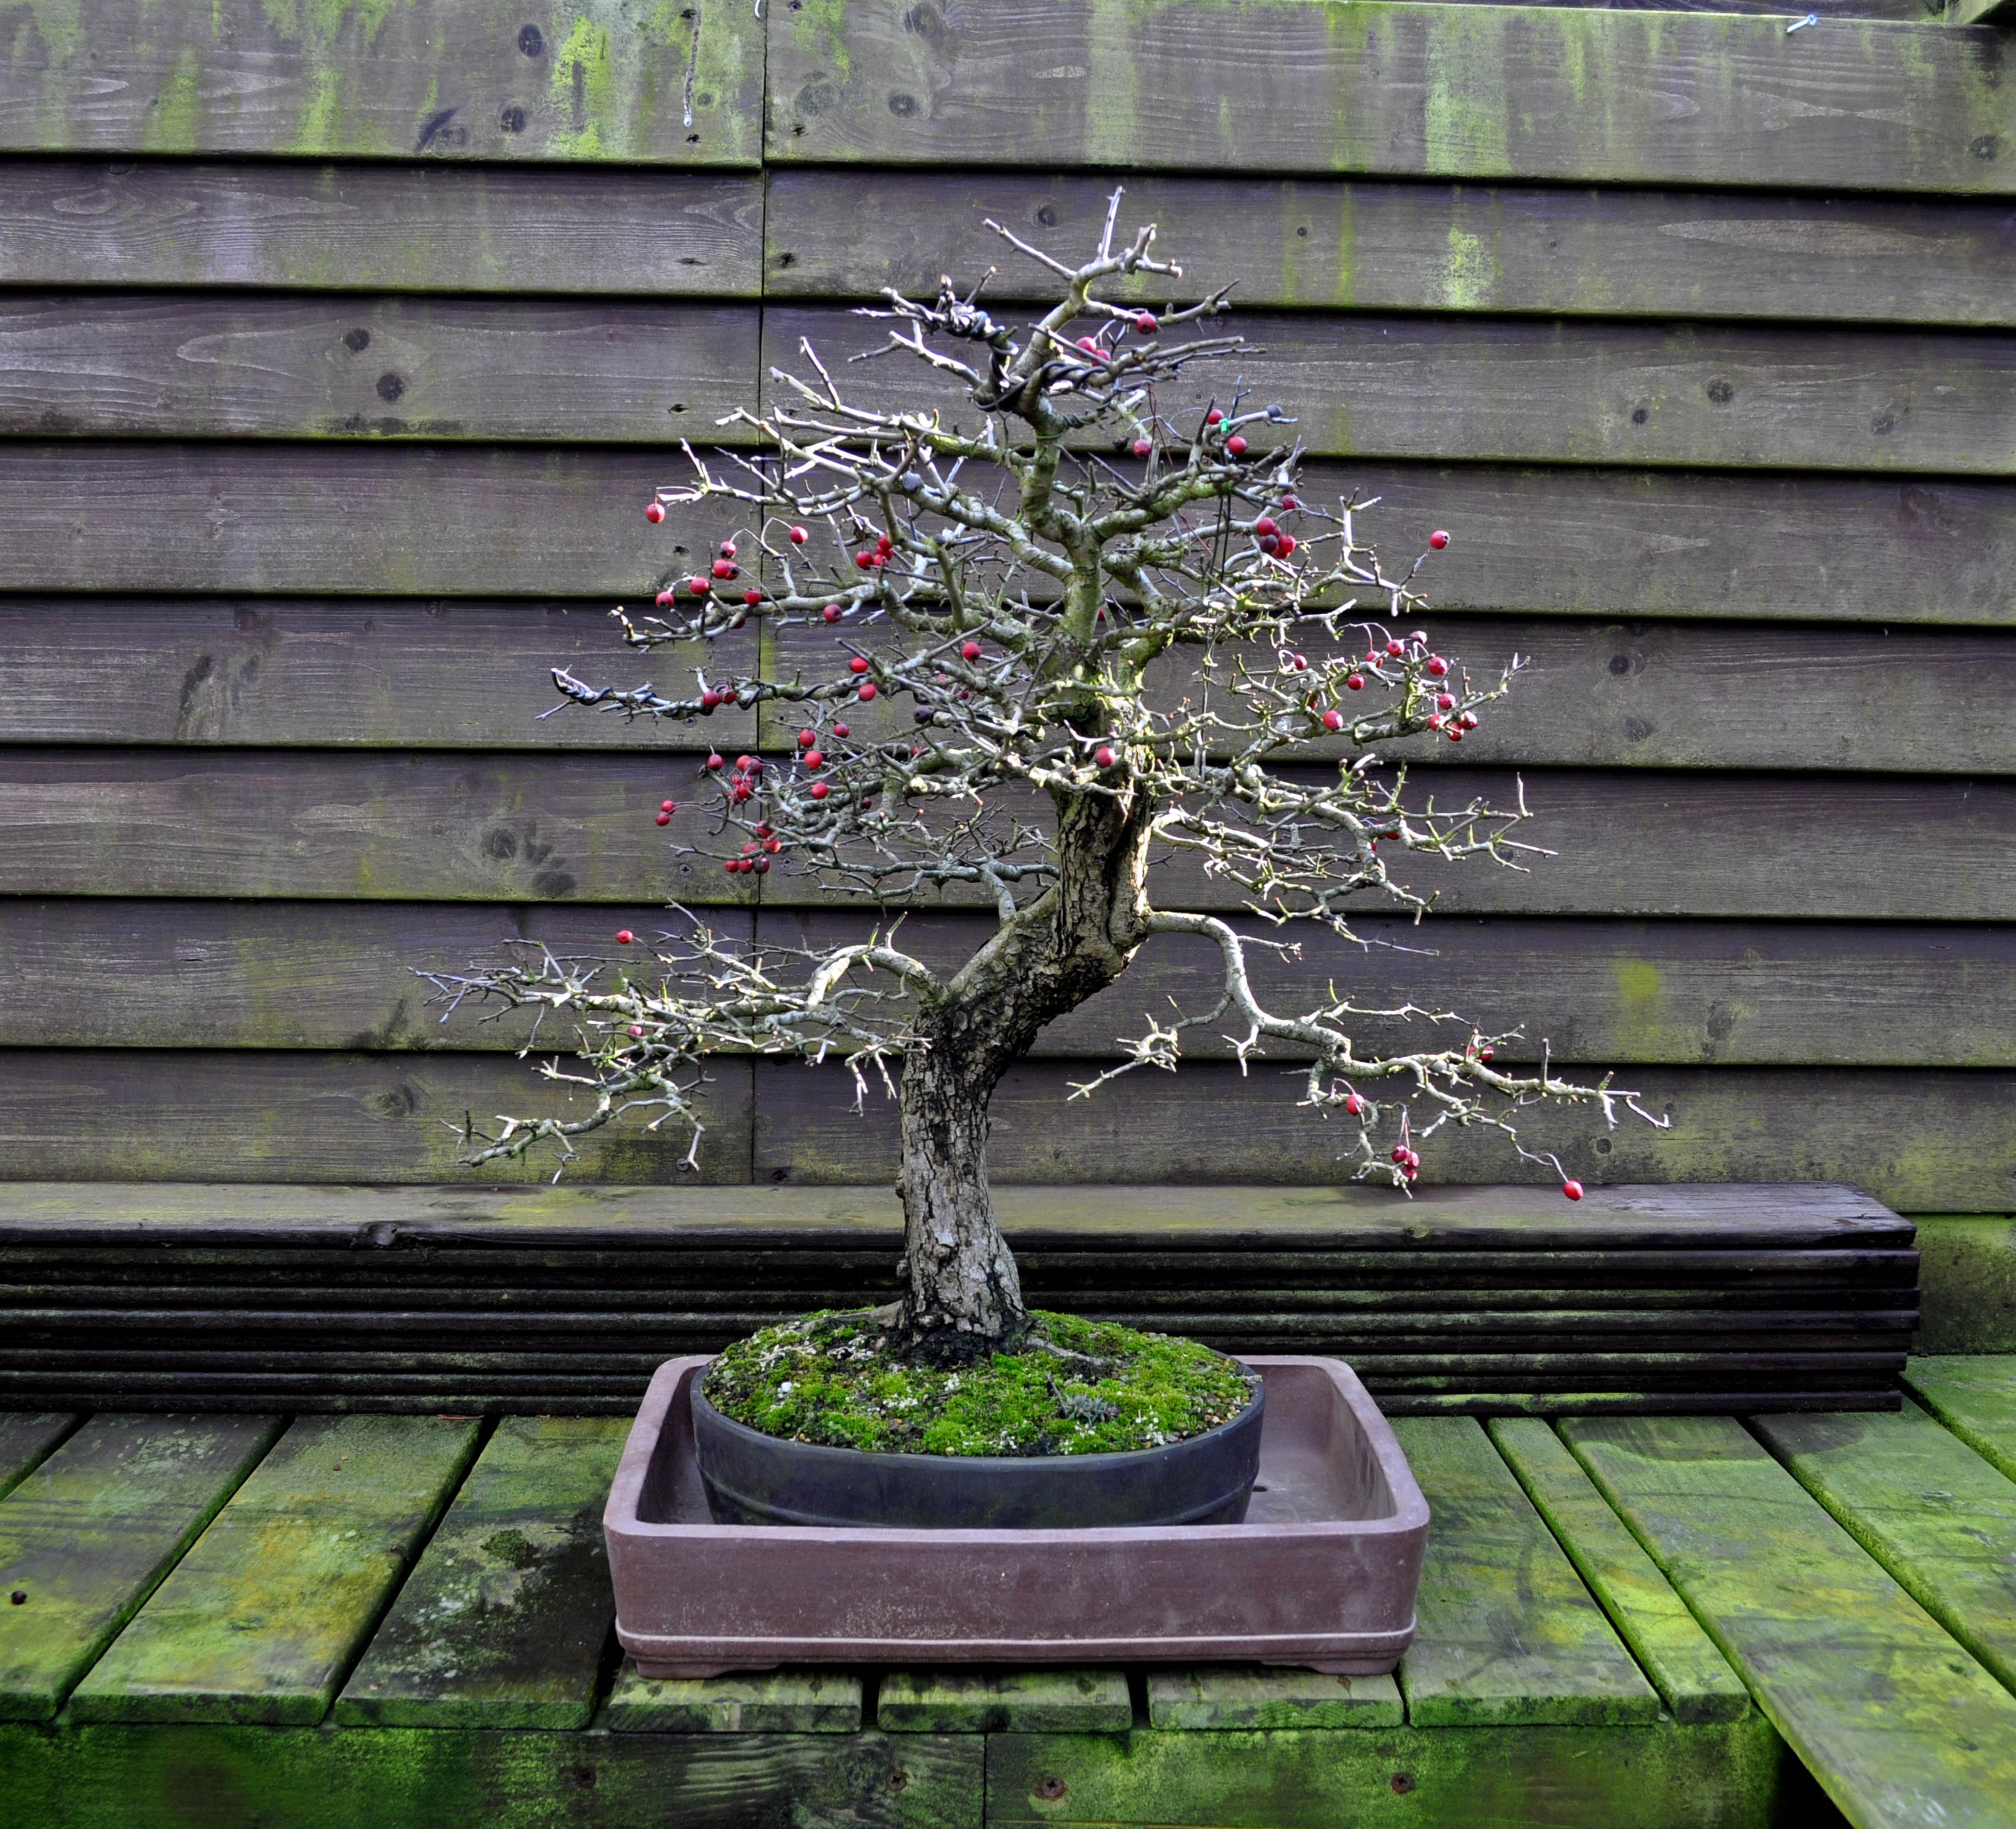
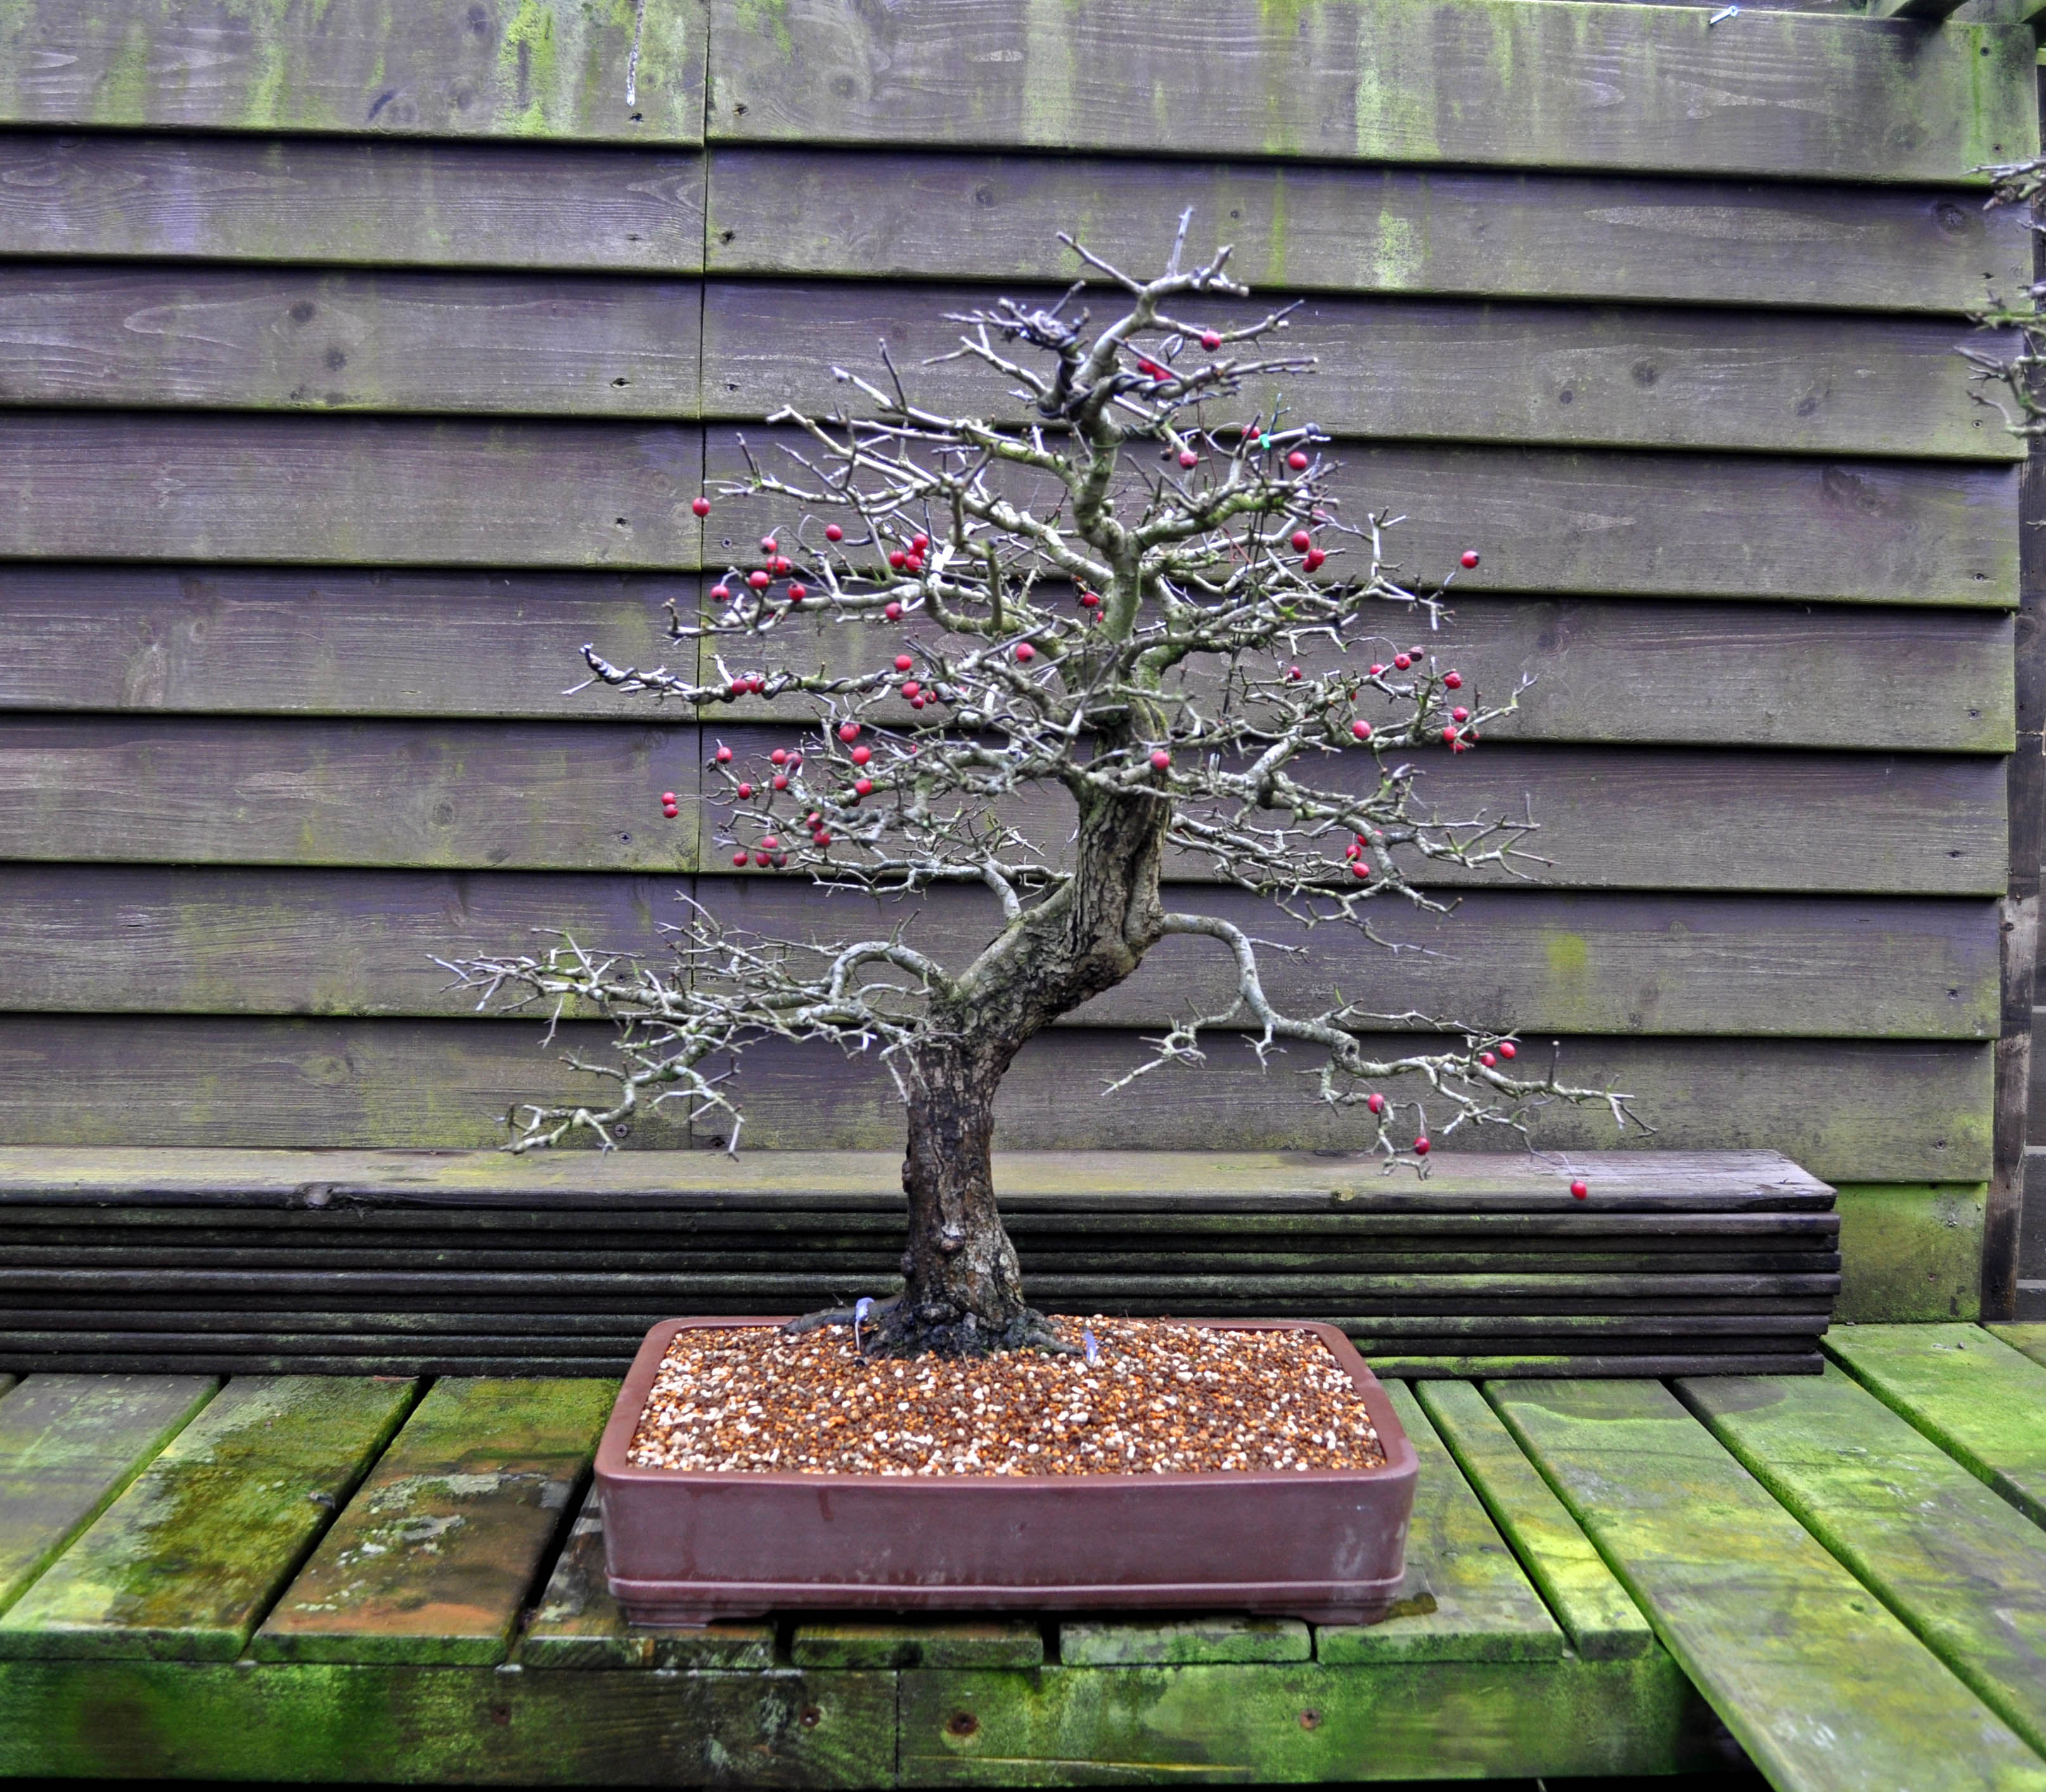
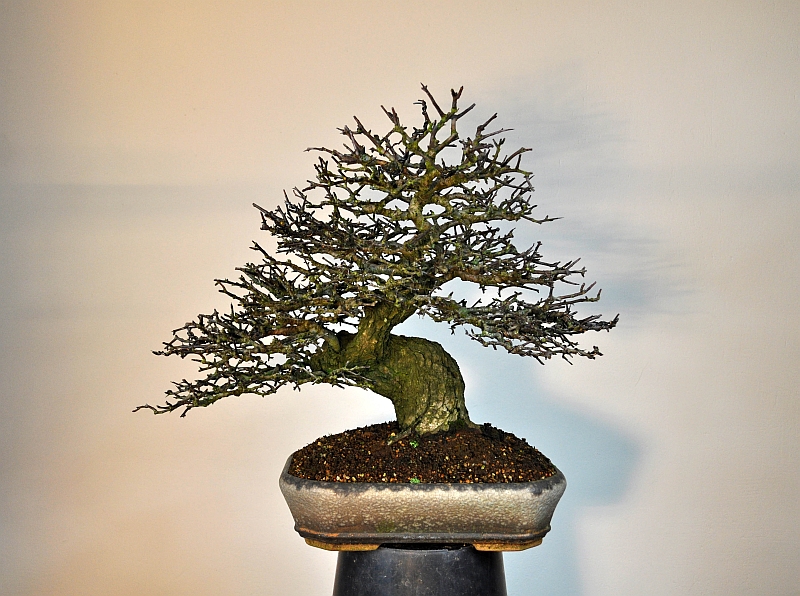
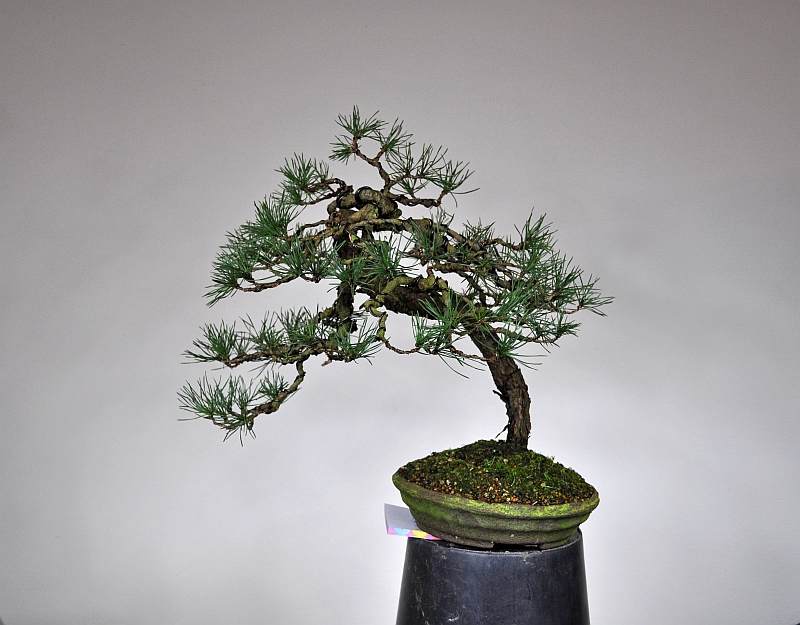
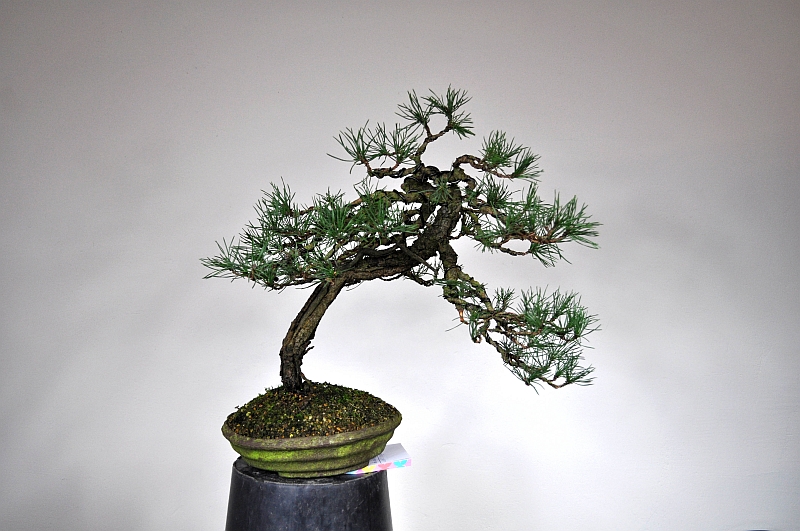
The Little Bonsai from this story was a wonderful gift from my dear British friend Terry Foster when I stayed at his home many many years ago! He pointed out some, especially in those early days, amazing Yamadori Blackthorns and said: pick one!🥳 So, of course, I went for the odd one out! This little wonder of nature must have been suffering from prevailing winds from the sea and that forced him to grow upwards in a spiral-like way like one of those old barber pools from yesteryear! And above that, it had amazing old wrinkled bark and deadwood that makes his crown look like an Ant Queens head! So my choice was made! This Blackthorn in this small pot is a slow grower and it took a very long time to create these branches and foliage but it is slowly getting there!Height: 30cm/12inch.
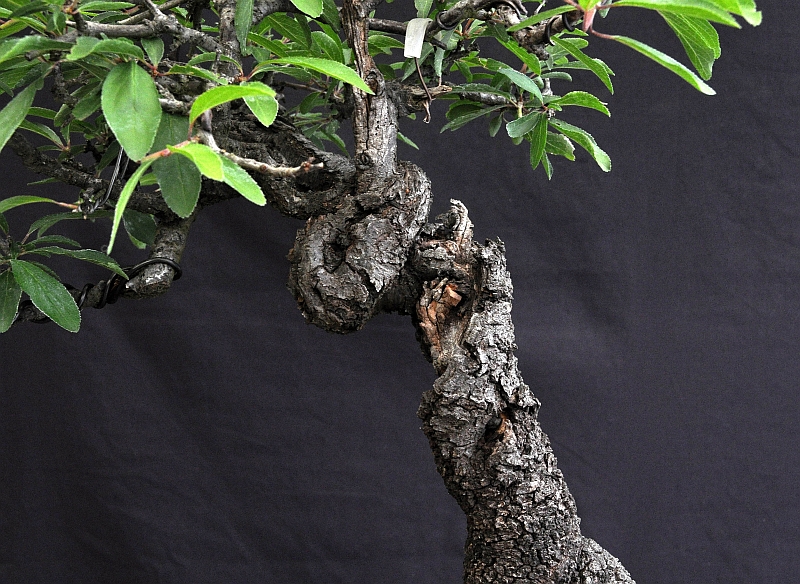
Below: A close-up of the ant-like topand the twisting bark.
here are some pictures and the text from the workshop that I gave on the 28 of April at my first Bonsai club “KOYA”. Text by: G. Schwagermann.
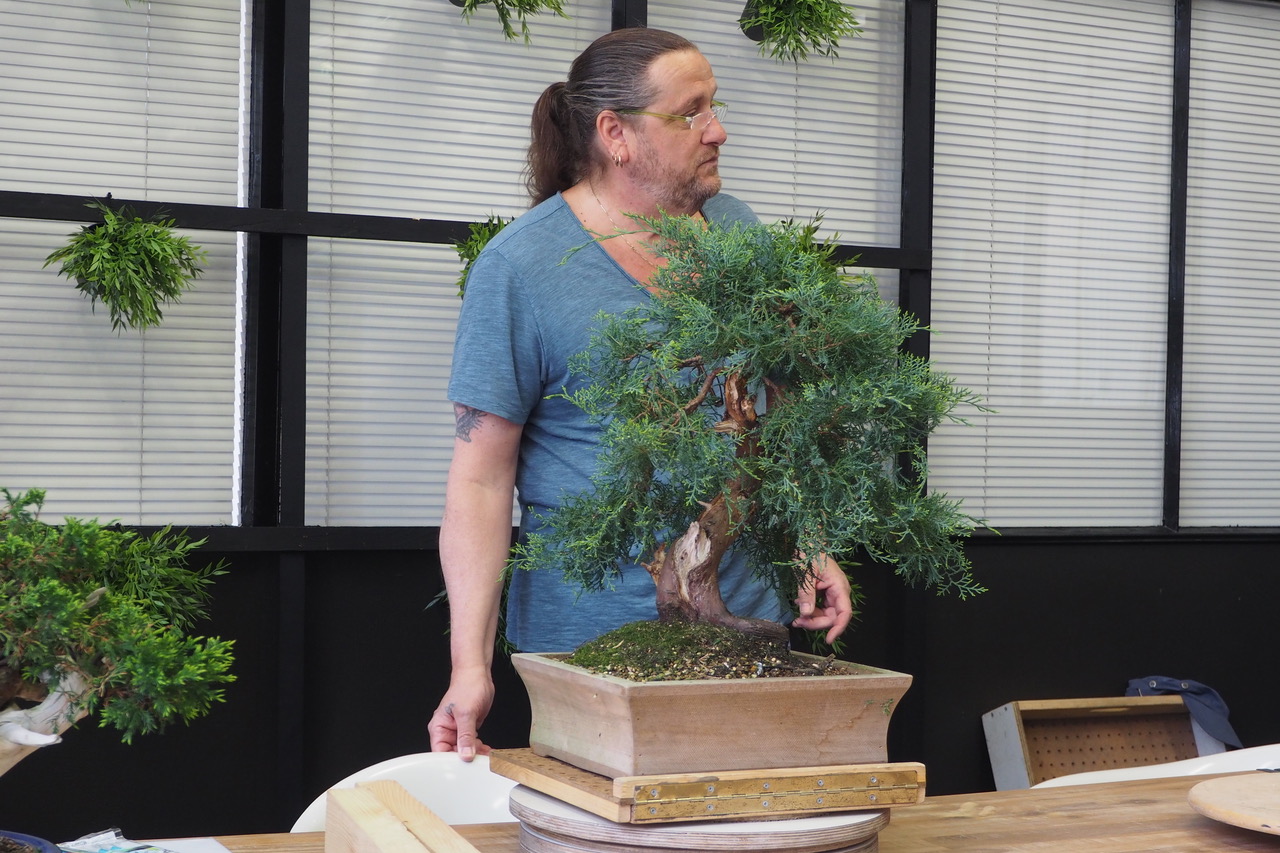
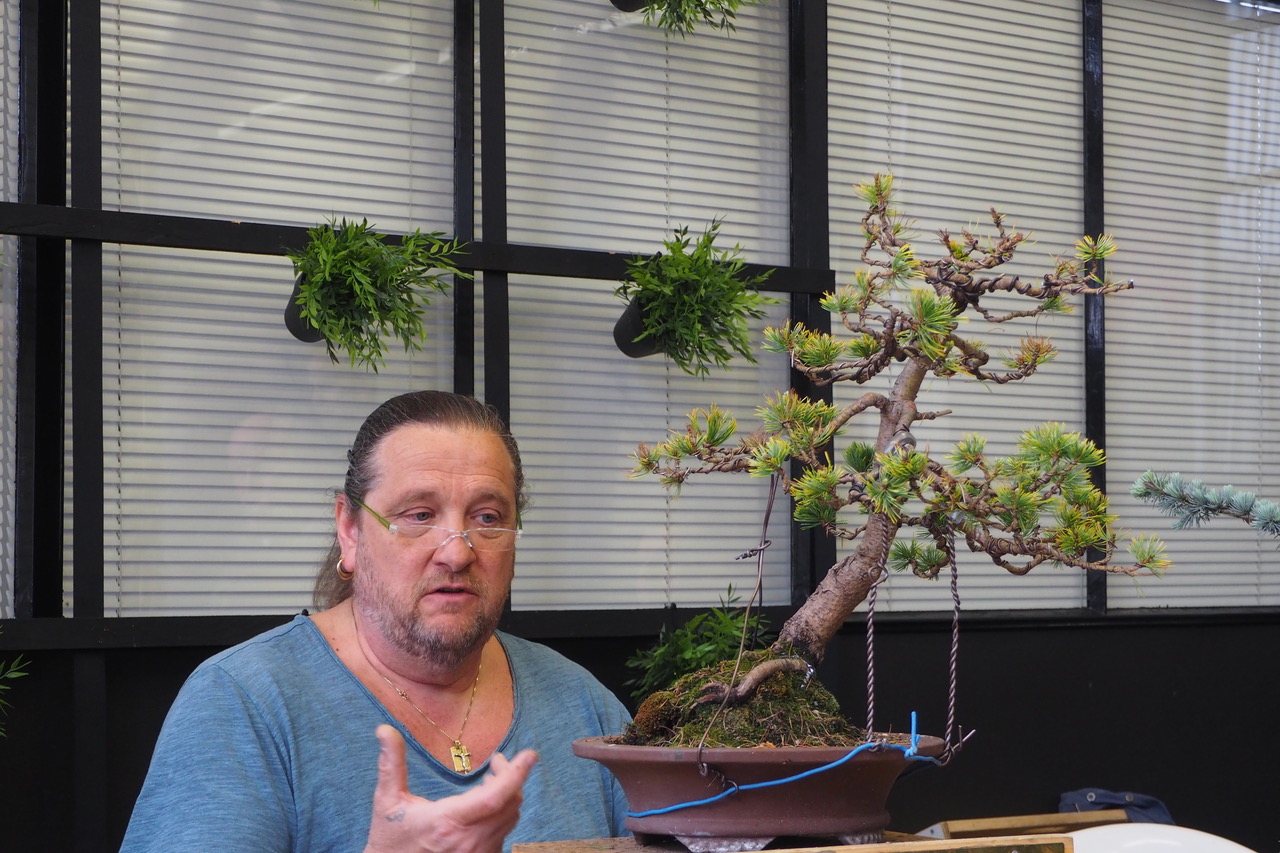
It took some surging to find the temporary location of the “Lijm en Cultuur” (glue and culture) building in Delft. But how nice it was that this old building is not yet demolished so that we all could enjoy Hans van Meer’s workshop in this “ART DECO” ambience. The workshop was fully booked with 10 Koya members, jong and old, beginners and advanced but above all, a group focused to learn. Dan Snipes did a short introduction that was followed by Hans presenting himself, he started once upon a time at Koya and now he is an internationally asked Bonsai teacher. Who is, as he said himself: now “back on base”. All trees that were brought in were discussed at length, with in between a lively discussion about the phenomena that brought us all together: Bonsai! After that, it was time to start working on the trees. Hans did his rounds and helped with advice and hands-on action, also there started a spontaneous interaction between different members, typical Koya! It was an instructive and entertaining afternoon that brought us a bit closer to the charm of Bonsai. Koya thanks you, Hans for participating in this workshop.
G. Schwagermann
————————————————————————————————–
Workshop Hans van Meer Delft, 28 april 2018
Het was even zoeken naar de locatie van Lijm en Cultuur aan de Rotterdamseweg 272 in Delft. Maar wat fijn dat ze dit oude gebouw (nog) niet gesloopt hebben zodat wij nu in een sfeer van “Art-deco” de workshop van Hans van Meer mochten ervaren. De workshop was volgeboekt met 10 Koyanen, jong en oud, beginners en gevorderden maar bovenal een enthousiaste groep gefocust om te leren. Dan Snipes gaf een korte inleiding waarna Hans zich presenteerde, ooit begonnen bij Koya en nu een internationaal gevraagde bonsaimeester. Nu, zoals hij zelf zei “terug op honk”! Alle bomen werden met aandacht van de hele groep uitvoerig besproken met daar tussendoor een levendige discussie over het fenomeen wat ons samen brengt: Bonsai. Daarna was de tijd gekomen om aan de bomen te gaan werken. Hans deed de ronde en gaf raad en daad, ook ontstond er een spontane samenwerking van de leden, Koya eigen? Het was een leerzame en onderhoudende dag en zijn we weer een stukje dichterbij de bekoring van Bonsai. Hans bedankt, Koya bedankt voor het ter beschikking stellen van deelname hieraan.
G. Schwagermann
—————————————————————————————————————————-
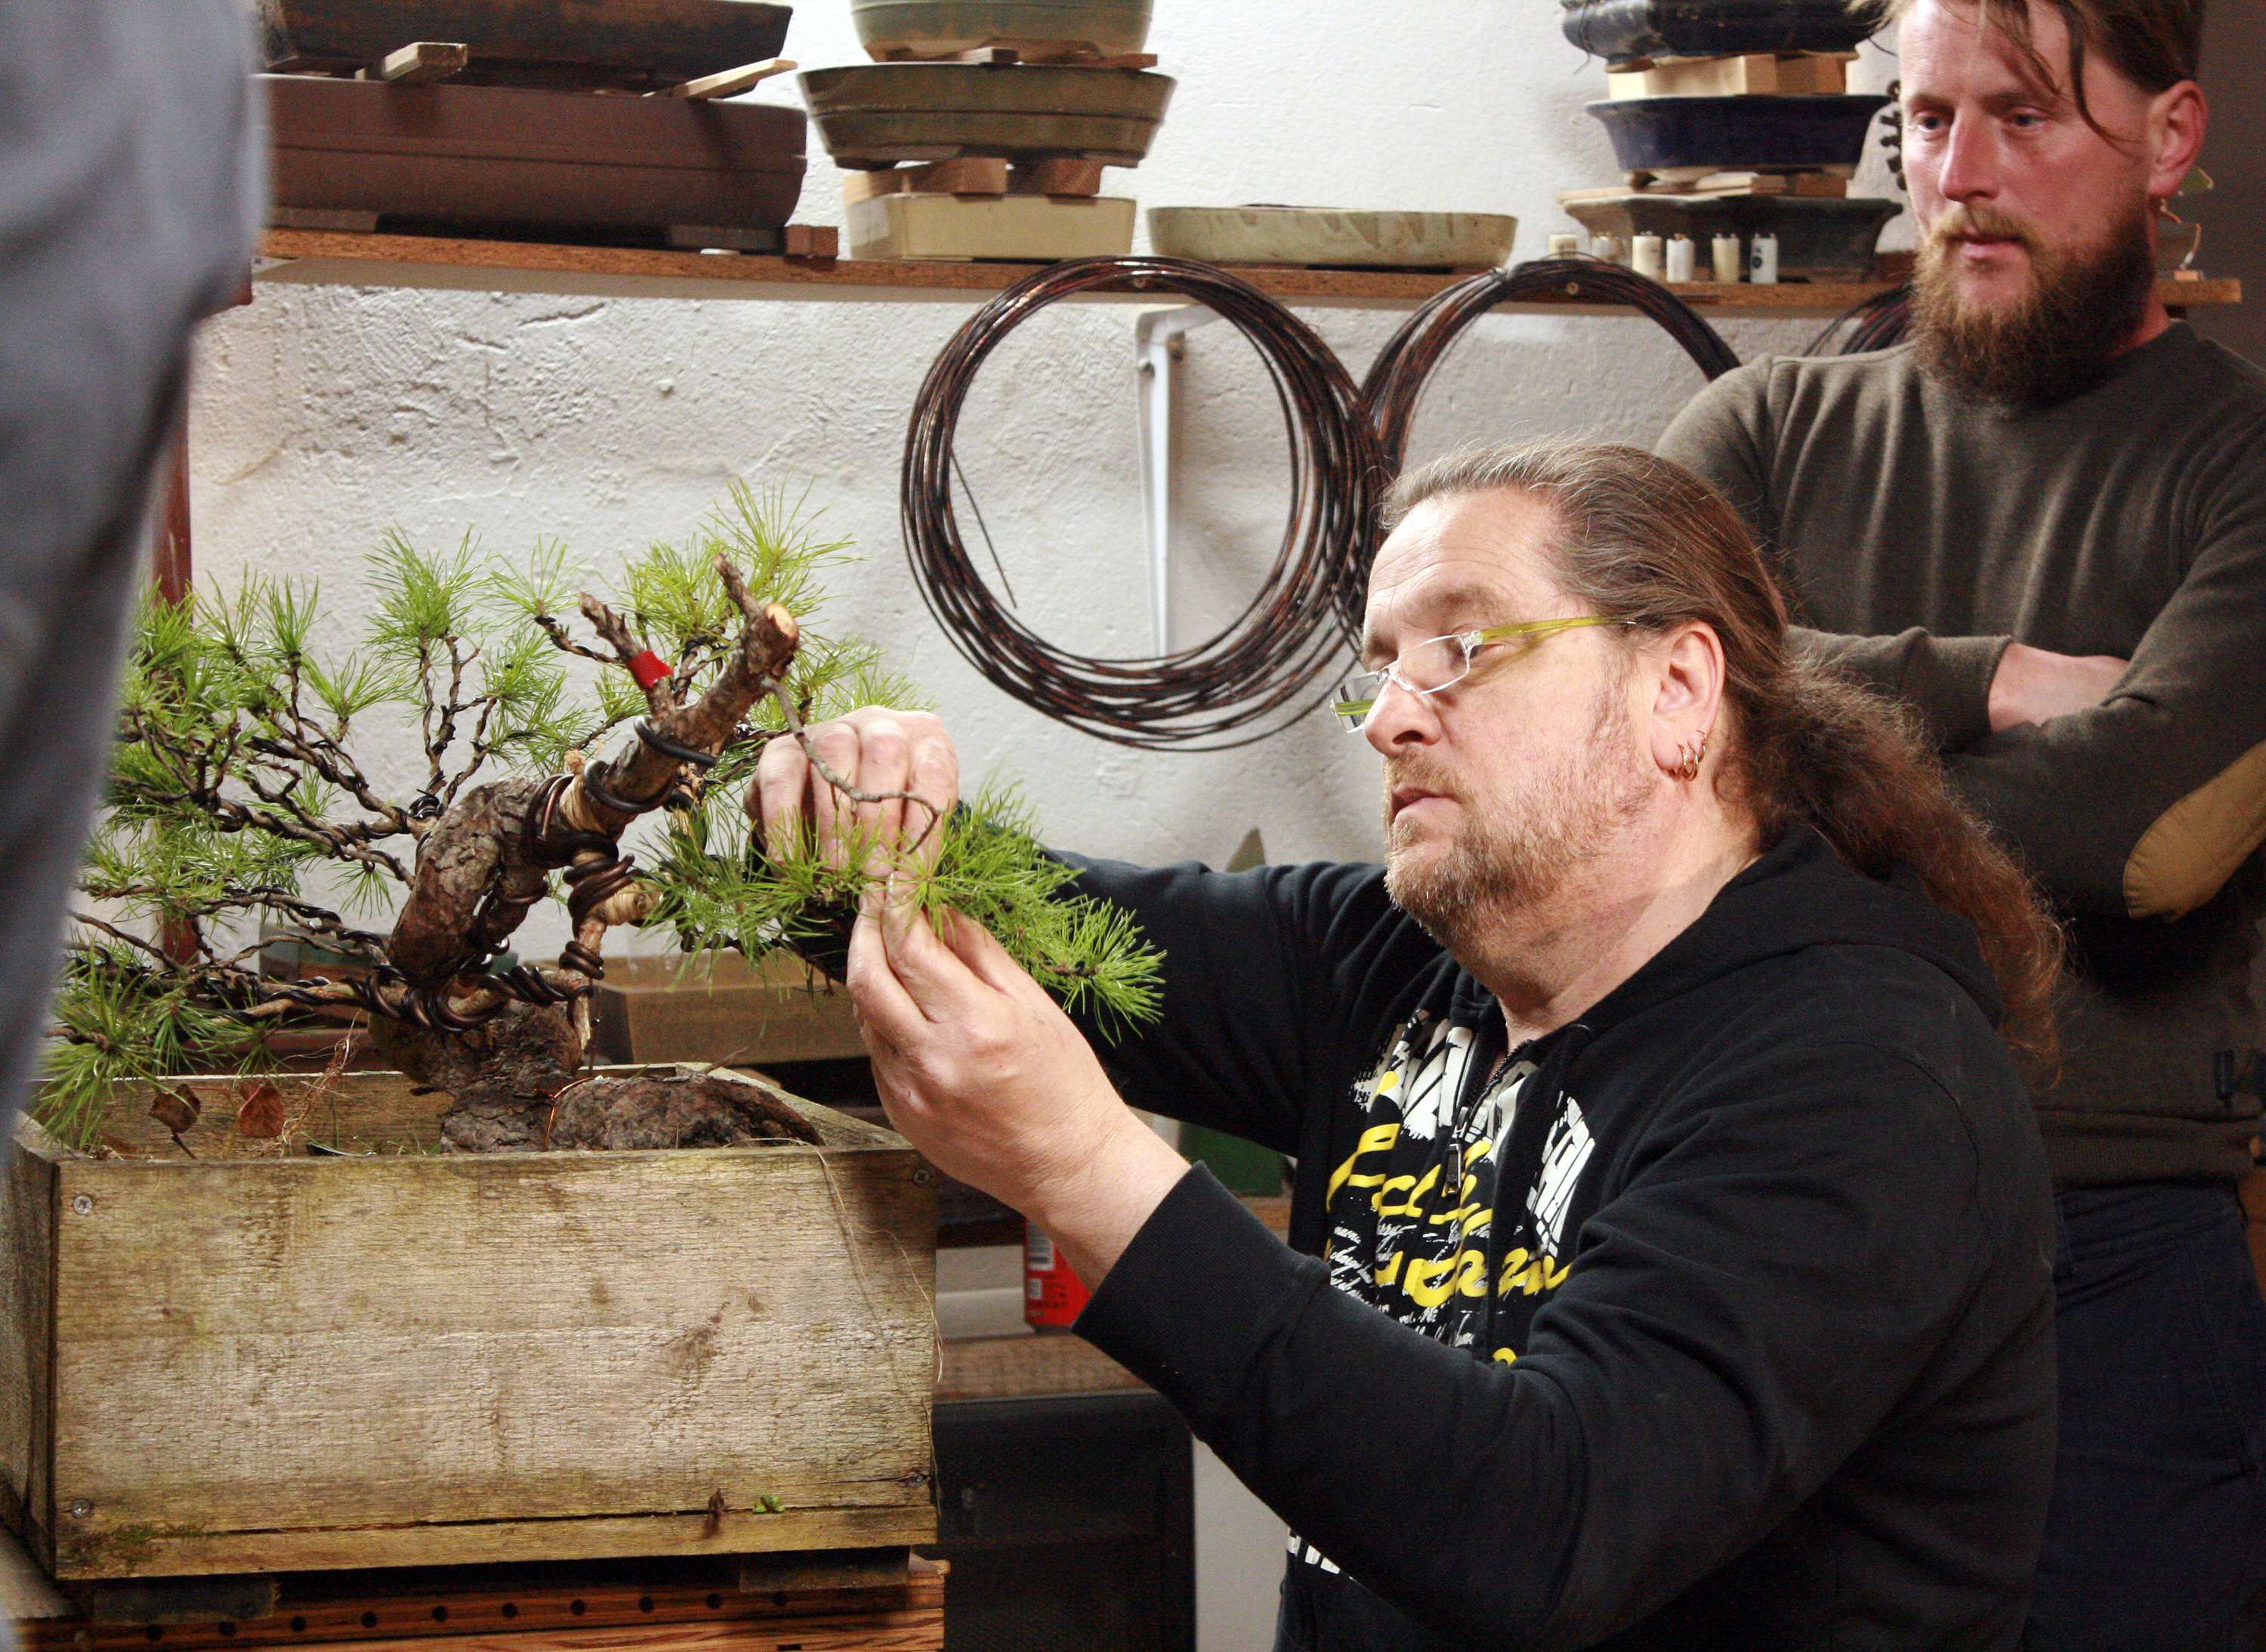
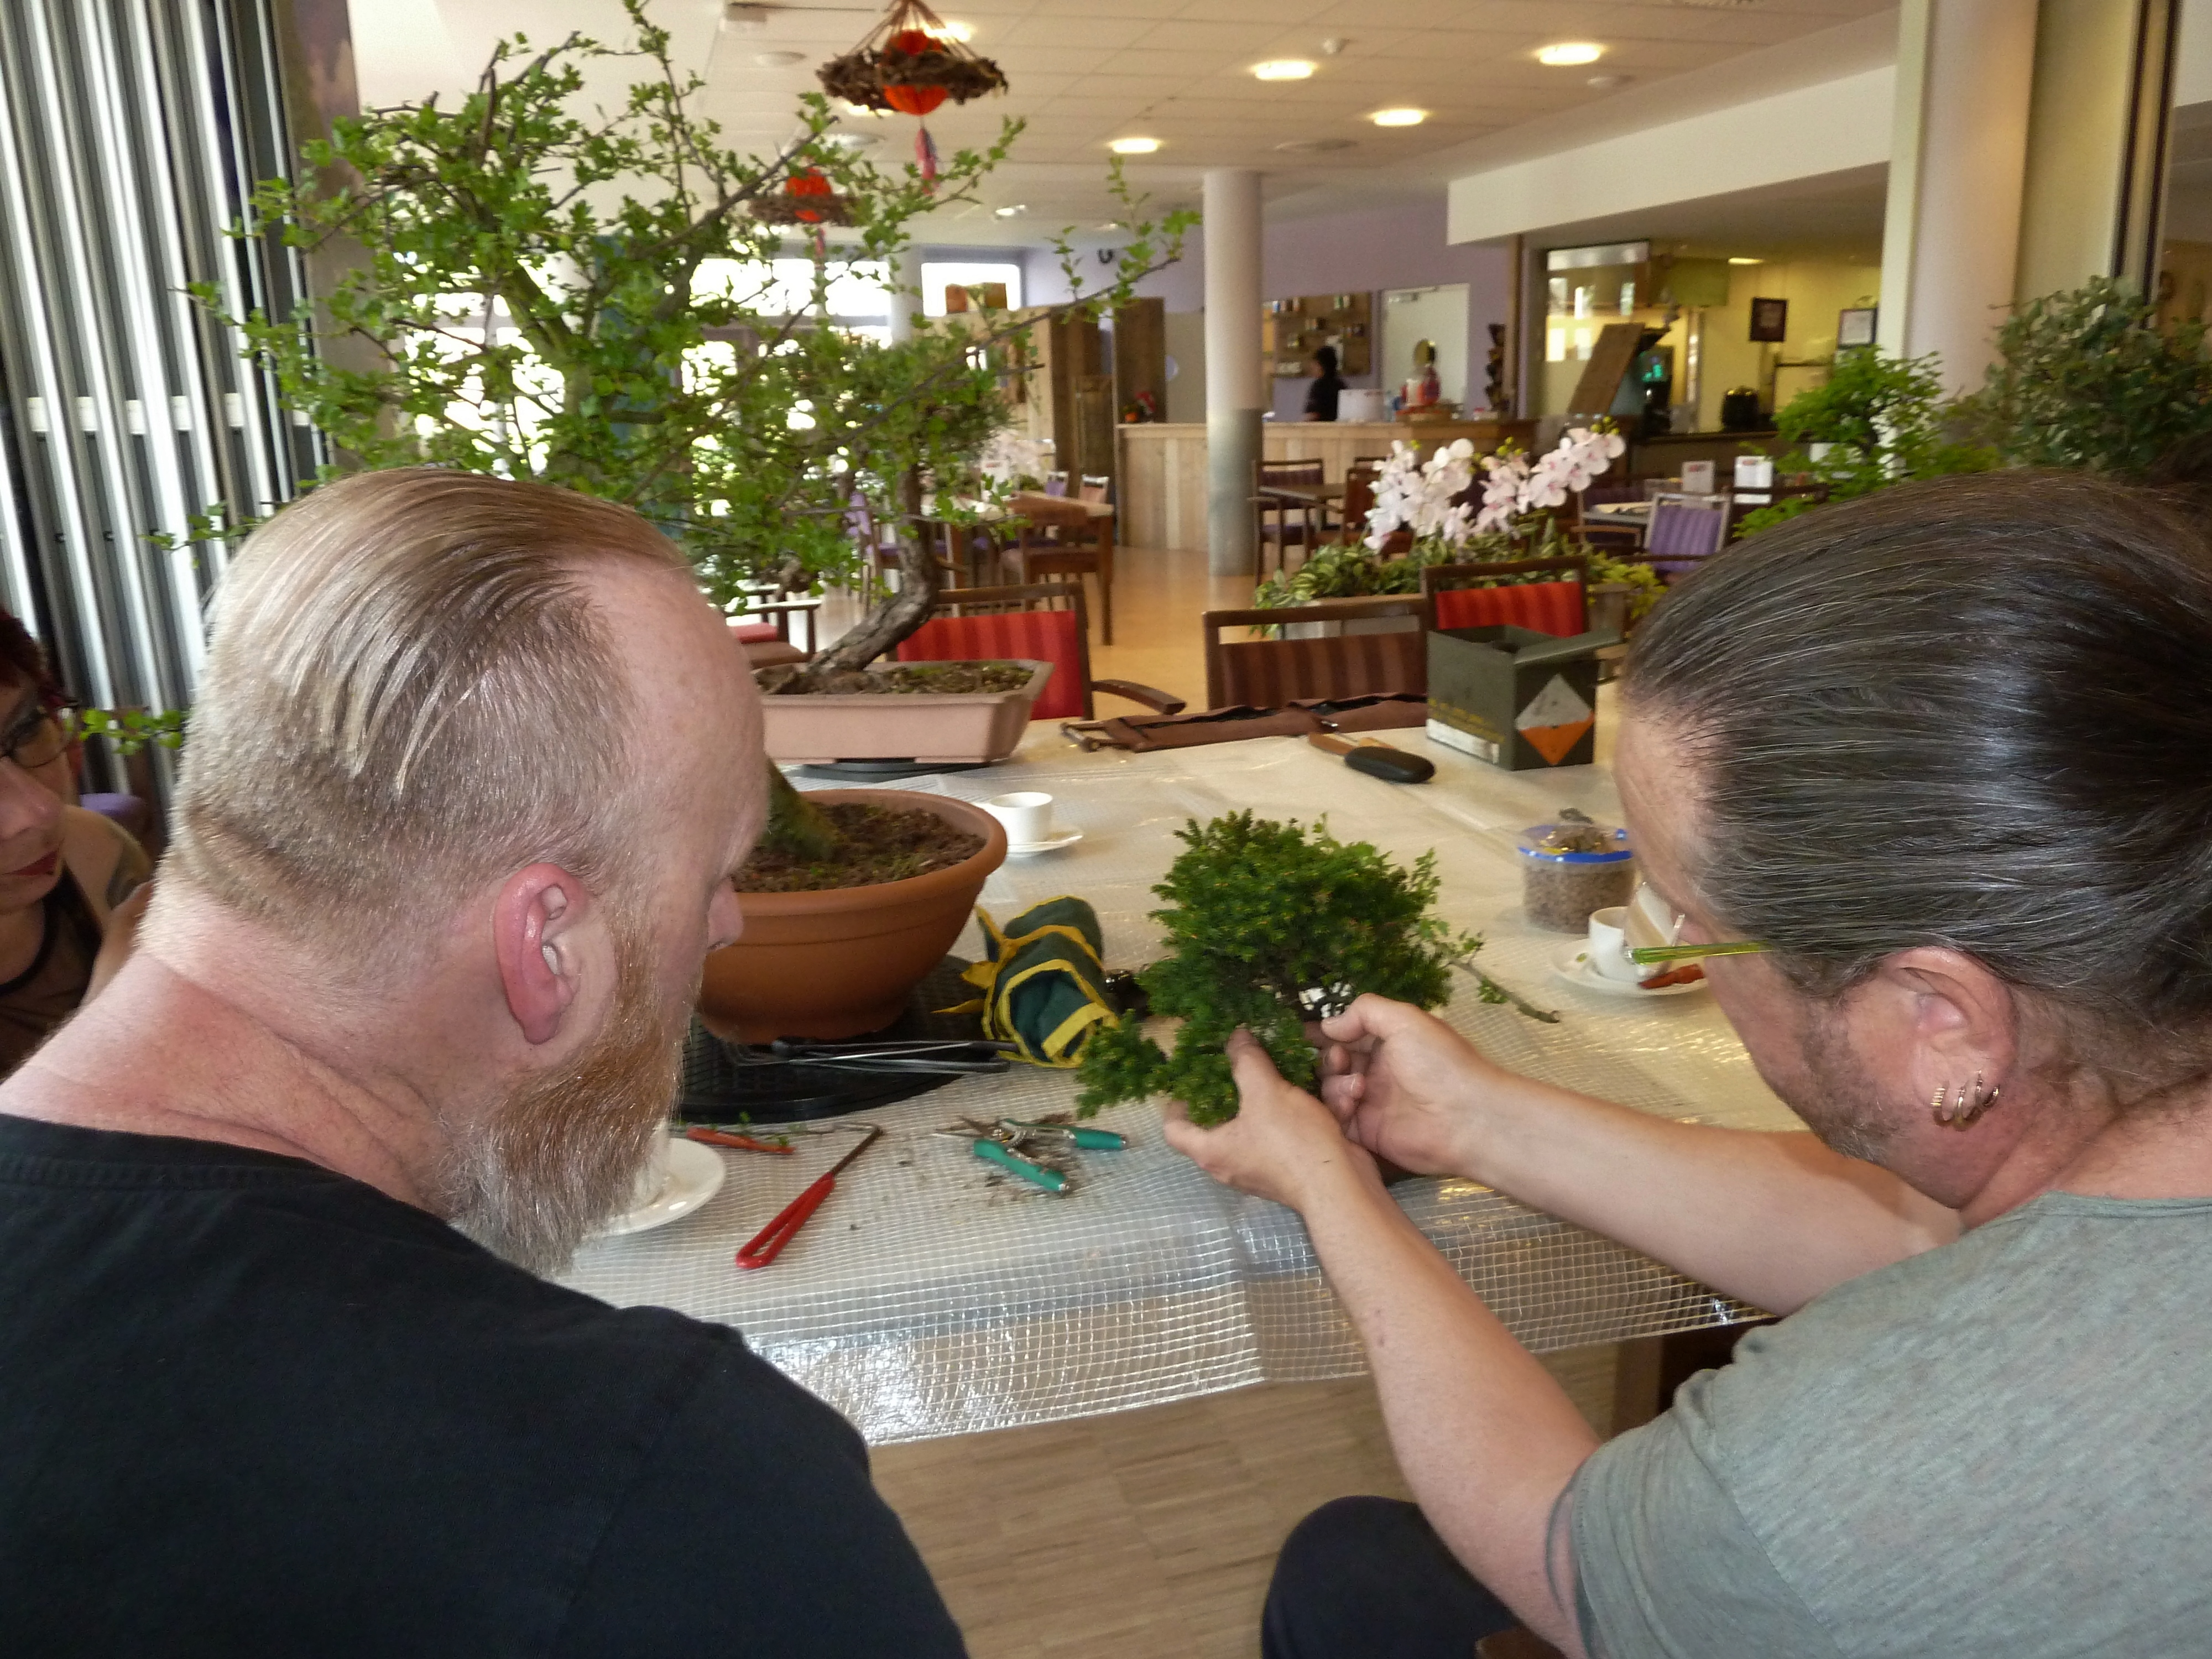
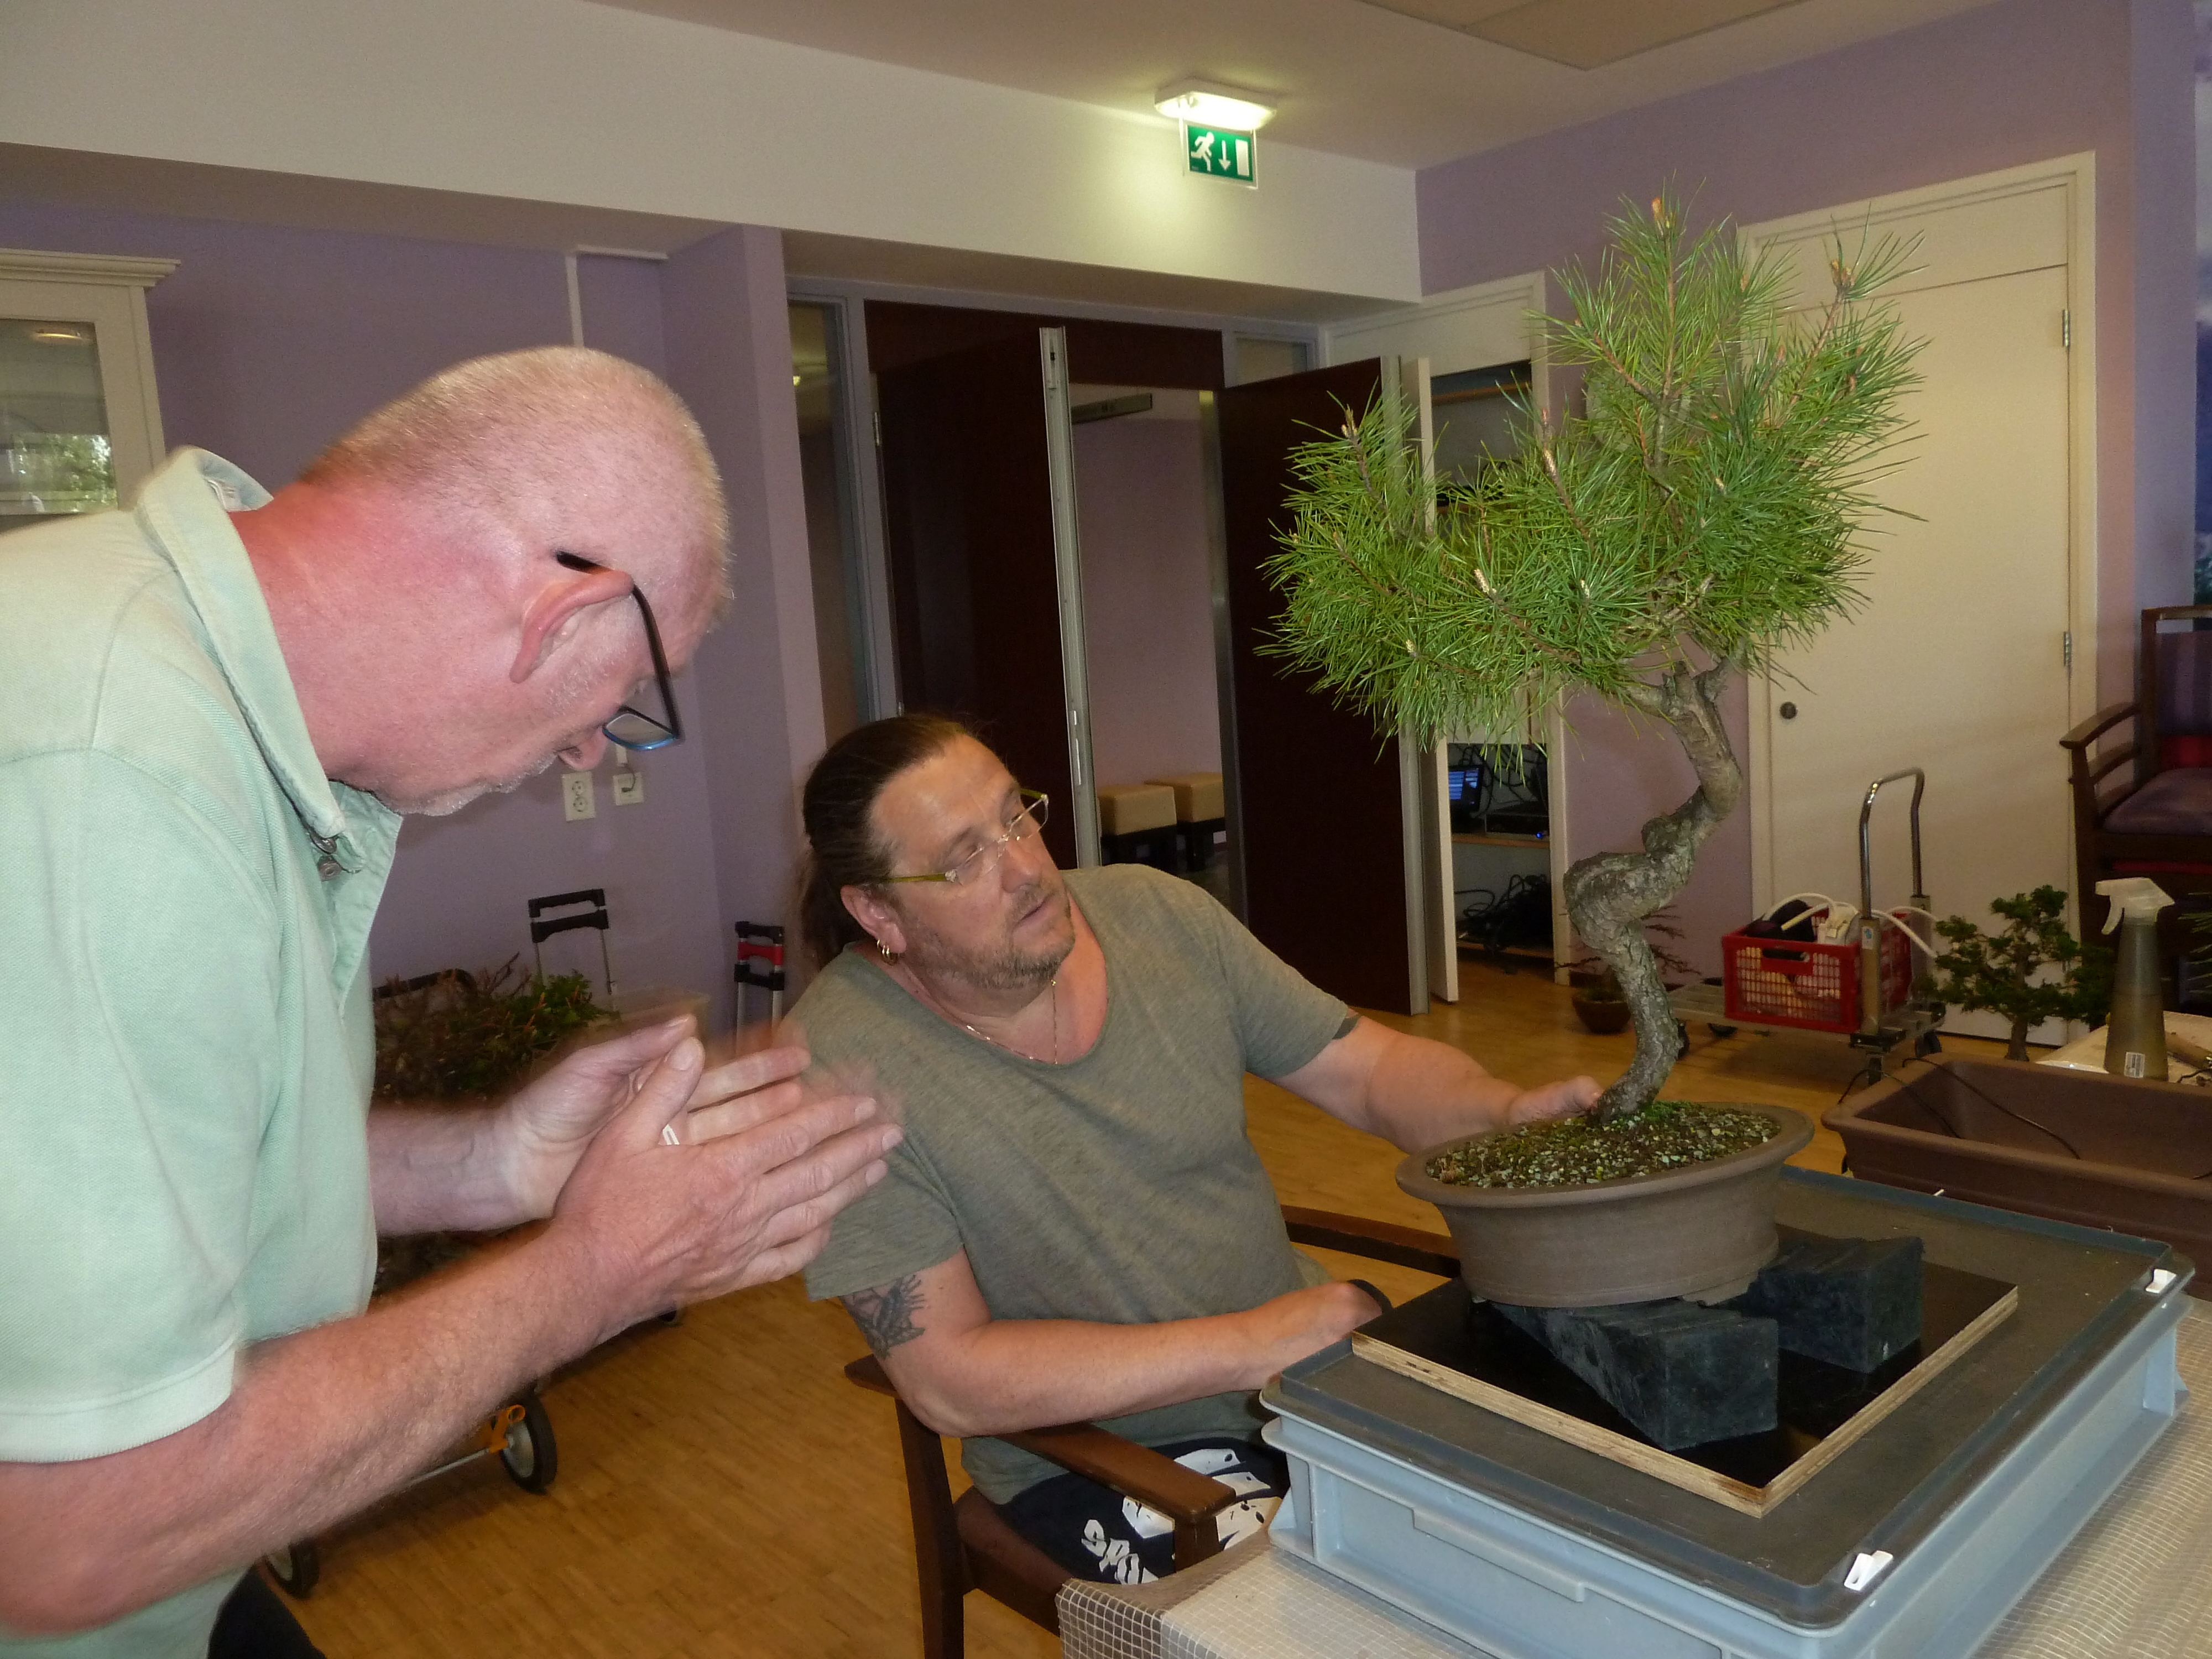
Below: every single Bonsai is discussed with the owner and the rest of the group. Their plans, ideas, options, health, techniques, timing etc.
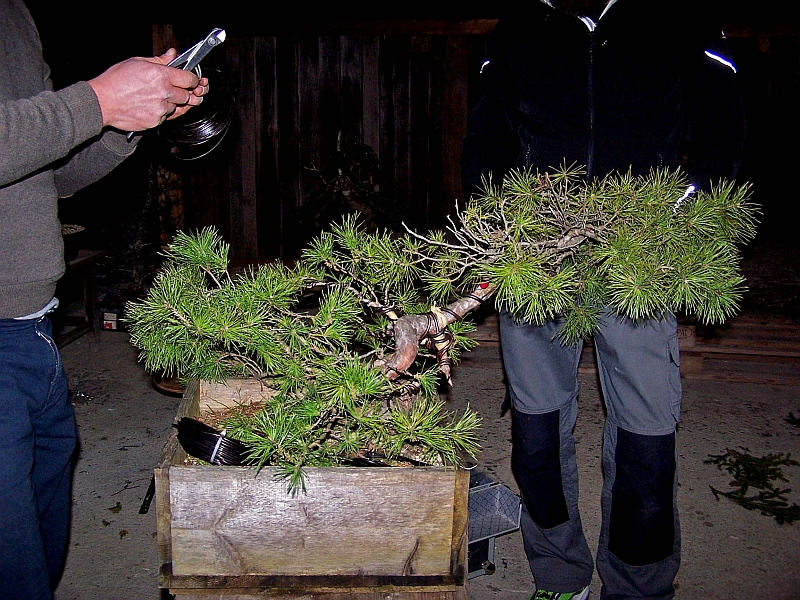
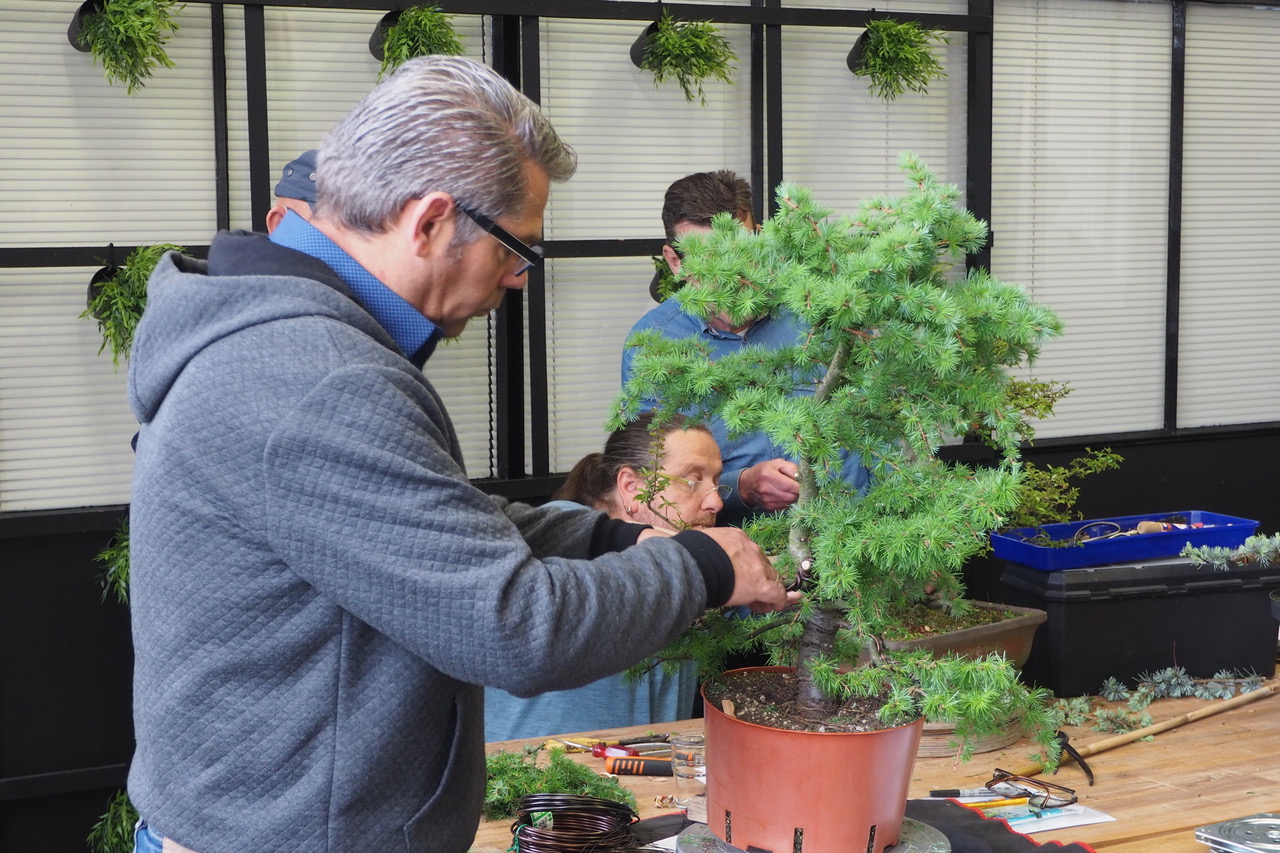
Below: many different varieties and styles are on offer and that is always a nice challenge, very interesting and informative for the students and me!
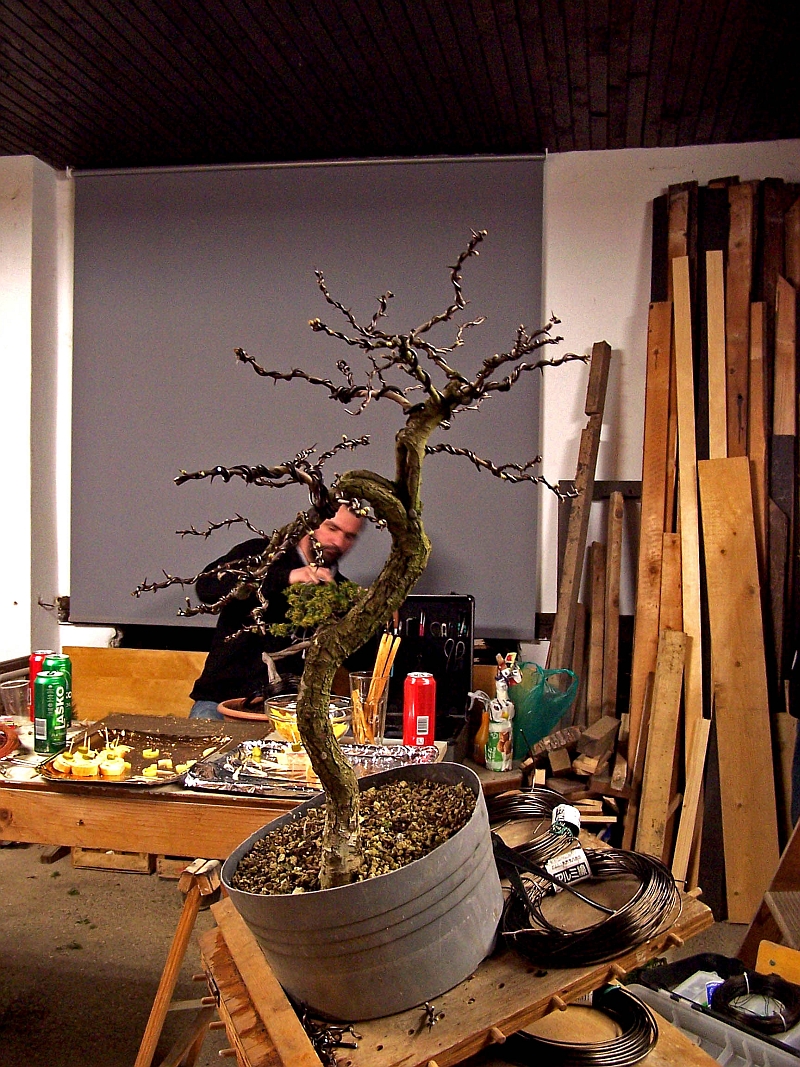
Below: some trees offer a real challenge.
Below: after the talk and discussions of all trees it is time to work.
Below: explaining and helping with an approach root craft to improve the Nebari (root base).
It was a fun day working together with the members of the Bonsai club where I once started my now 28 years old Bonsai adventure and I hope that we will do more of these in the future! Thanks, Koya for this article and the pictures it is highly appreciated!
Next up is my trip to Slovenia for a demo and a workshop and a lot of hiking and site seeing with my good friend Roland! So watch this space!
I had the good fortune to give some workshops these last months and there are more planned for the coming months here in Holland and abroad! And although I love to give a demo like the one planned in Slovenia in a few weeks’ time, workshops are still a bit more favourable to me! The interaction with the students and the shared pleasure of creating and working on those little trees is so fulfilling to me! Here are some pictures that Marijke made a week ago during my workshop in Poortugaal (NL).
It is also good to see that the material that is brought in these days to work on is much better and that means that my students and their trees are evolving, and that is a good thing to see and makes me proud and happy!
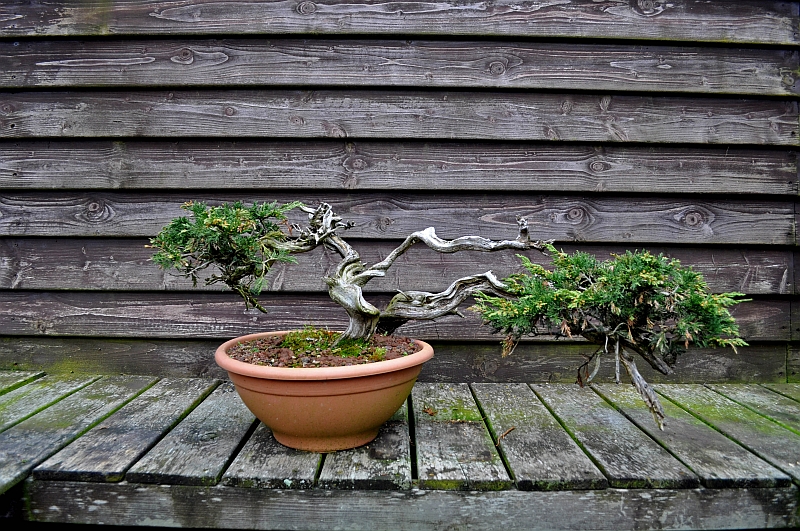
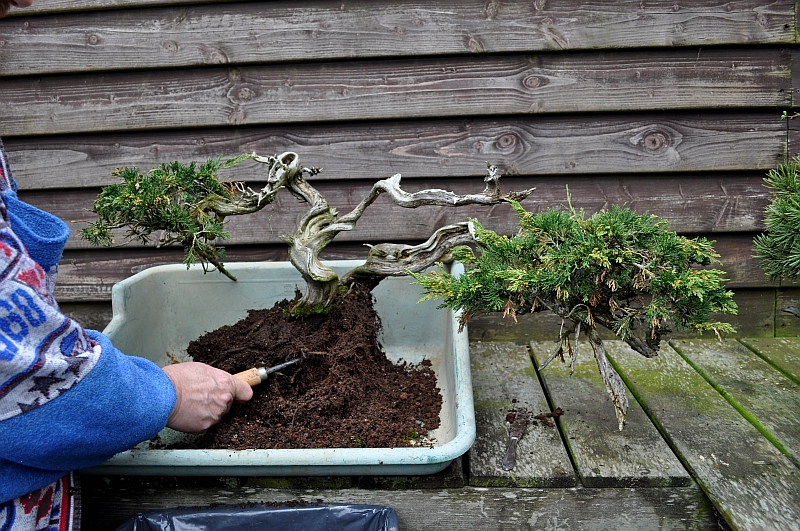
this is the story about the repotting of one Yamadori Sabina that will end up with two?! I bought this nice mid-sized Yamadori a year ago and left it untouched all this time to make sure that it was enough settled and strong enough to repot safely. I acquired it because of its stunning movement with a lot of deadwood and because there was (maybe) the possibility to separate it into two beautiful small trees! Buth early this year I started to see a decline in this little tree’s health and I decided that I would take it out of its plastic container because I wanted to see what caused this?! And now looking back, I am glad that I did because it was planted after collecting in some sort of very compact sticky muddy soil with not much-draining capability?! So with a lot of frightened anticipation, I took it out of its container to find what I was afraid of…poor soil! So even though it was not in a good condition I had to act before the tree would suffer even more, so I decided to free it from all this bad soil and plant it in a proper Bonsai soil mixture in which it could recuperate to become healthy and happy again!
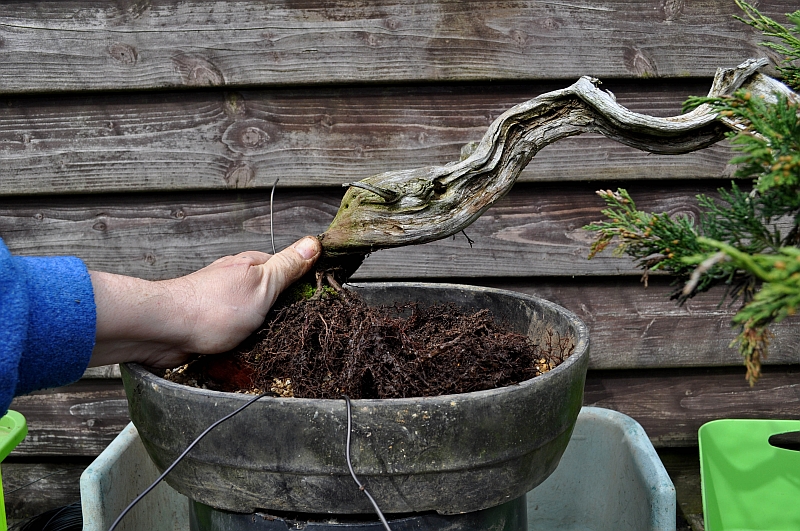
Below: the two trunks of Sabina Yamadori.
Below: close-up of two separate trunks. One all twisted and turned with a long twisted Jin and the other one slanting more straight and gently twisting with a foliage crown at the end.
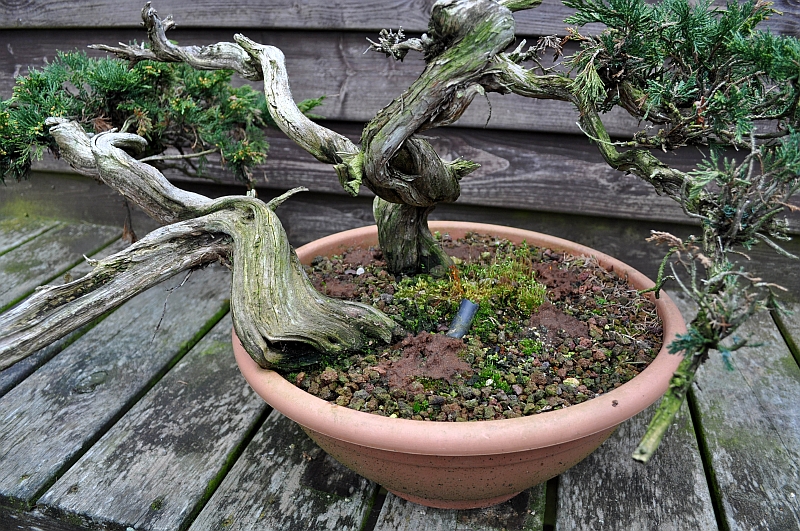
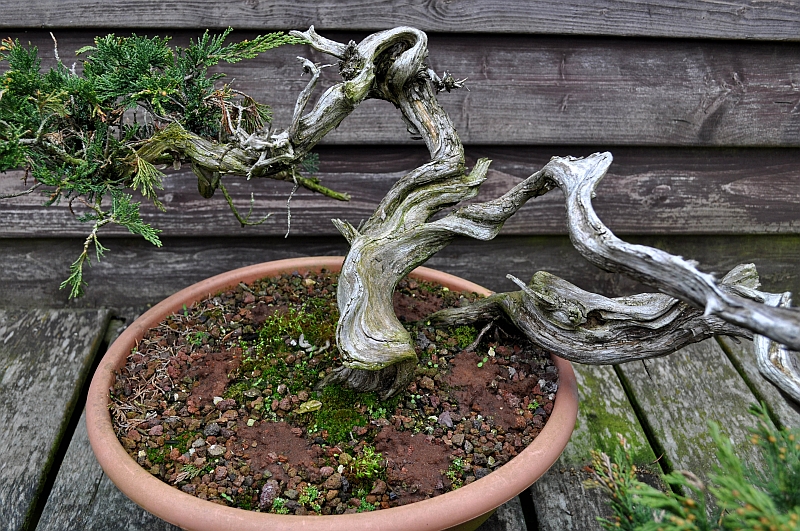
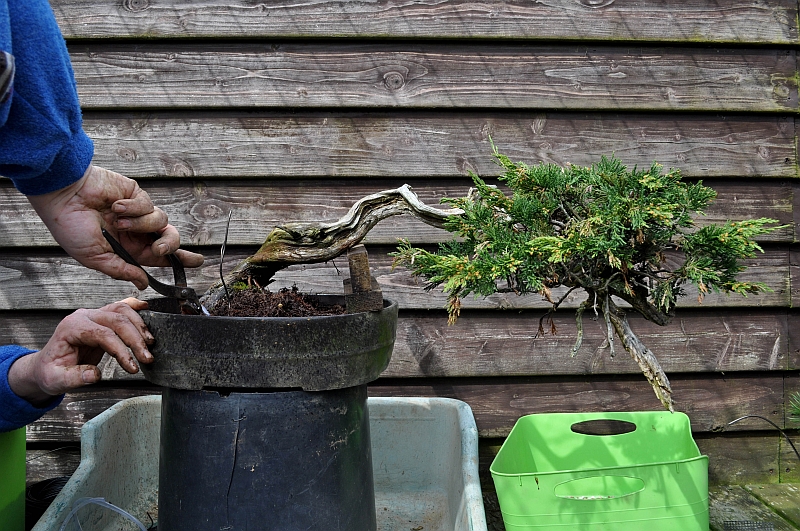
Below: viewed from another angle.
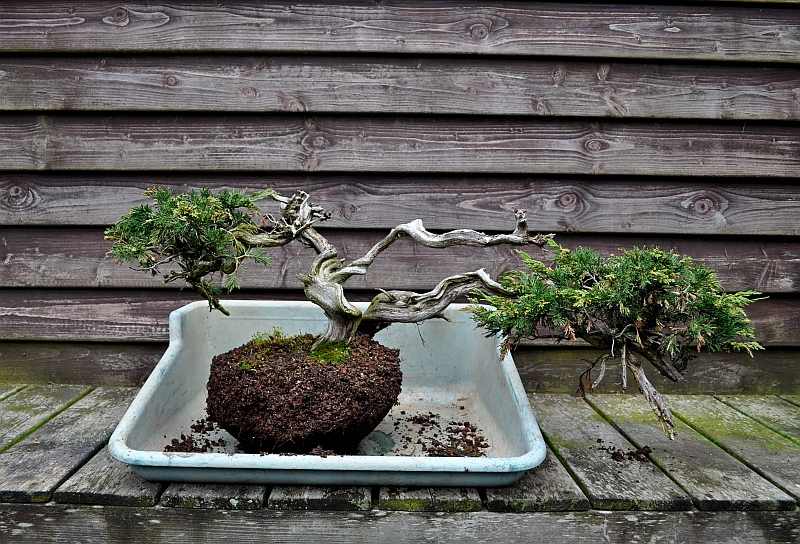
Below: released from its plastic container.
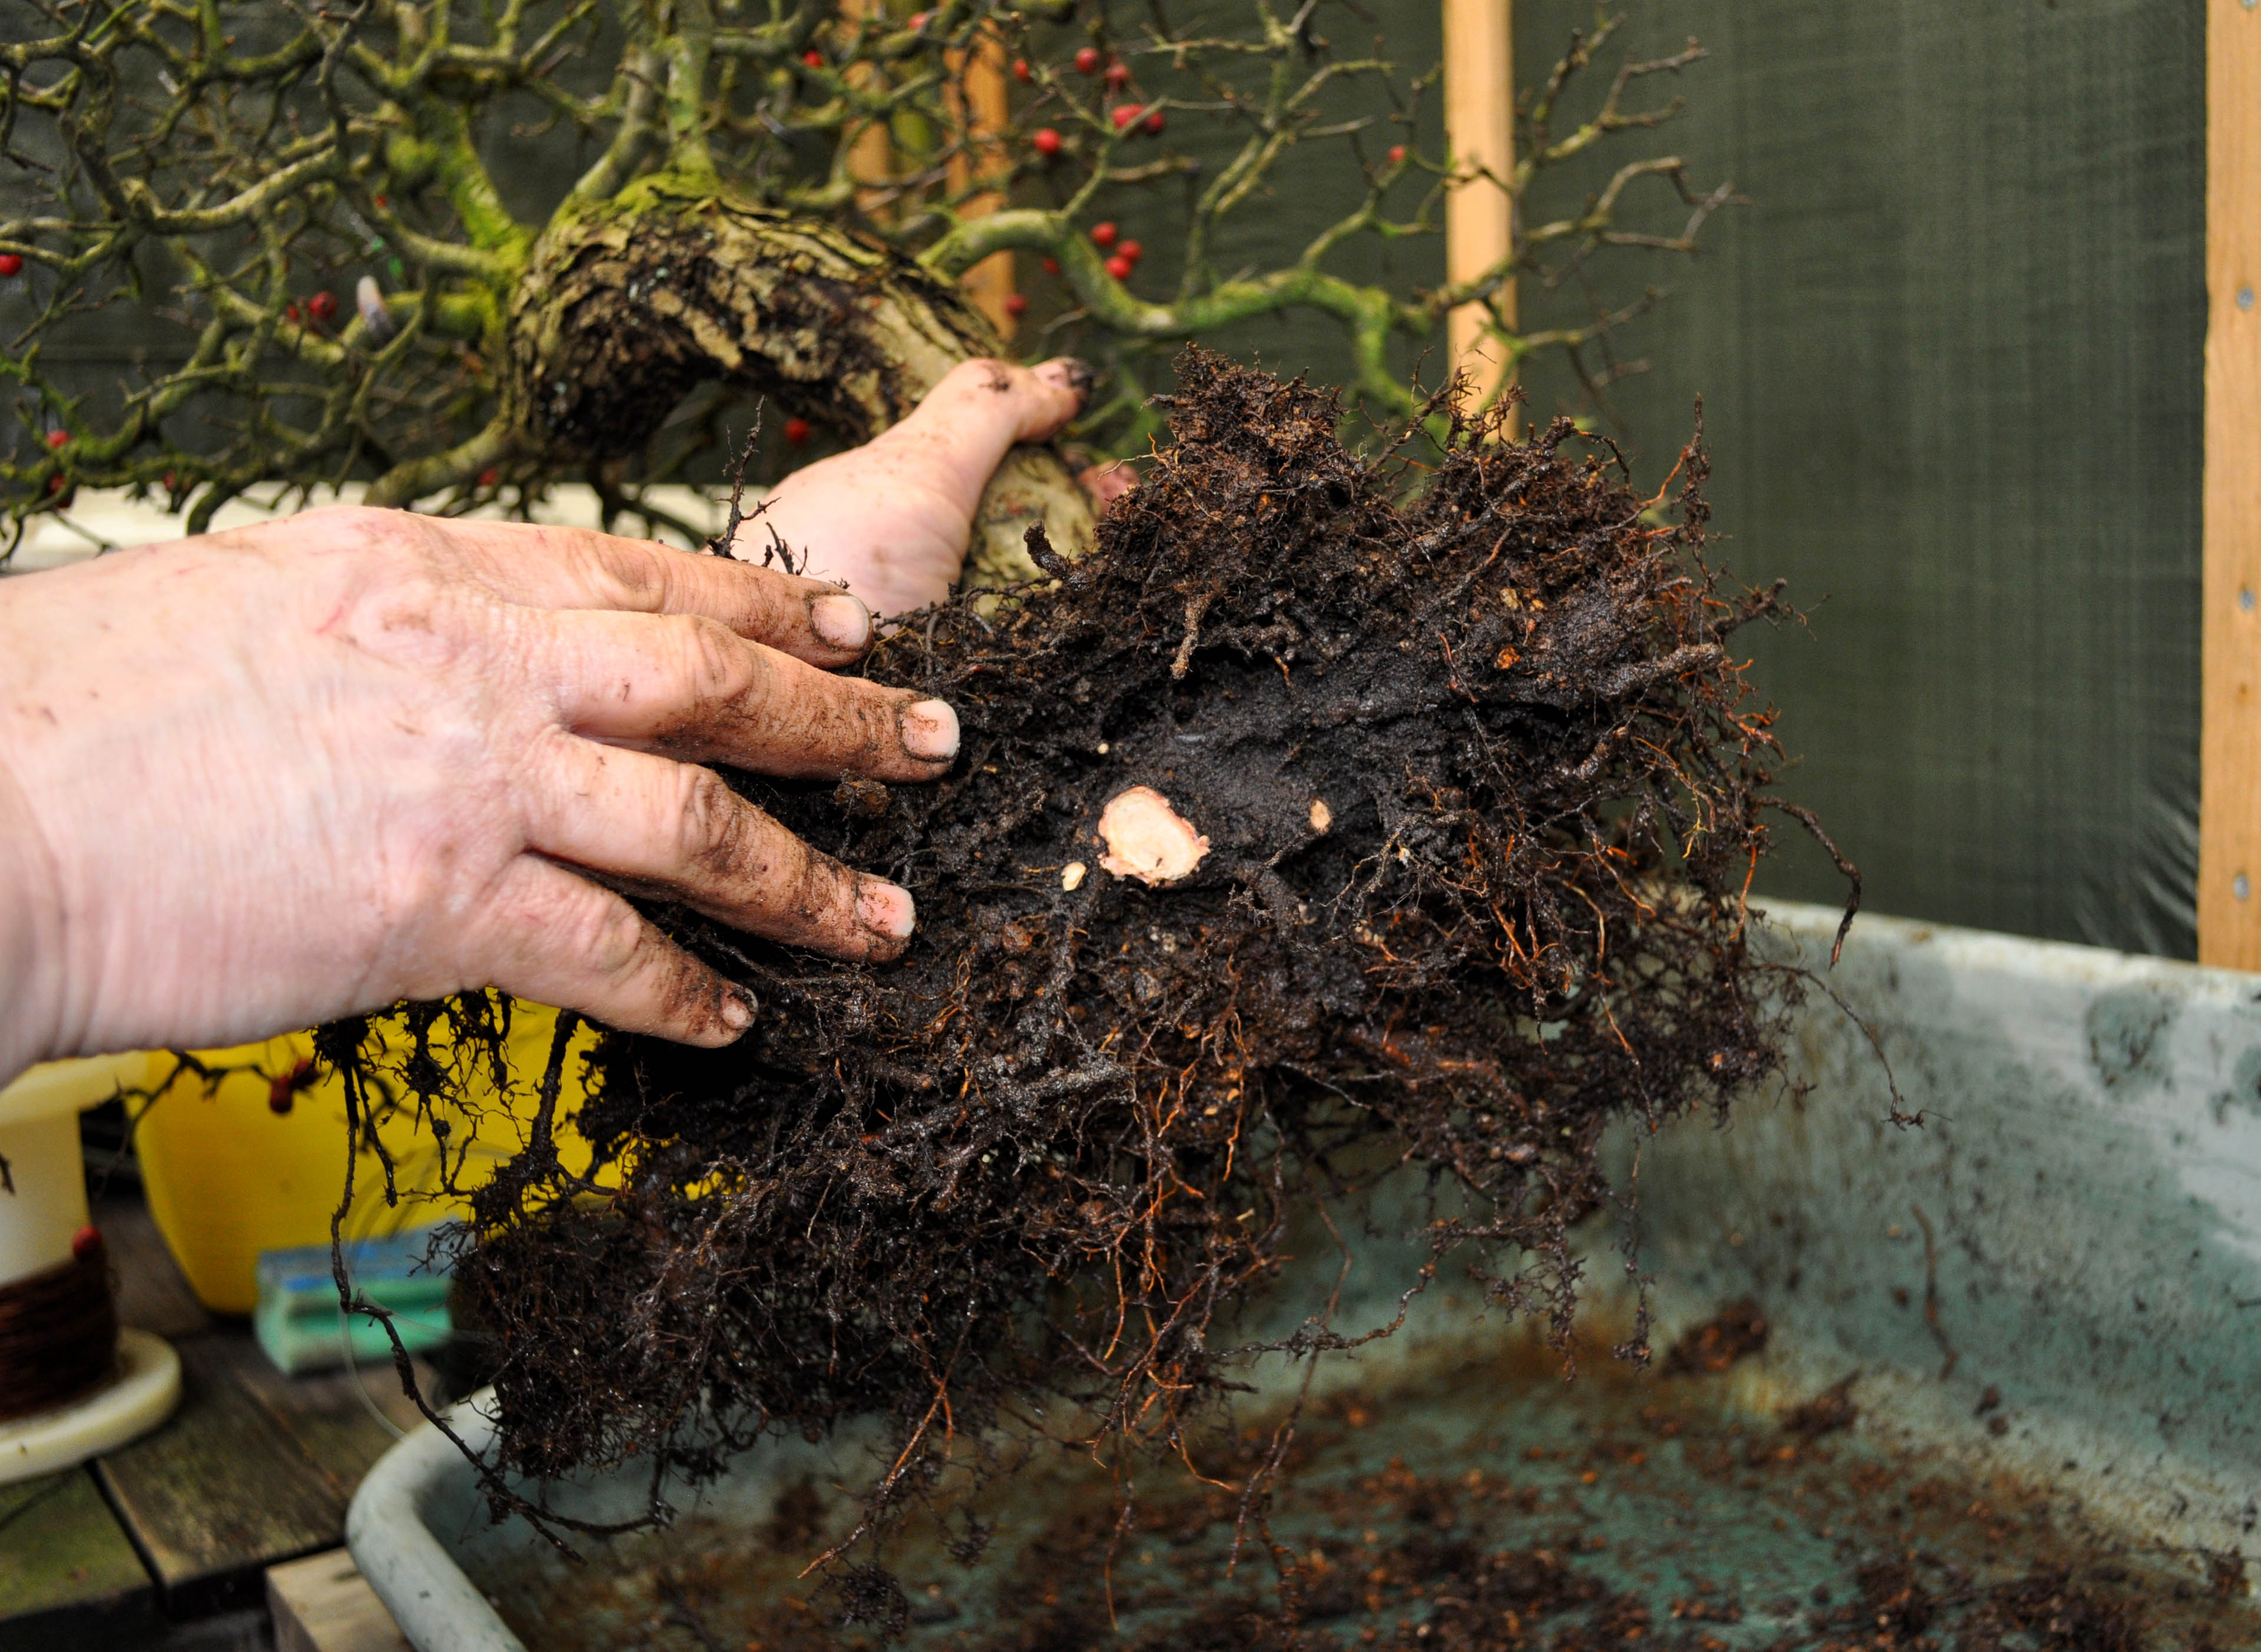
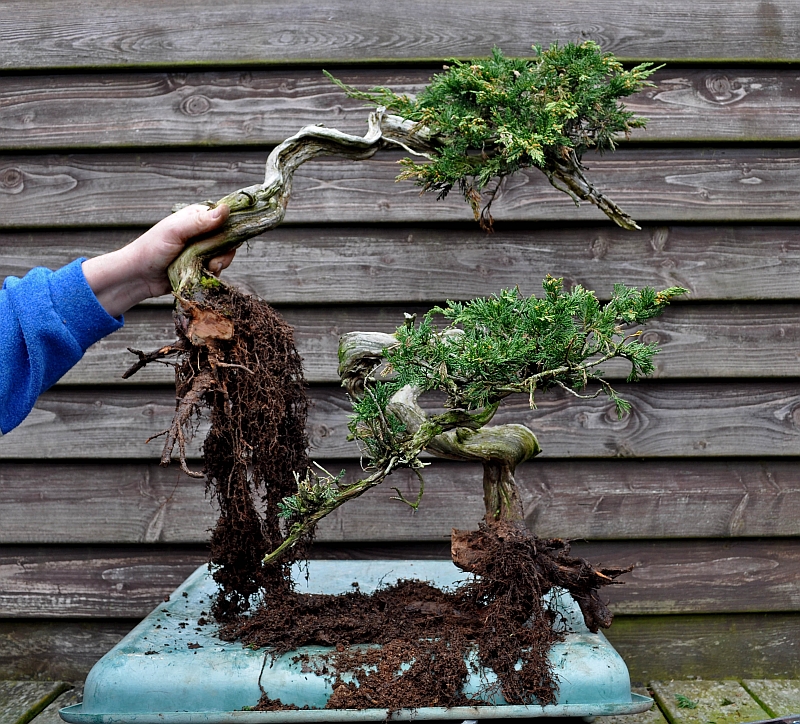
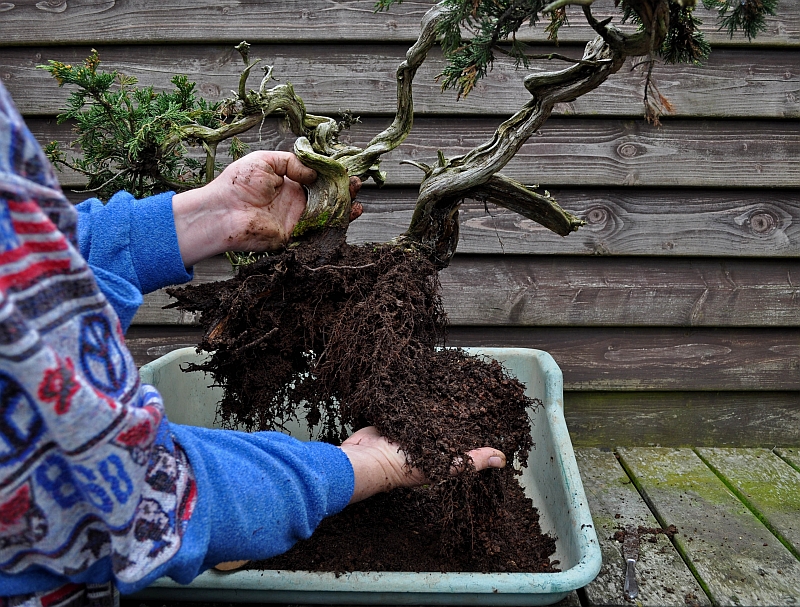
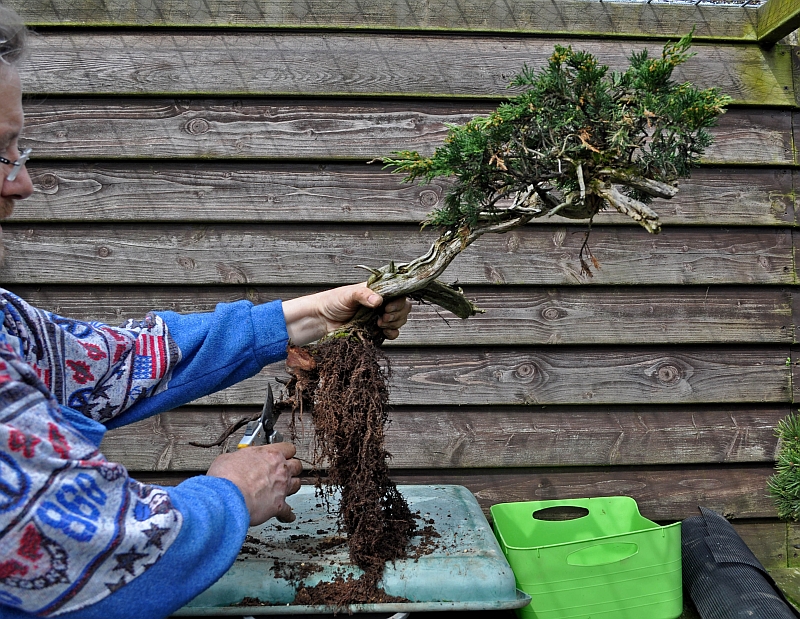
Below: Carefully and anxiously combing out the roots hoping for plenty of healthy roots and for roots on both trunks so that they could be separated from each other without any danger or problems?!
Below: looks promising with plenty of roots!
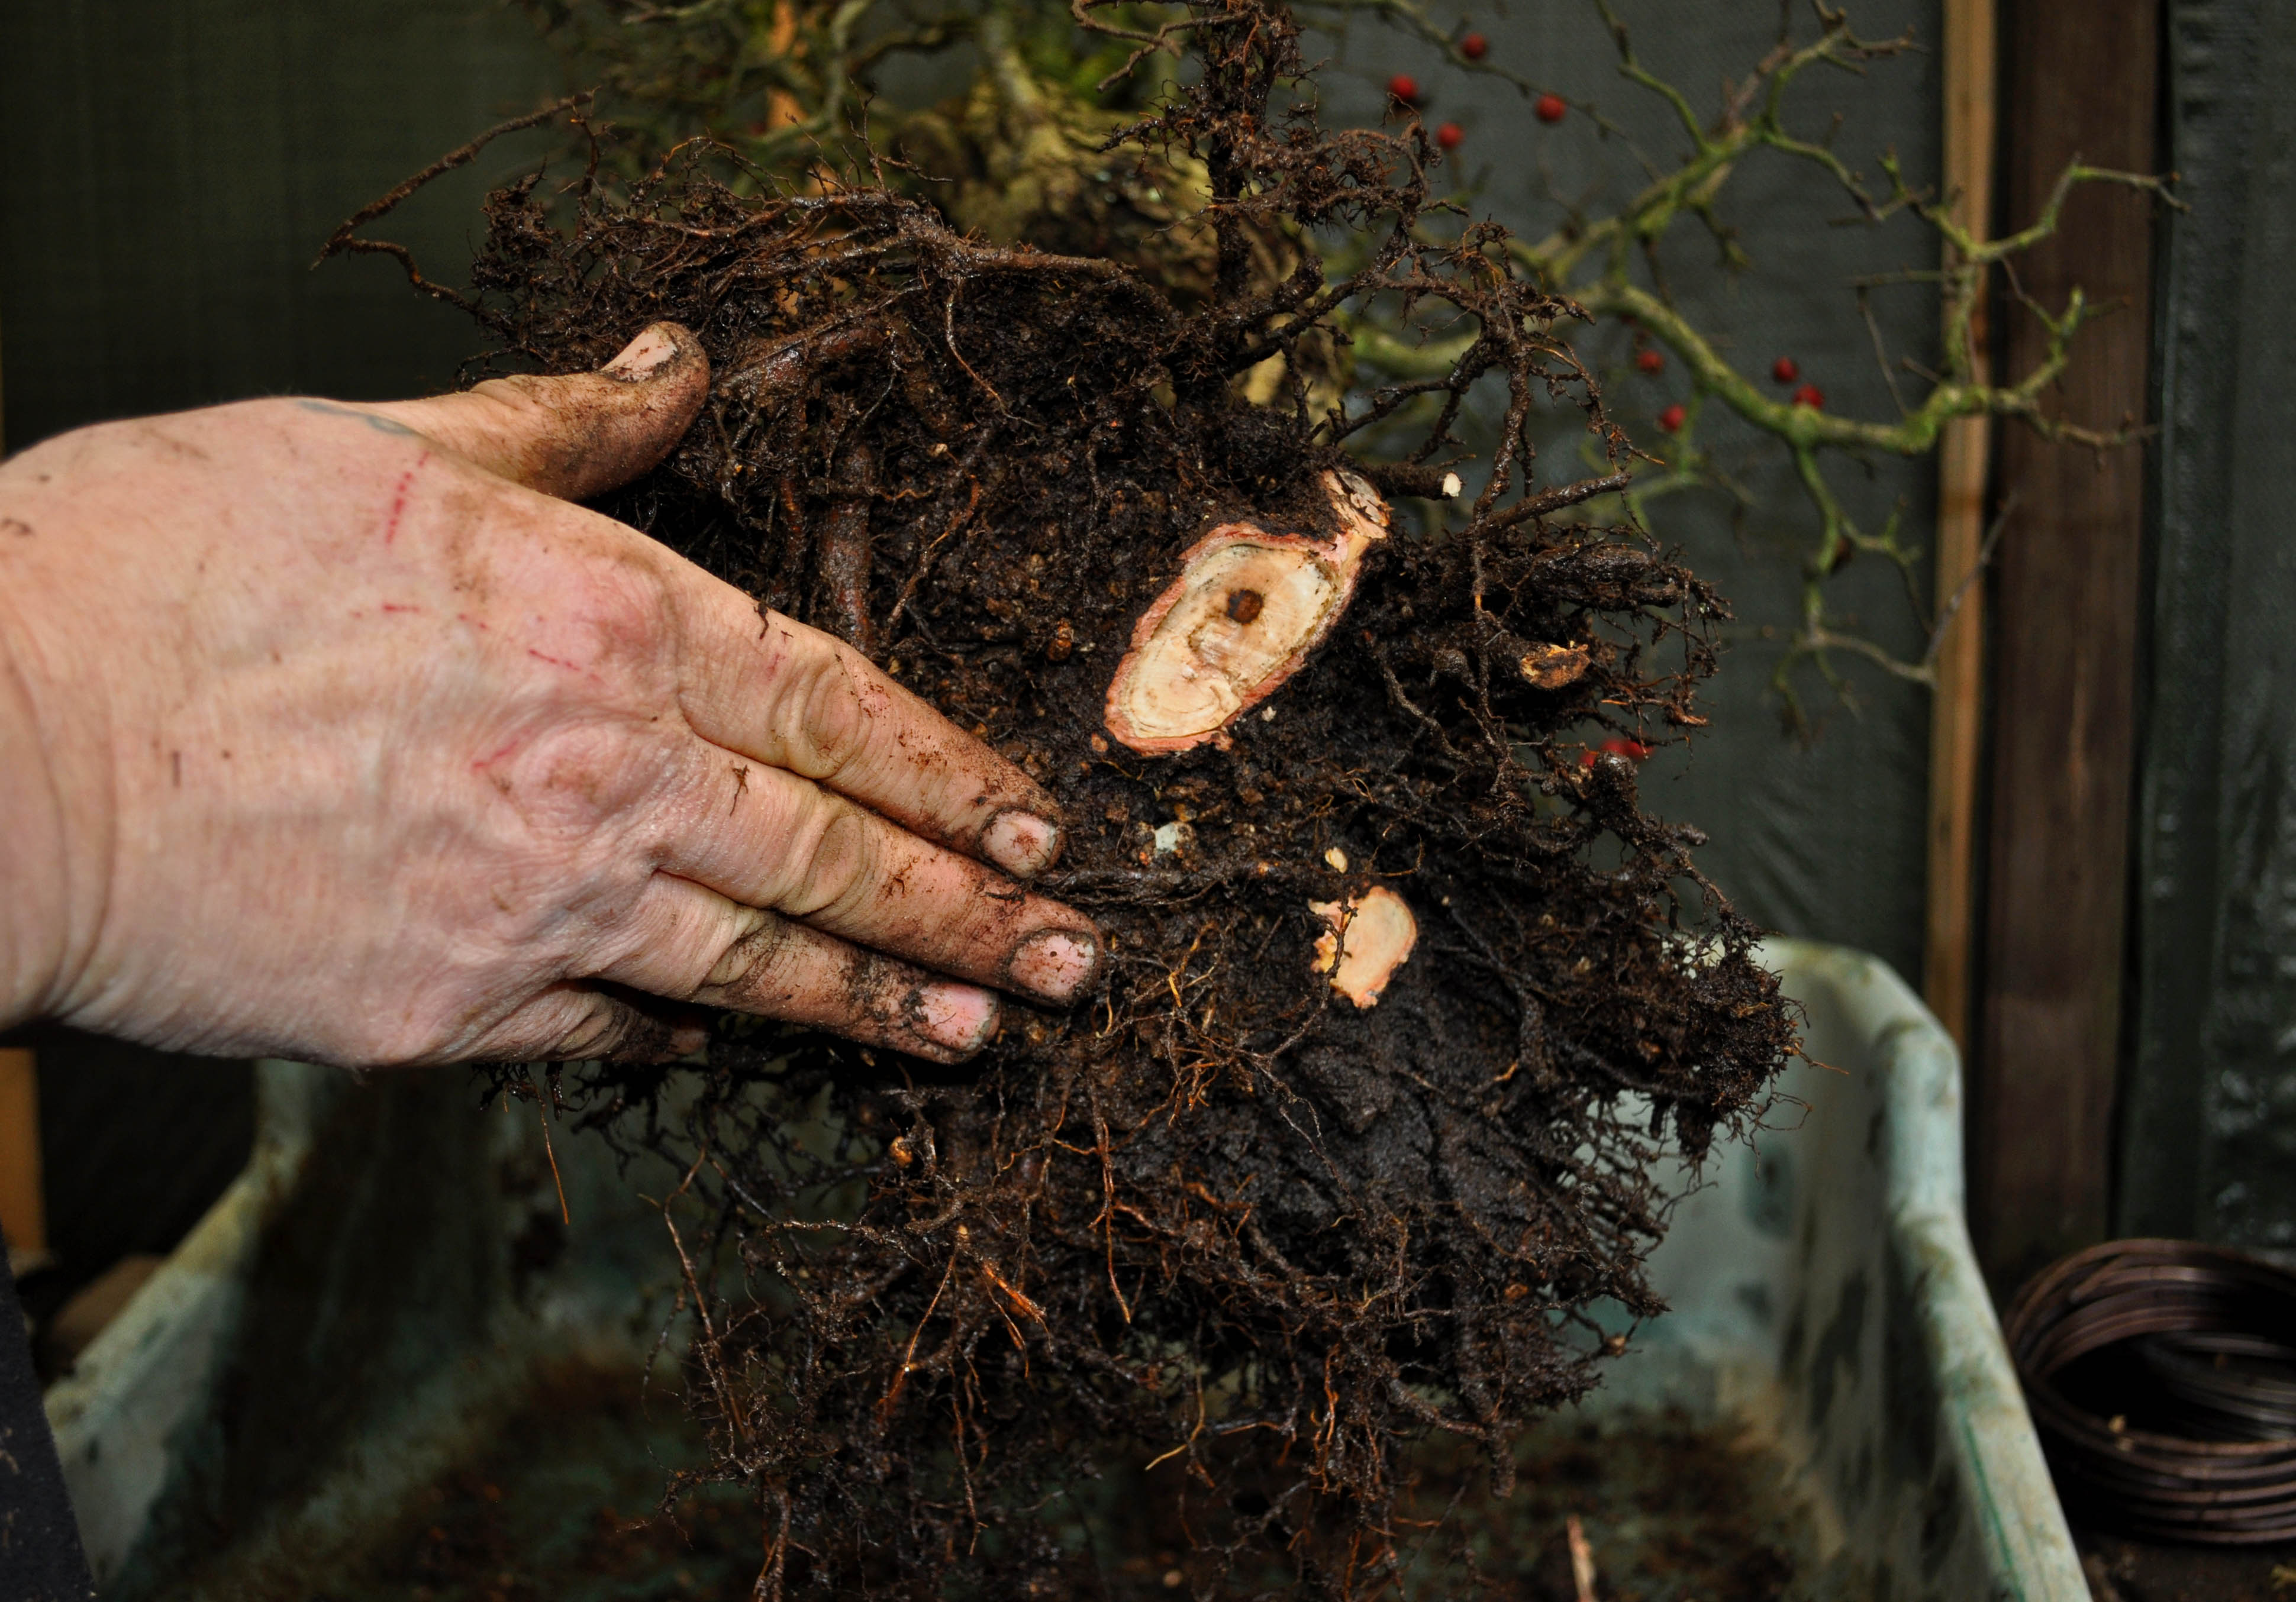
Below: look at all those roots on the left and the right trunk…but is it enough so that the two trunks can be separated?!
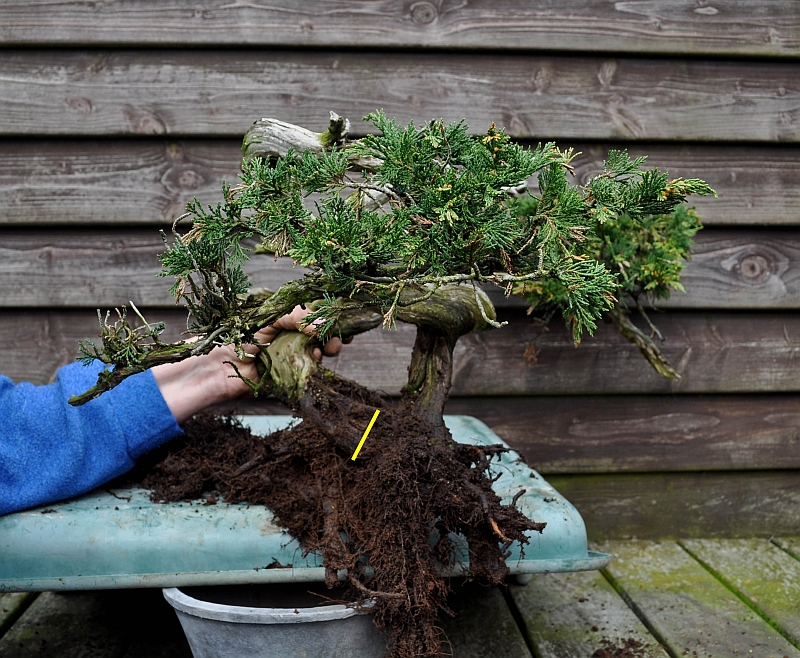
Below: red arrow points to roots growing from the curly trunk. Green arrow points at a thick root that grows to the right from the curly trunk. Blue arrow points to roots that grow from this thick root…so there are more than enough roots to keep the curly trunk alive and healthy when it could be separated from the second straight trunk! The white arrows point at the root mass that grows from that second straight trunk! The yellow line in the middle of the picture shows the spot where the two trunks could be separated from each other!
Below: seen from the other side. Red arrow points at the roots that grow from the end of that thick root that grows from the curly trunk. The yellow line shows the spot where the two trunks will be separated.
Below: the cut will be made from this side right across that yellow line.
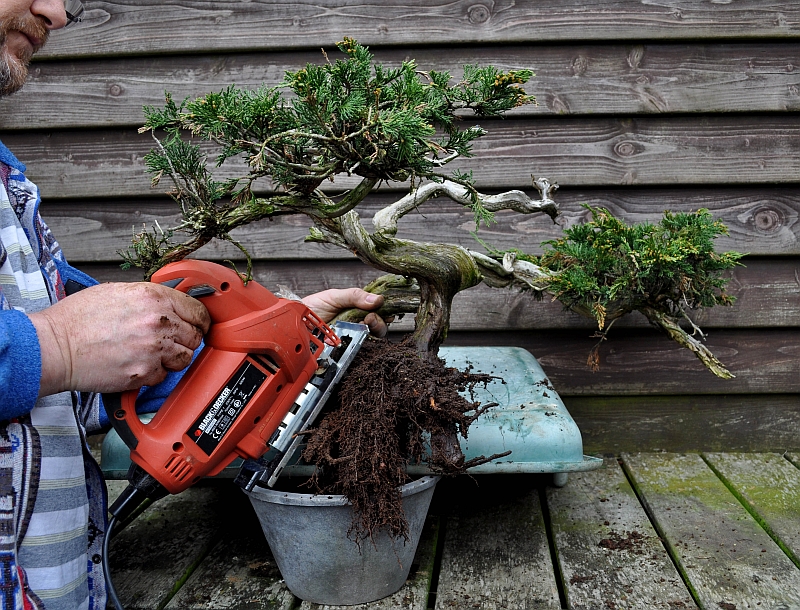
Below: carefully cutting with the help of a power saw.
Below: mission accomplished! The two trunks are separated successfully! The straight trunk on the left has more than enough roots. And the right side curly trunk roots are spread out on the plastic green surface and look more than enough…so I am relieved and very happy! Now I have to keep the exposed roots moist of one of them while I plant the other into its new home away from his brother or sister?!
Below: this repotting and separation even reviled a more than welcome unexpected wide root base on the curly tree!!! Making it even better than it already was!!! And this provided a better anchor point to secure it to the pot with wires!
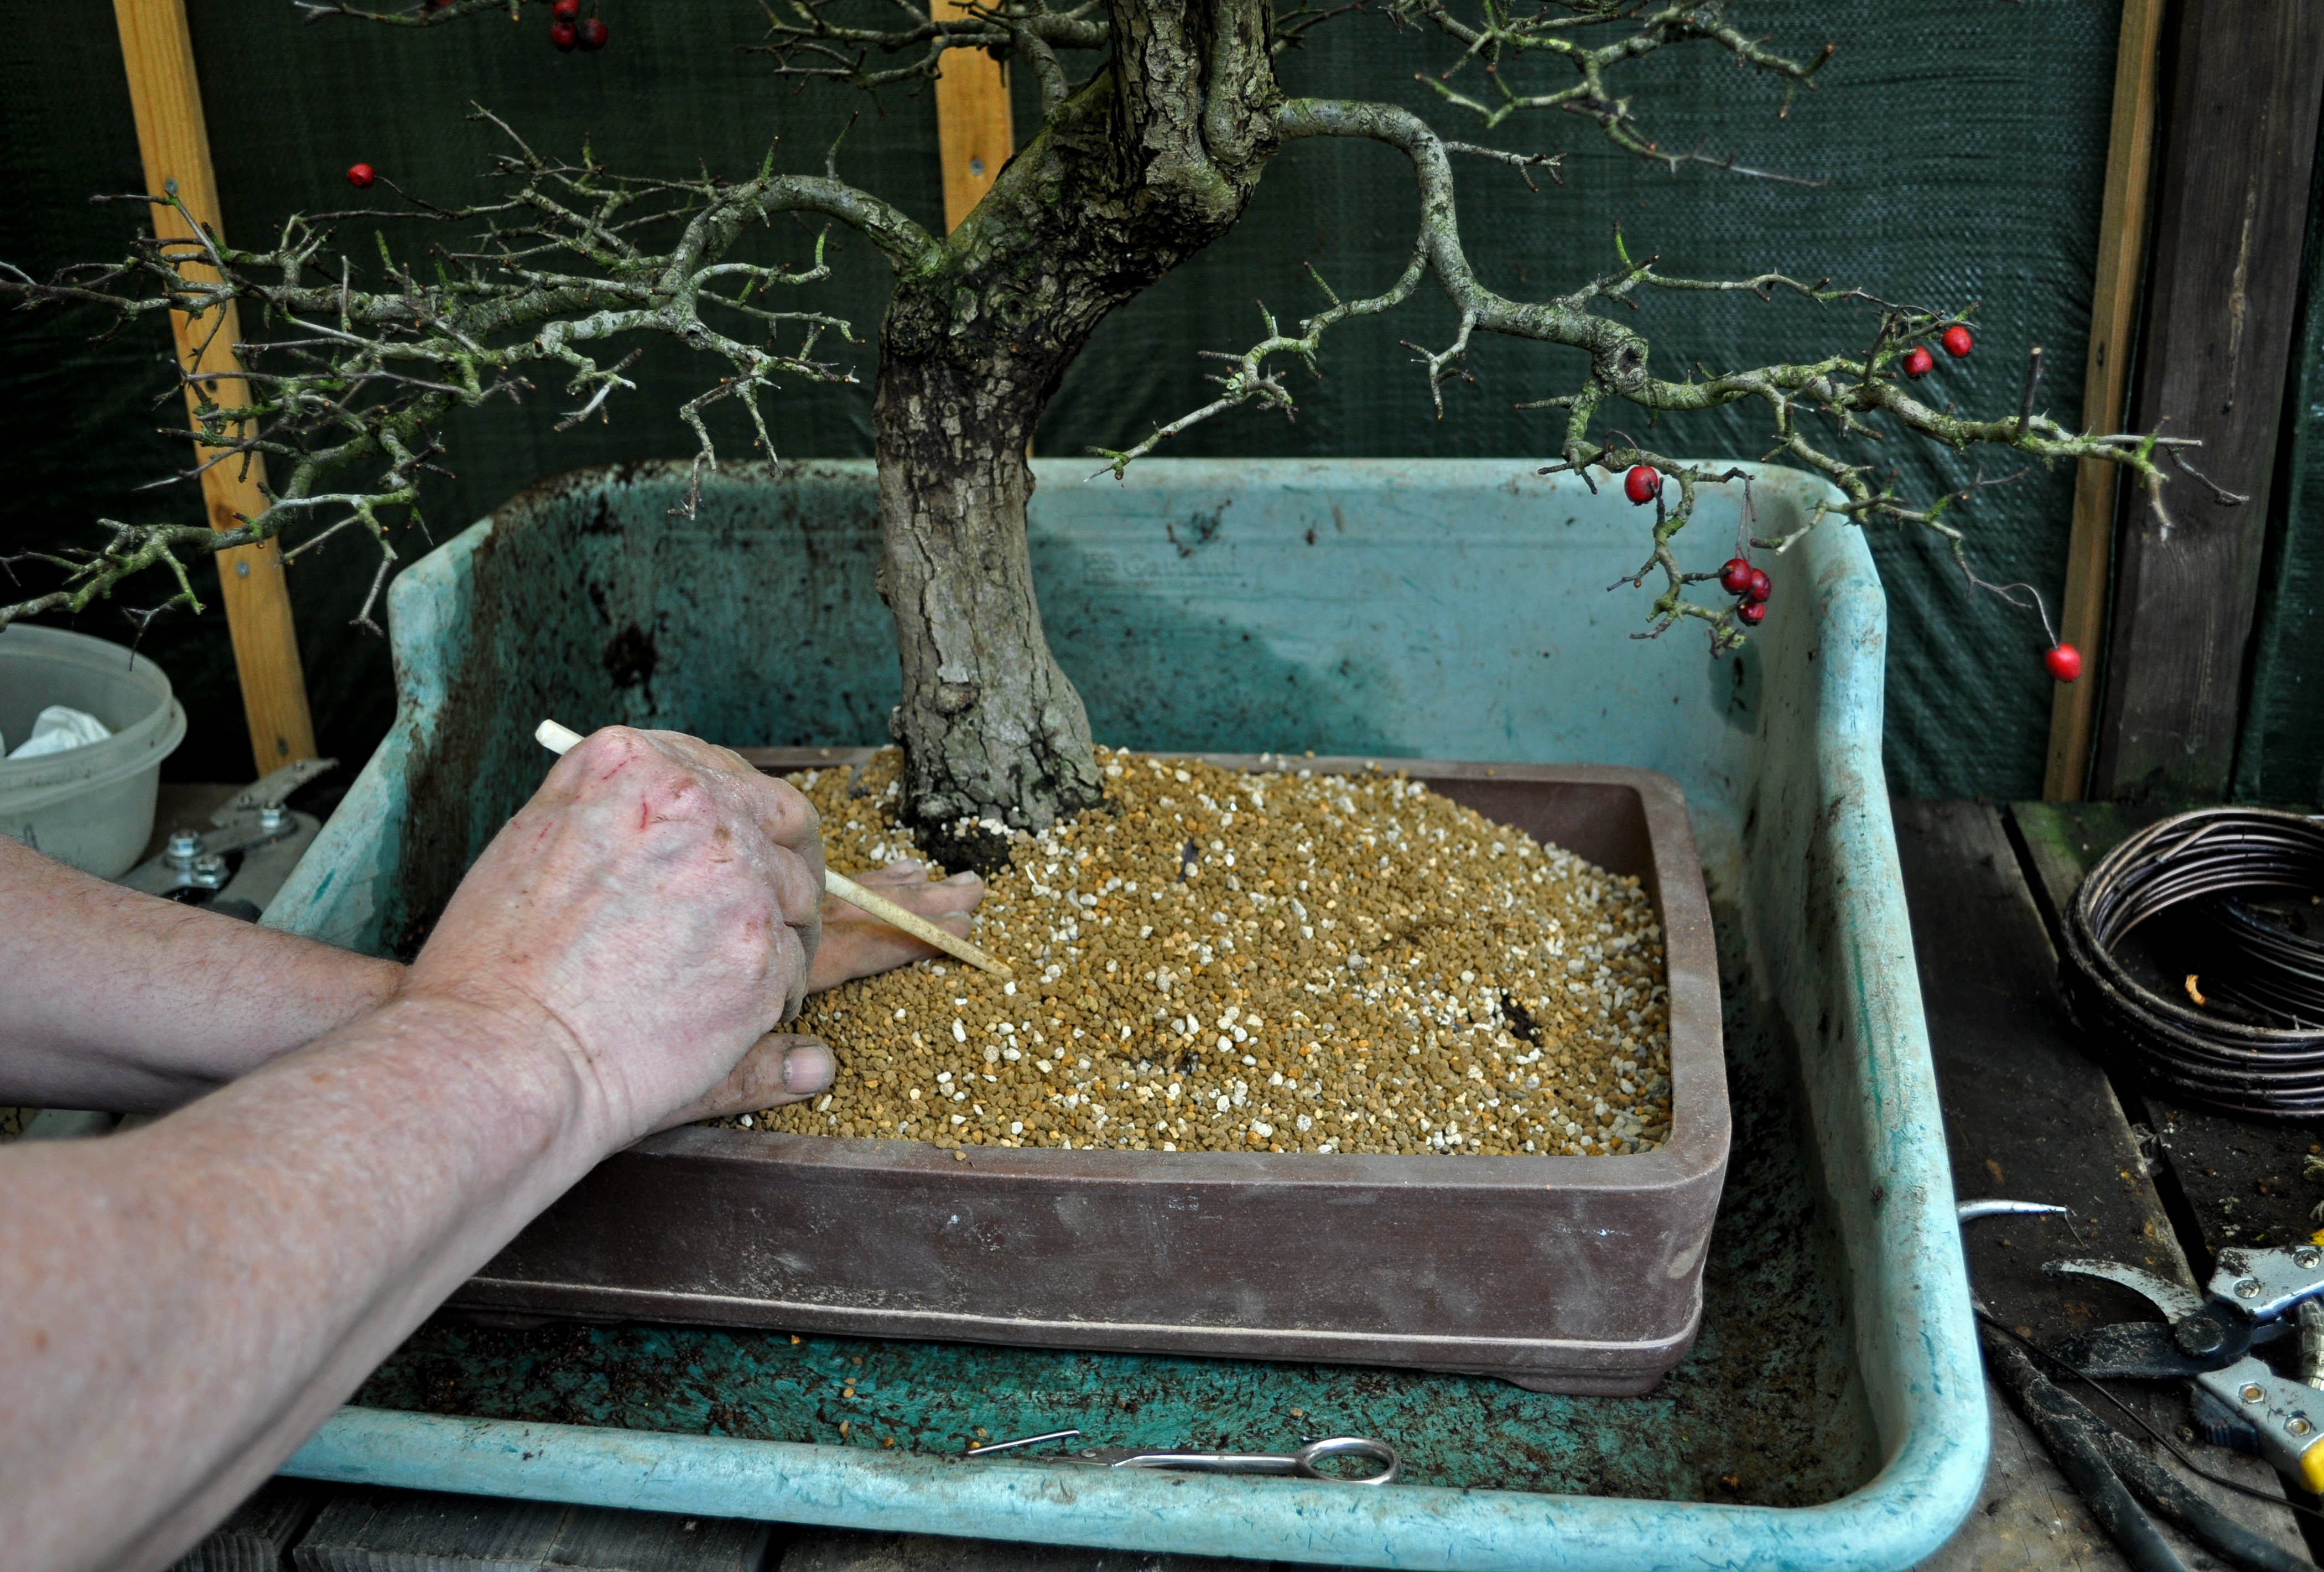
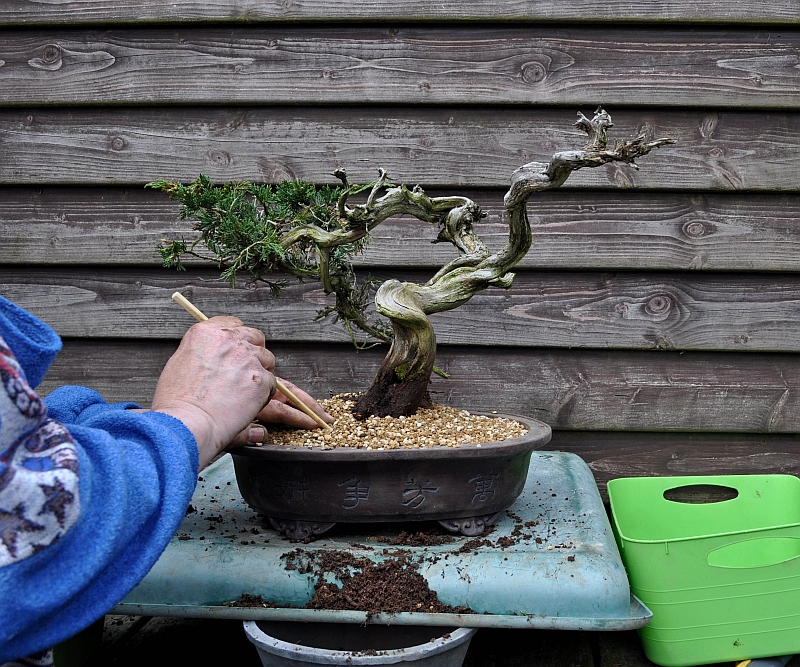
Below: with the help of a chopstick the soil mixture containing Akadama, Kiryu and Bims is pushed in between all the roots, making sure that now are pockets are left!
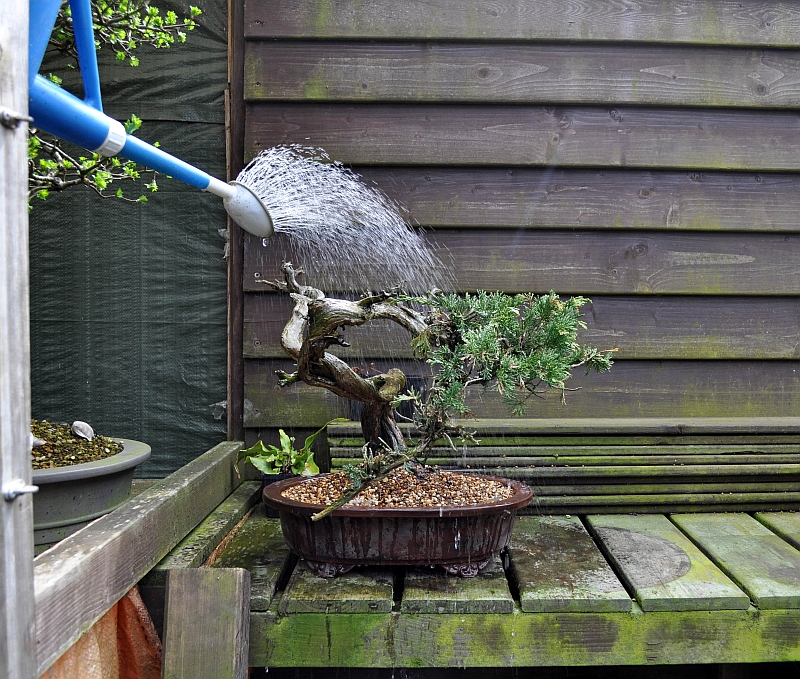
Below: then the tree is watered thoroughly until the water that runs out of the pot is clear of any dust!
Below: next the straight trunk is prepared to go into its new home. Here a long thick death root is cut off so that it will fit easier in its pot.
Below: the tree was placed on the bottom layer of large particles of soil for extra drainage. Just look at all those roots that fill almost the whole pot!
Below: two wooden blocks are placed under the right side to support the tree into its new desired position and then it is firmly anchored to the pot with thick wires.
Below: carefully bringing in the soil.
Below: then watering it like before. In the next couple of weeks, the trees will be kept in a warm spot with filtered sunlight and their foliage will be misted a couple of times a day to help them safely through this period
Below: separated but still together they stand here at their start as two future Bonsai.
I hope you enjoyed this little story of one Sabina Yamadori that became two pre-Bonsai with hopefully a bright future ahead of them?!
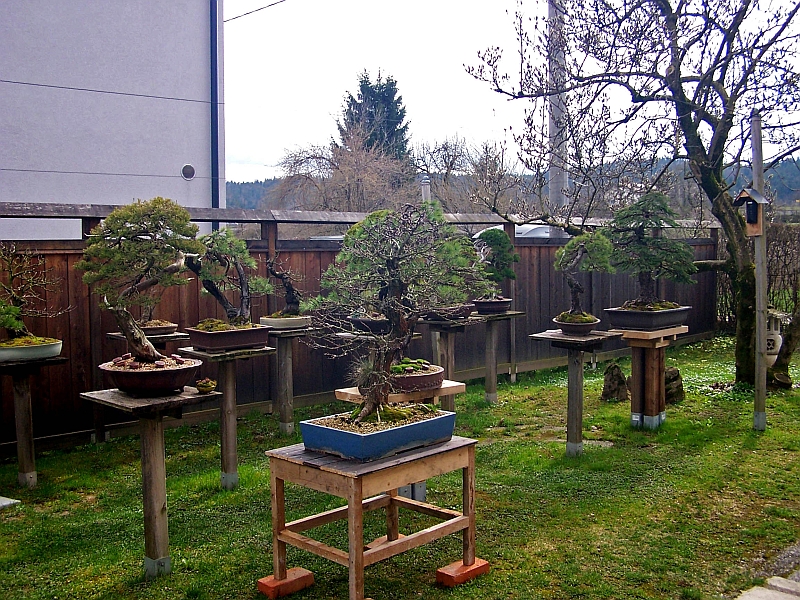
just one day back from my visit to my Friday workshop in beautiful Slovenia! My dear friend and kind host TOMAŽ KOVŠCA from the “TORA” International Bonsai School in Slovenia took me on an amazing two days sightseeing tour around Slovenia that left me even more in love with this breathtaking country and its super friendly people! Like I told him many times during that trip: I could happily live here and grow old with a smile on my face! Images and the story from that part of my visit to this wonderful place will follow soon! On Friday afternoon and evening there was a workshop planned in his great Bonsai studio that I would lead with the help of Tomaz himself and his talented student Gasper Gabrijel. Relaxing after our sightseeing trip before it all would start we were waiting in the sun enjoying a Turkish coffee and home-brewed vodka with Juniper berries in it that you could chew…it was absolutely heavenly and boy did it hit the spot! And the view of Tomaz’s beautiful Bonsai collection that surrounded us was not half bad either! Here are some images of his amazing collection that were shot (with a not-so-good old camera) by me before the students arrived.
Below: A view of just a section of Tomaz his beautiful collection.
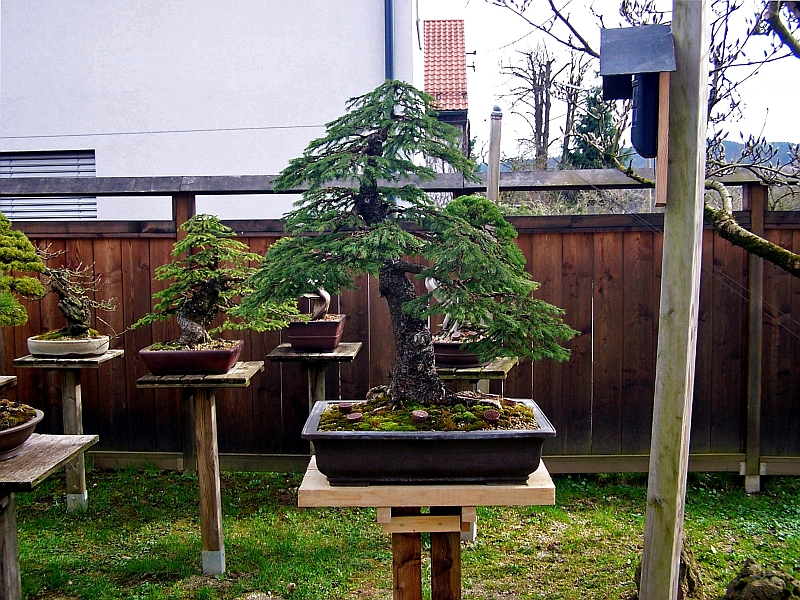
Below: A wonderful self-collected and styled Spruce.
Below: One of his many amazing Sylvestris.
Below: A very stylish Juniper.
Below: A local Prunus mahaleb Yamadori.
Below: And another stunning Sylvestris Yamadori.
Below: And this is the one that I fell in love with a very promising Mugo Yamadori!!!
Below: In his studio, this beautiful self-built Tokonoma with a uniquely styled garden material Juniper Bonsai was welcoming me and the students.
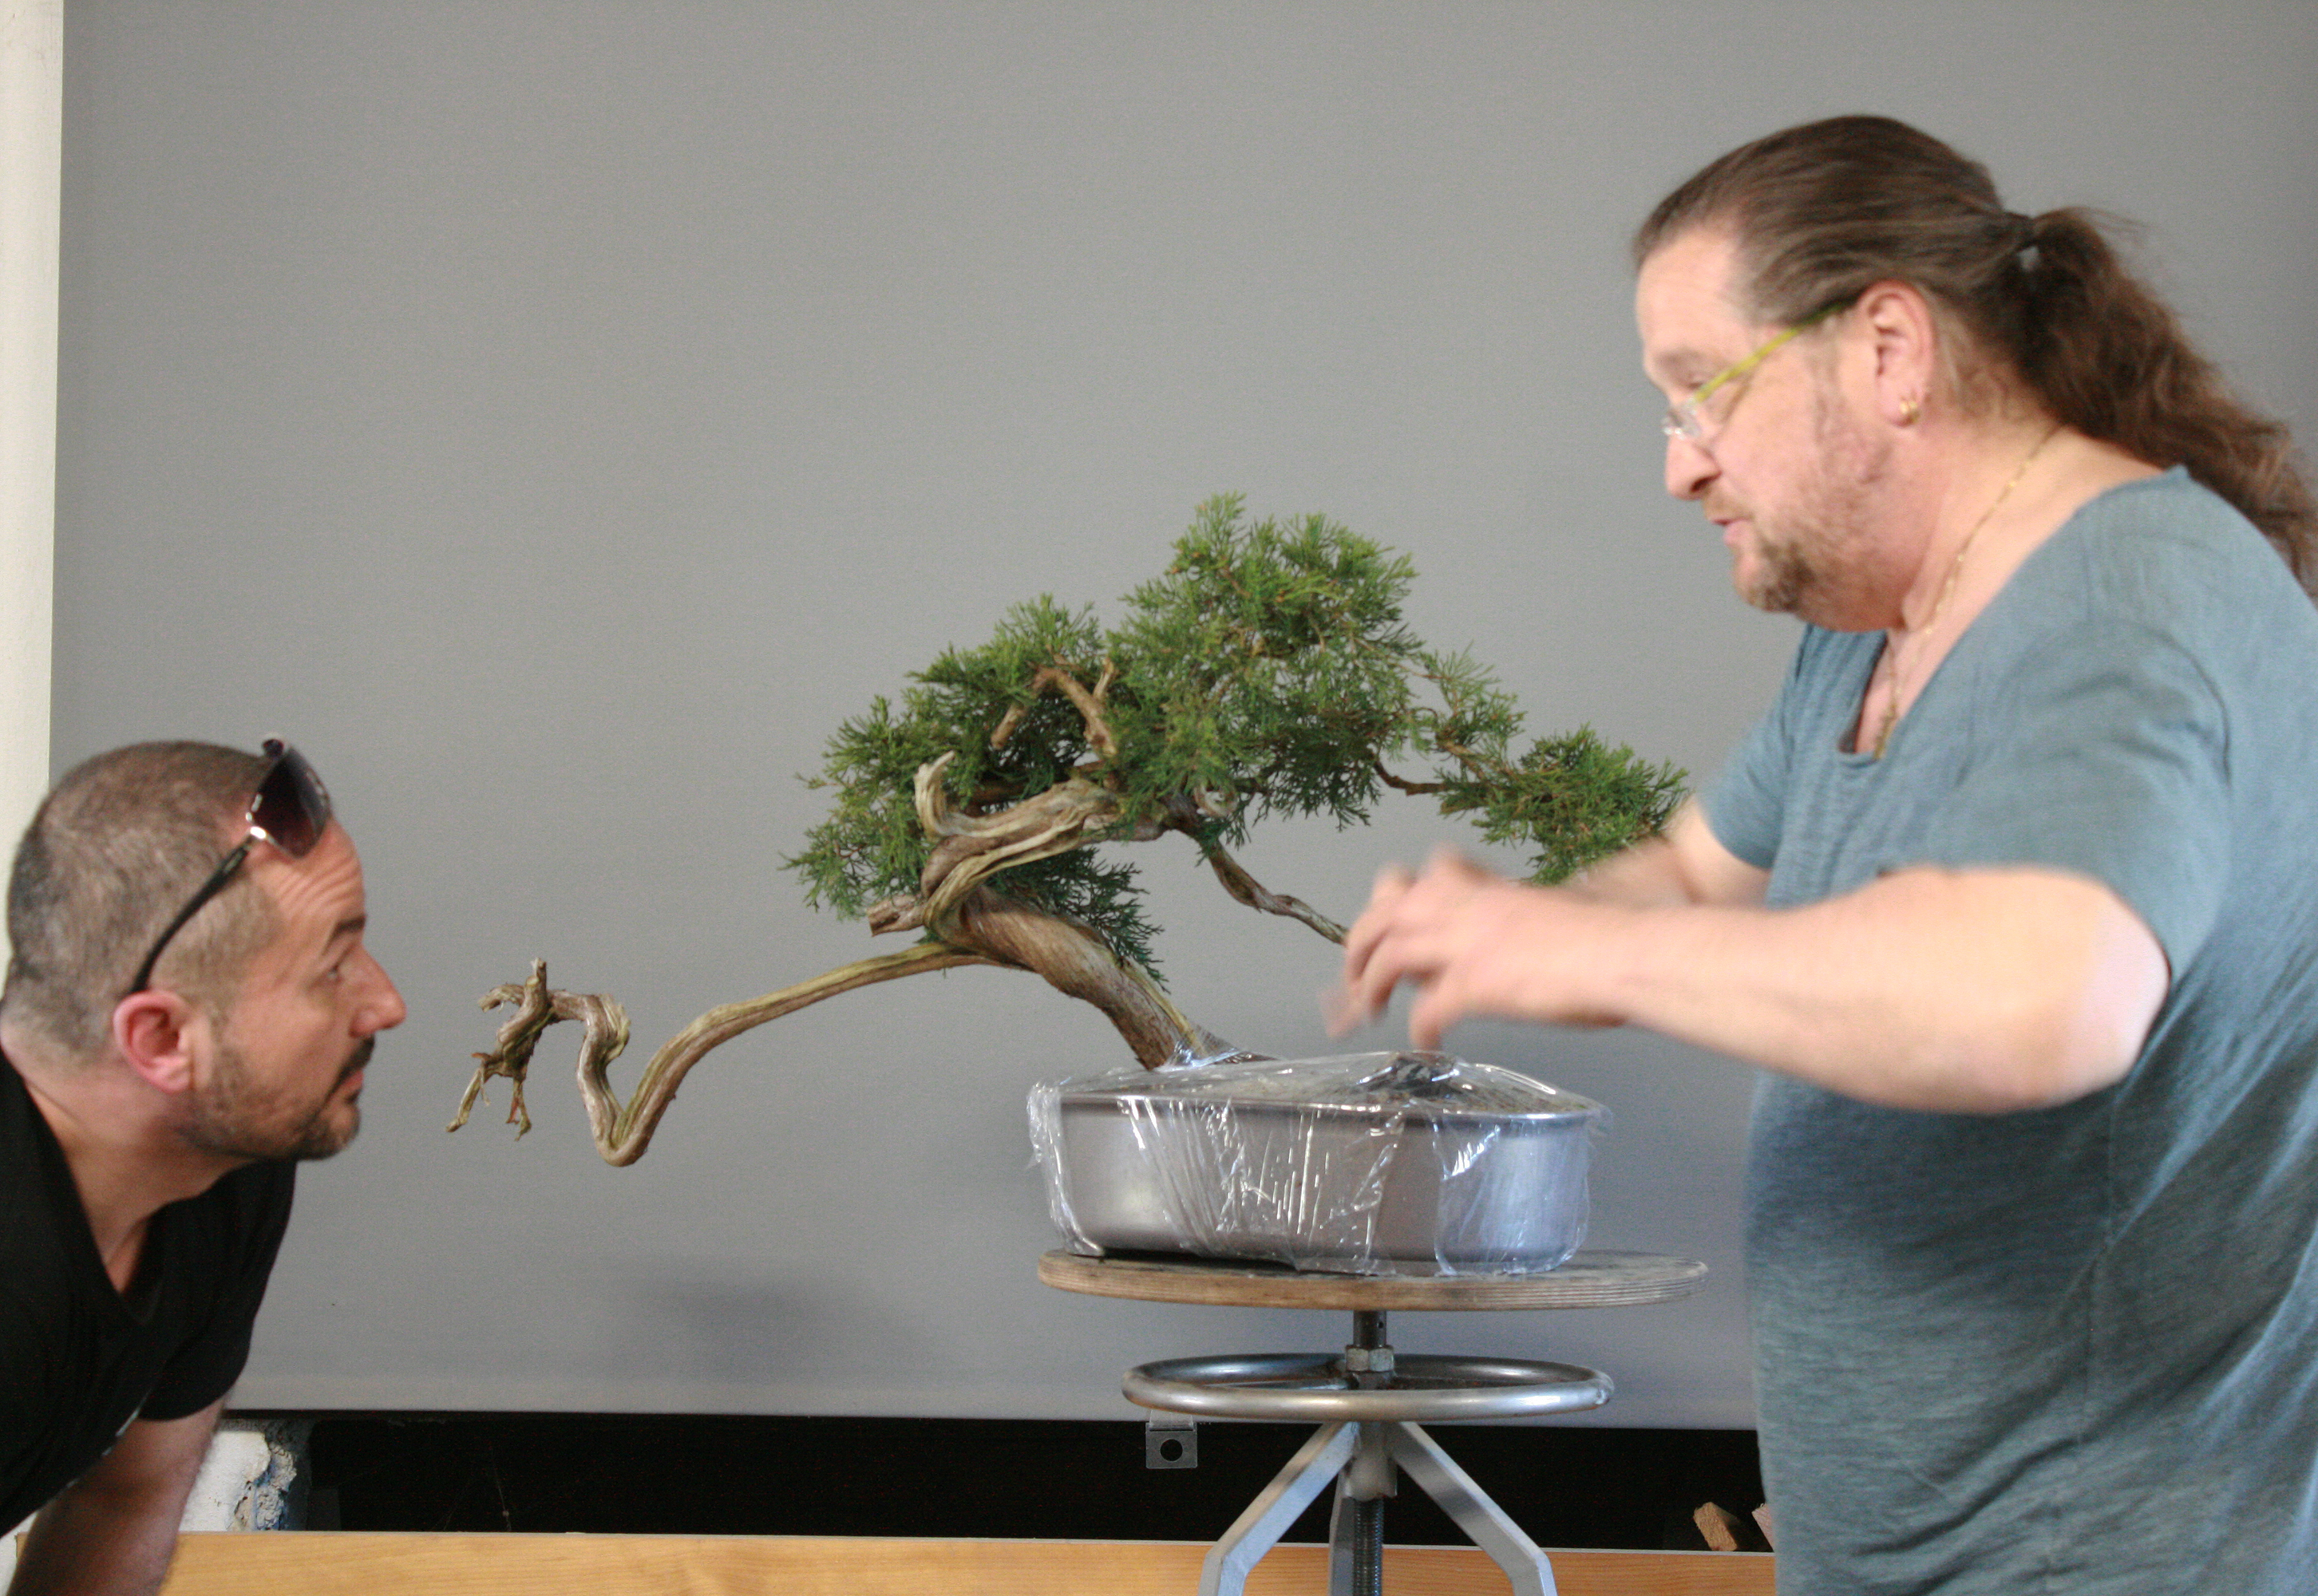
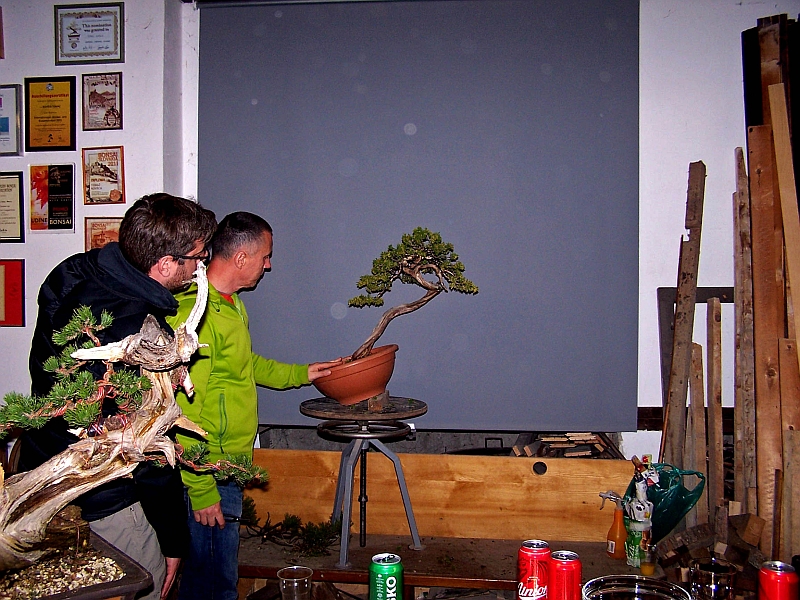
Below: Before the actual work on the brought-in trees started I first discussed them all with the owners in front of all the students. So that everybody could learn from each and every tree! This is a very valuable part of the workshop for the student and very exciting for me to do! This Juniperus sabina Yamadori was after I discussed the possibilities styled by two Croatian students with the help of Tomaz himself and the end result is pretty impressive and promising indeed!
Below: Tomaz and his student Gasper Gabrijel working on the final touches.
Below: The beautiful end result of this first styling.
Below: A Yamadori Hawthorn before the work started.
Below: Almost finish after some drinks and lovely finger food!
Below: The end result is a Literati deciduous Bonsai.
Below: A local Yamadori Spruce with a unique but difficult root base.
Below: And the end result, a young but already elegant and natural-looking pre-Bonsai.
Below: Some were so into the work that they resisted the late-night cold before coming in!
Below: Later that evening inside that same tree, the owner is concentrated looking on while I make some adjustments and bring some of the branches in position.
Below: My old friend Roland Petek brought in two mindblowing Mugo Yamadori Pines with him! This one has amazing deadwood all along this side, but still, we selected to style it with the other side as its front. This site would always look like a Tanuki and that is not what you want for your Bonsai…especially a Mother like this one!!!
Below: Roland concentrated on applying a layer of raffia and then a layer of black plastic tape to protect the thick and old branches from cracking. And this is much-needed because we have to bend and reposition them severely!
Below: This is the very promising end result after its first styling. From this side, there is still more than enough deadwood to be seen, but now it is accompanied all along the trunk by the beautifully contrasting old flaky bark! The left-side hanging branch pushes the sloping tree back upwards and gives the whole composition an exciting balancing act. The foliage is basically a triangle that cuts through the upwards going lines of the trunk, leading the eyes to the left and back again on their way to the top of the tree and then down again! So this Bonsai has it all: balance, rhythm, movement, visual old age, a wide Nebari, Jin, Shari, life veins, and a very proud owner! Weldone Roland and thanks for trusting me!
Below: From another student came yet another beautiful Yamadori pine! And again with some problems to solve and big decisions to make! But I had no problems convincing the owner and the rest of the students how to proceed to solve them and to bring the best out of this, once again, beautiful and exciting Yamadori. That long downward Jin needed to go because it distracted the beauty of the abrupt movement of the trunk line in the top section! This was mostly caused because it protrudes from the inside of the curve in the trunk its top section and like with branches that grow from the inside of a curve in a trunk they almost always look misplaced and disturbing! Also two Jins on the lower section of the trunk needed to be reduced because they were distracting and other Jins and the Shari needed to be styled! Then the top main branch was protected by a layer of raffia and wired before everything could be put into place and that sounds easier than it actually was because the top section needed a lot of heavy bending!
Below: And here is the (for now) finished pre-Bonsai. I am discussing here at the end of the workshop what the happy student with some help from me has reached…and that is simply amazing! Because I really do think that this is a very exciting and promising result! And I do believe that in just 3 or 4 years time this will be an amazing Bonsai!
The above-shown trees are just a small selection of the 10 or 11 that were worked on and styled that day and more images can be seen in a very nice video that Tomaz made of it all and has posted on YouTube (link below)!
I would like to thank Tomaz and his lovely wife for taking so good care of me and for trusting me to do this workshop in his Bonsai School! And I would like to especially thank all his students for trusting me with their precious trees!
I can hardly wait to go back in May to Slovenia to do my workshop and demo at the
I will be posting soon pictures that I made during my trip with Tomaz through stunning Slovenia…so I hope to see you back here soon!
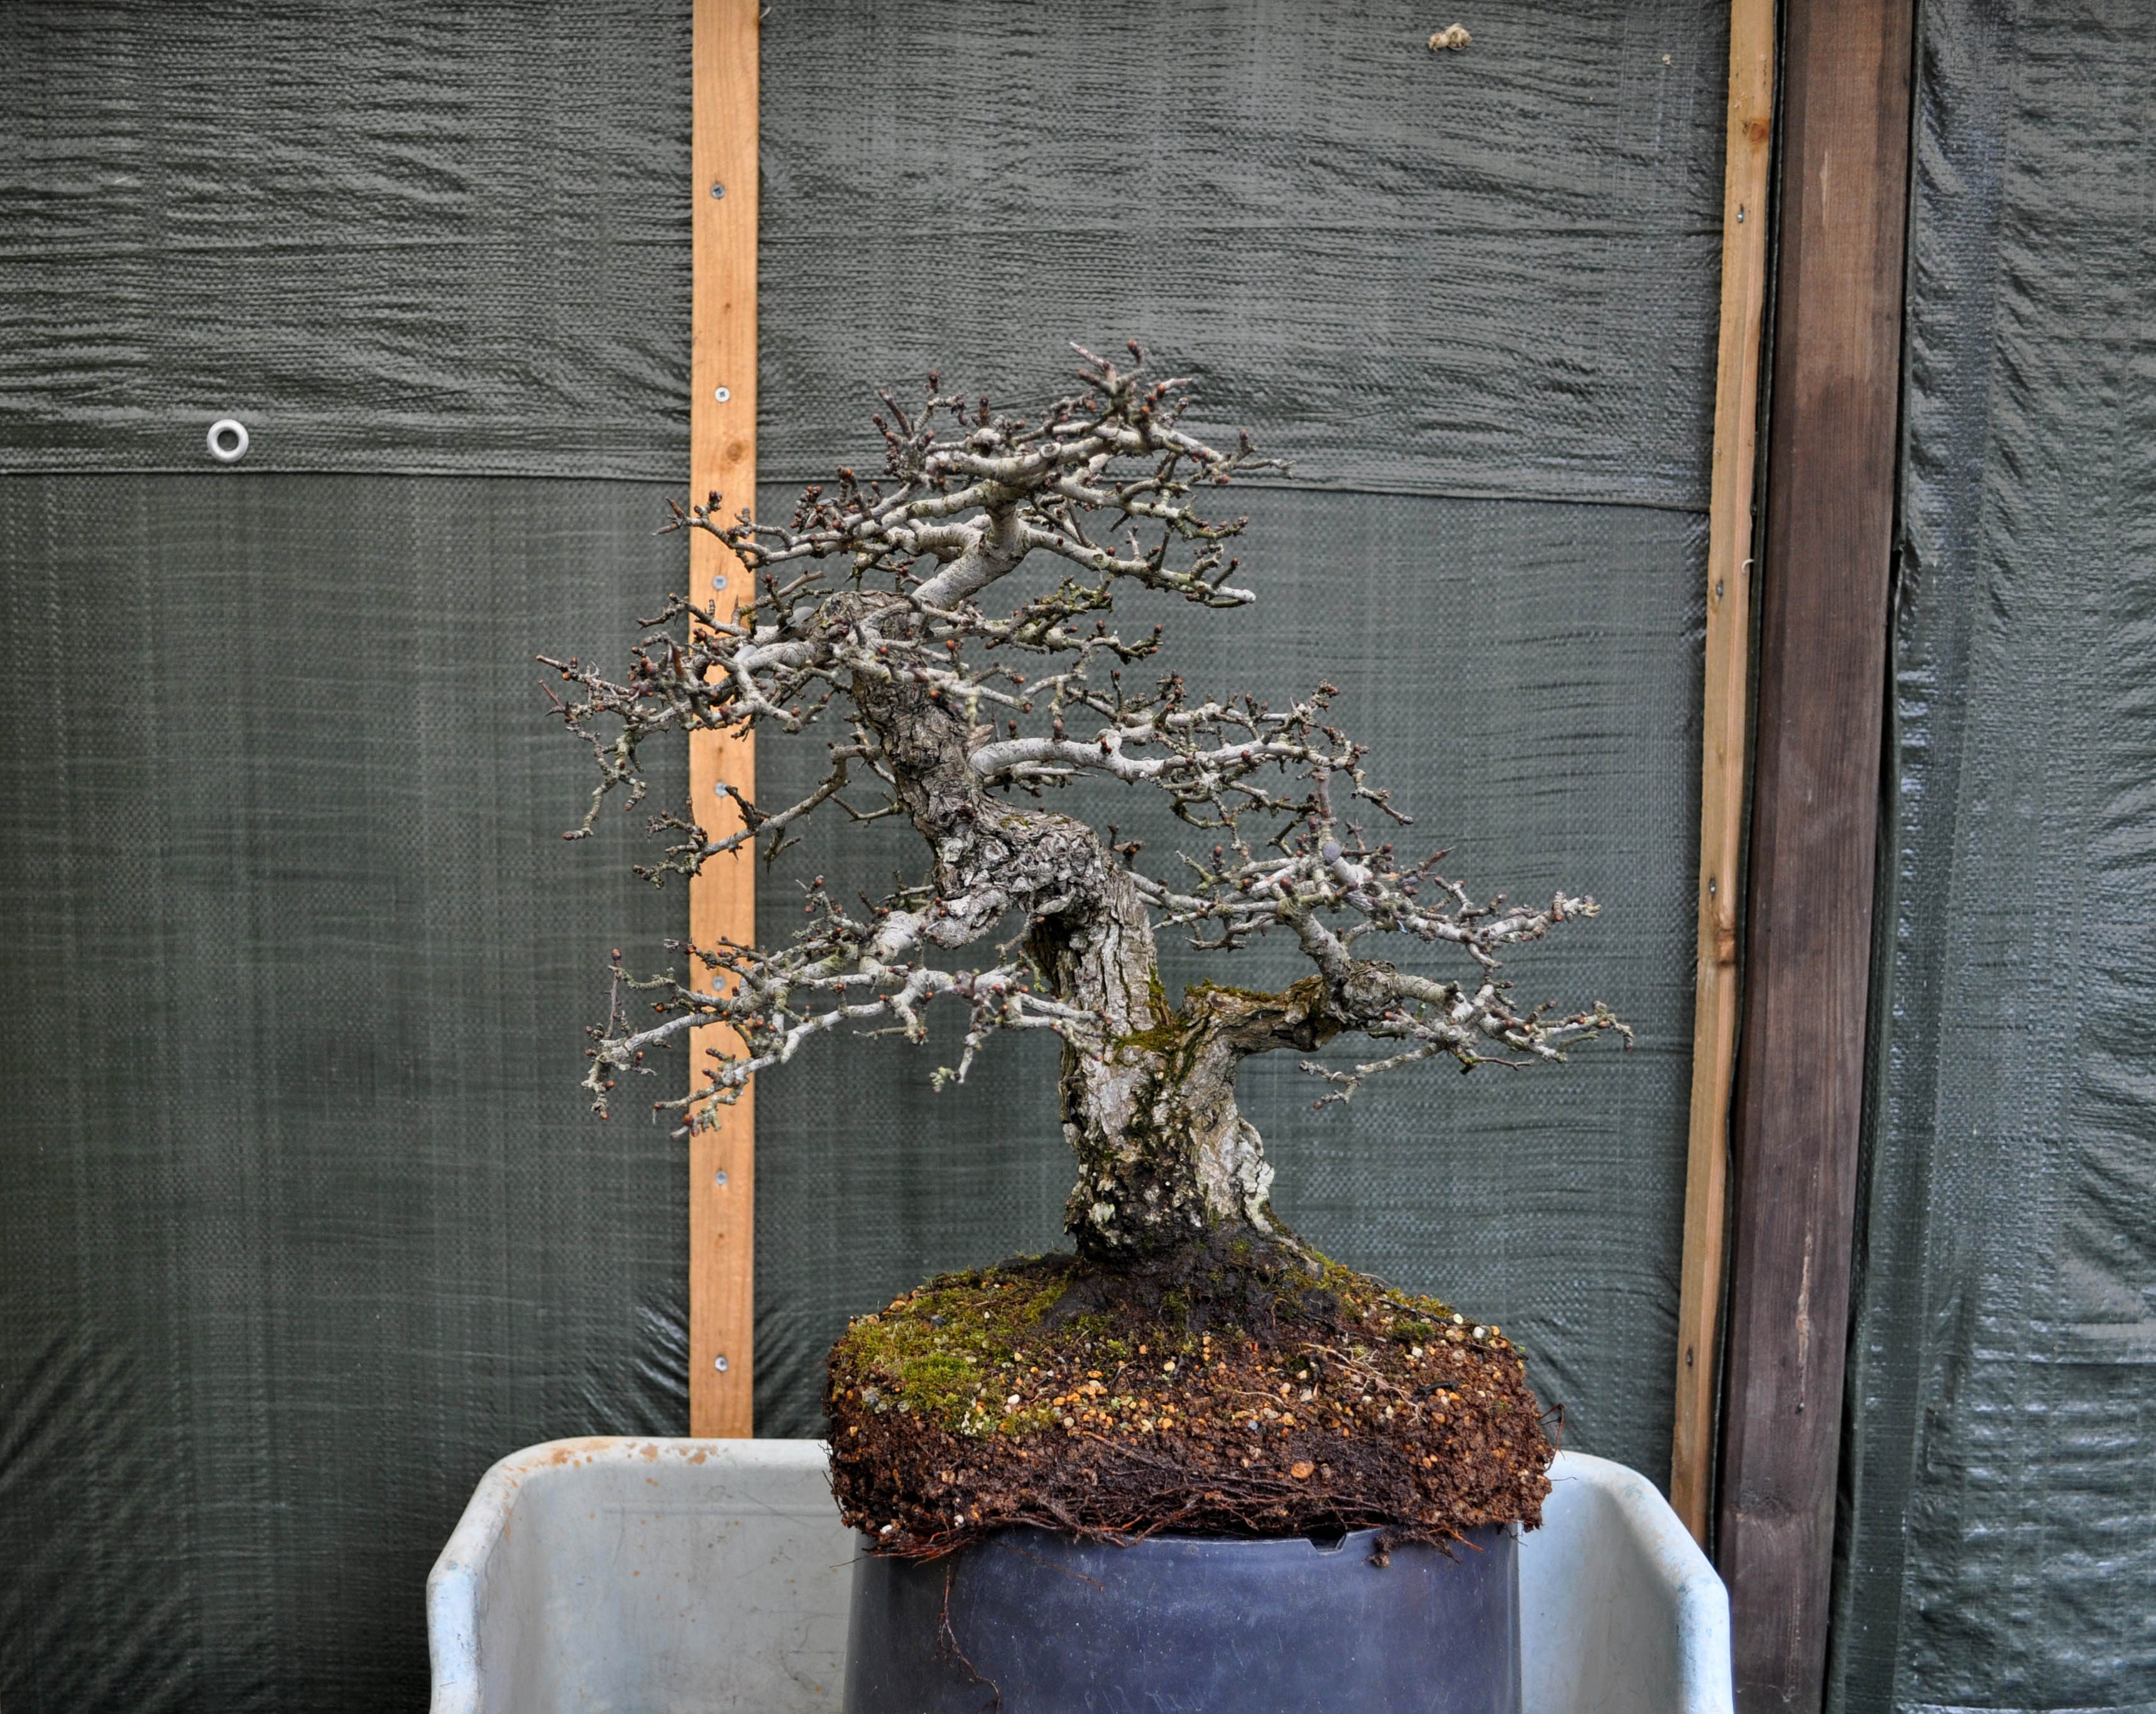
last week I had finally two repotting sessions after the long abnormal frost period we had for a few weeks and that was about time for most trees that I had to do because the buds on some of them were already opening! First up was my easy-to-repot old Hawthorn Yamadori ( Crataegus monogyna) in his beautiful Dan Barton pot.
Below: Everything that I could possibly need for this repotting is in place and my old Hawthorn is patiently waiting for his haircut and fresh soil.
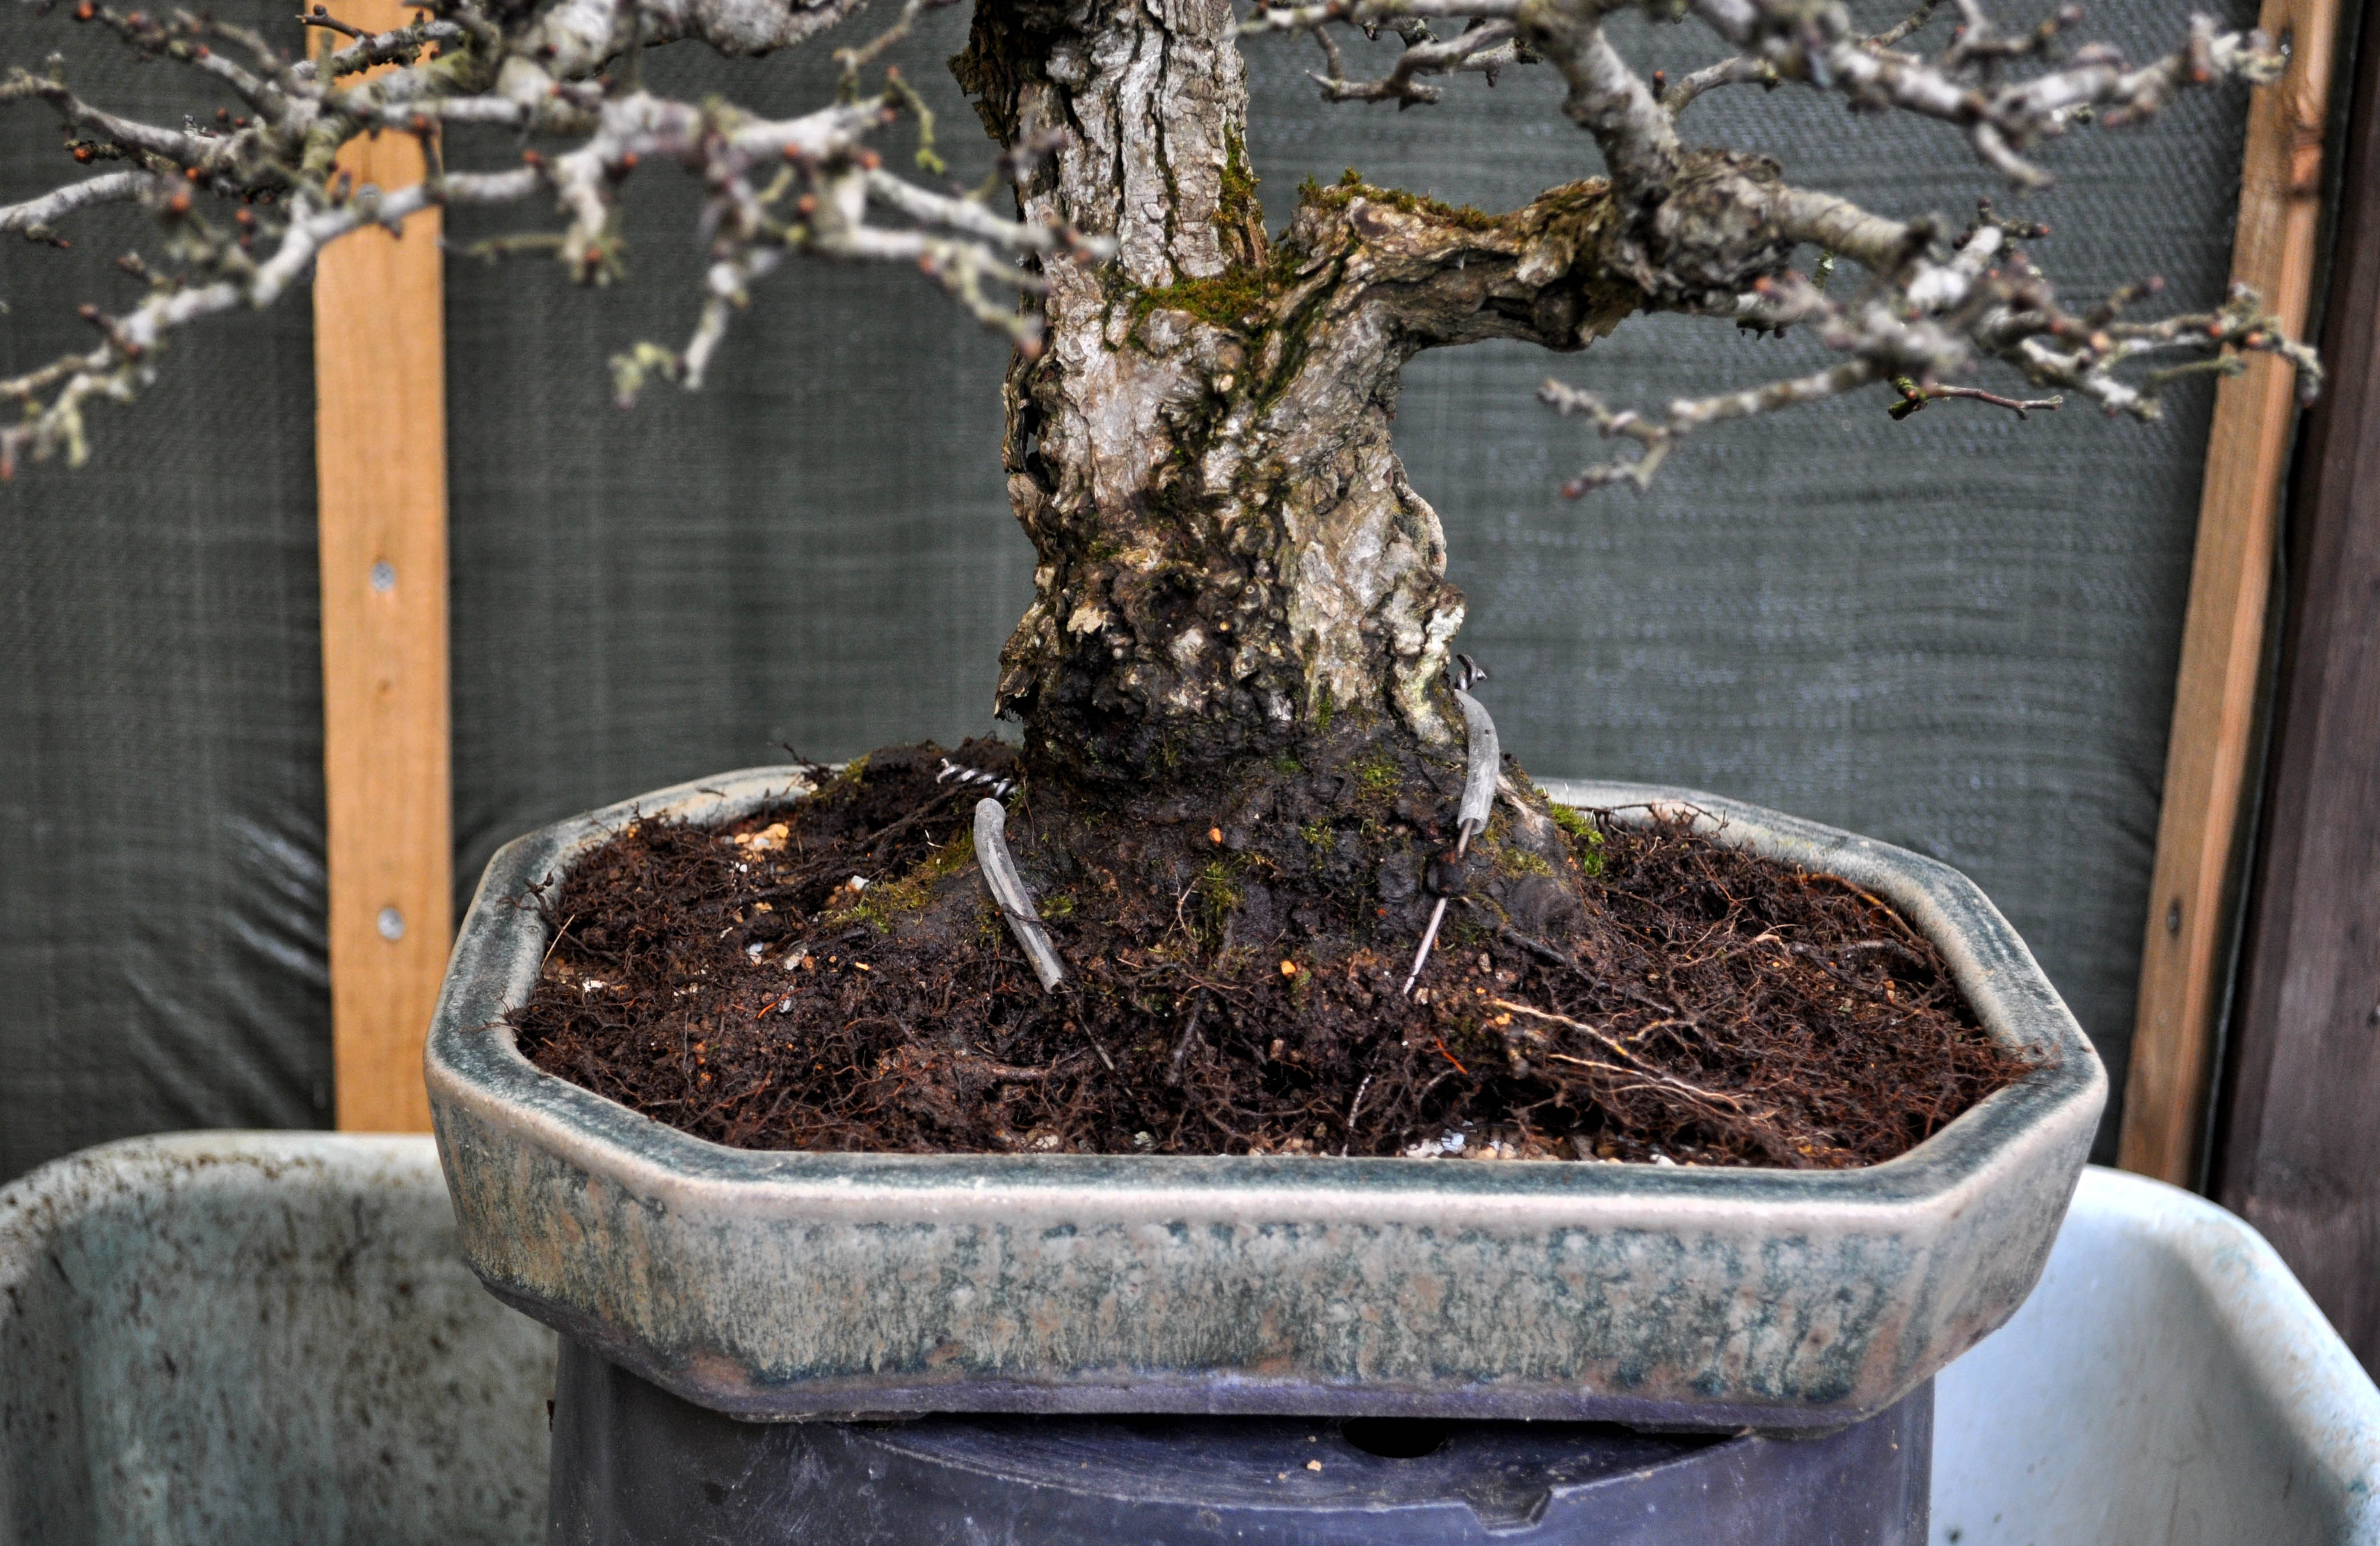
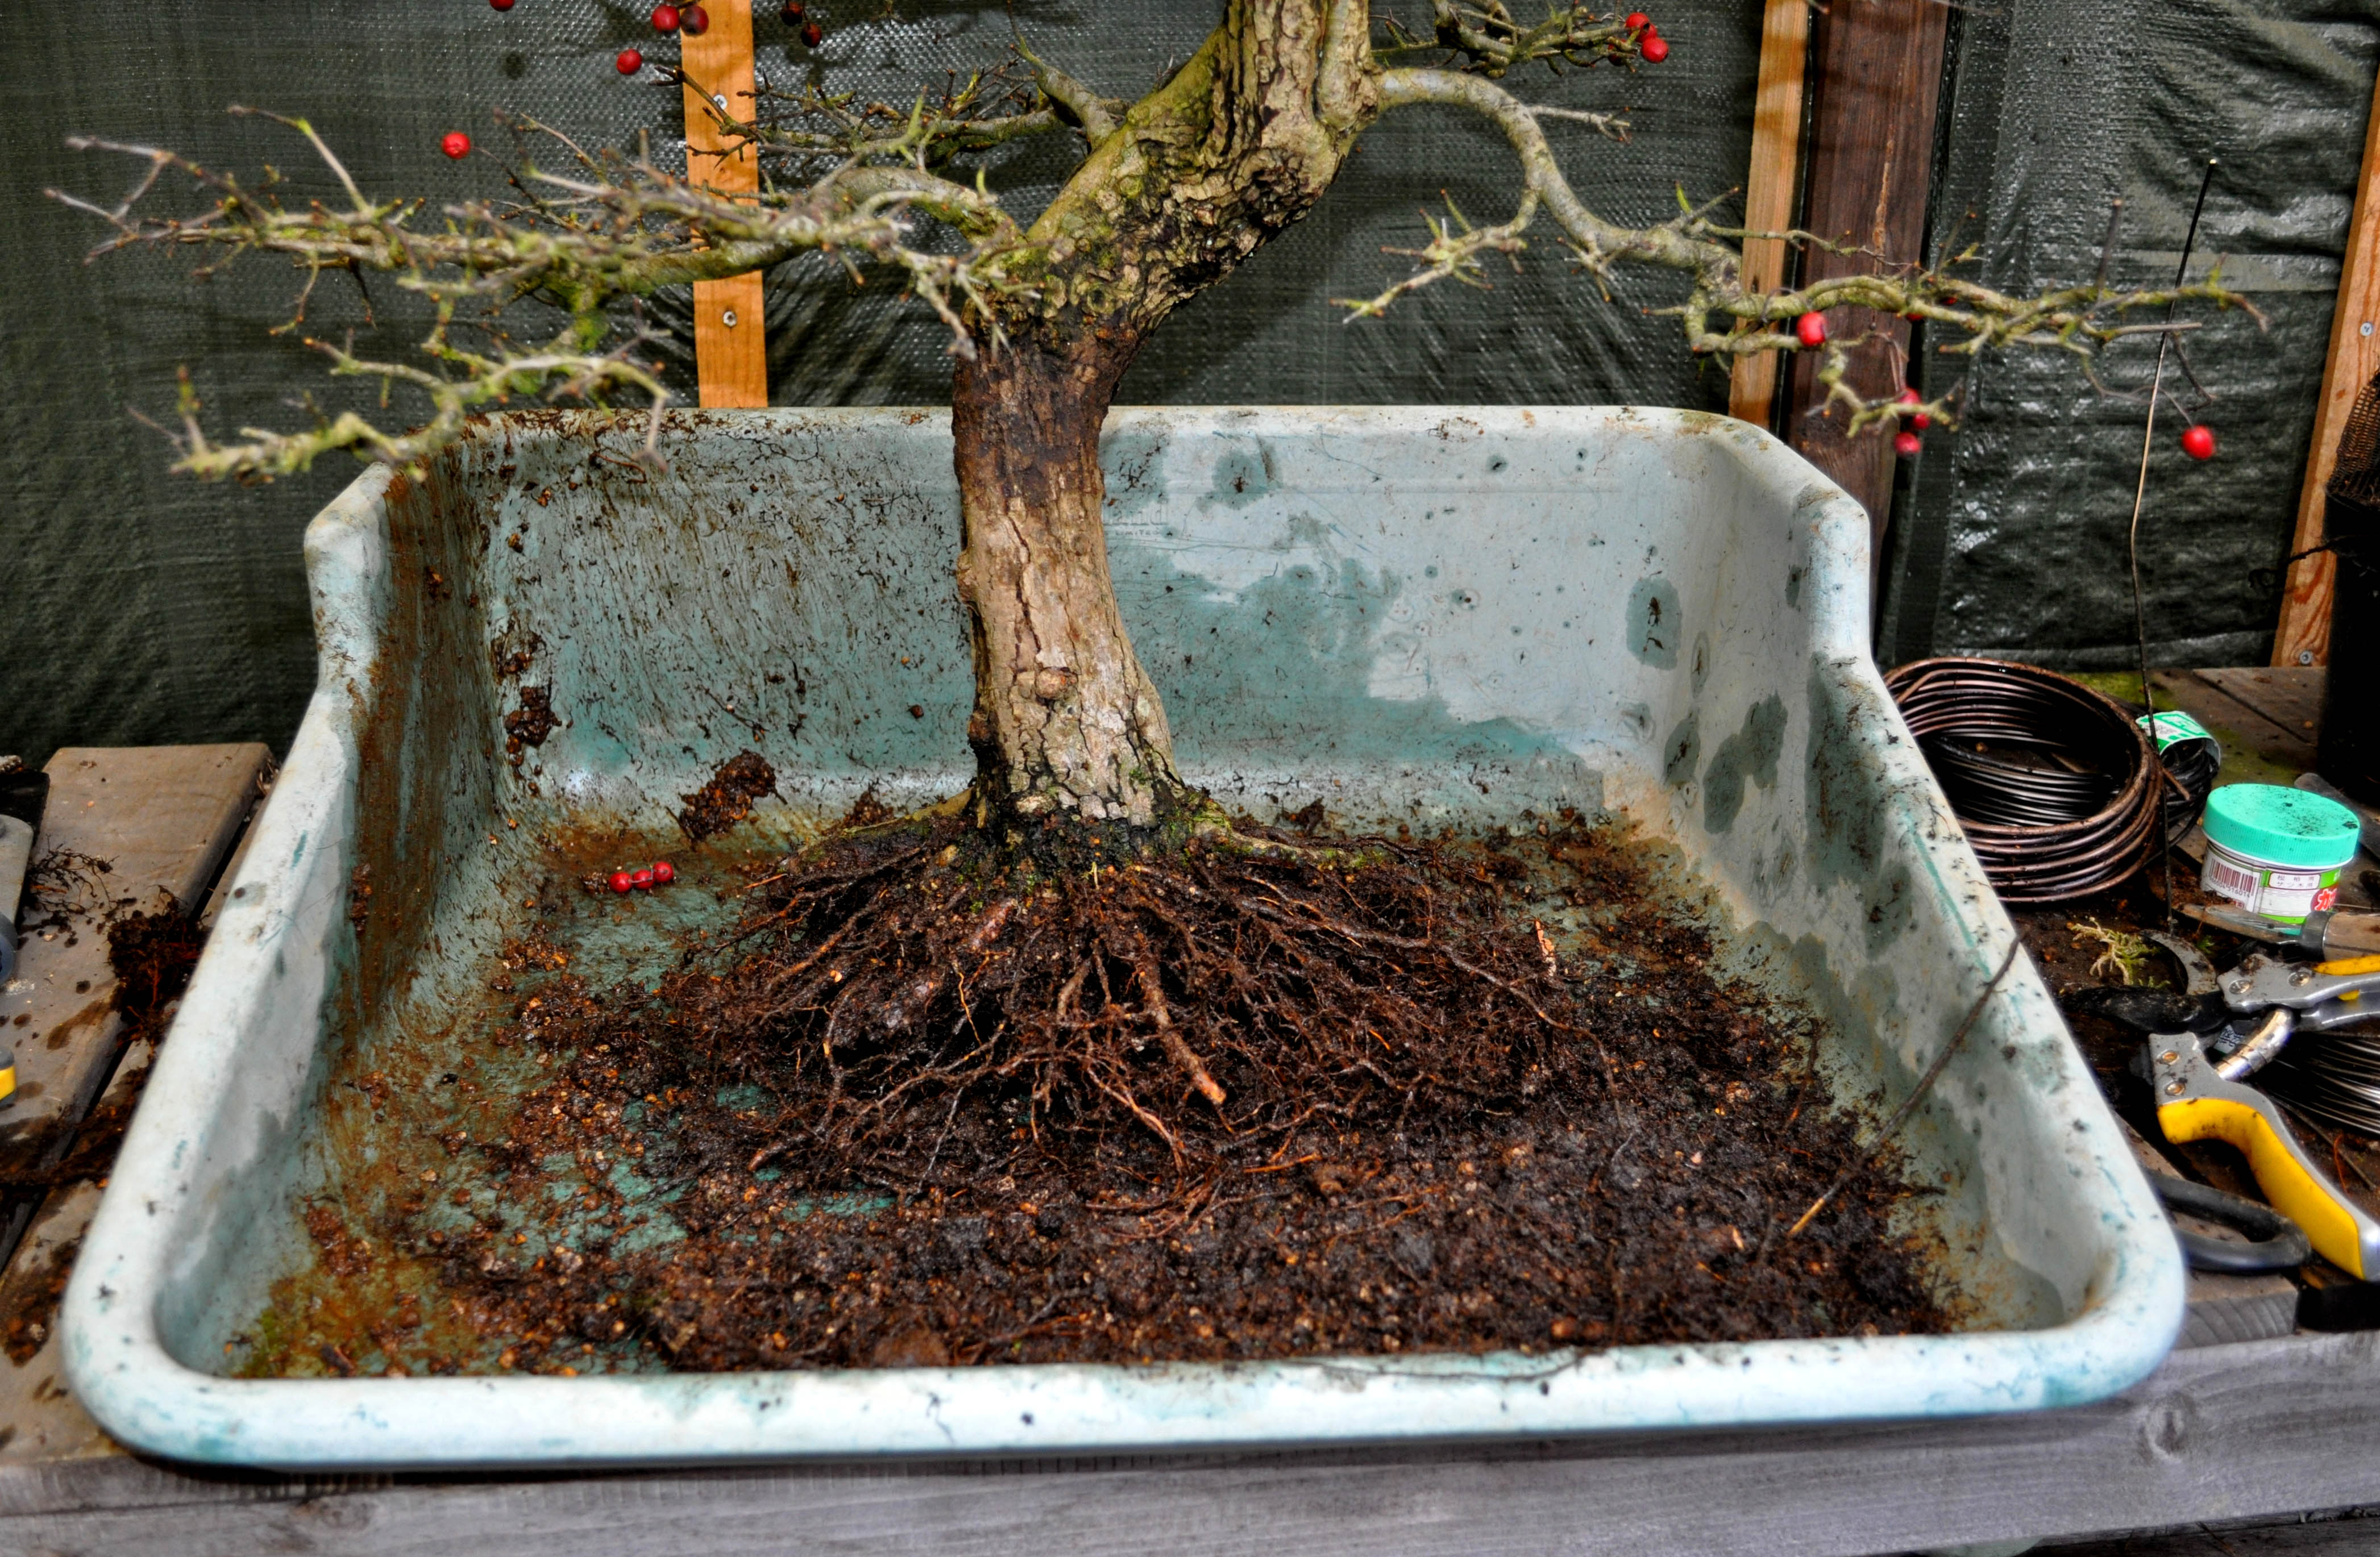
Below: Out of his pot and ready to remove as much of the old soil from in between the roots as possible and safe! My objective is to remove all downwards growing roots so that I can replant him even lower in its pot!
Below: A layer of my soil mix containing Akadama, Kiryu and Bims is spread out over the bottom of the pot.
Below: Then a small pile of the same soil mix is made more or less in the middle of the pot on which the tree is pushed down with a turning motion. This way all the cavities in the bottom of the rootball are automatically filled with the soil! Stop with the downwards turning motion when the tree has reached the acquired height in the pot and stands in the right direction and angle etc.
Below: Then the wires are tightened loosely so that necessary soil can still be brought in under need the roots with chopsticks.
Below: When that is successfully done the wires are tightened some more to secure the tree firmly in the pot!
Below: Next is this rare Dutch Hawthorn (Crataegus monogyna) that I collected many many years ago in a wet dune forest close to the beach and not far from where we live. It was chopped and all branches and the top that you see in this picture are all later grown completely new. It stands now about 75cm high and it is time to release it from the plastic training pot where it grew happily for the last 6 years! The top will be shortened by some 10cm after the repotting!
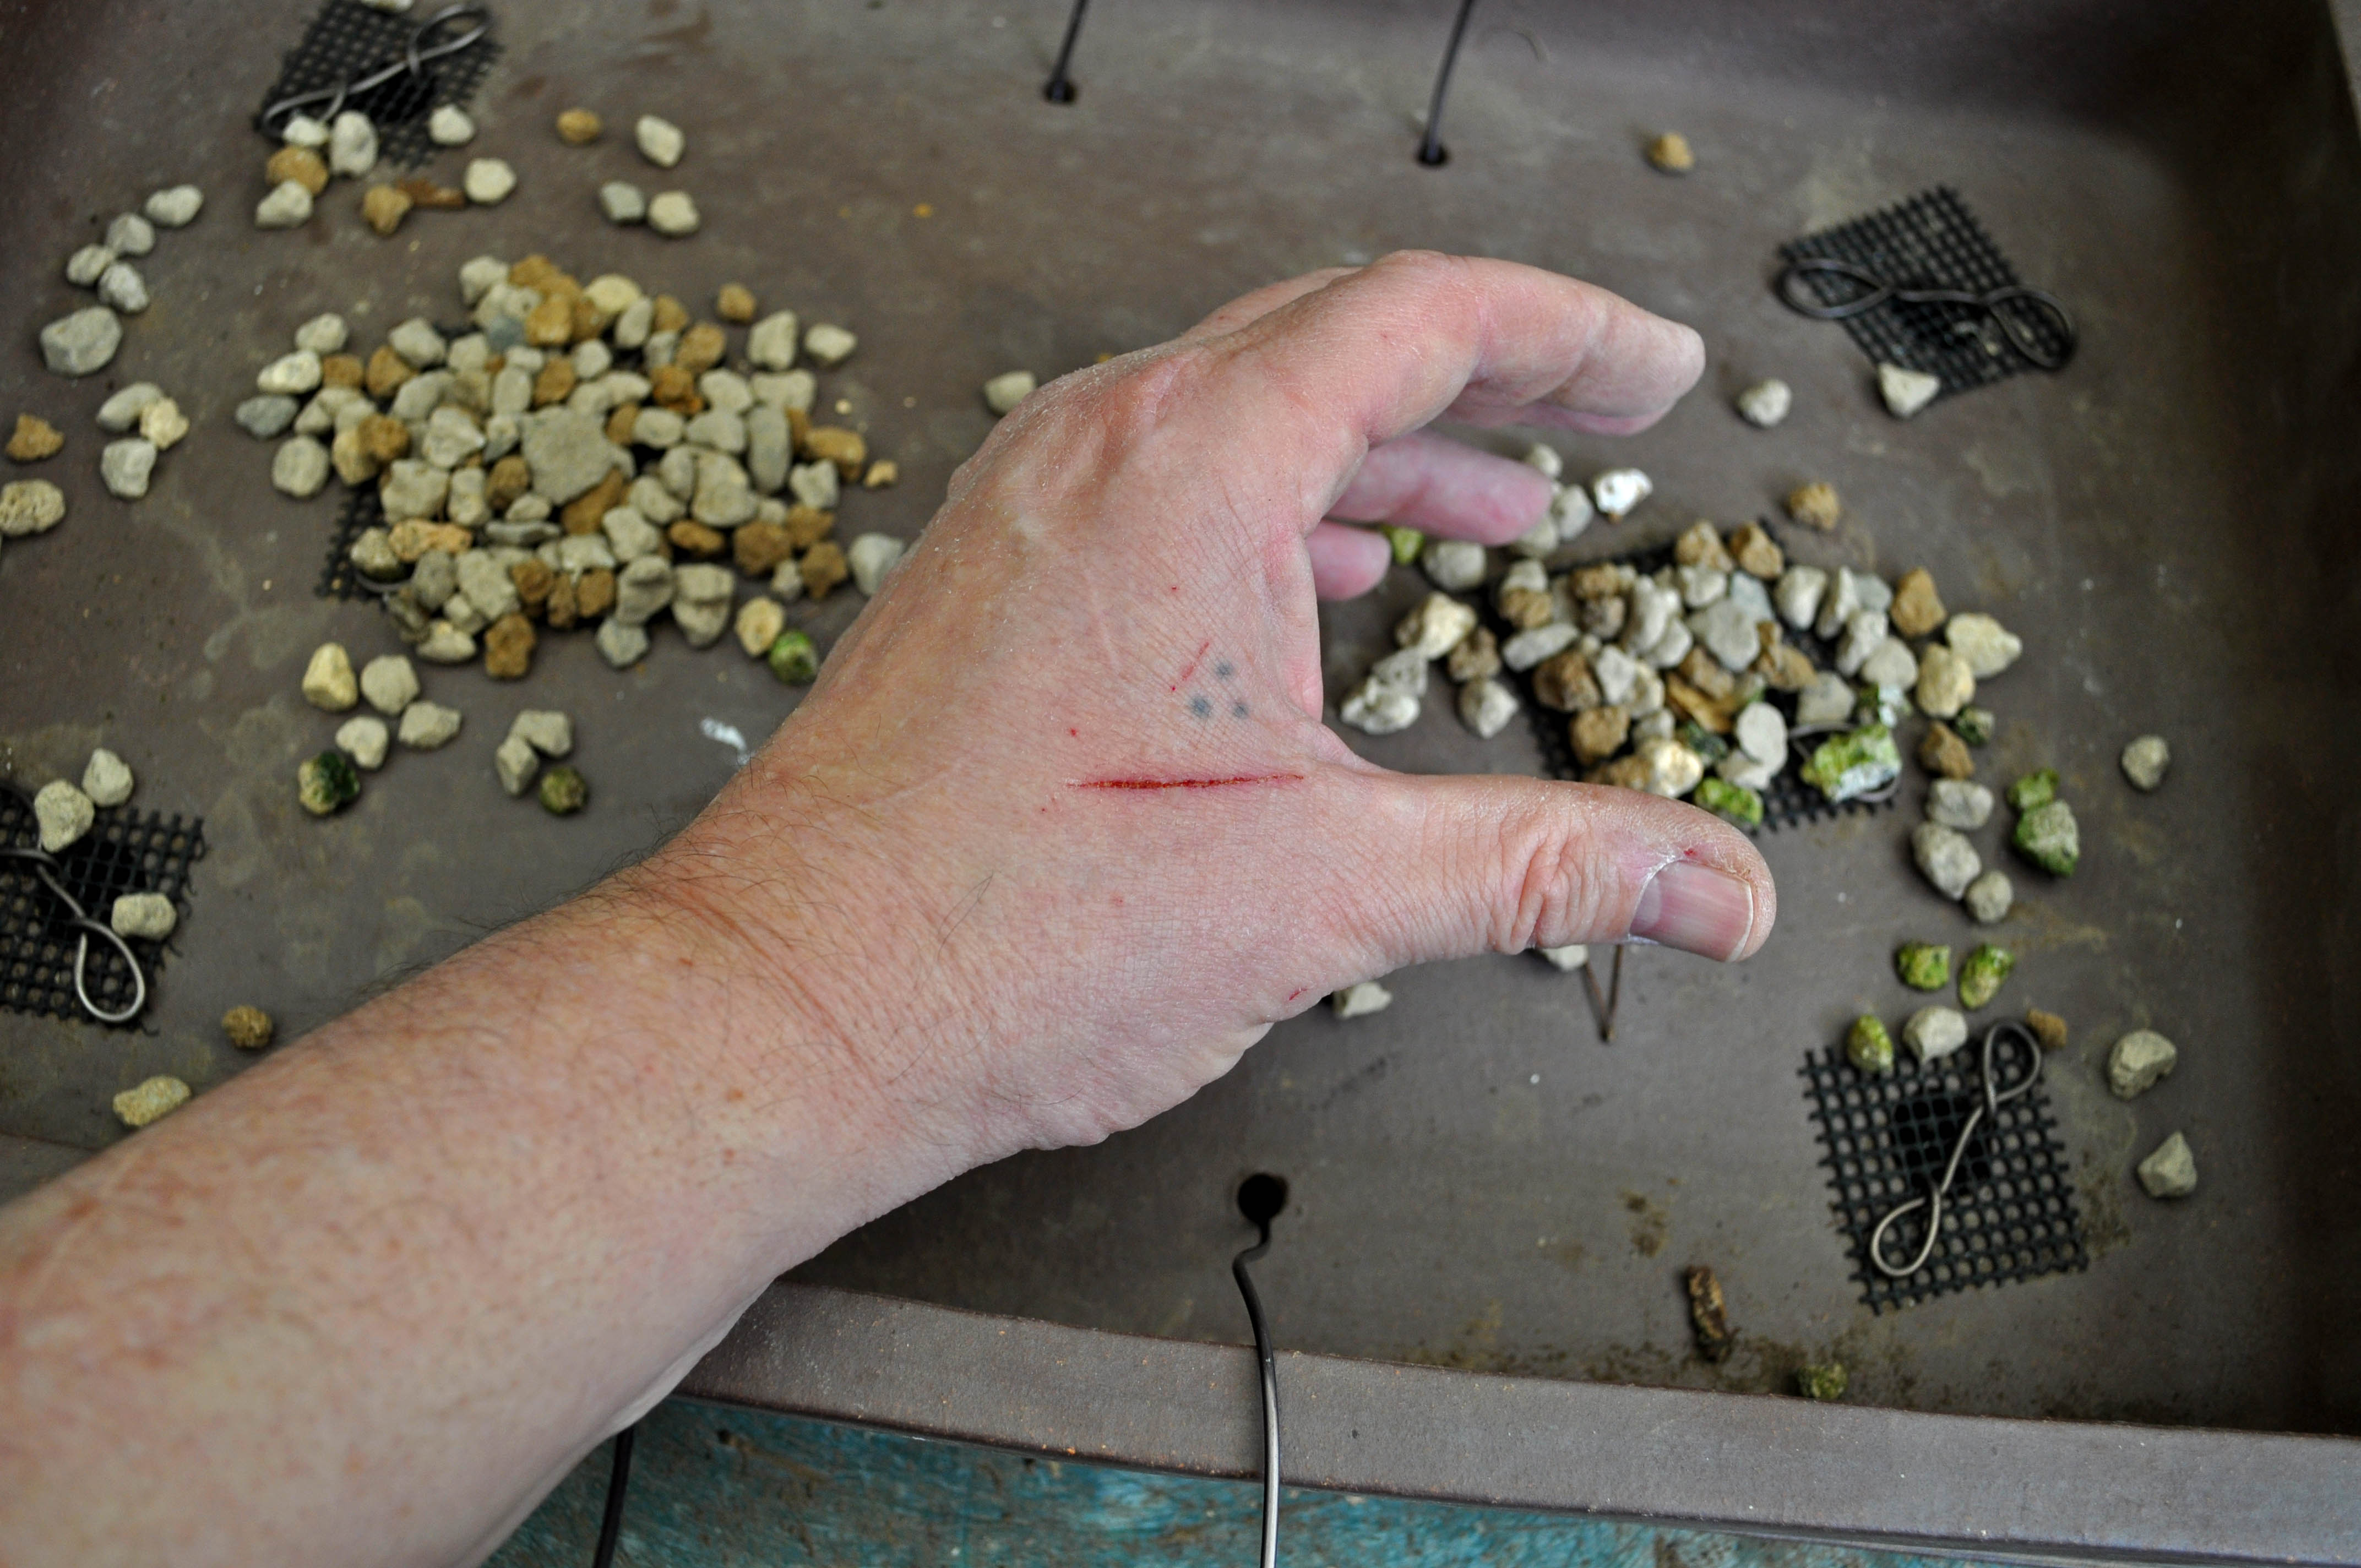
Below: The wholes of the new pot are covered by mesh and I am just applying the first layer with large-sized soil mix to the pot when I notice yet another scratch on my hands from one of those ####ing sharp Hawthorn needles that will turn in another inflammation…gggrrr!! 😉
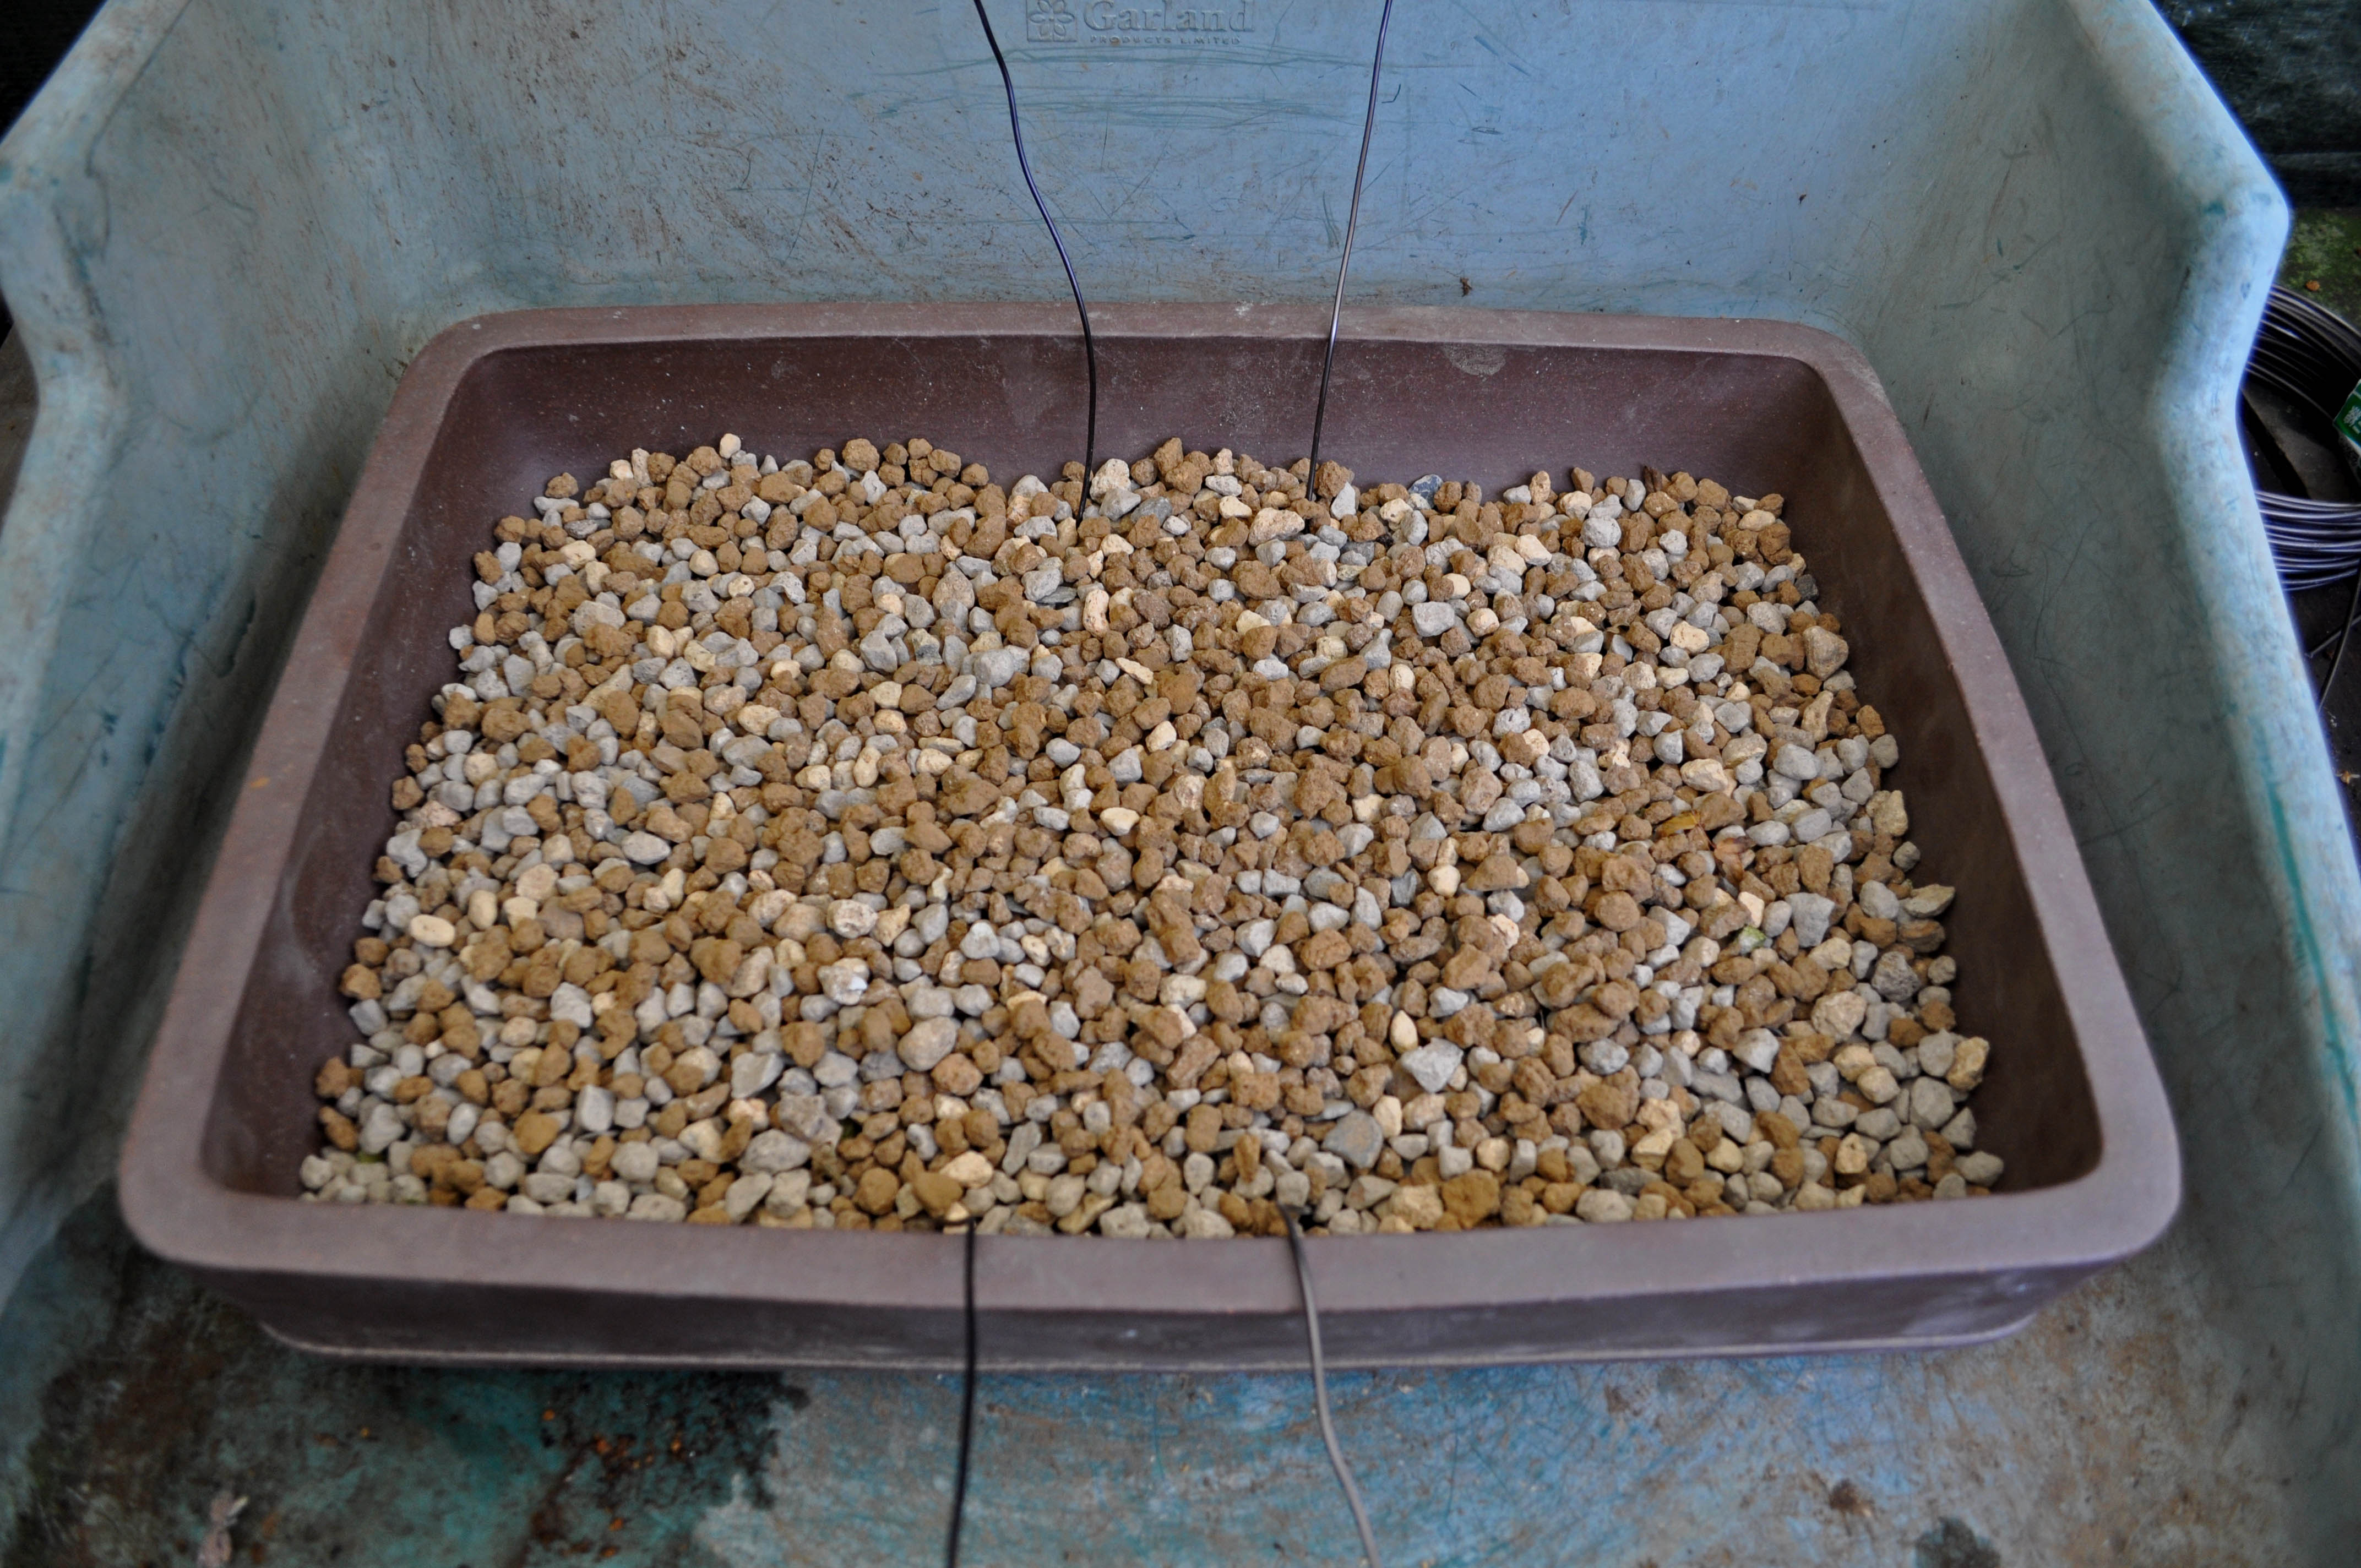
Below: First large particles mix applied.
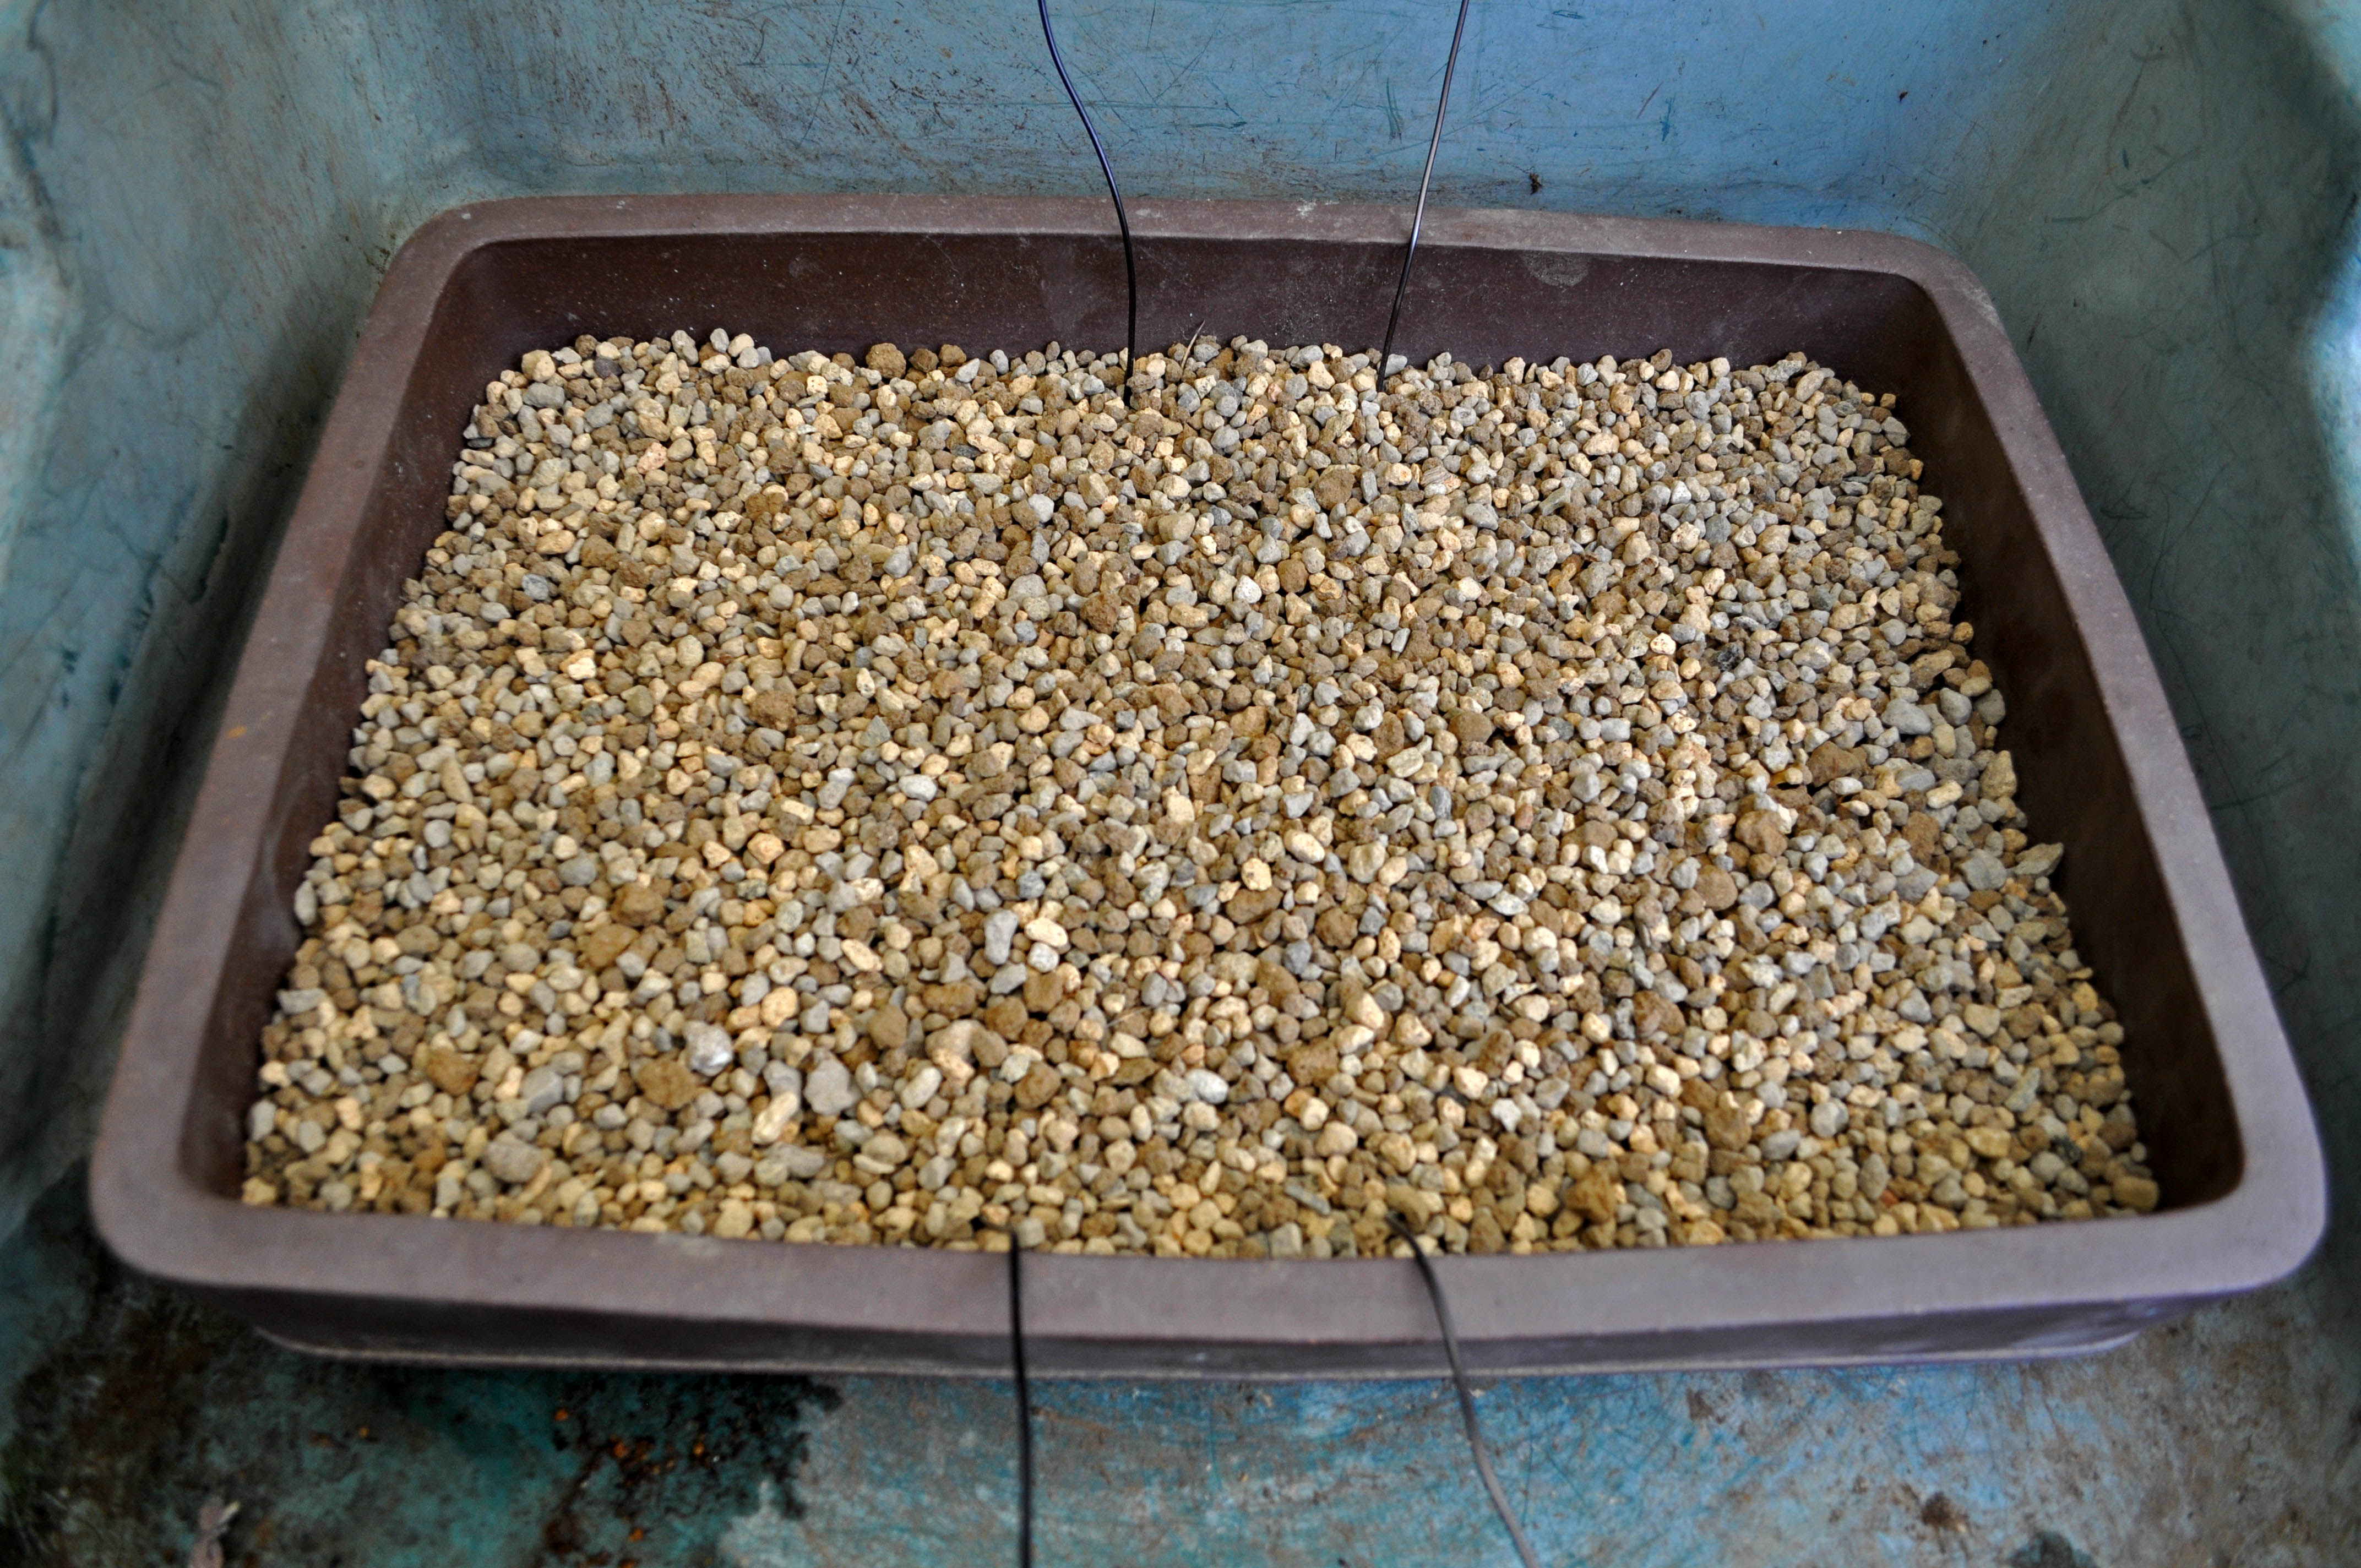
Below: Second finer soil layer applied.
Below: The Hawthorn freed off its old training pot.
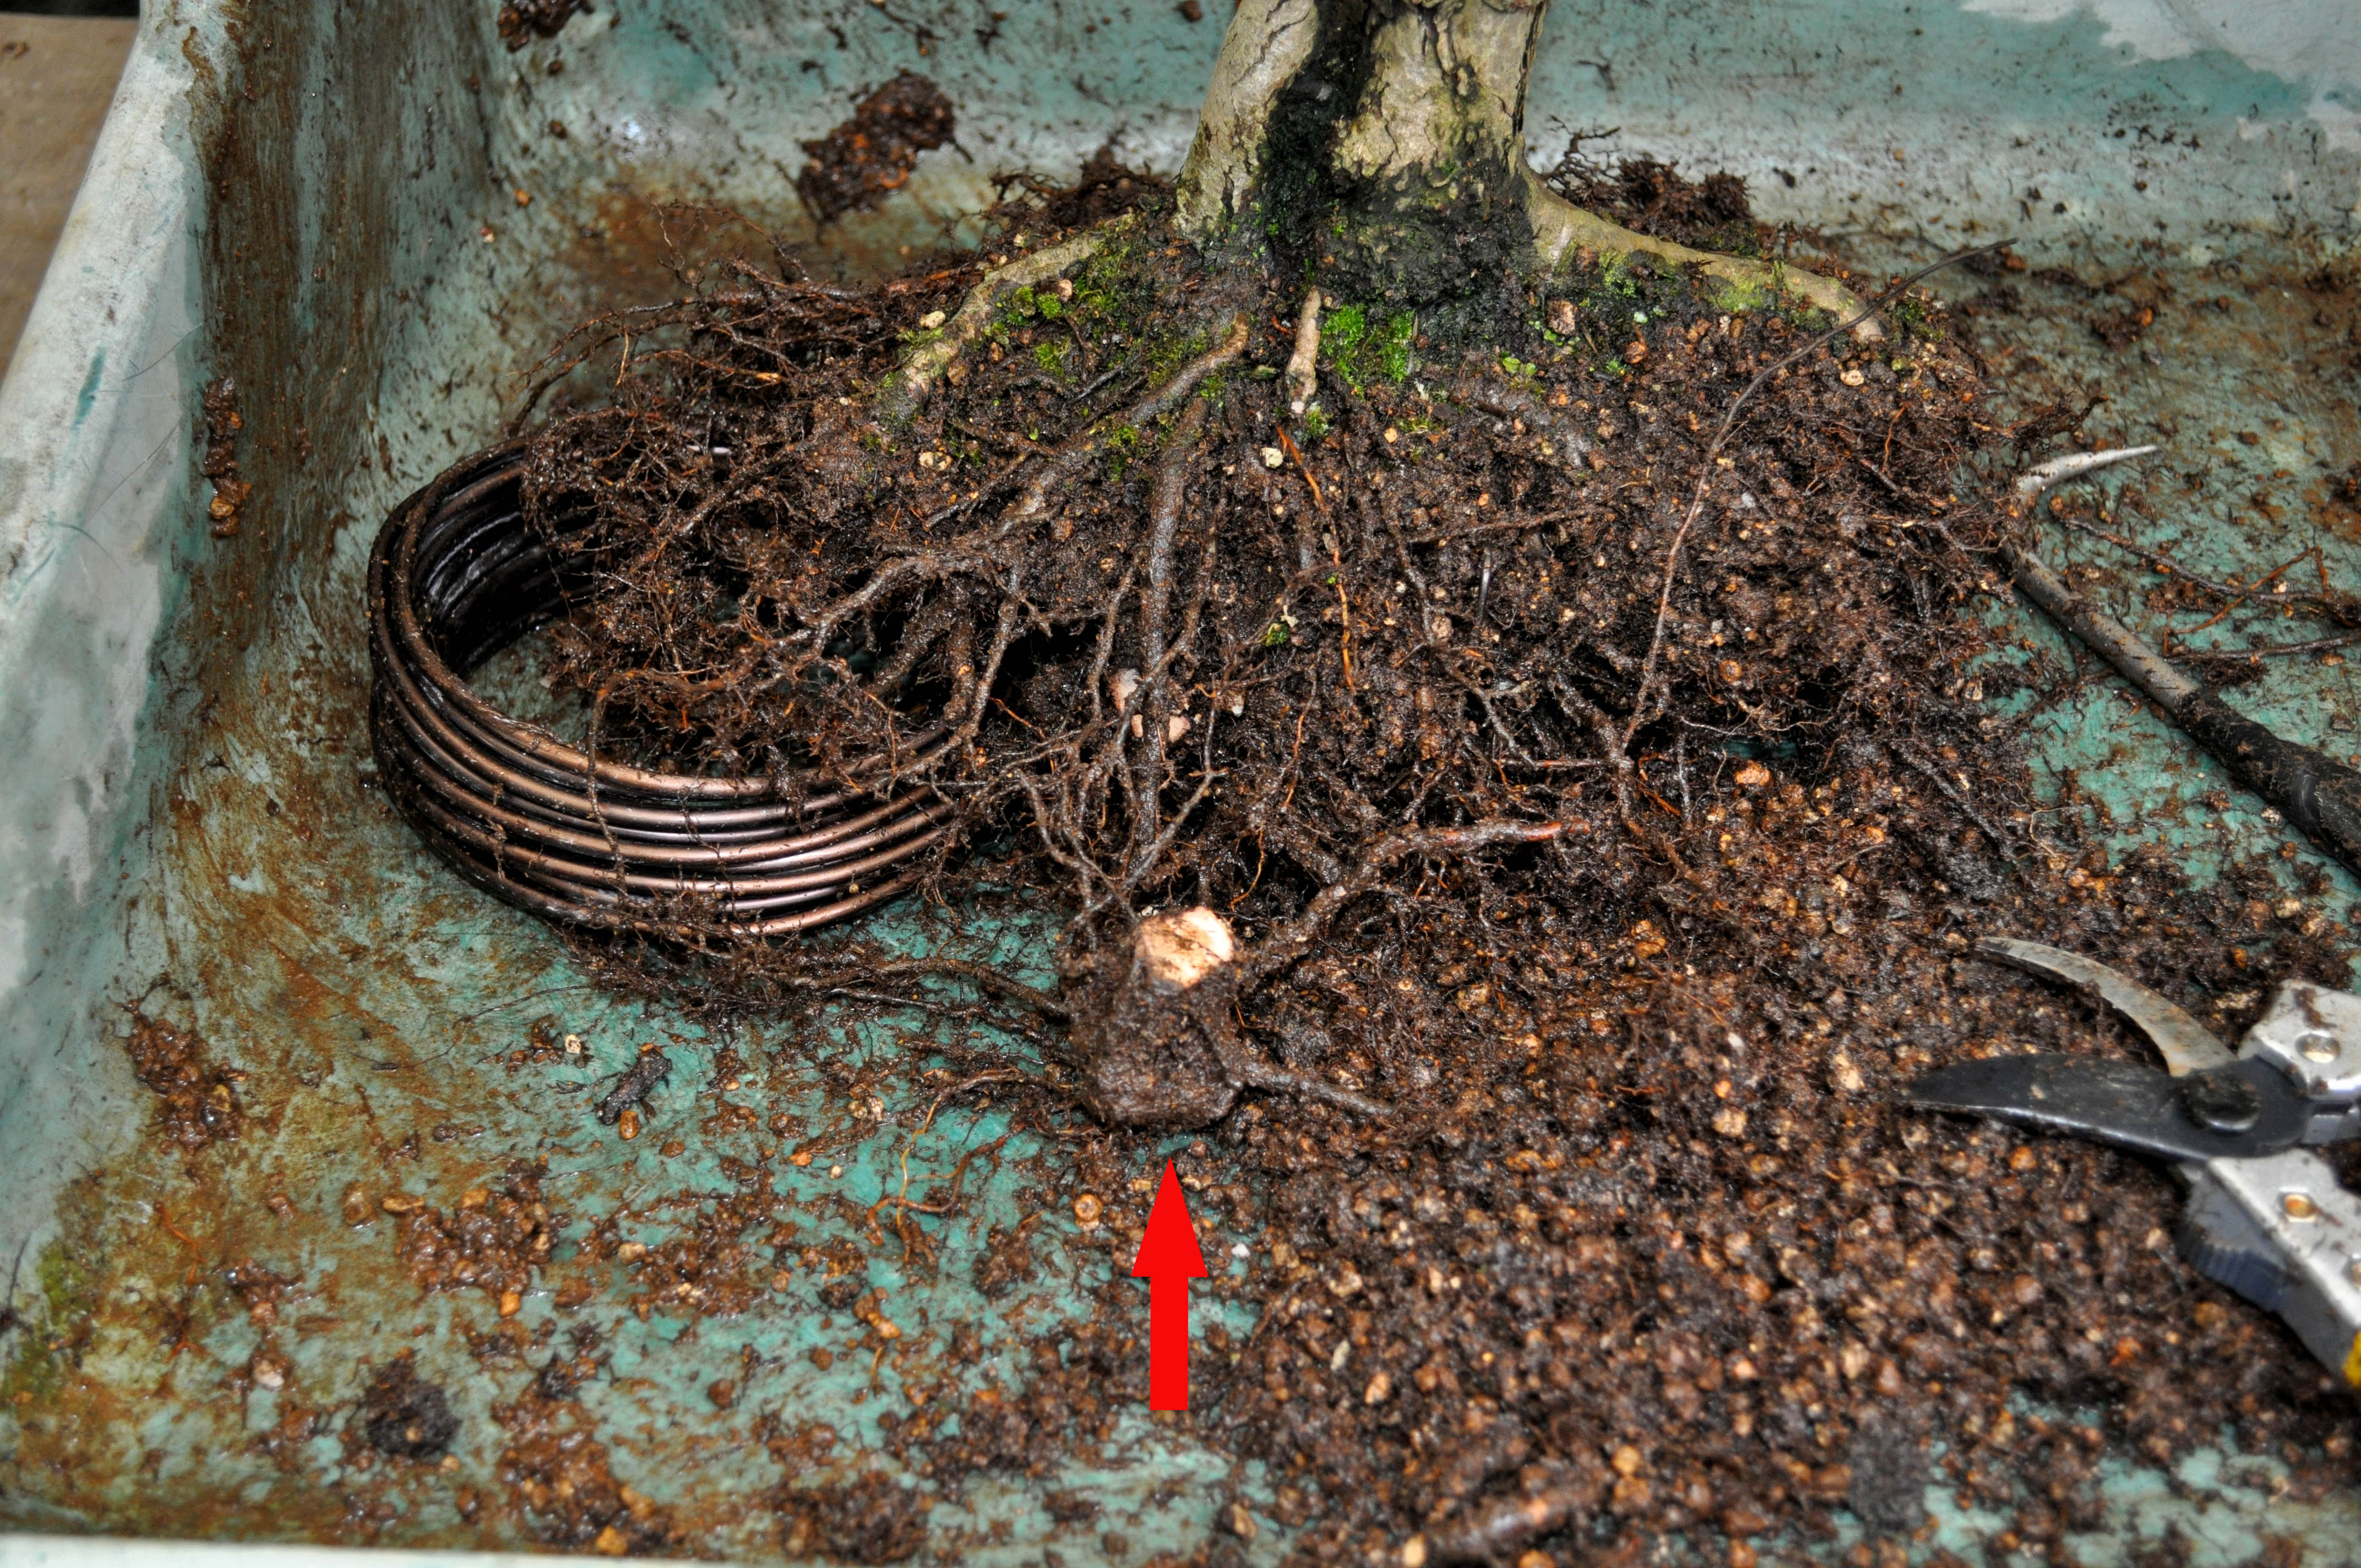
Below: The roots are freed from most of the old soil and the long roots are shortened right up to where finer roots grow from them! Red arrow points at a thick root that was preventing the tree from being potted lower in its new pot so it was removed!
Below: Downwards growing thick roots were also removed.
Below: Even larger ones were cut back to create a flatter root system (Nebari)!
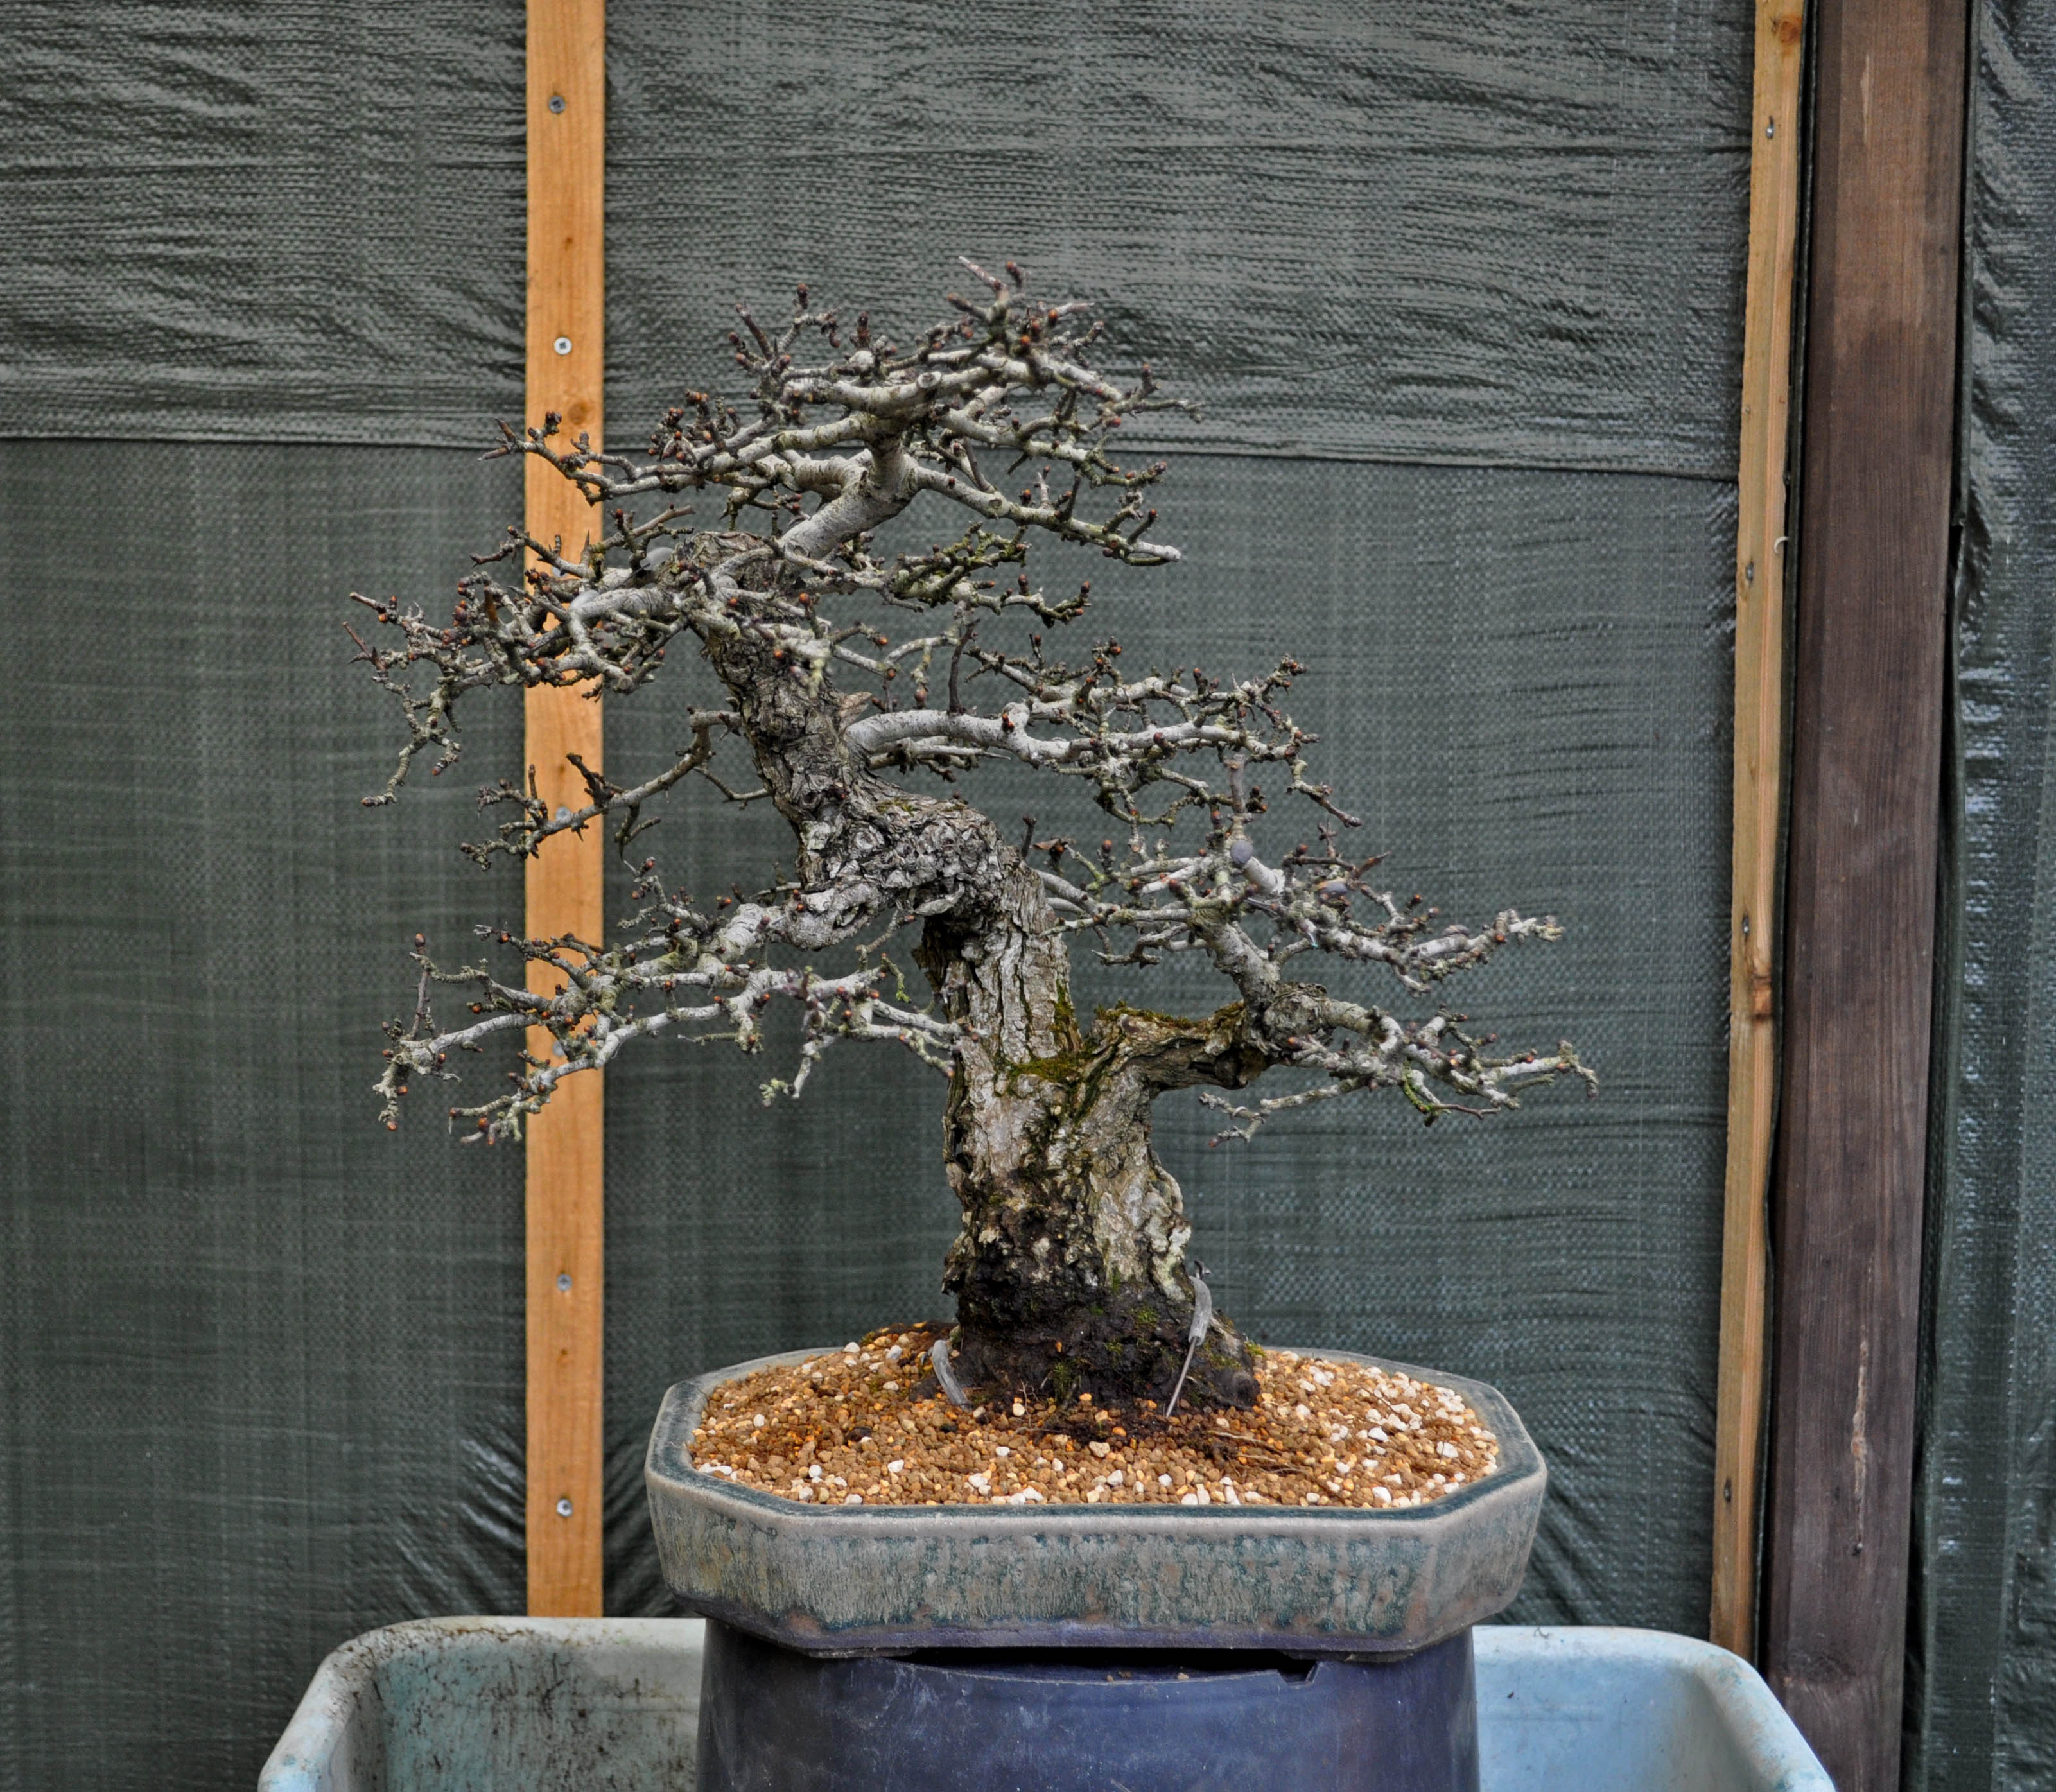
Below: The tree can now already stands on its own with its new flat roots base and that is just what I was aiming for the last 10 years or so!
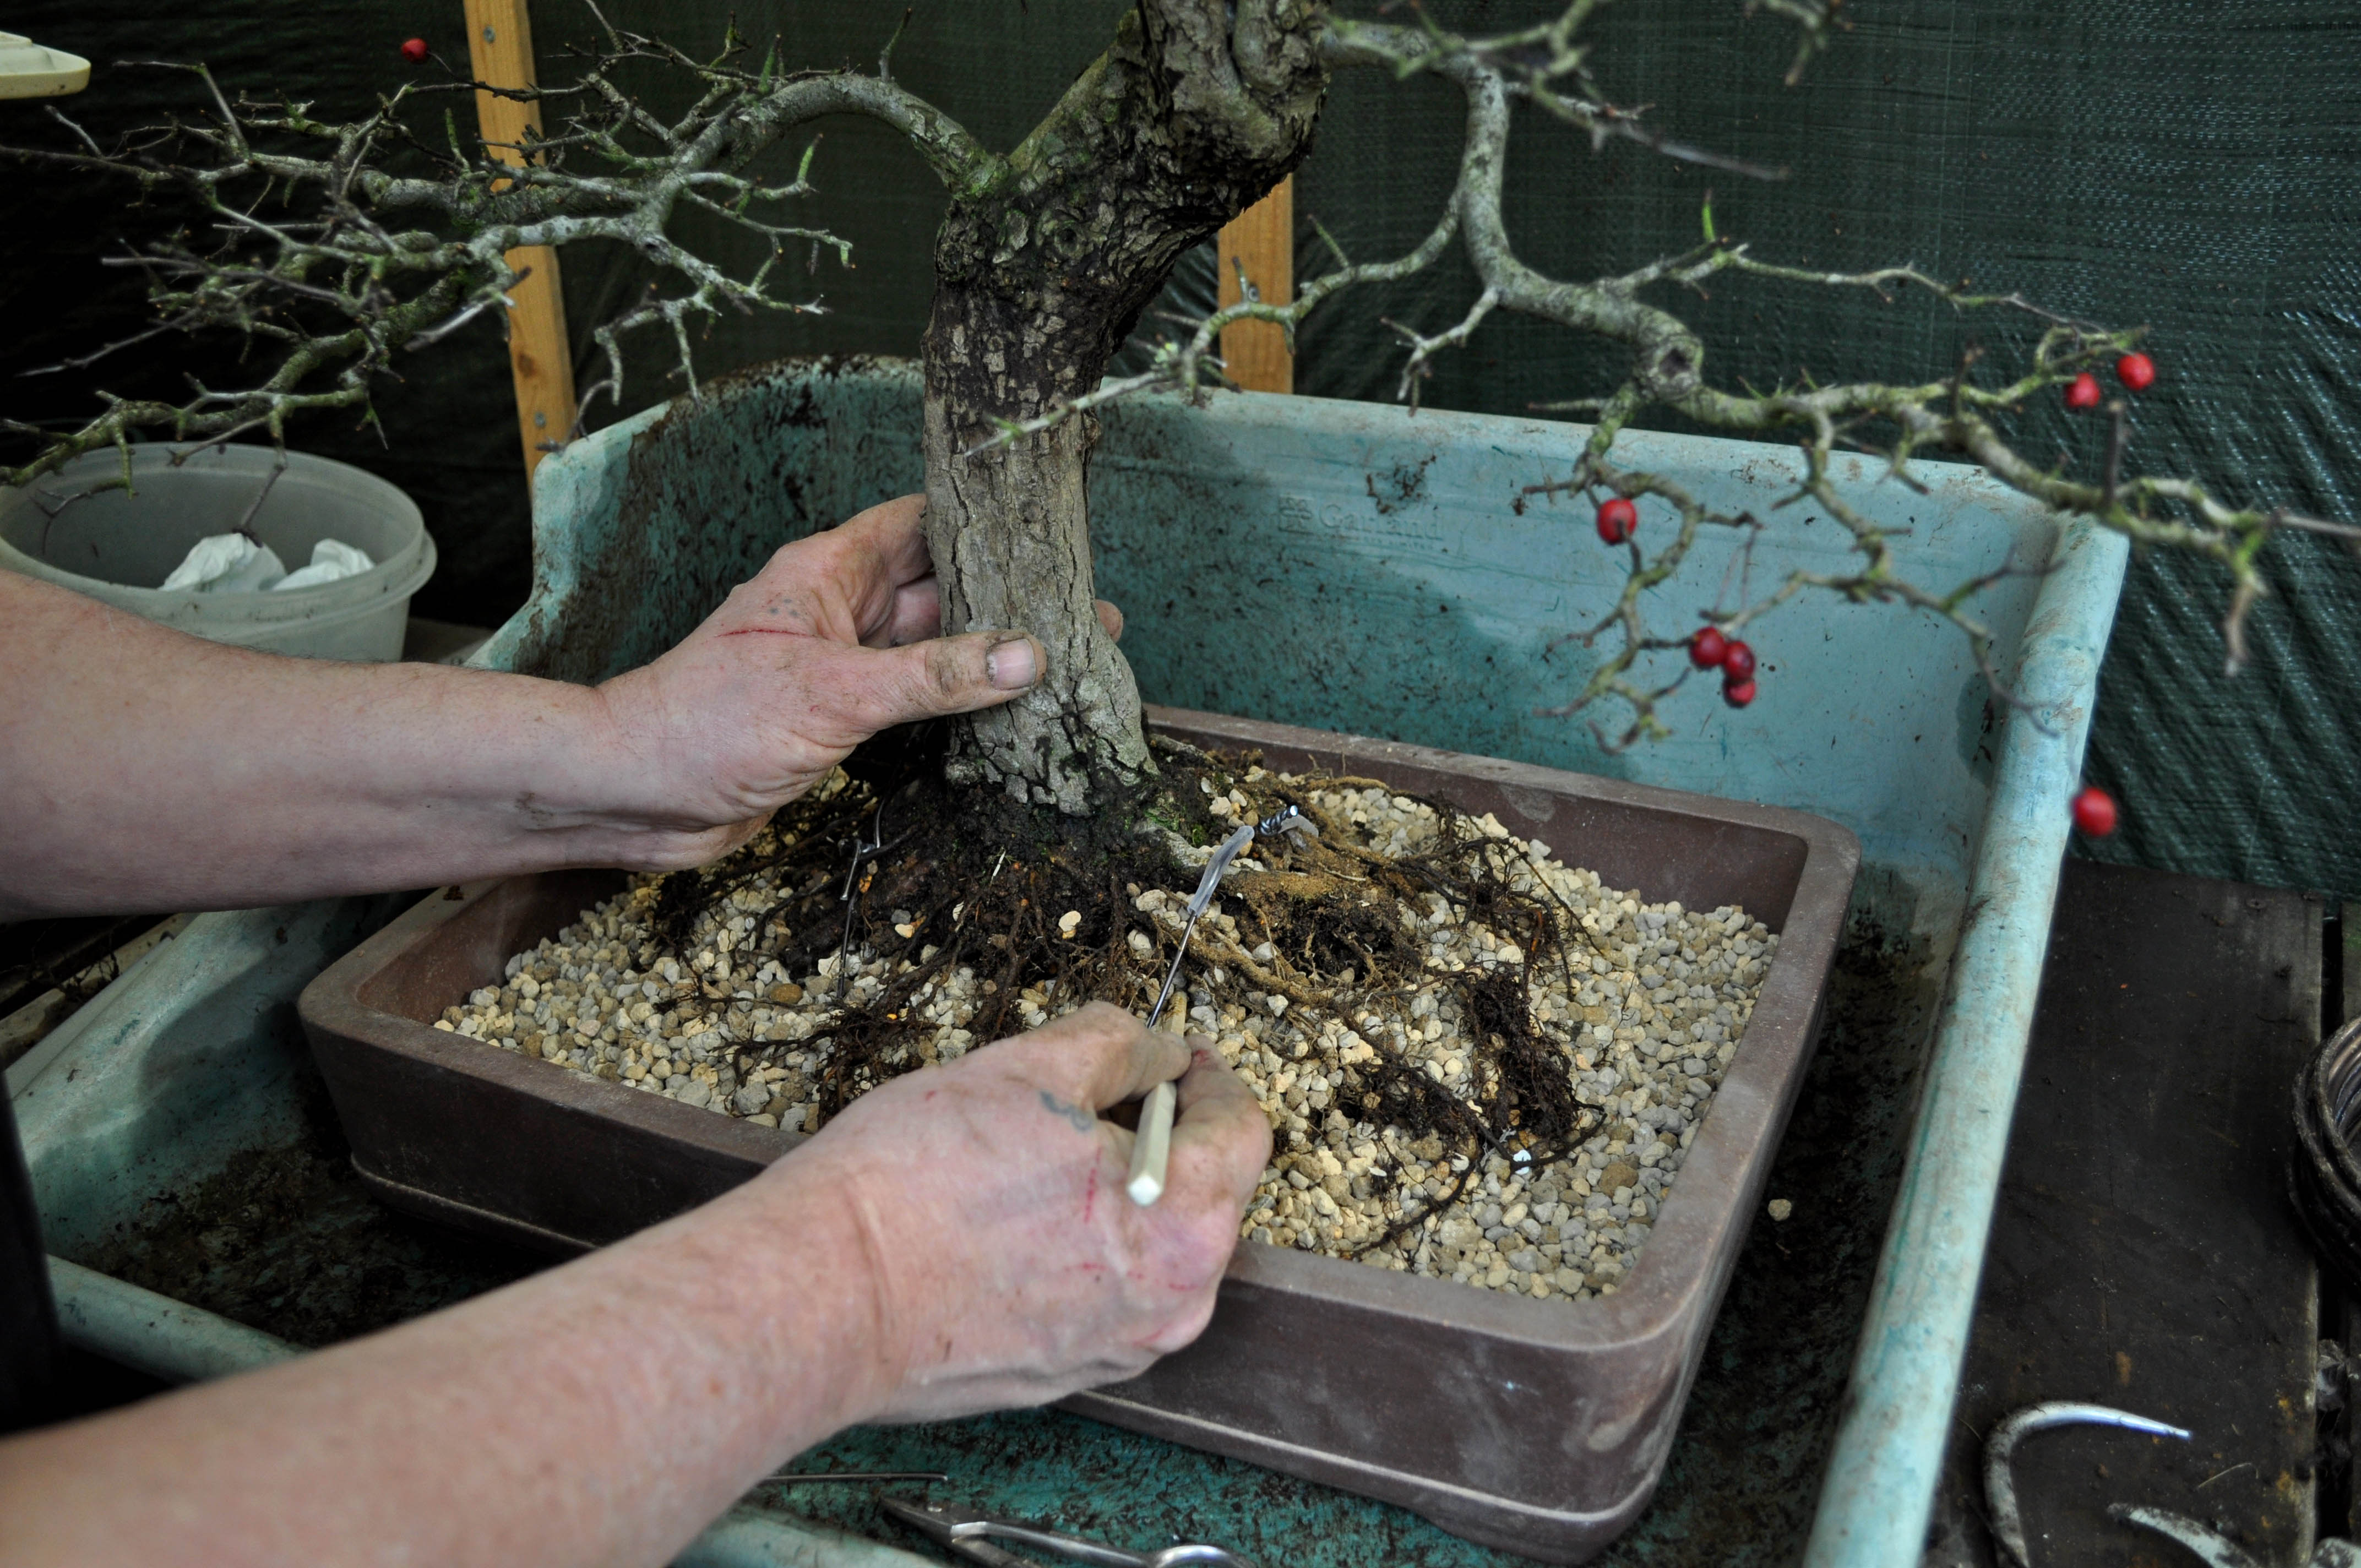
Below: With the help of a chopstick soil is brought carefully into the roots making sure no air pockets are left behind! Roots that pop up to high are pushed/held down with little upside-down U-shaped pieces of wire to hold them in place.
Below: The final top layer is carefully brought in and is then taped even more in with the palm of my hand so that the last cavities are filled with soil!
Below: Close-up of the root base. The tree is just thoroughly watered until the water that runs out is transparent and free of dust!
Below: The tree in his new home and I am happy with how it looks in it! The top will be shortened soon and then I will make some more pictures to share here on my blog.
I will post tomorrow the massive repotting of “XL” my big Yamadori Larch so watch this space! I hoped you liked this little post about a long-awaited repotting session?!
Hi everybody,A few days ago I brought my small Punica granatum indoors to give it its winter pruning and to wire the tiny branches where necessary. This little Bonsai is a Yamadori from France and is 27cm/10.7 Inch high and has been in my care for more than 20 years now. In all these years it has grown from being a small Shohin to its present size and has developed most of its branches new and an amazing Nebari for such a small Bonsai! I think it has a very natural and mature image for such a tinny tree and that’s why I want to show it to you all! The pot is by John Pitt (UK).
all my Bonsai luckily made it safely through yesterday’s uniquely heavy Western storm that took several lives and caused 90+ million in damages to houses and buildings and tipped over more than 70 trucks causing huge day-long traffic jams and paralysing almost all plane and train traffic for most of the day! These tragic things seem to happen more and more worldwide and more frequently… it almost looks like somebody is trying to tell us something ?! Anyhow… even though today (the day after) was a sunny day, I still decided to do the work that I planned indoors where there is EDM on the radio and a coffee machine close by! The first one I worked on was my old Prunus spinosa Yamadori Shohin from Wales. Too long branches were shortened or removed and some branches that were alright but misplaced were wired and repositioned. A long time ago this little tree was painstakingly styled by me as a Moyo-gi and was enjoyed in that style for several years… but I always felt that there was a better option hidden inside that style, but that meant that I had to completely restyle the tree and remove some of its major beautiful old branches! So I made a drawing (that I can’t find somehow) and came to the conclusion that it was well worth the risk to restyle it completely… so I did it! Now many years later it is growing better and better into that design that I envisioned all those years ago and I have not regretted that decision for a minute. The pot was given to me as a present when I was touring the US and was made by an obviously talented local potter…but I sadly can’t remember who it was and I can’t find it anywhere in my older posts?! Sorry for that!
Next, the little Hawthorn that I collected in November 2006 in Wales with Tony Tickle was brought inside for some correctional pruning and wiring!
Below: this is how it looked in February 2008 after I had removed all but a few branches from it, revealing its beautiful and uniquely tapered movement! In February 2016 it was proudly shown at the prestigious Noelanders trophy in Belgium.
Below: this is how she looks after the pruning and wiring session. All the badly placed and too thick branch tips were cut back to be replaced by a tinner one creating tapering in almost all the branches! And some branches were wired to reposition them in the desired position. It has grown so hard last two seasons that it has pushed itself out of this beautiful custom-made pot by John Pitt (UK) so it needs to be repotted in a few months’ time. This also means that there are now more than enough small roots to safely give me the chance to finally be able to remove a large stone from in between its old tick roots, creating more room to grow for the finner roots! And to pot the tree much deeper in its pot! On May 26, it will be shown at the second edition of the “KEI BONSAI KAI” ten and the ten “DANNY USE & FRIENDS in the famous “GINKGO” Bonsai centre in Laarne Belgium! It is the first time that it will be shown with its foliage so it has to look at its very best!
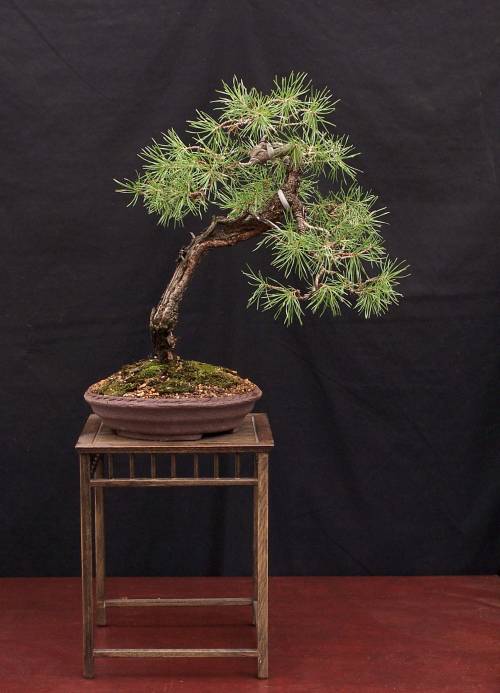
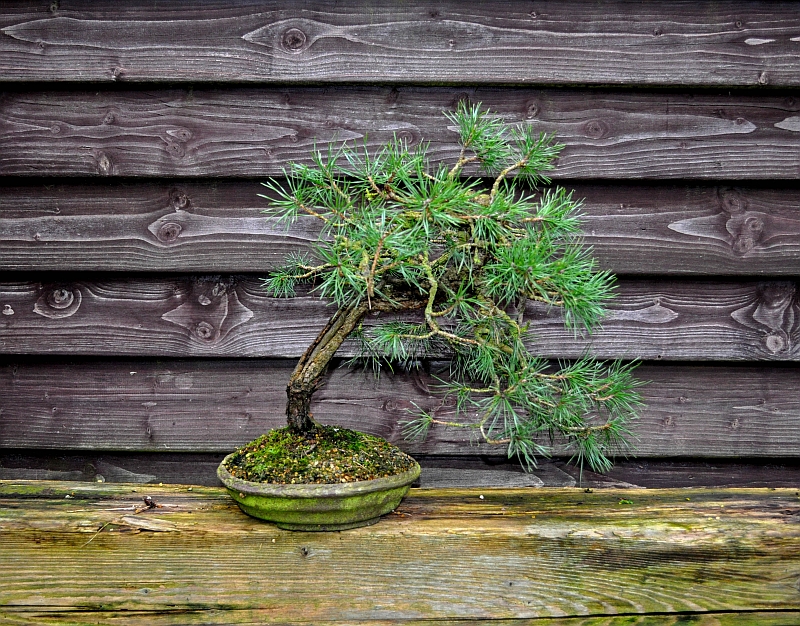
this is how this little “PEE PINE” that I found and collected In Austria in May 2004 looked after one of its first styling way back in April 2008. 35cm/14inch. It is named “PEE PINE” because it grew well hidden between the high grass and I almost accidentally peed on it during a walk through the mountains! 🙂
“PEE PINE”
Below: This was taken in Spring 2009 in its new Tokoname pot.
And yesterday still in that same pot, while rain, hail and a storm were torturing my garden, I took her indoors for yet another restyling. She now measures 41 cm/16 Inches and has matured a lot! Below:
Below: before the work started.
Below: left side view after wiring and styling.
Below: right side view.
Below: backside view.
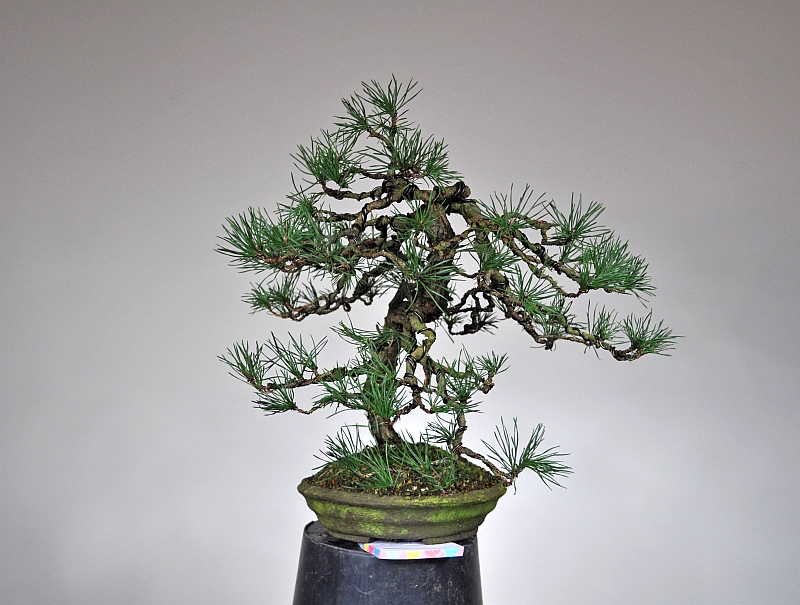
Below: and the finished front side view. I am really happy with just how mature this tinny Pine looks right now! If it is not yet sold next Spring, it will be repotted as soon as the buds start to swell back into the same pot. But a little bit more tilted to the left! And as soon as the weather clears I will clean the Shari section and Jin’s and treat them with lime sulfur.
“THE FIRST STYLING OF DIEDERICK HIS PINUS SYLVESTRIS YAMADORI” on YouTube! This is the story of the two fun sessions that we did to style this tall and unique Yamadori that I collected some 5 years ago. My friend and student Diederick and his wife fall in love with this tree when they visited my garden for the first time and they were happy to buy it from me and we then made an appointment to style it together at his place and film it all! This Yamadori is a tall formal upright uniquely shaped Pine with a long first branch that somewhere in its distant past was almost completely broken off by either snow or falling rocks! Somehow this almost fatally cracked branch stayed alive and healthy over with a beautiful Shari and was now all those years later the reason why I fell in love with it that day on that mountain…I just had to save this old guardian from falling into the closing dept just in front of him! It might be a bit controversial as a Bonsai, but we both really loved the story this tree had to tell because of this branch and would not thick off removing it! Thanks to Diederick and his lovely wife for their trust and for taking good care of me and the “Guardian”. I hope you all enjoy this little story of this pre-Bonsai?!


 Below: then watering it like before. In the next couple of weeks, the trees will be kept in a warm spot with filtered sunlight and their foliage will be misted a couple of times a day to help them safely through this period