PICTURES OF MY “LILAC” AND “HAWTHORN” IN BLOOM.

Hi, everybody,

today was another amazingly Sunny day! So I took advantage of all that light and made some pictures of two of my bonsai in bloom.

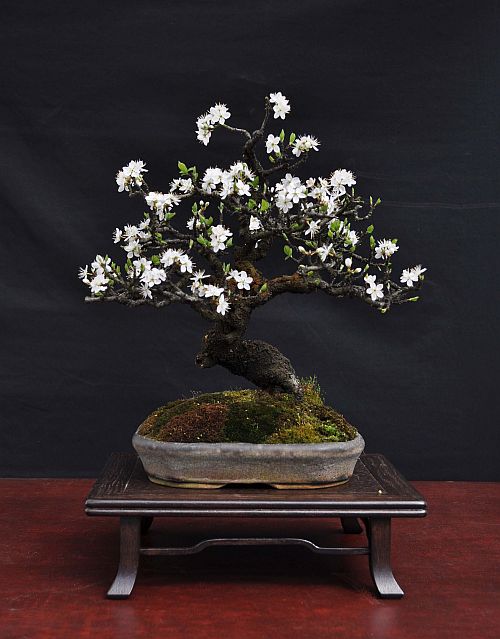
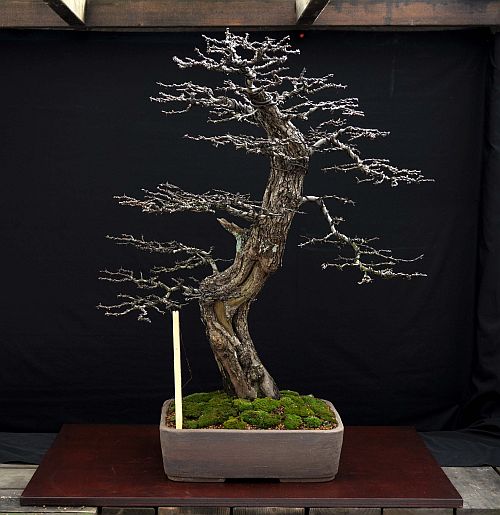
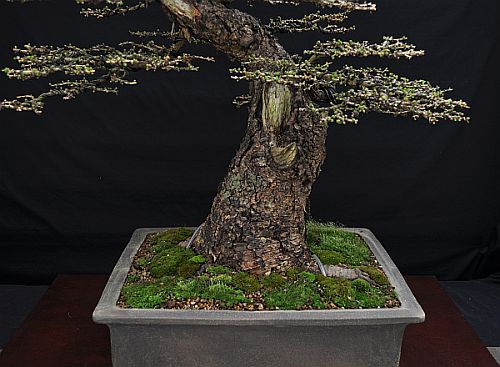
The first one, a syringa microphylla “suberba”  is an urban yamadori that I bought in September 2009 from my friend Teunis Jan Klein. LINK:  http://hans-van-meer.ofbonsai.org/2009/09/05/my-visit-to-bonsai-studio-deshima/  So it’s is in training for just a couple of seasons now, but even so, I think it is special already! Its trunk and roots are all gnarly and there is deadwood everywhere. There is even a see-through in the middle of the trunk! Its Winter image reminded me of the spooky trees that play their role in many fairytales and in many of the fantasy novels that I read. But then Spring arrived and the brightly fresh foliage started to grow and open up ever so slowly, softening the roughness of the battered trunk. And then three weeks ago, I saw the first signs of flower buds, and now those buds have grown into beautiful pink and white sweat-smelling towers of flowers! The contrast between the trunk and these flowers could not be greater! Beauty and ugliness go hand in hand!

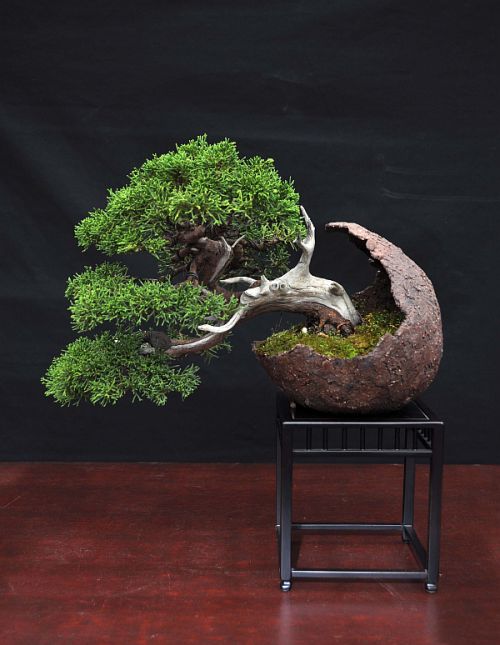
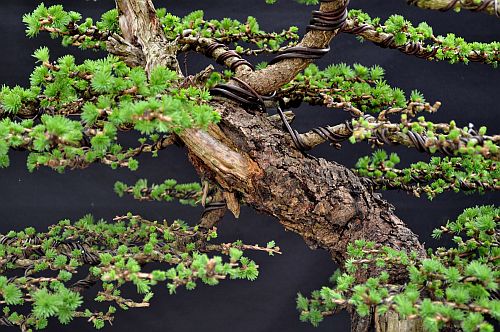
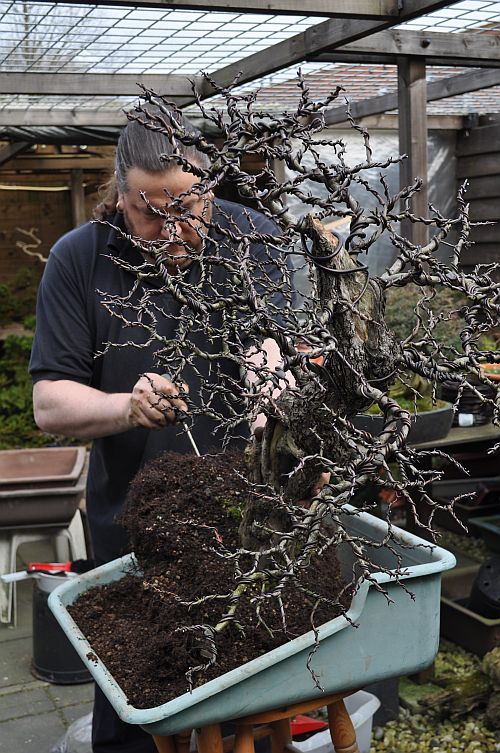
Above: I have just started to build the new foliage pads and they need a lot more work in the next couple of years! But I do like the image already!

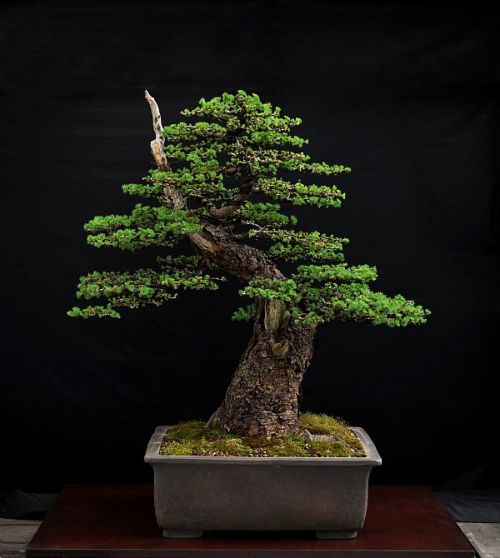
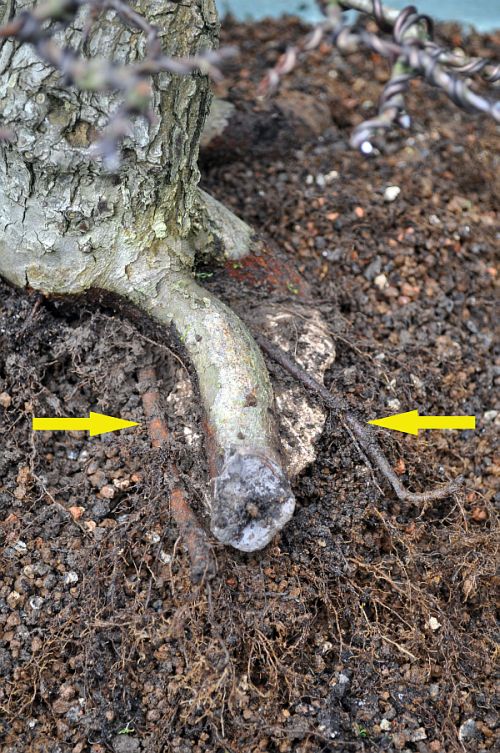
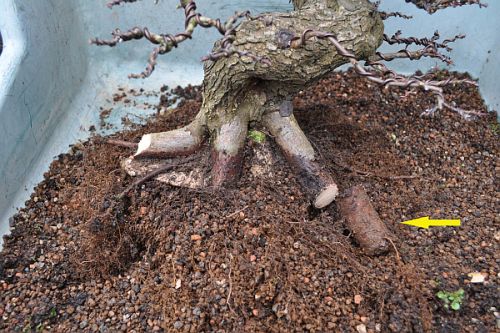
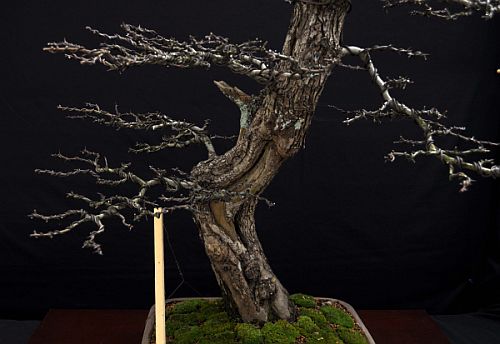
Above: Close-up of the old trunk, which looks like a half-buried head in this picture, and the snake-like roots. And although the flowers are completely out of proportion, it still has its charms. It shows us complete opposites living together!

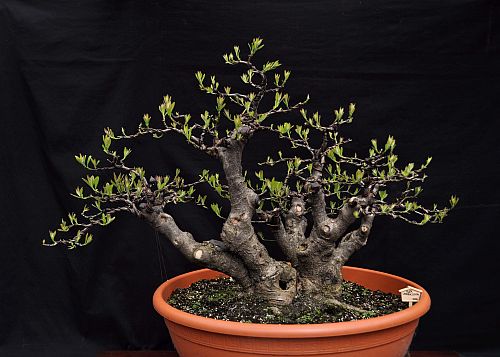
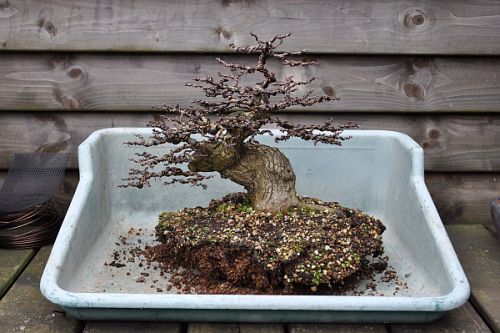
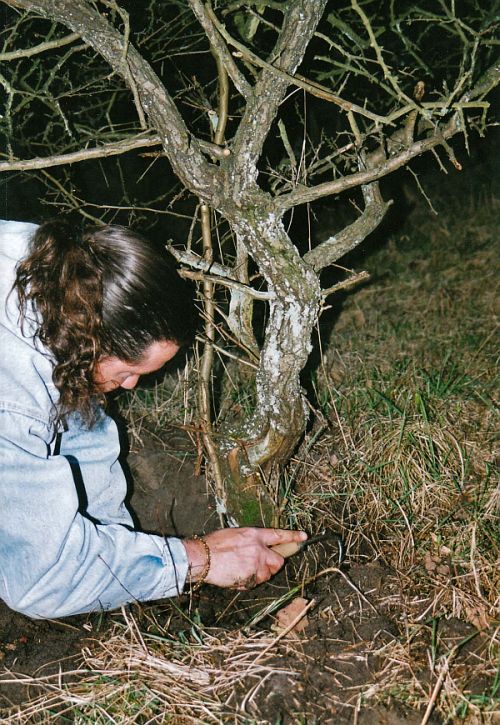
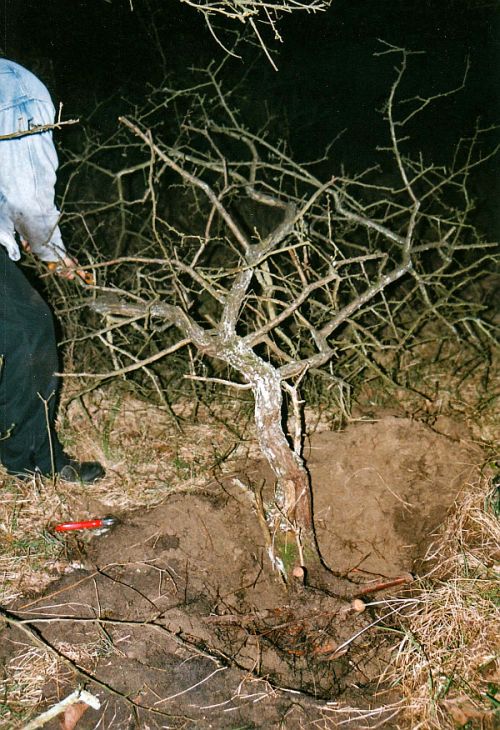
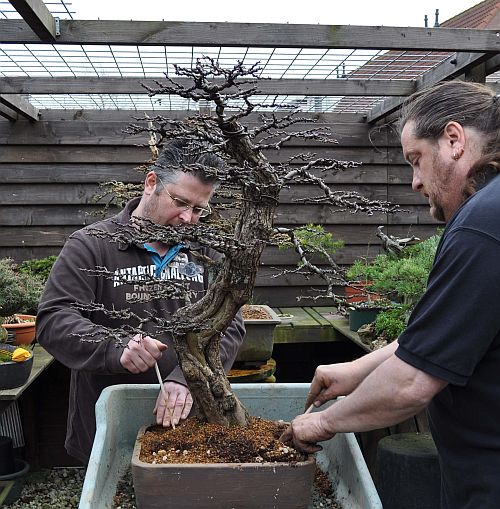
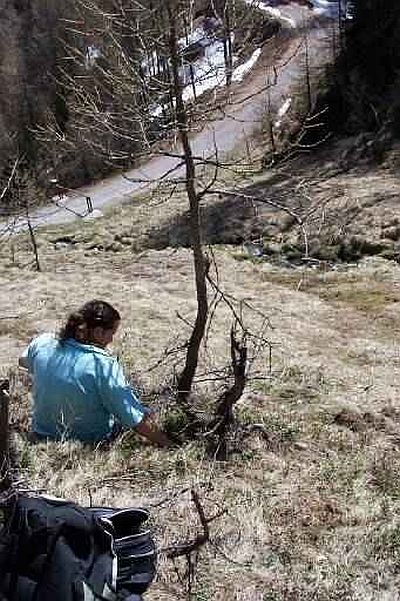
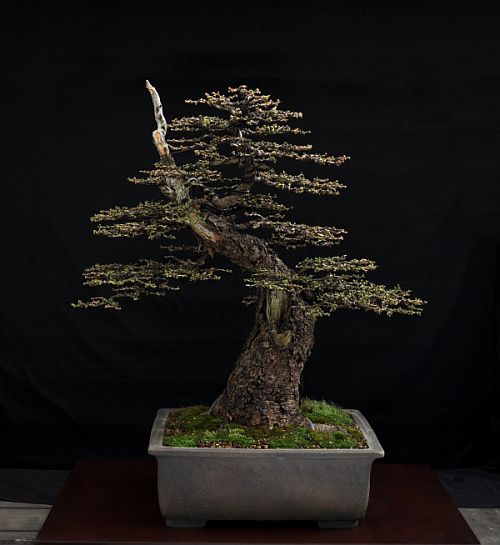
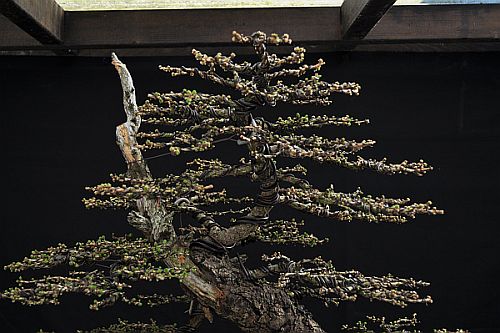
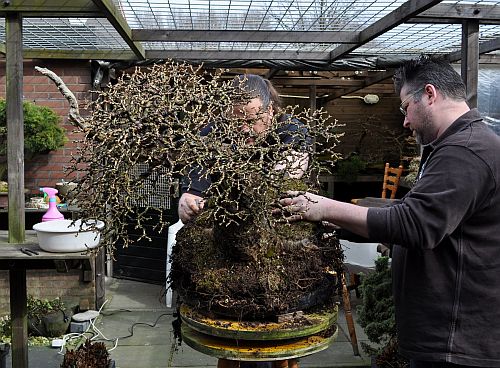
Below: This Hawthorn was collected by me during a collecting trip in Wales together with my good friend Tony Tickle in February 1999. LINK: http://www.karamotto.org/index.php?page=14

In 2005 it was shown at “Joy of Bonsai” in Bath [UK] and in September 2006 it was shown at the prestigious “Ginkgo Awards” in Belgium. So you can see that we go back a long time! I am pleased that he made some flowers for us this year. Last year there was non!

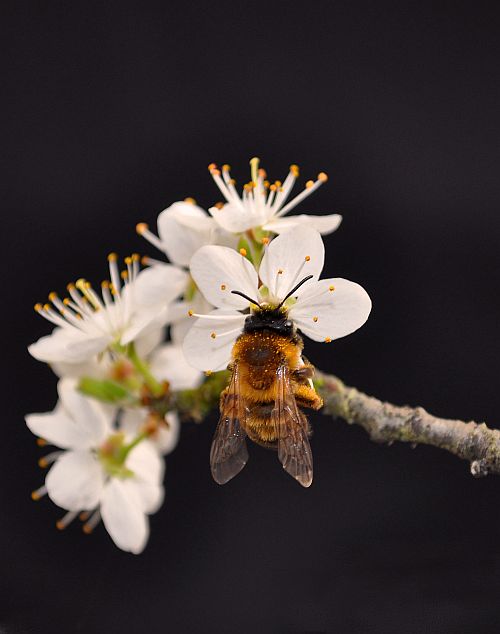
                            Below: Close up of those lovely fragile flowers.

I hope you enjoyed this little tribute to Spring?

Cheers,

Hans van Meer.

Info: karamottobonsai@hotmail.com

———————————————————————————————

SOME FUN IN THE SUN!!

Hi, everybody,

the last few days were really sunny over here, so I thought it would be a great opportunity to do some fun work while taking in some rays. Over the last 4 or 5 years, I have been taking cuttings from several Itoigawa plants. These plants themselves were raised from cuttings that I took from 3 small four-year-old itoigawa plants that I bought over a decade ago from Danny User. I bought them because I wanted to craft them onto a Juniper that was very promising but with the wrong kind of foliage. I used one for this purpose and sadly it failed.  Four years later after a very hot summer, it started to lose its strength and it died shortly after. The other two itoigawa I used to make tanuki from. I had some beautiful pieces of deadwood that would be just perfect. From these (now) Tanuki I took cuttings and two air-layered (new) plants. Since then I planted every little branch that I cut off, with some rooting powder in a small plastic pot.  Or I would simply stick the small cutting into the soil surrounding one of my yamadori or pre-bonsai. Many of my larger plastic pots hold a big recovering tree that is surrounded by small cuttings! 🙂 It is surprising to see just how many of these impulse cuttings survive! So by now, I was left with over 40 of these 2 to 4-year-old cuttings that needed repotting and some first styling. I freestyled them in all kinds of interesting shapes, but keeping their future image in mind! It was great fun to do and I am so curious just how these little cuttings eventually will look in 10 or 15-year time? And all this future fun from 2 small plants bought over a decade ago! Bonsai fun doesn’t have to cost a lot! 🙂

Below: Most of the repotted and wired Itoigawa in one shot!

           Below: One of the many pre pre pre Bonsai!

Below: This is one of the Tanuki that I started all those years ago. From this tree, many cuttings and two air layers were made! Here you can see the result of the first real styling of the branches and a freshly made air layer on one of the thicker branches that otherwise would be just cut off and thrown away!

It was great fun styling these baby Bonsai!  Inlets say 10 years’ time  I will show you how they look, I can’t wait!  🙂

Below: This is a picture of my Ilex verbicilata urban yamadori. I bought it in 2009 and I think it is coming along nicely!

Cheers,

Hans van Meer.

Info: karamottobonsai@hotmail.com

—————————————————————————————–

MY SHOHIN ITOIGAWA IN IT’S NEW POT!

Hi everybody,

Last week I repotted my shohin Itoigawa into its new moon shape pot. As you can see in the first picture, it had seriously outgrown its old pot during the last 15 years that it has been in my collection. I had to wire it to this table to prevent it from falling forward! I first brushed the bark clean and applied fresh lime sulfur to the deadwood. Then the tree was rewired and restyled.


Below: The tree in it’s new pot.

When the tree has settled into it’s new pot I will start refining the foliage. But for now it is left alone to recover.

Hope you like this new combo?!

Cheers,

Hans van Meer.

—————————————————————————————–

PICTURES OF MY BLACKTORN’S IN BLOOM.

Hi, everybody,

here are two pictures I made today of my Blackthorns in full bloom. The lighting was not ideal, but I still hope you can enjoy the beauty of their fragile blossom that contrasts the black rough bark so much that they almost jump out towards you! So sweat!

Above: This little Blackthorn was a present from my old Bonsai friend Tony Tickle when he came over to stay with me, now more than a decade ago! The amazing pot is by another friend of my Potter and Bonsai artist John Pitt (UK).

Above: Many years ago I got this little Blackthorn as a gift from Terry Foster another dear Bonsai friend of mine. The odd thin section, just under the top, is actually created by the tree corkscrewing itself twice around there. After many years the deadwood that was created because of this weathered away, leaving that thin-looking section. But it looks better in real life than in this picture! 🙂 I repotted it two weeks ago into this gorgeous pot by Slovenia.

Hope you like the pictures?!

Cheers,

Hans van Meer.

Info: karamottobonsai@hotmail.com

 ————————————————————————

LAST WEEK WAS A BUSSY ONE!

Hi, everybody,

last week was a busy one for me, Bonsai wise that is! I repotted a handful of trees, among them, were two of my Shohin that after some ten years had grown out of their small pot. So they moved up a few pot sizes and had a chance of pot style as well. Then last Thursday I gave my second Masterclass in Leersum (The Netherlands). This time the topic was Larch, so that went nicely with all the Larch work that I have done lately! It was a great evening and I was surprised about the quality of the Larches that the students brought along for me to discuss. So that evening went by in a flash, and before I knew it, I found myself back in my car, very tired and with a long drive ahead of me. And then last Sunday I gave a full-day workshop at the Bonsai Club Rijmond (The Netherlands). This is a local club full of Bonsai enthusiasts that I know for more than a decade now, so it always feels like coming home when I work there! We had a great day of Bonsai work and this day also was over in a flash! I was really tired after this week of real Bonsai work, but it was good to get out of the house again to spend some quality time with my Bonsai friends!

I don’t have any pictures (yet), but I will post them when someone will send me some! 🙂

Here is a picture that I made today, while I was shooting my flowering Blackthorns. Summer is near! 🙂

I will post pictures of my repotted trees as soon as I made some decent ones!

Cheers,

Hans van Meer.

Info: karamottobonsai@hotmail.com

———————————————————————————

PICTURES OF MY BRIGHTLY GREEN LARCH (XL).

Hi, everybody,

yesterday I made some pictures of my Larch that I would like to share with you! Its bright green and still short new growth makes it all look so much more in proportion. That’s why I love Larch as bonsai, it possesses the Winter image of a deciduous tree and the Summer image of an evergreen! Their winter image allows us to admire the fine ramification on the bare branches and see all the work that went into creating that! I can’t wait to see how “XL” will look after this growing season, with all those new small branches to fill out its Winter silhouette even more.

                                                Above: Close-up of the base.

                  Above: Close up from where the deadwood top section starts. 

Cheers,

Hans van Meer.

Info: karamottobonsai@hotmail.com

————————————————————————————-

PICTURES OF MY SMALL HAWTHORN IN IT’S NEW POT.

Hi, everybody,

two weeks ago I repotted my small Hawthorn and I wanted to show you some pictures I shot that day. Unfortunately, it was too big a risk to plant the Hawthorn into the planned Dan Barton pot, it was just too shallow to house the root mass that is clinging onto a large stone. So I planted it in a temporary and a bit oversized pot. Next repotting I might be able to remove that rock and then I plant it in Dan’s pot!

Below: The small Hawthorn released from its ugly plastic container.


Below: A small detail I did not expect or had forgotten about! A rock holds firmly by thick roots. Those two roots (yellow arrows) might be useful in the future to replace that thick root. For now, the thick root will be shortened.

Below: The thick root is shortened. (Yellow arrow) The second thick root holding one to the root is not cut back, for now, there were just too many small roots growing from it. Next repotting time, when more fine roots have grown from the top thick roots it will be removed and then the stone might be removed as well!


            Below: On the backside of the tree another thick root is shortened.

                                        Below:  And another one is removed!

Below: After all is done, the tree gets a well-deserved shower, that removes all the dust and small particles from the soil.

Below: This picture was made a few days later. I know that the tree needs a lot more work and that the top section needs to thicken and fill out more, But I do feel it is heading in the right direction. I love to work on Hawthorns!

Hope you like where this little Hawthorn is going?! I will keep you posted on its future developments.

Cheers,

Hans van Meer.

Info: karamottobonsai@hotmail.com

======================================================

PICTURES OF MY DUTCH HAWTHORN YAMADORI IN IT’S NEW POT.

Hi, everybody,

as promised, I would like to share some pictures of the repotting of my “DUTCH” Hawthorn yamadori. I collected it way back in ( will find out tomorrow)  in a dune forest close to the sea and not too far from where I live. It took me three seasons to downsize it to the height I wanted and all but a few branches were removed. So I created a blank canvas and basically had to hope for new buds to appear in just the right places to create the new branches with.

Now after all these years of working on the ramification, the tree is heading in the right direction. It will take another 4 to 5 years of growth and wiring to fill out the desired image, but the basic branch structure to work from is there already.

I hope you like this little story of this Hawthorn, the rest you can find soon on my website!

                                              Above: Collecting the tree.

Above: The tree is freed from the sandy soil, and now I am cutting the tree down to a more liftable size!

Above: A year later, The yellow arrow shows where I want my future apex to grow from.

Above: All the unwanted branches are removed or shortened. Only one original branch remains on the left middle side of the trunk!

Above: A few days ago. The larger roots were shortened. This is done with every repotting until the roots are in proportion with the base of the tree.

                                   Above: Carefully remove the old soil.

Above: My student Ed van der Reek is helping me to carefully work the fresh soil in between the roots.

Above: I am pleased with how this tree is progressing. There is still a lot of growing and work to be done, but it already looks promising.

Above: Close-up of the natural deadwood. This tree has come far in just a short time and I can’t wait to see how it looks in 5 years?! I love this hobby! 🙂

I hope you like where this pre-bonsai is going?!

Cheers,
Hans van Meer.

Info: karamottobonsai@hotmail.com

———————————————————————————————

—————————————————————————————————

PICTURES OF “XL” MY LARCH IN IT’S NEW POT.

Hi, everybody,

well, it took a few days, but yesterday was finally the sunny day that I was waiting for to make some decent pictures of my Larch (XL) in its new pot! So with the help of a few light-reflecting pieces of white hardboard, to illuminate the tree, I managed to make some good enough shots to show to you all! 🙂

I think he looks great in this Brian Allbright pot! It gives the tree stature and both an elegant and powerful image! This next growing season is spent keeping the new growth under control!  Where I need some more branches, I will let the new shoots grow until it has the length that I need. But the number one thing that I am after, is lots and lots of upwards growing thin short branches to fill out the winter silhouette of this majestic tree! This should be the final step towards showing XL at next year’s “Noelanders Trophy”!

I hope that XL is happy in his new home and will grow strong so that I can show and share him with you all for the very first time!

                                   Below: Collecting XL in Austria May 2004.

                                                      Below: February 2006.

                             Below: XL has gone a long way in a short time

Above: The pot is still a bit dirty from the akadama dust, but I was not able to clean the rough texture any better in this spot! And carrying this tree around is not a wise thing to do with that back of mine! 🙂

Above: Close-up of the area where this tree, in my fantasy, in the past was hit by lightning and lost its old top! From that spot, as in nature, lots of new branches emerged. And the strongest top branch grew out to be the new top! Still looks relatively young, but the texture of the bark on these new branches ages rapidly. Becoming more and more believable every year!

I hope you like the new look of  XL ?! And I will keep you all posted on his progress through this new growing season!

I will post some more repotting stories here tomorrow!

Cheers,

Hans van Meer.

Info: karamottobonsai@hotmail.com

————————————————————————————————-

REPOTTING MY LARCH “XL”.

Hi, everybody,

2 days ago, the weather forecast predicted that last Sunday would be a day full of rain. But when I woke up that morning, it was lovely weather! So I immediately phoned my friend/student Ed van der Reek and asked if he could help me to repot my old Larch named “XL”. He made it to my house in just under half an hour! This repotting was I bit of a gamble for me, pot size wise that is. I collected this massive old tree with a large compact rootball, that way the tree has a greater chance of survival and it recovered just fine! But there is one problem with this technique and that is that you don’t know what is hidden in that rootball. It could be filled with large roots! So you can imagine that selecting a proper-sized pot was a bit of a gamble. Well, the rootball proved to be OK and not too many large roots had to be removed to fit “XL” in the smallest and best-suited one of the 3 pots that I had selected! This is a beautiful pot made by my good friend Brian Allbright. Here are some impressions of that wonderful and exciting repotting.

Above: Backside of the tree. Removing the plastic container with a power saw. This way the rootball will stay intact.

Above: Now that the rim of the container is removed, we carefully start to work our way inward.

                             Above: This root was a bit bigger than I thought!

Above: Almost all the old mountain soil was removed. And a lot of rocks as well!

Above: Birdseye view of “XL”. I am really happy with the way its ramification looks! Next year, I plan to show “XL” for the very first time and by then its ramification will look even better with this coming season’s new finer growth added to these almost fixed branches.

Ed and I had a lovely and exciting Bonsai day! At the end of the day I was really tired, but it was good to do some serious work again! I hope that “XL” will do well in its new home and I can’t wait to finally show it next year!

Cheers,

Hans van Meer.

Info: karamottobonsai@hotmail.com

———————————————————————————————–