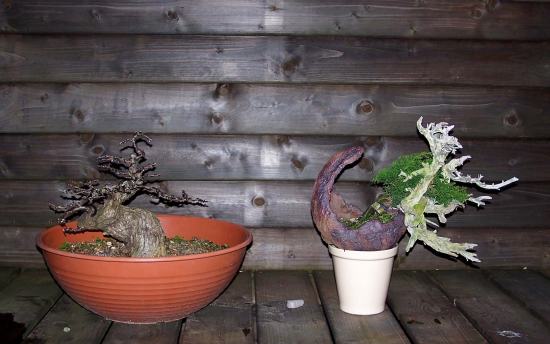
It was just before dinner time and about to get dark, that I realised that I had to still clean up my working area, from the work I had don, that afternoon! From the repoting of the Hawthorn, I kept the little Alpine plant that was growing in the same pot. This Alpine plant was growing in the roots of a Yamadori Pine I bought in the mid-nineties. From that original plant, I repotted some in small pots. The one that has been growing alongside, this Hawthorn, must have landed there by excited. I don’t like to waste anything that’s alive, especially when it is something so pretty as this plant! So I looked for some pots to put the plant in. When I had a brainwave :), I have some beautiful stones from the English shores, that were given to me, by my dear friend Terry Foster, that were not yet used for anything. So I divided the small plant into two and planted it on the rocks in a mix of Kato clay and Akadame dust. I think they look cool now and I have a good reason to display these stunning rocks as well!
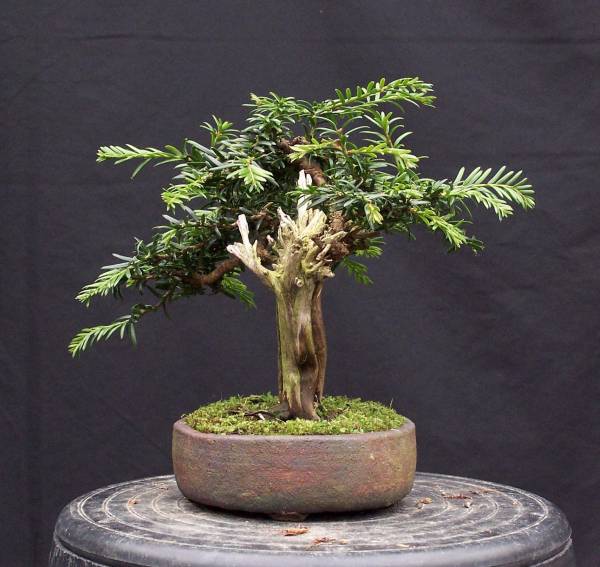
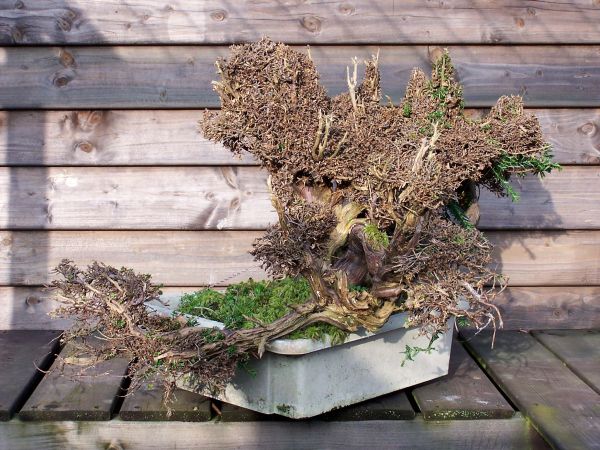
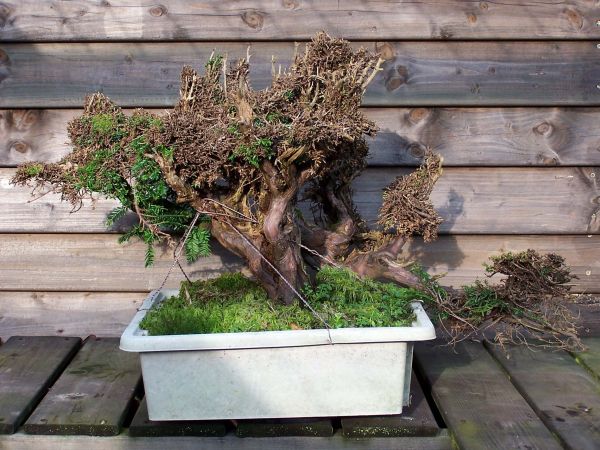
While I was making room in my winter shelter, to get to a Hawthorn I needed to work on, I bought this “Itogawa” Tanuki outside. Now just before dark, I bent, without any wire, some of the new growth, trough and under need the deadwood. So It can grow in the right direction. And I think it is starting to make a pretty image. This way, this beautiful piece of deadwood is not lost, but can still be appreciated in this marriage with the vibrant green Juniper. As you can see in the pictures, it was already dark, when I made them! It was about time to go in, and wash up before dinner, Kato clay makes your hands look awful. I could do with some nice Chinese food and a beer, it was a great Bonsai day! 🙂
I like doing those silly little things, just acting on a hunch! 🙂
Here the Juniper is standing next to the Shohin Hawthorn I worked on this afternoon.I only rewired this small Hawthorn and did some repositioning of the branches. I think this little gem is going to be beautiful someday!
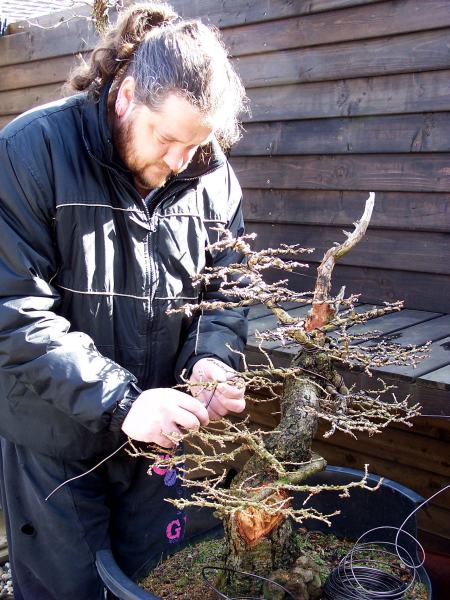
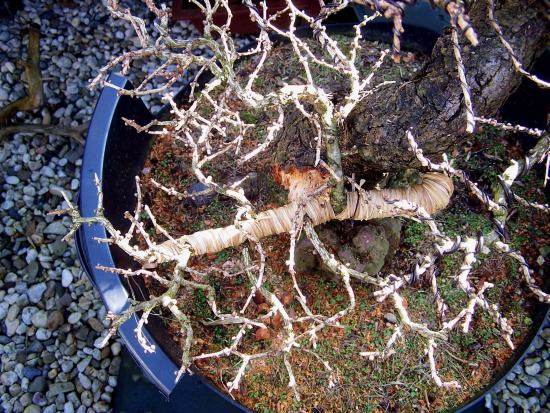
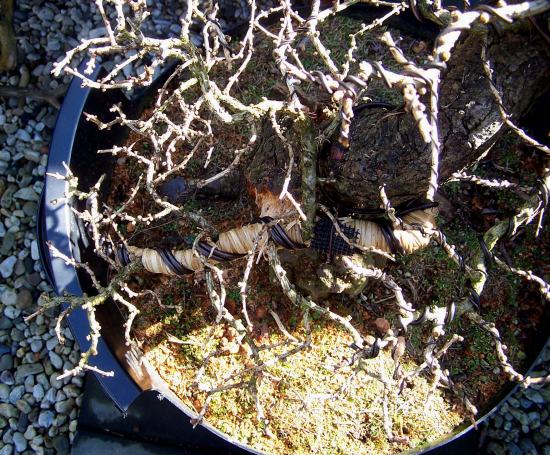
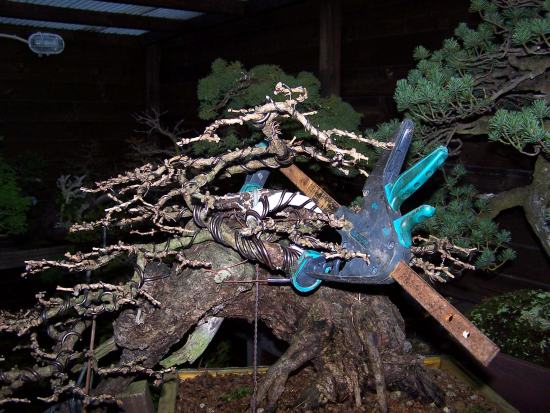
Above pictures: The secondary branch structure is getting better on all the branches, but the straight line of the first branch on the right is bothering me. This is the only older branch on this tree and it needs a bit off help to get some gentle movement. This way it looks less boring and will fit the rest of the branch structure of this tree. Straight lines must be avoided at all times in a successful design, the stick out like a sore thumb! So I wrapped it in water soaked raffia and bent some movement in it.
Above: I know! I’m a tree hugger!
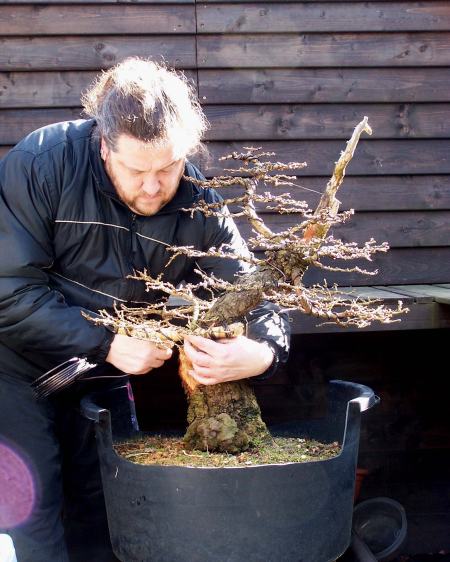
Above pictures: It was hard to place my hands on this branch to bend it, but you can see I managed to great a gentle curve in that straight and thick branch in the end! Now it fits the rest of my branch structure. In Bonsai you have to pay attention to every little detail, even if you think no one will knottiest what you are doing. A lot of small mistakeswill make a big one!
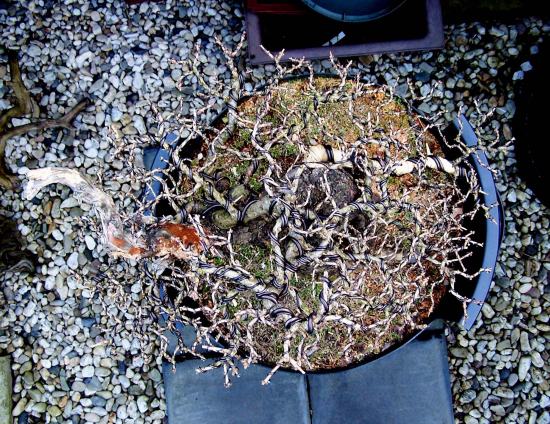
Above: Bird’s eye view of the branch structure.
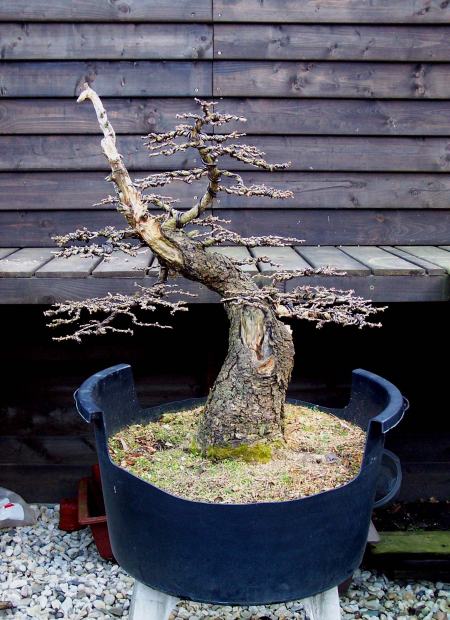
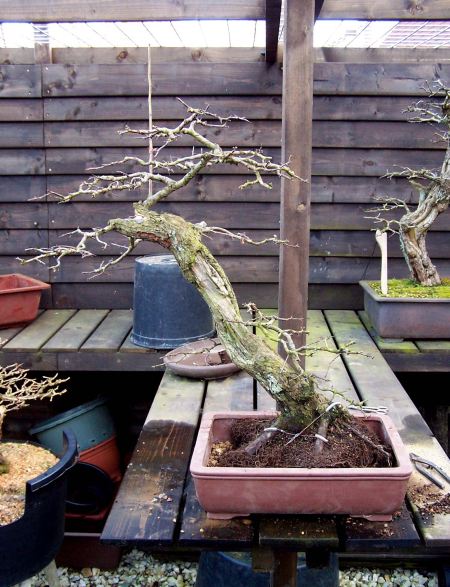
Above; I made this picture with a backdrop to make the branches stand more out. I am really happy how the image of “X.L” is progressing. I can’t wait to see how he will look in a few weeks, when the brightly, and still very small, green needles start appearing. Then the scale of this old Larch is at it best! Maybe next year, if possible, I will plant him in a nice pot? I hope you like the progress so far?
Some serious bending going on.These roots, on one of my Acer palmatum’s, are begining to look nice.
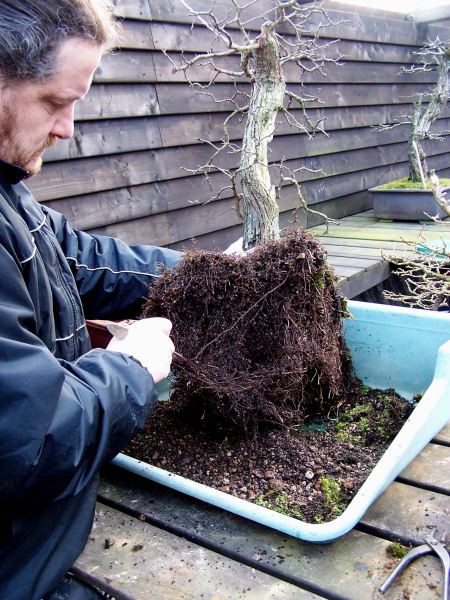
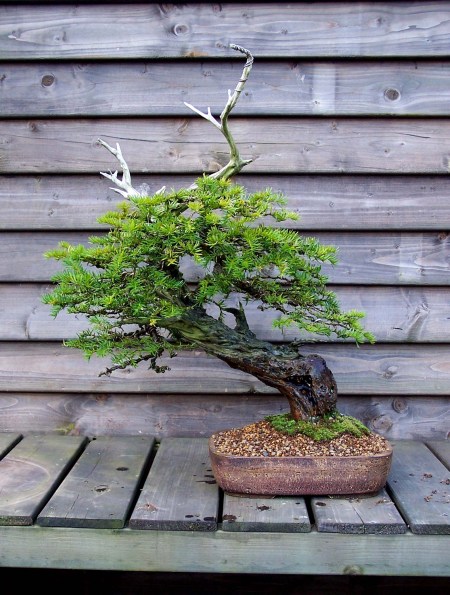
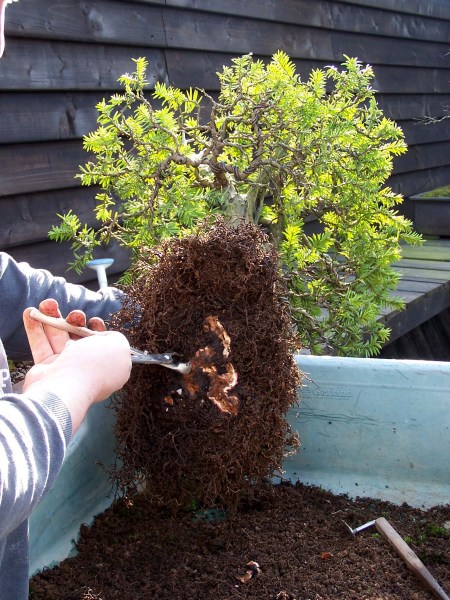
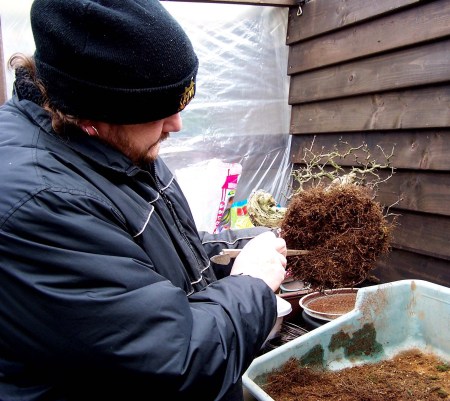
Here the tree is back in it’s old pot, as soon as it is settled down and showing lots off new growth, I will start to wire it again and bring it back into its desired form. I am glad this tree recovered from it’s ordeal so well, it holds a lot of good memories for me!Look how flat the football, consisting of only small feeder roots, is now! This means I can plant it deeper into it’s pot and that the tree will look more balanced in it!Here I am removing more off the old rootstub that was left for safety the last time this old Yamadori “Yew’ was repotted. This “Yew” I found in the U.K, many years ago now and it is the first tree that I ever collected. This tree lost a lot off its vitality 2 years ago and some lower branches on the left were lost, but now it slowly recovered and it was safe to work on the roots again!For now this “Dancer” has a new home, were it can grow into a beautiful lady! 🙂Some promising roots were redirected with wire. Thicker roots were cut back, right up, to about half a Inch away, from were strong, but smaller roots emerge from it. This simple, but sure technique, will be repoted, until the overall roots size, fits inside the planed design for this tree.For now she is planted in a deep pot, with plenty of room to grow. I want a vigures tree, that produces lots of new growt to fill out and style the top section of this future Literati Bonsai.Now I am left with a nice flat rootbase, full of fine feeder roots. This means that at the next repoting, I will be able to plant this tree in a much shalower pot. This wil make here, more elegant and smaller…she is a bit tall! 🙂Here I am removing the extra roots I left on for extra security when I collected this Dutch Yamadori “Hawthorn”.Repotting the “DANCER”.Moments of joy! 🙂Here the tree is planted back into it’s small Brian Albright pot.Side view of the “larch” stumb. 🙂
Here the same tree is planted back into it’s Brian Albright pot.Not me!:) Here is a other Hawthorn with only small feeder roots.Who sad that you could not get, a easy to repot, root system on a Hawthorn?
, I know! But I had to take a few steps back from the keyboard and try to focus on the more important things in life, mainly my health! These last few month’s, my back problems have become more severe and kept me more or less away from any real Bonsai work. But I did do some important small styling work and some repotting that could not wait any longer! At this moment I am gladly posting these pictures in the knowledge that there might be a solution for my back problems in the near future. I have found a great Doctor in Belgium that uses a new kind of operating technique! So now I only need the O.K from my insurance company and I am off to Belgium! So keep your fingers crossed for the next couple of days for me! 🙂
Who said that you could not get, an easy to repot, root system on a Hawthorn?
Not me!:) Here is another Hawthorn with only small feeder roots.
Here the tree is planted back into it’s small Brian Albright pot.
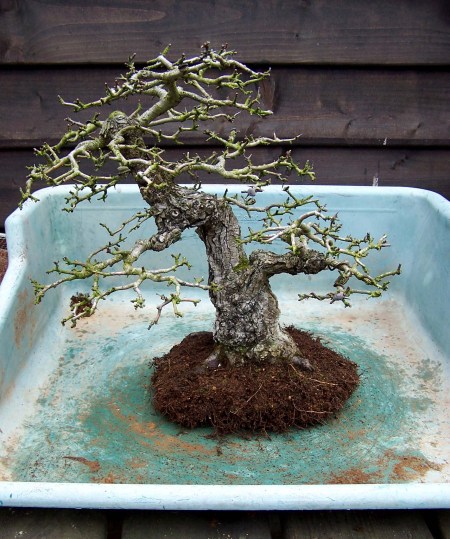
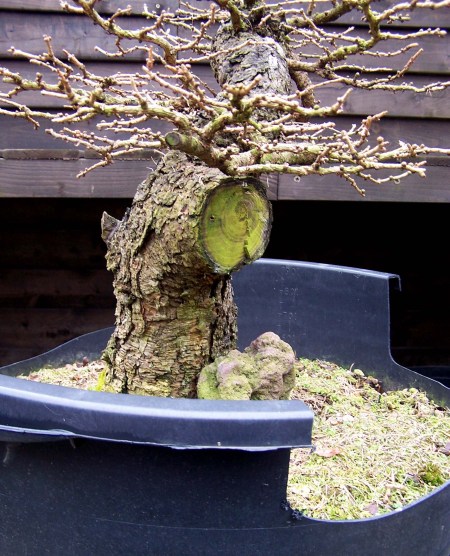
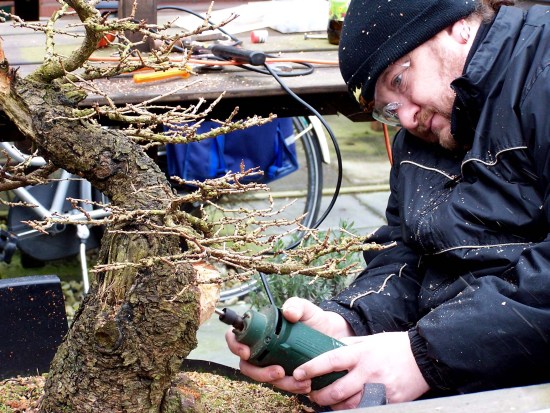
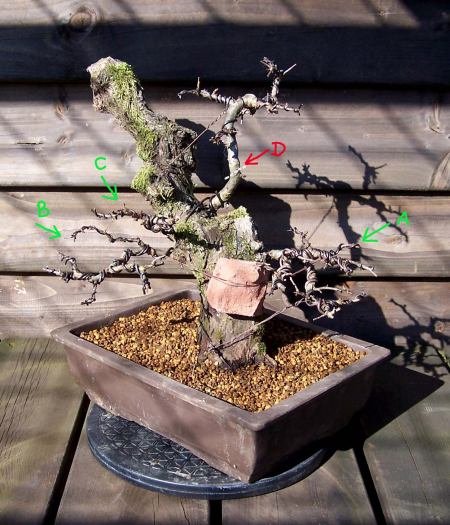
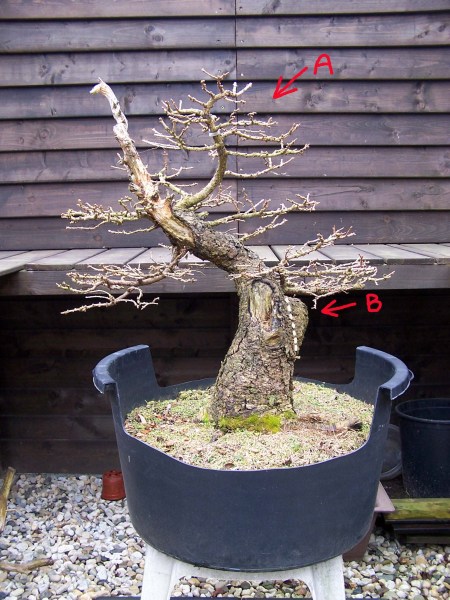
Above: This“Larch” has been completely wireless during the winter months. So, considering the short time I have been working on this tree, I am pretty pleased with how quickly the, mostly new branches, have already settled in their position. Only the (Youngest) top section (A) needs to be repositioned. I had left the Large stump (B) alone for a few seasons, to prevent the risk of dye/dry back in the main trunk. So now it was safe to remove most of it with power and hand tools and then style it in harmony with the spirit of this tree! The white dotted line is more or less the line of the trunk, so a lot of work had to be done to get there!
Repotting the “DANCER”.
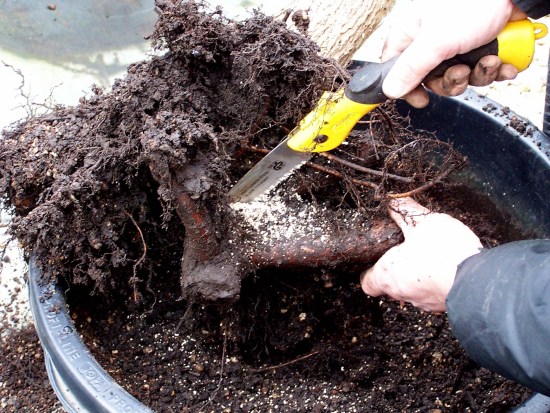
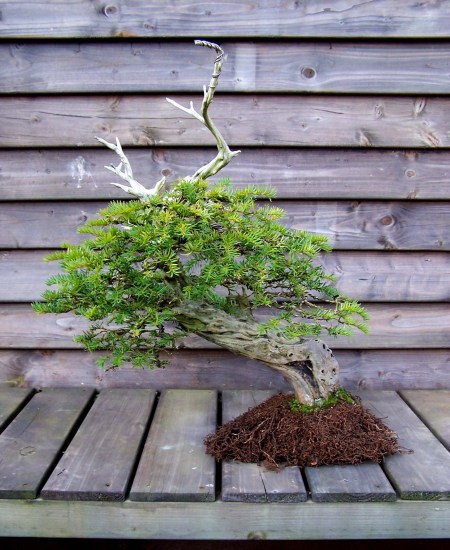
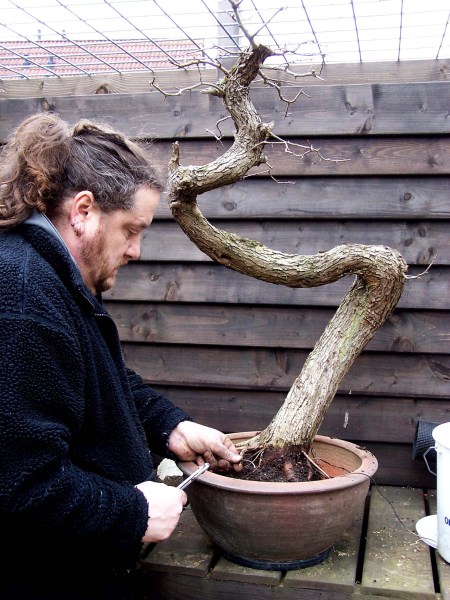
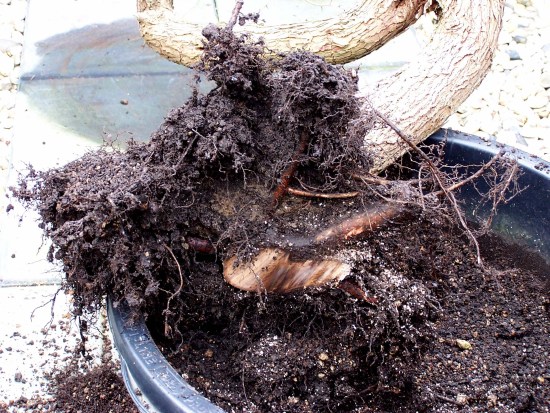
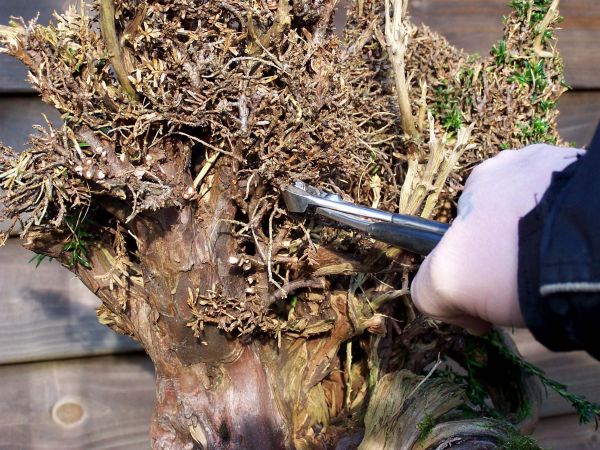
Here I am removing the extra roots I left on for extra security when I collected this Dutch Yamadori “Hawthorn”.Now I am left with a nice flat root base, full of fine feeder roots. This means that at the next repotting, I will be able to plant this tree in a much shallower pot. This will make her, more elegant and smaller…she is a bit tall! 🙂
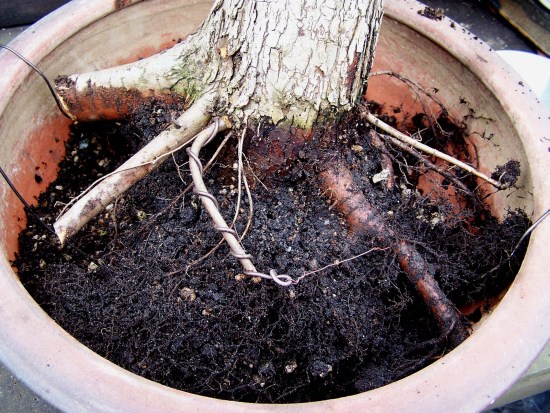
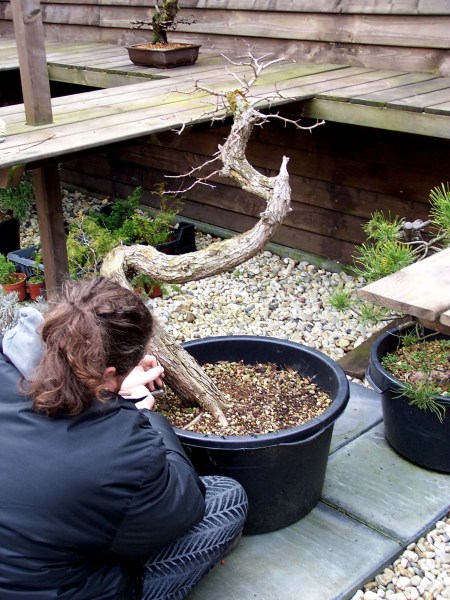
For now, she is planted in a deep pot, with plenty of room to grow. I want a vigorous tree, that produces lots of new growth to fill out and style the top section of this future Literati Bonsai.
Some promising roots were redirected with wire. Thicker roots were cut back, right up, to about half an Inch away, from were strong, but smaller roots emerge from it. This simple, but sure technique, will be repeated, until the overall roots size, fits inside the planed design for this tree.
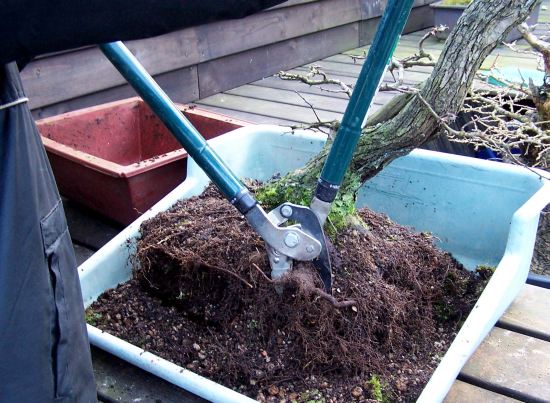
For now, this “Dancer” has a new home, where it can grow into a beautiful lady! 🙂Here I am removing more of the old root stub that was left for safety the last time this old Yamadori “Yew’ was repotted. I found this “Yew” in the U.K, many years ago now and it was the first tree that I ever collected. 2 years ago this tree sadly lost a lot of its vitality and some lower branches on the left were lost, but now it has slowly recovered into good health, so it was safe to work on the roots again!
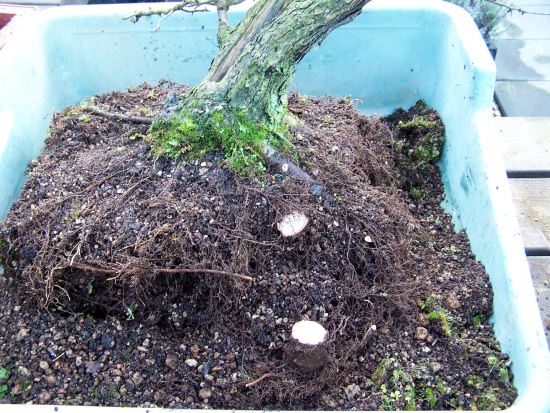
Look how flat the rootball is now, consisting of only small feeder roots! This means I can plant it deeper into its old pot and that the tree will look more balanced in it!
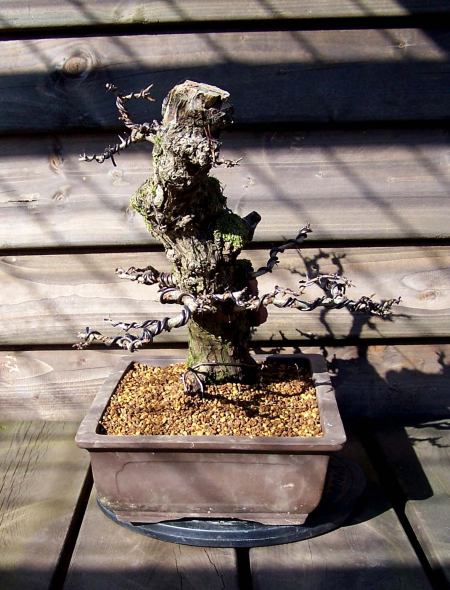
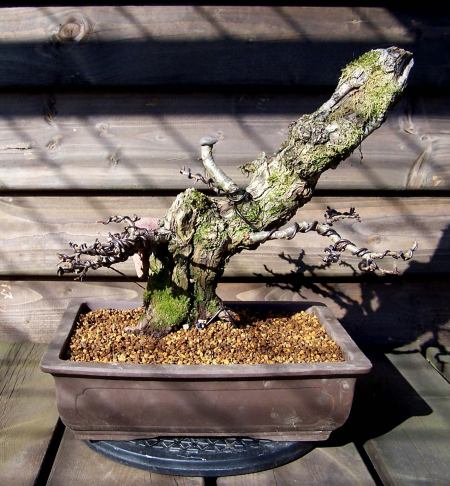
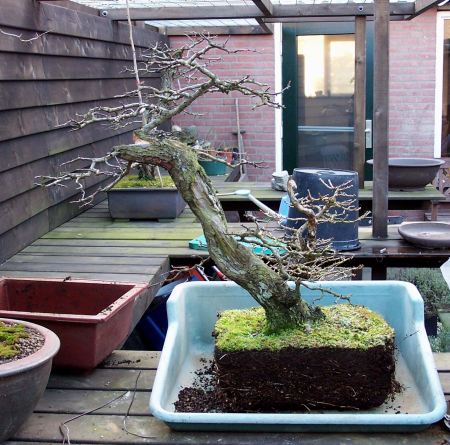
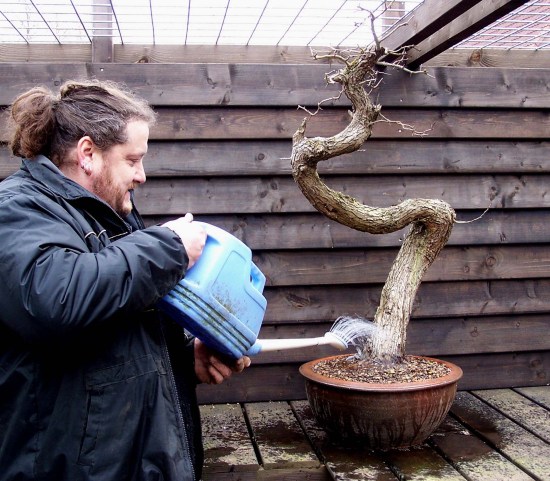
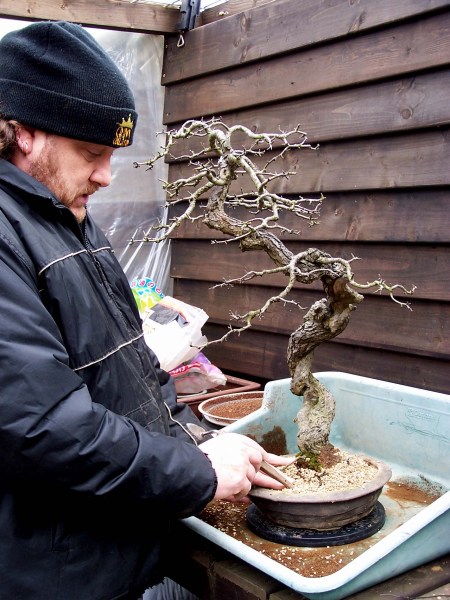
Here the tree is back in its old pot, as soon as it is settled down and showing lots of new growth, I will start to wire it and bring it back into its desired form again. I am glad this tree recovered from its ordeal so well, it holds a lot of good memories for me!
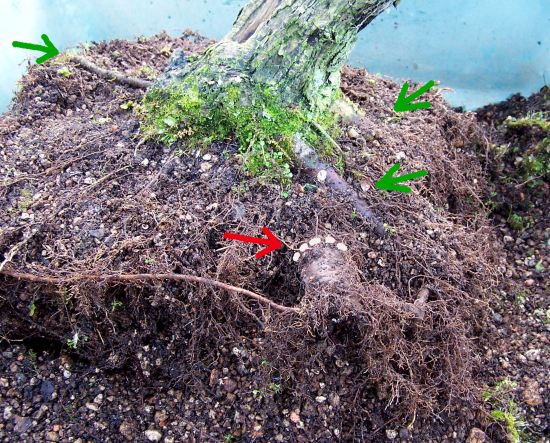
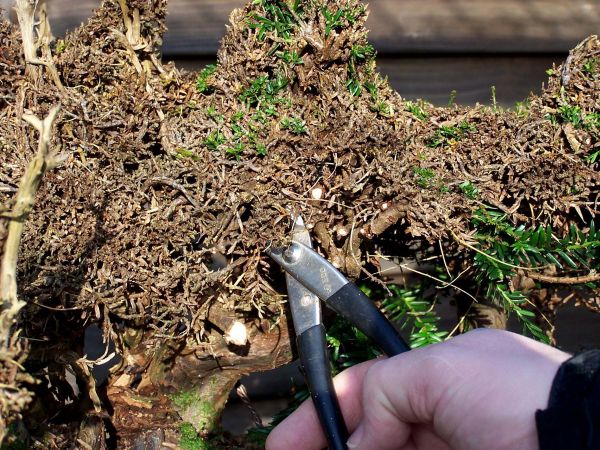
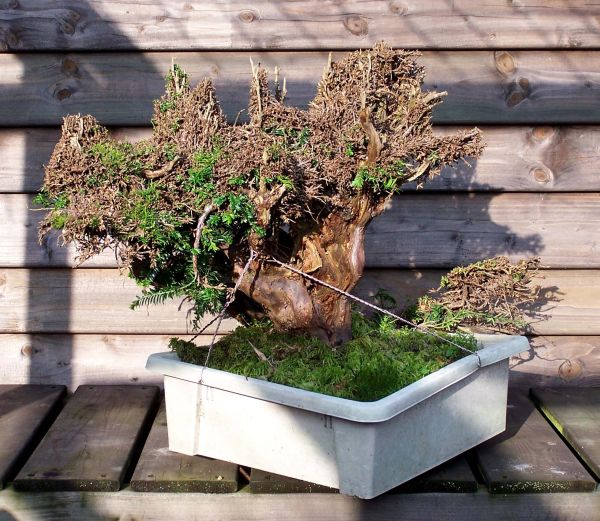
Above: This is the first transplanting for this Dutch “Hawthorn” Yamadori. As you can see the pot is full of healthy roots, so it was safe to remove the too thick root (red arrow) you can see in the second picture. The green arrow in that same picture, show some nice positioned strong roots. The next 2 picture s show how I removed that root. The last picture shows the tree in its new pot for now. For the next couple of seasons, I will concentrate on the growth of the relatively young branches, the need to thicken and mature. And of course, I have to work on the total ramification of the tree. This ugly duckling is quickly becoming one off the favourites trees to work on, in my collection! A couple of years ago I offered it for sale, still as raw material, during a big convention. For a very reasonable price, but nobody seemed to notice this oddly shaped tree, so full of natural mistakes. There and then, I drew a design on a small piece of paper, and afterwards, I gladly took the tree home with me, to style it myself! I have to admit though, it took a lot off imagination and even some optical tricks. But I seem to have overcome, some major design problems. Creating a thing of interest or even beauty, out of not too good material, is something I really love. Because these trees are not too obvious to style, you really have to look for that hidden Bonsai! But when you find it and everything turns out well, you will have a Bonsai that is often so much more interesting than the prefab ones. I enjoy it when a plan comes together! 🙂
Of course, I know, this tree has a very long way to go, but it is growing nicely into a “Mother and child” tree, with a twist. The mother leaning into the wind, protecting the little child that clings to her side, from the prevailing winds that torture the Dutch coastline were I actually collected this tree! I will keep you posted.
These roots, on one of my Acer palmatum, are beginning to look nice.
Above picture: This small tree is also a Dutch “Hawthorn” Yamadori.
Some serious bending going on.
Before We go any further,I would like to say, I am sorry that this post is dragging on so long. But it is the only way I am able to post anything new on my blog!
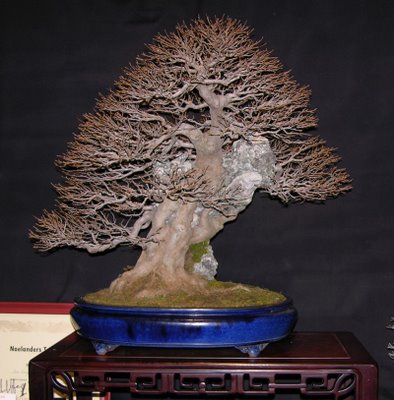
here are some pictures I shot during the “NOELANDERS TROPHY X” last weekend.
The above picture of the winning tree, an Acer buergerianum by Udo Fischer from Germany, is courtesy of my friend Andy “stone monkey” Pearson.
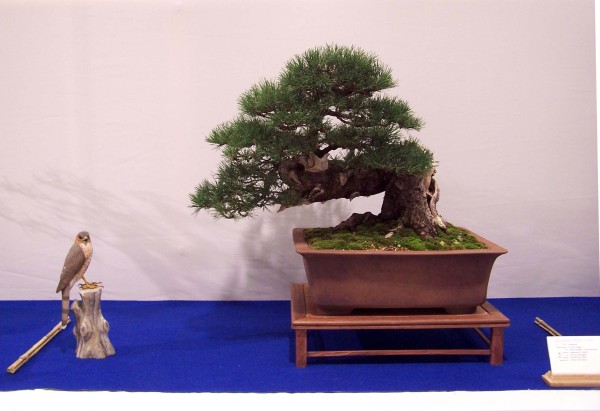
Above: My Mugo Yamadori. Although the current pot is too big and will be replaced by a smaller one in the near future, I do feel that “BIG RON” looked pretty good during this show! This old Mugo Pine can only be repotted into a smaller and more suitable pot when in the future there are enough new small roots. Then I can safely remove a bit more of the large root clump that is hidden under the ground! For now “BIG RON” will be left alone for a few years to grow and mature, he deserves it! 🙂
Above: I was proud to finally be able to show my Chamaecyparis obtusa that I have worked on for so many years. Although it is an imaginary tree, Chama’s don’t grow into this style of a tree or any kind of tree for that matter, I do feel that it’s image of an old and bettered tall spruce-fir like tree is believable. To take full advantage of the lovely fan-like shape of this kind of foliage, I styled it not too strict. The wild foliage together with the many different shades of green creates the feel and image of a tree in the distance. This tree has come a long way indeed!
Above: Resident photographer, W. Evenepoel hard at work to shoot a bird’s eye view picture for the commemorative book of this anniversary edition.
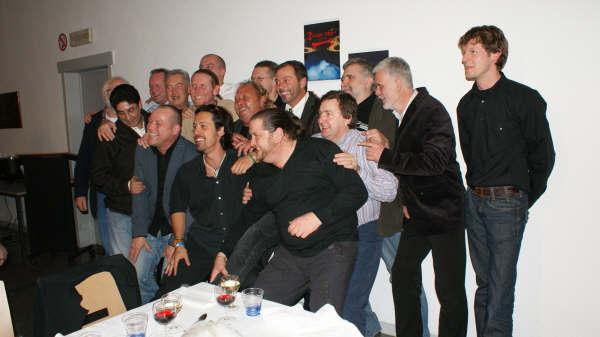
Above: 4 stupid Bonsai friends in Belgium. Left to right, Ed van der Reek, Me, Jeroen Huivenaar and last but not least a close-up view of Rune Kyrdalen.
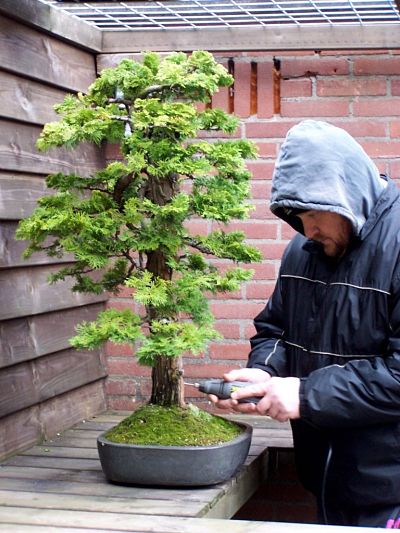
Today finally, after more than two weeks of temperatures below freezing here in Holland, the temperature reached above O! At last, I could open the winter shelter and let some fresh air in there. I am so happy for this spell of warmer weather, now I was finally able to do some last touch ups on the 2 trees I am showing in the “NOELANDERS TROPHY” this coming weekend. Because of all the trees that are jammed in close together in this small shelter, I had not much room to move around. So I had to be careful not to knock anything over, while I worked on “BIG RON” my Mugo pine! But I managed to adjust some of the deadwood with hand and power tools. Then, with the help of a straw, I had to blow away all the sawdust from the bark, branches and foliage in the interior of the tree. This is a very effective way when you cant reach into the branches anymore, but it makes you quite dizzy after a while! 🙂
Then I managed to get my Chamaecyparis out of the shelter, so I could clean it up and replace some thick guide wires, with 0,3 mm copper wires. They are almost invisible and placed in a way that they are hidden by foliage or branches. With a copper brush on a small power tool, I removed the hard whitish resin that this Chamaecyparis produces on the edges of where the bark meets the deadwood and rolls/grows over it, like a slow flow of lava. Although this resin is perfectly natural, it doesn’t look too good. It is like lumps of dried up lime sulphur on the beautiful bark. So I cleaned it all off and next to the deadwood I cleaned just a fraction deeper to reveal the deep red colour a Chamaecyparis bark has just under need it’s rough dark brown outer shell. Now the line between the weathered deadwood and the live bark becomes more prominent, showing the struggle, but also the perseverance of this strong and proud tree! The rest of the beautiful old and rough bark I live untouched to show the true age of this tree. Then I replaced some weathered moss and tried out some different accents for the first time. Then I called it a day, even do it was above zero, the very strong wind made me feel way colder than I felt during the last couple of weeks! Who said that Bonsai was only fun? Just kidding, this is all part of this beautiful art form. Just a few more days until the show. I can’t wait!
yesterday I finished the final styling of my “Hinoki cypres” Chamaecyparis obtusa ‘Nana Grasciles’ 95 cm/38 inches.
About 12 years ago, I was very lucky to buy 4 or 5 of this old “Hinoki’s” directly from a professional grower in “Boskoop” (Holland). He had planted them together with his father some 50 years ago when he was still a young boy. He seemed to like the idea of having them restyled into Bonsai! All these long years, the small scrubs were used as “Mother plants”, every year all the strong growth was cut off to be used for grafting or as cuttings. So the trees had remained small for all those years and most of the foliage grew close to the trunk. But this was not the case with this tree, it was tall, straight and all the foliage was located in the top part of the tree. So I only had some branches in the top that I had to bend down and let grow for many years. So I had to style the tree in a way, that made those hanging branches believable. This “Hinoki” would be a fantasy tree (they don’t exist as large trees) and styled as an Old Pine/Larch/Picea solitaire, that lost its top section somewhere in the past and all of its bottom growth and all of the branches were forced down by the weight of the winter snow. I have seen examples of those old soldiers on many a high mountainside in the Alps. So, to give the trunk more interest, I made a Shari over the full length of the trunk. And then waited for all these years, until now, for the foliage to grow and the branches to thicken, in the meanwhile the Shari aged very nicely and the bark grew beautifully over the deadwood in some places, making it all look aged and mature. I really love the foliage of these “Hinoki’s”, you can create wonderful foliage pads, without it becoming too overly styled, it looks really natural, like a tree in the distance. I think this fantasy tree gives off a good impression of an aged mountain dweller now and I decided to enter it into the “Noellanders Trophy” next January! Although this species is not so commonly used in Bonsai anymore, I do believe they are wonderful material for good bonsai! Even this, not so good starting material, turned out into a believable old looking tree. This tree has become a good representative of what I seek for in my designs and styling, I hope you like it to?
I found this wooden slab to place it on in the show, do you think it goes well with this tree?
Regards,
Hans van Meer.
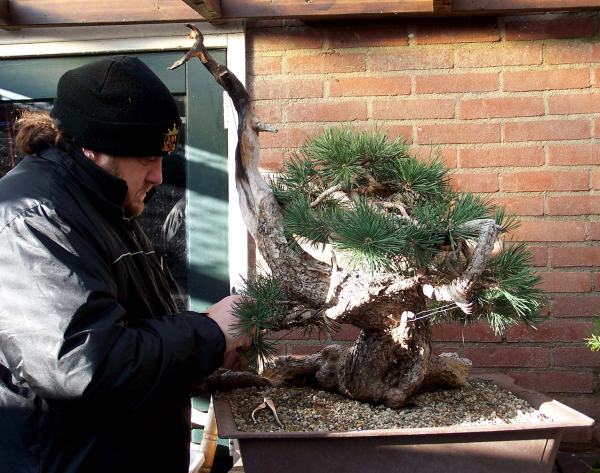
Yesterday I finally had the change to finish the work on my Pinus Uncinata. Although it took me a month or so too long to do it all, I am glad about the outcome of my work. The tree had enough growth and new foliage for me to give the image more height and width, I even removed a major branch from the left bottom branch. There was no more need for heavy wire, every main branch is fixated, more or less, in its right place. I tried to create more layers in the separate foliage pads and more open spaces between the foliage, these details create a whole new feeling when I look at it. The tree, now, looks taller and more like it is growing in the distance. I feel this is very important part of the future process of trying to find some sort of believable balance in this extreme Bonsai design I have in my mind for this Pine! The right Jin on the ground is already half cut to give me a better impression of how it will look in the near future! I left it like this because that part of the Jin that is left on is used to tie down the tree to the rim of the pot to hold it upright and secure!
More to come!
*
*
Above picture: I placed the tree in a virtual pot to get a feel of how it will look, in a more upright position. As you can see, the open spaces increased a lot between the bottom branches and the soil level. And that is something to take along in the next restyling session. This is not a pot I would go for, but it will do for this purpose.
A few days ago, during a short sunny dry spell, I removed all of the last years and some of this year’s needles. To control and promote growth and to make it easier to wire the branches.
When I feel up to it, I hope to start to wire the tree! This picture is a rare shot of the backside of this old Pine.
Hi, everybody,
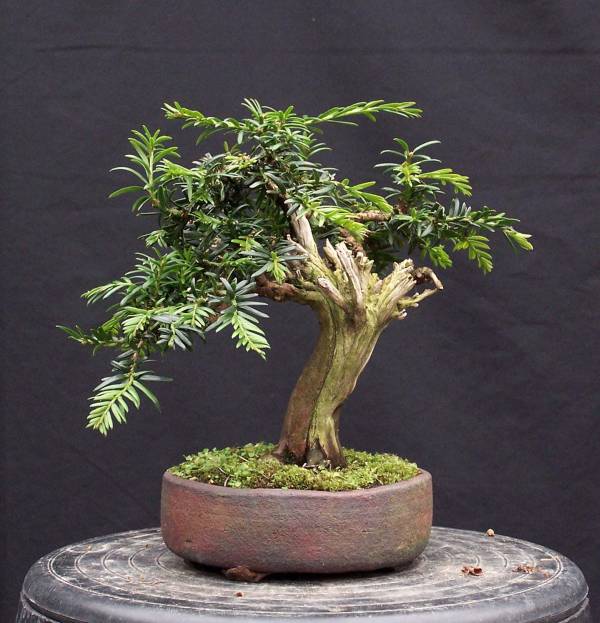
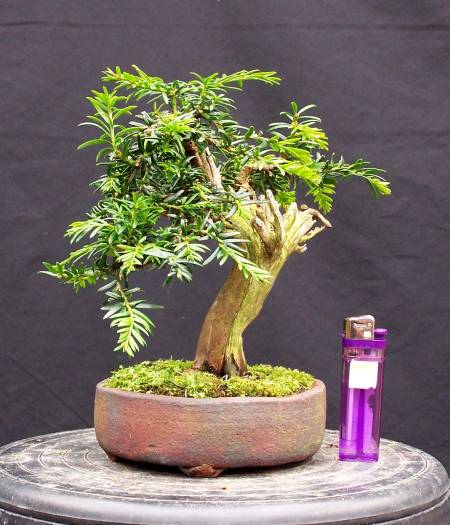
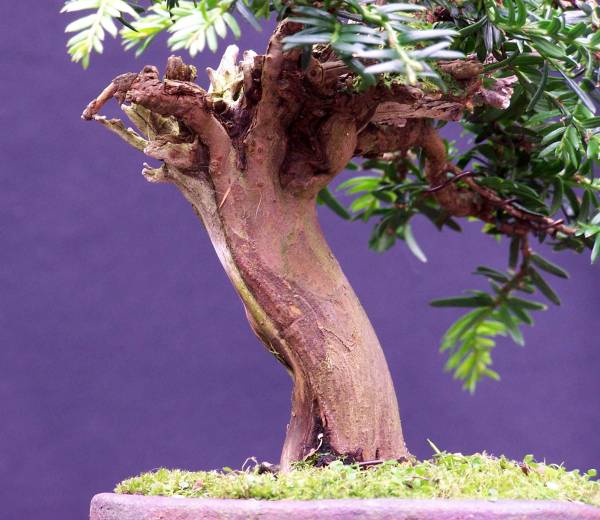
a few weeks ago, when I was in the UK to do another “BURRS” weekend, I stayed as a guest in the warm home of my dear friends Charlot and Terry Foster. Every year they spoil me half to death when I visit them and this year I even was surprised with a real Halloween party (my first), with great food and light refreshments! 🙂 All too soon this weekend with my talented friend ended and I probably won’t see him until next year, for the next “BURRS” event. But he took care of that problem as well for me! The last morning, during a wonderful breakfast, he surprised me completely again! He gave me this lovely little Yamadori “Yew”, he collected himself 6 years ago. He said, here is something to remind you, of this fun time we spent together. Once again this modest man had struck a nerve in me and I just had not enough words to take him for his wonderful gift! You got to love him!
I am because of my back problems, still not being able to do much work at once, so I decided to work on this little gem. Trying to honour Terry’s design, but with a little twist of the Hans. 🙂
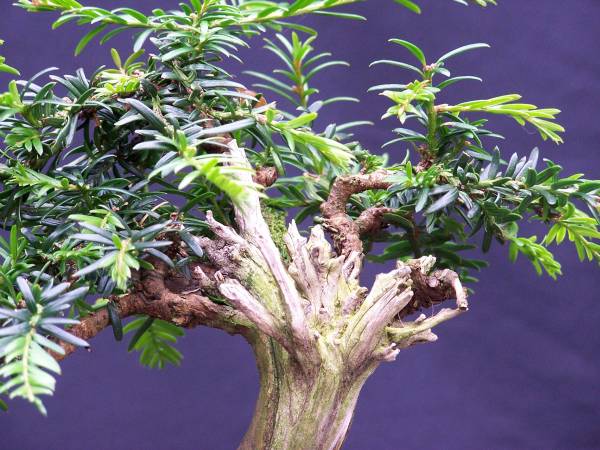
I removed unnecessary foliage and some branches that did back, then wired every branch, which, because of the dense foliage, was not so easy as it sounds. I had to be extra careful with those big hands of mine. I put all the branches into there desired place. I cleaned the deadwood and live bark with a toothbrush and some water then applied lime sulphur to protect and whiten the deadwood. Took these picture for my weblog and of course, I named this Shohin: “LITTLE TERRY”!!!
Thanks, Terry!!!!
Above picture: Before the work began.
Above picture: Here you can see how small she actually is.
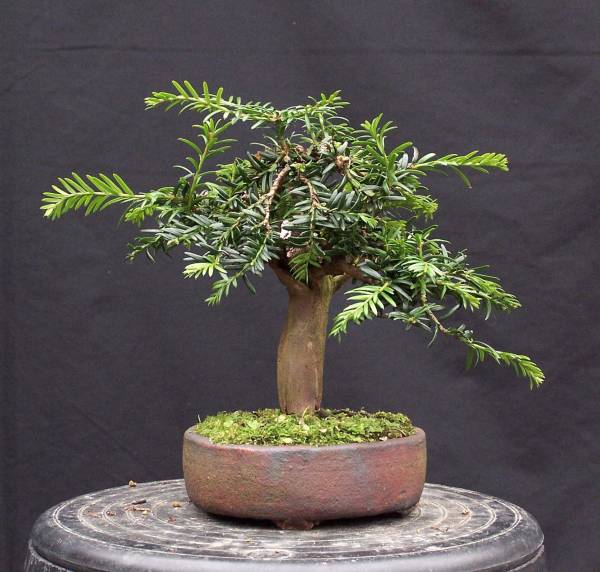
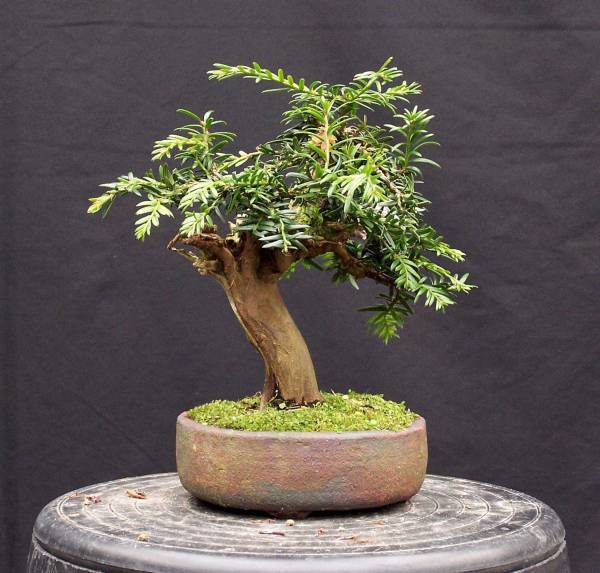
Above picture: Left side of the tree.
Above picture: Back side of the tree.
Right picture: Right side of the tree.
Above Picture: A branch has died back, so the live bark will shift more to the right in the future, but this is something the tree will do by itself!
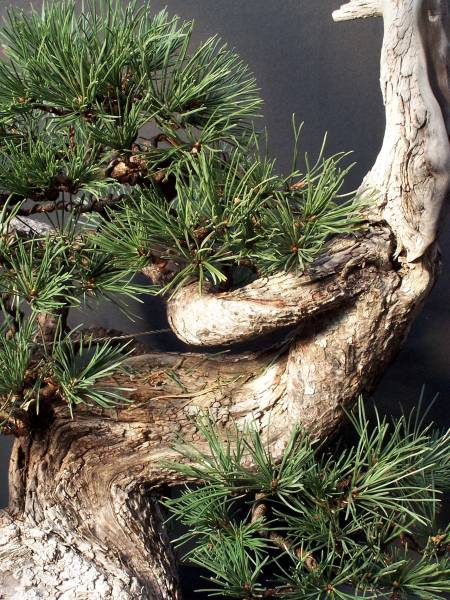
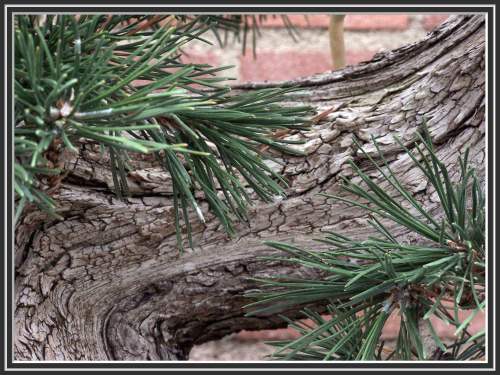
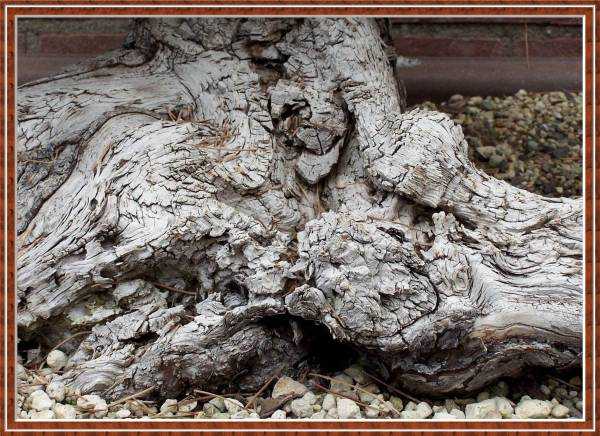
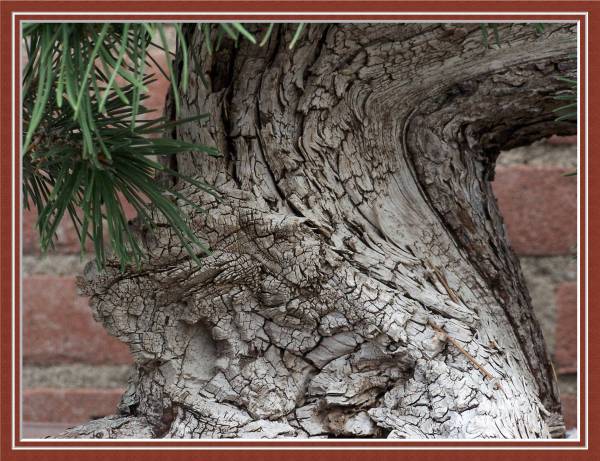
My back is a little bit better today, but I am still not able to work on any tree for a while. So I decided to take some close up pictures of the beautiful deadwood on my Pinus uncinata.
I can look at it over and over again and get totally lost in the beautiful random patterns and the 50 shades of grey on this wooden history book of this very old tree! This is just the thing I like to see in a yamadori, the wonderful beauty of nature! This wonderful main focal point of this tree should only be enhanced by the artist, to bring out the best of both into one Bonsai. 🙂
Hans this I dedicate to your tree.
This is from my heart what I saw in your tree.
It is yours now forever and ever.
Mom.
” The Whisper of the Wee Tree”
Come closer my friend and hear me speak
My old and gnarled bark is just the outside of me
Many tales can be told of how old I really am
But the life of me runs strong and deep
The battle from seed to what you see
tells the world the story of me.*
Thanks, Mom!
Hope you like them?
Cheers,
Hans van Meer.
*copyright is freely given to Hans Van Meer November 15th, 2008 by Irene I Britton


 , I know! But I had to take a few steps back from the keyboard and try to focus on the more important things in life, mainly my health! These last few month’s, my back problems have become more severe and kept me more or less away from any real Bonsai work. But I did do some important small styling work and some repotting that could not wait any longer! At this moment I am gladly posting these pictures in the knowledge that there might be a solution for my back problems in the near future. I have found a great Doctor in Belgium that uses a new kind of operating technique! So now I only need the O.K from my insurance company and I am off to Belgium! So keep your fingers crossed for the next couple of days for me! 🙂