A “LARCH ” PROJECT PART 2.


HI everybody,

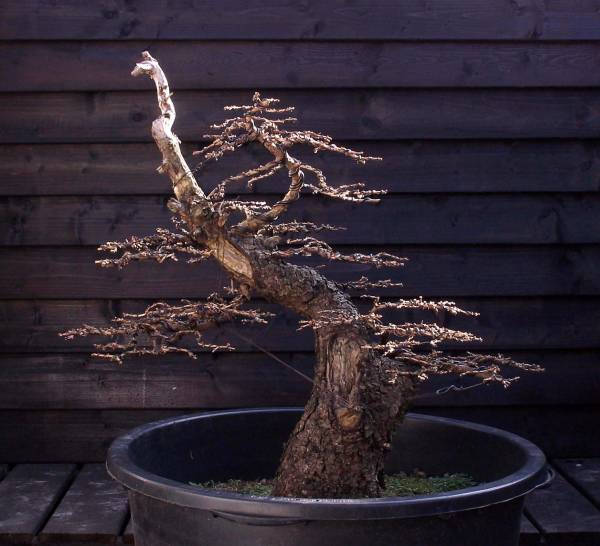
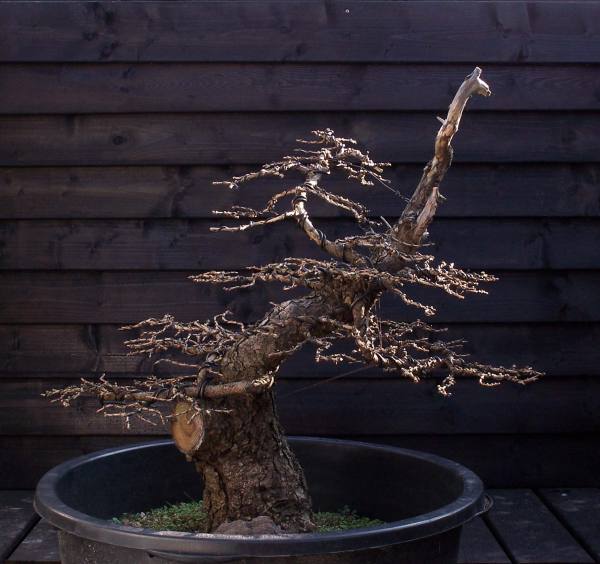
last week we had a spell of unusually warm and sunny weather over here, so I decided it was about time to do the first major styling I have planned for several of my trees for this year. The large Yamadori “Larch” in this story was ready for its second branch structure styling.

Check out: “THE STORY OF XL PART I” on my YOUTUBE channel!

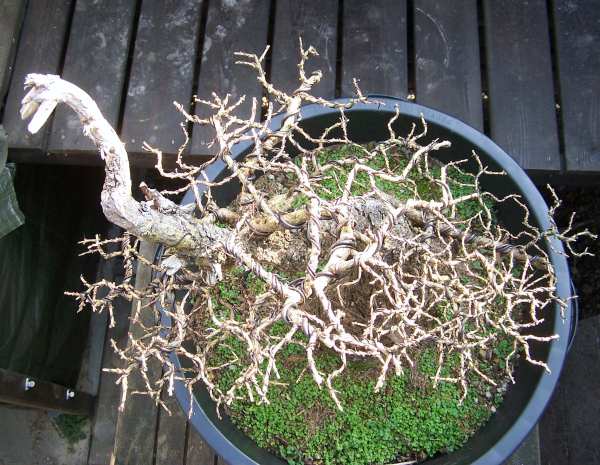
I really took my time, working on this tree. Enjoying every minute of that relaxed and zone like feeling that comes over me when I’m guiding the branches of the tree as closely, as safely as possible, to their envisioned future shape. Overcoming or incorporating little problems, that I came across while working, without giving it any real thoughts. Sometimes things just fall together when I am working on an old tree like this one, when instinct takes over, with the sun in your face….MMMMMM! 🙂

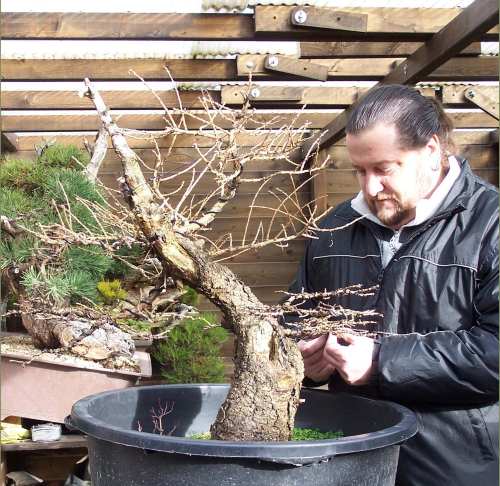
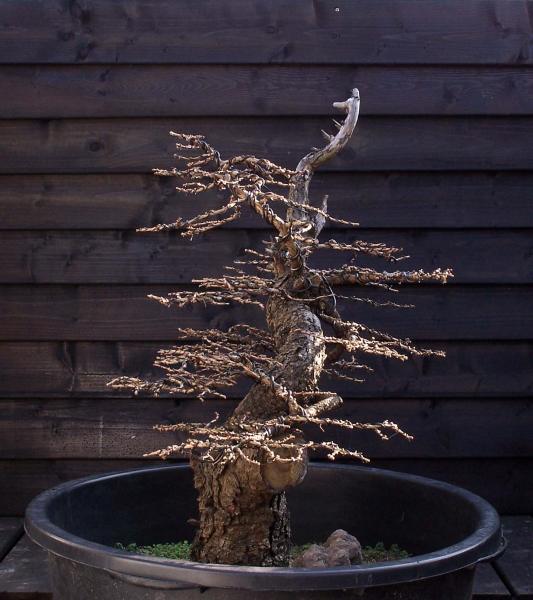
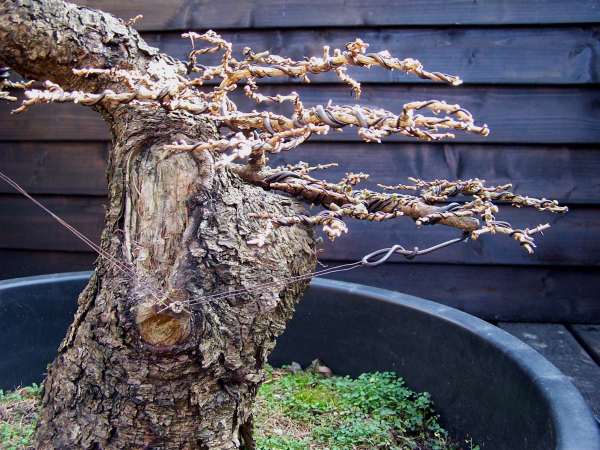
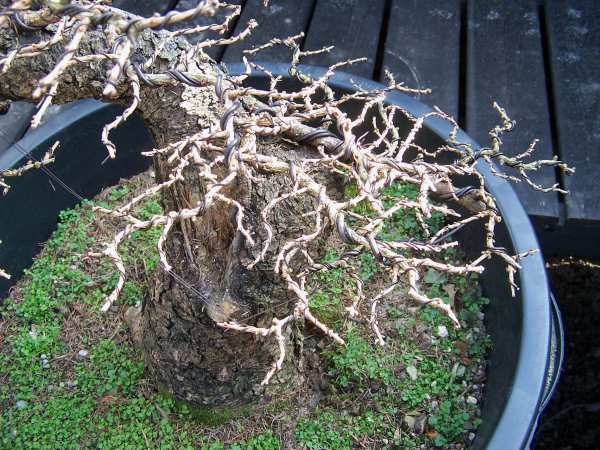
Remember it is only the second structure styling, the top will fill out and thicken quickly in the next couple of years and there is about an Inch more trunk hidden behind the rime of that plastic container, as you can see in one of the pictures! In real life, the tree is taller and the base is wider and the whole tree is looking more balanced.

The first picture is taken when I just started to work.

In a few months, after all the Spring work is don, I will start working on the deadwood.

I hope you enjoy this little story,

Hans van Meer.

Info: karamottobonsai@hotmail.com

—————————————————————————-

februari-2008-003-hans-van-meer-web.jpg

februari-2008-408-hans-van-meer-web.jpg

februari-2008-415-hans-van-meer-web.jpg

februari-2008-418-hans-van-meer-web.jpg

februari-2008-422-hans-van-meer-web.jpg

februari-2008-428-hans-van-meer-web.jpg

februari-2008-440-hans-van-meer-web.jpg

februari-2008-439-hans-van-meer-web.jpg

                              —————————————————————————-

A “ULMUS” WINTER CREATING.


Hi, everybody,

we are going through a period of cold weather here, and as usual, I am too late preparing the winter shelter for my trees. So this afternoon, in freezing cold weather, I had to do some last work on it. BBRRRRR! When I was bringing my last trees into the winter shelter, I noticed how beautiful the winter colours on my “Ulmus” looked. So I made a quick photo set up in the fading pale winter sunlight and with the shivers, I shoot the picture below. This is one of my earliest bonsai and one of my favourites. Because of the millions of “Ulmus” malsai that have been sold in Europe over the last 20 years, they got stigmatized as inferior bonsai material. In my opinion that could not be further from the truth! I think that “Ulmus parvifolia” are wonderful to work with and very affordable, available and forgiving ( this one is frozen solid for 3 days now). And I think they look pretty amazing in these bright winter colours! I hope you like the Picture?

Regards,

Hans van Meer.

ulmus-dec-2007-hans-van-meer-blog.jpg  

                                              A “ULMUS” WINTER CREATING.

Info: karamottobonsai@hotmail.com

———————————————————————————————–

VERY OLD “MUGO UNCINATA”.

Hi everybody,

I would like to share a picture with you I shot this afternoon of my old “Mugo Uncinata”.

In 2001 my wife and I travelled all the way to Switzerland to buy this and another Pine Yamadori from a well-known bonsai pro. After a few months in the growing season, the Pine still did not show any signs of growth! So I decided to check out the condition of the roots. I did not like the soil it was planted in after it was collected, it was some sort of grey gravel that stayed wet far too long and was really compressed. Carefully digging for some roots, my worst fears came true! There were no roots whatsoever to find! Only a small piece of tap root (4/5 inches) covered in clay was all that was left on the tree, all the other roots were simply cut off with a saw. You got to love those provisional collectors and sellers, don’t you?!

(Note: It is now 2022 and after all these years I am still **** off by how I was sold a tree without any roots by this well-known Artist/seller…shame on you!

Brokenhearted I repotted the tree into my own soil recipe and placed the tree in a protected spot in my garden, where I could monitor everything from Sunlight to water! And then I waited and hoped!

Well to make a long story even longer….this amazing old survivor recovered and today is thriving. It is still secured to the pot with its deadwood on the right, to support it until the whole pot is full of roots! Then this deadwood will be shortened up to the red line. Then the root base will measure 56 CM/22 INCH. With the length of this Pine being 58CM/23 INCH this is very impressive! There is only one live line on the left of the tree alive, twirling around the back of the tree, coming back into sight on the right of the tree, feeding the only branch left on it. From this branch, I created the whole image of this pre-bonsai. A few years ago I cut off an old branch from the left part of the root base. I scrubbed the wood with fine sandpaper, so I could count the year rings. I could not count them all because they were simply too thin! But the ones I could count, went way over the 300 years mark! Last year I removed pieces of dead wood from the back and top and did the same, and was really amazed to count way more than 400 rings! This might just be one of the oldest living trees in Holland! And still, it managed to survive without any roots for all that time!

I still have a long way to go with this amazing piece of history, but I’m not complaining!

I hope you like it so far?

regards,

Hans van Meer.

september-2007-360-webblog-hans-van-meer.jpg

Info: karamottobonsai@hotmail.com    

———————————————————————————————————-

MORE YEW WORK

Hi, everybody,

Last weekend I did some more refinement work on one of my Yews in preparation for the Ginkgo Award.

Picture 1: Shows the small Shohin Yew before I worked on the ground coverage.

Picture 2: Shows the tree after different fresh mosses were added.

Picture 3: Shows that the second branches on both sides are growing from the same height on the trunk. The branch on the left side was always meant to be removed but was left on the tree to fill the big empty space between the bottom left branch and the top until the branch right above it would have grown enough in length to replace it. Especially on a bonsai this size these obvious folds are an eyesore and should be avoided or solved before you enter the bonsai in any show.

Picture 4: Here the branch is already removed and a small jin is left as a reminder. The branch above the one that is removed is brought down to more or less replace it.

Cheers,

Hans van Meer.

Info: karamottobonsai@hotmail.com    

——————————————————————————————————————————-