Some serious bending going on.These roots, on one of my Acer palmatum’s, are begining to look nice.
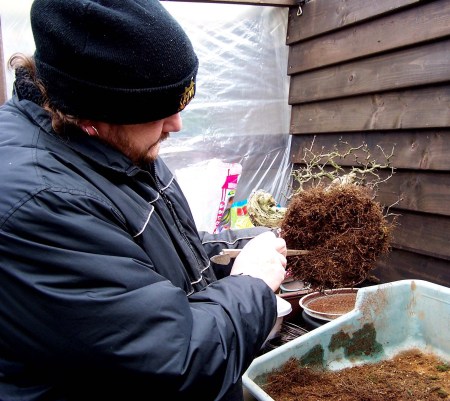
Here the tree is back in it’s old pot, as soon as it is settled down and showing lots off new growth, I will start to wire it again and bring it back into its desired form. I am glad this tree recovered from it’s ordeal so well, it holds a lot of good memories for me!Look how flat the football, consisting of only small feeder roots, is now! This means I can plant it deeper into it’s pot and that the tree will look more balanced in it!Here I am removing more off the old rootstub that was left for safety the last time this old Yamadori “Yew’ was repotted. This “Yew” I found in the U.K, many years ago now and it is the first tree that I ever collected. This tree lost a lot off its vitality 2 years ago and some lower branches on the left were lost, but now it slowly recovered and it was safe to work on the roots again!For now this “Dancer” has a new home, were it can grow into a beautiful lady! 🙂Some promising roots were redirected with wire. Thicker roots were cut back, right up, to about half a Inch away, from were strong, but smaller roots emerge from it. This simple, but sure technique, will be repoted, until the overall roots size, fits inside the planed design for this tree.For now she is planted in a deep pot, with plenty of room to grow. I want a vigures tree, that produces lots of new growt to fill out and style the top section of this future Literati Bonsai.Now I am left with a nice flat rootbase, full of fine feeder roots. This means that at the next repoting, I will be able to plant this tree in a much shalower pot. This wil make here, more elegant and smaller…she is a bit tall! 🙂Here I am removing the extra roots I left on for extra security when I collected this Dutch Yamadori “Hawthorn”.Repotting the “DANCER”.Moments of joy! 🙂Here the tree is planted back into it’s small Brian Albright pot.Side view of the “larch” stumb. 🙂
Here the same tree is planted back into it’s Brian Albright pot.Not me!:) Here is a other Hawthorn with only small feeder roots.Who sad that you could not get, a easy to repot, root system on a Hawthorn?
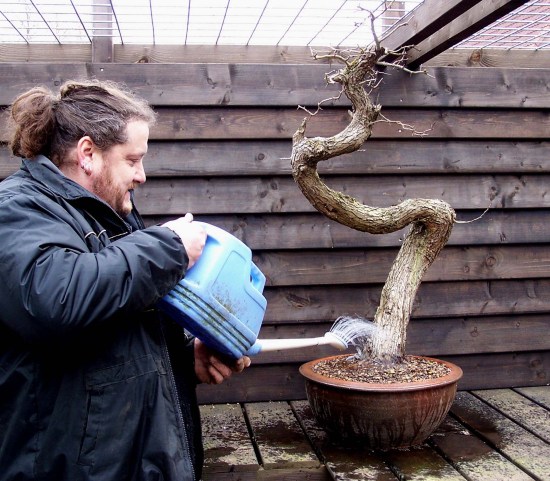
, I know! But I had to take a few steps back from the keyboard and try to focus on the more important things in life, mainly my health! These last few month’s, my back problems have become more severe and kept me more or less away from any real Bonsai work. But I did do some important small styling work and some repotting that could not wait any longer! At this moment I am gladly posting these pictures in the knowledge that there might be a solution for my back problems in the near future. I have found a great Doctor in Belgium that uses a new kind of operating technique! So now I only need the O.K from my insurance company and I am off to Belgium! So keep your fingers crossed for the next couple of days for me! 🙂
Who said that you could not get, an easy to repot, root system on a Hawthorn?
Not me!:) Here is another Hawthorn with only small feeder roots.
Here the tree is planted back into it’s small Brian Albright pot.
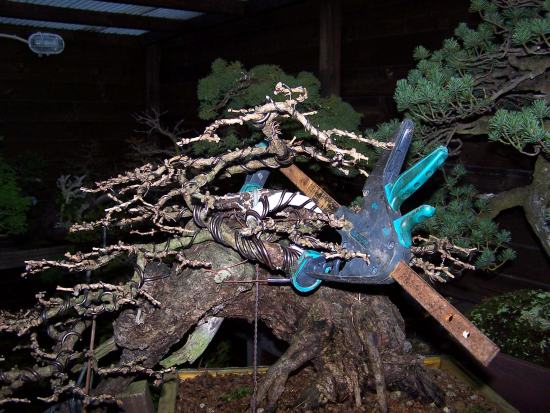
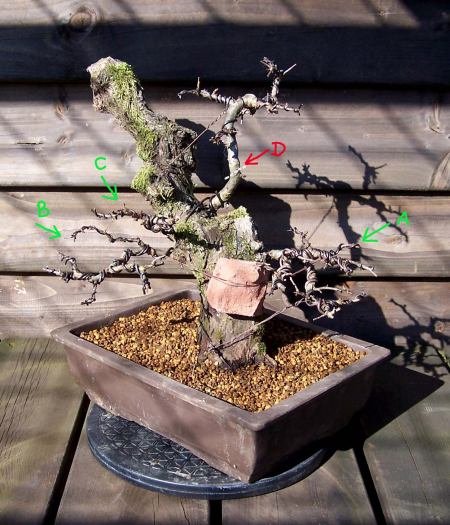
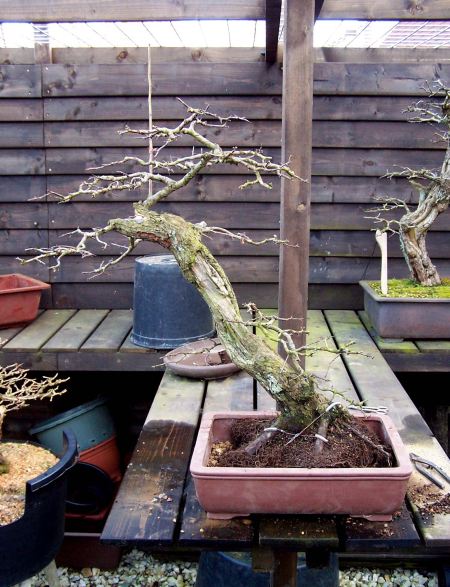
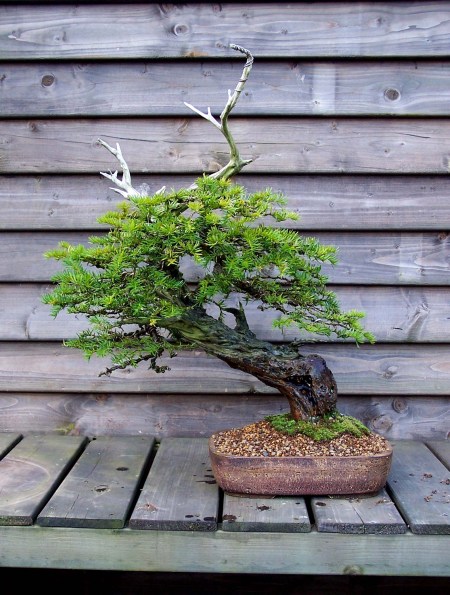
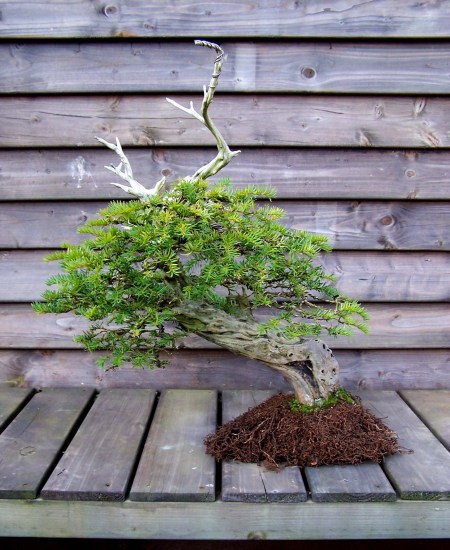
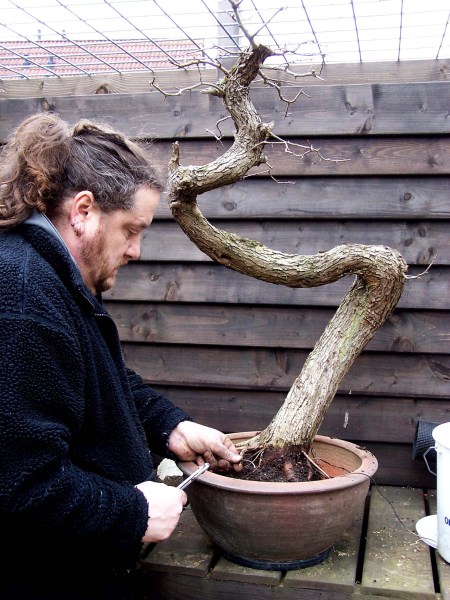
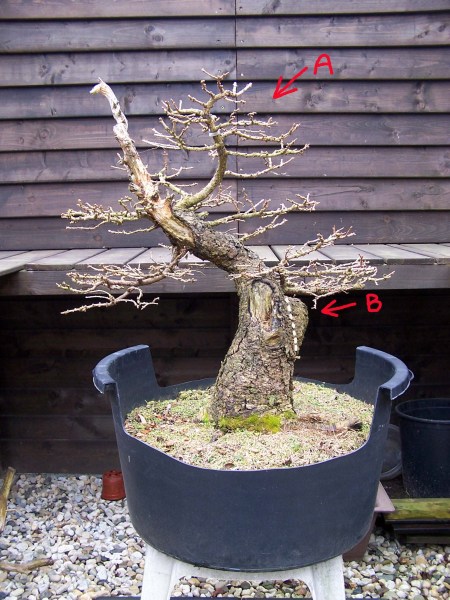
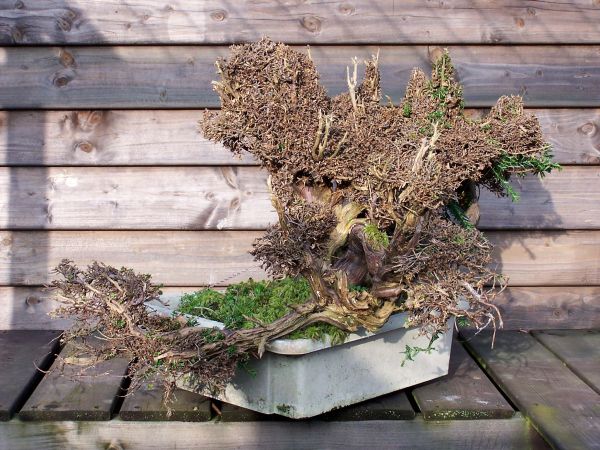
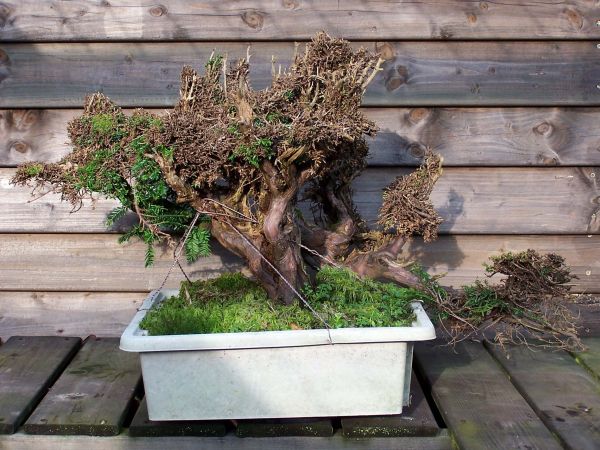
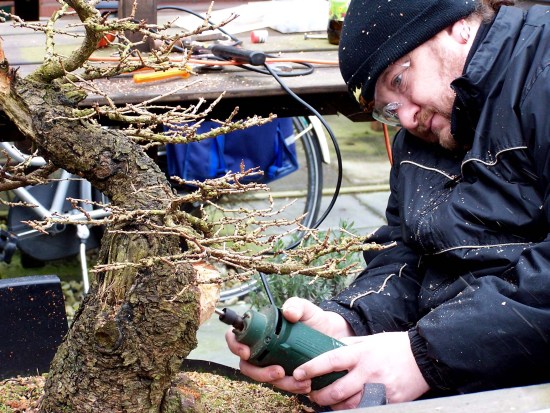
Above: This“Larch” has been completely wireless during the winter months. So, considering the short time I have been working on this tree, I am pretty pleased with how quickly the, mostly new branches, have already settled in their position. Only the (Youngest) top section (A) needs to be repositioned. I had left the Large stump (B) alone for a few seasons, to prevent the risk of dye/dry back in the main trunk. So now it was safe to remove most of it with power and hand tools and then style it in harmony with the spirit of this tree! The white dotted line is more or less the line of the trunk, so a lot of work had to be done to get there!
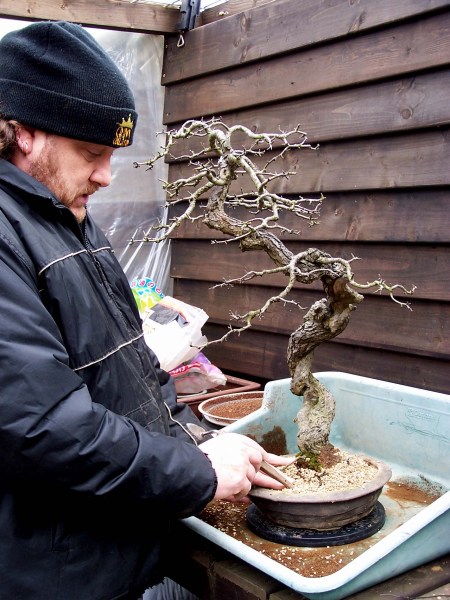
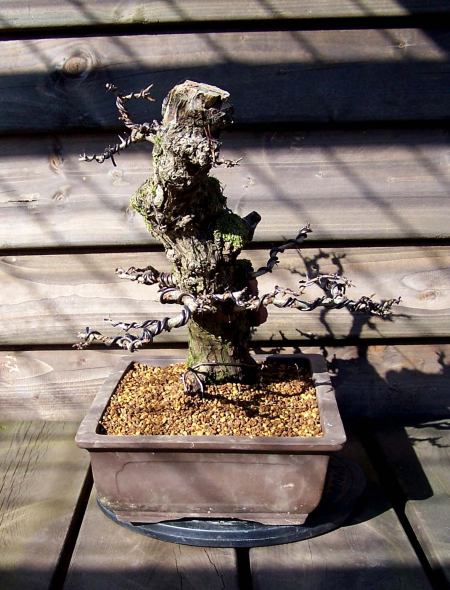
Repotting the “DANCER”.
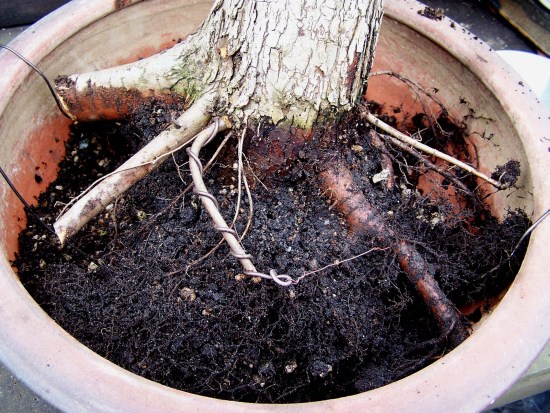
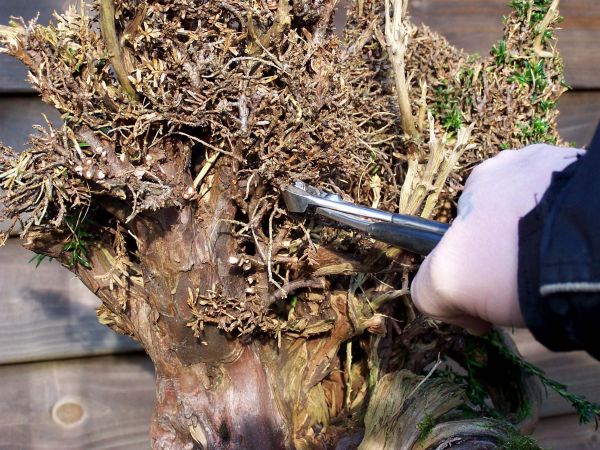
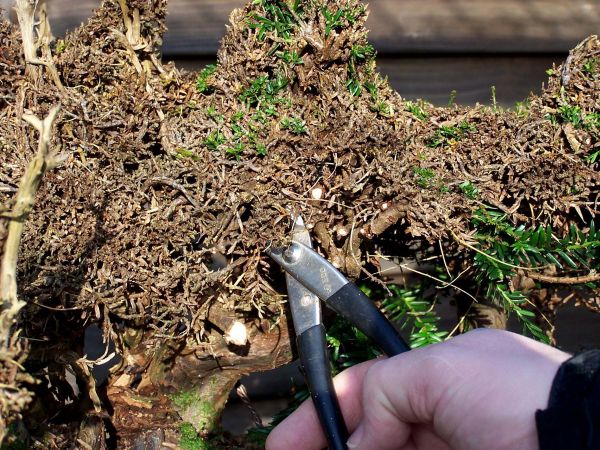
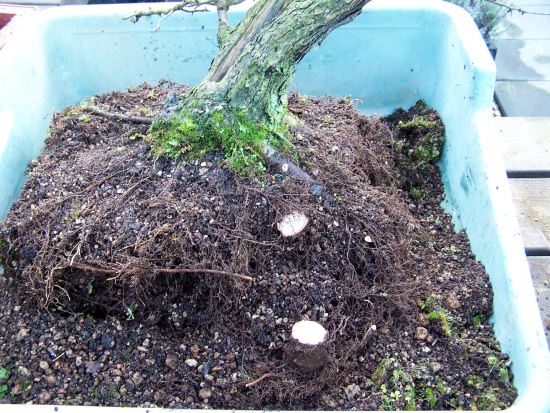
Here I am removing the extra roots I left on for extra security when I collected this Dutch Yamadori “Hawthorn”.Now I am left with a nice flat root base, full of fine feeder roots. This means that at the next repotting, I will be able to plant this tree in a much shallower pot. This will make her, more elegant and smaller…she is a bit tall! 🙂
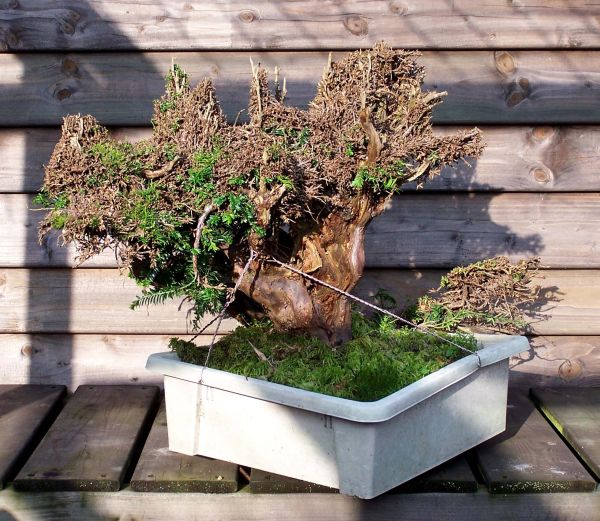
For now, she is planted in a deep pot, with plenty of room to grow. I want a vigorous tree, that produces lots of new growth to fill out and style the top section of this future Literati Bonsai.
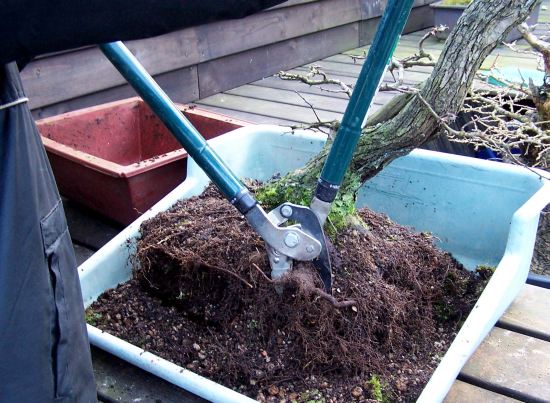
Some promising roots were redirected with wire. Thicker roots were cut back, right up, to about half an Inch away, from were strong, but smaller roots emerge from it. This simple, but sure technique, will be repeated, until the overall roots size, fits inside the planed design for this tree.
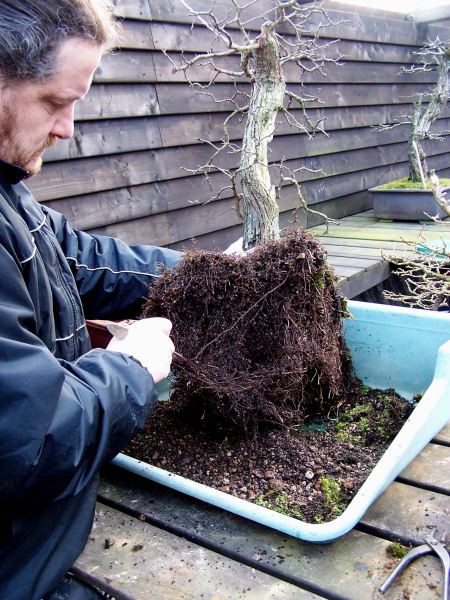
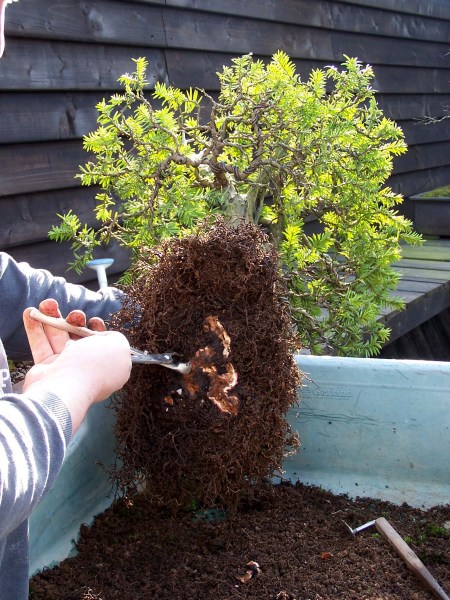
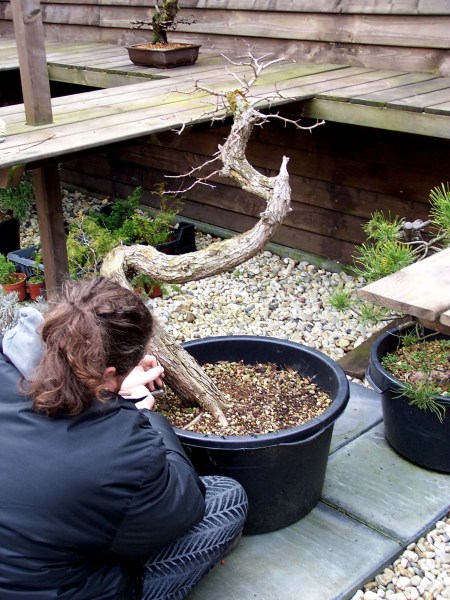
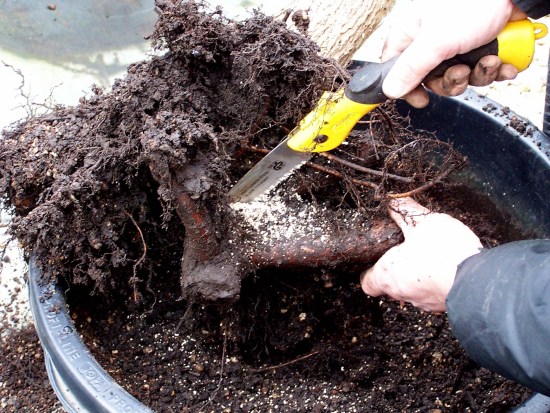
For now, this “Dancer” has a new home, where it can grow into a beautiful lady! 🙂Here I am removing more of the old root stub that was left for safety the last time this old Yamadori “Yew’ was repotted. I found this “Yew” in the U.K, many years ago now and it was the first tree that I ever collected. 2 years ago this tree sadly lost a lot of its vitality and some lower branches on the left were lost, but now it has slowly recovered into good health, so it was safe to work on the roots again!
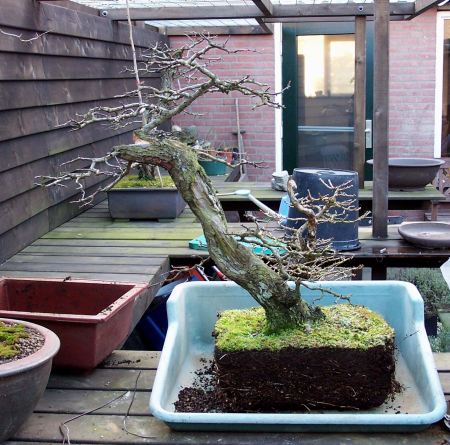
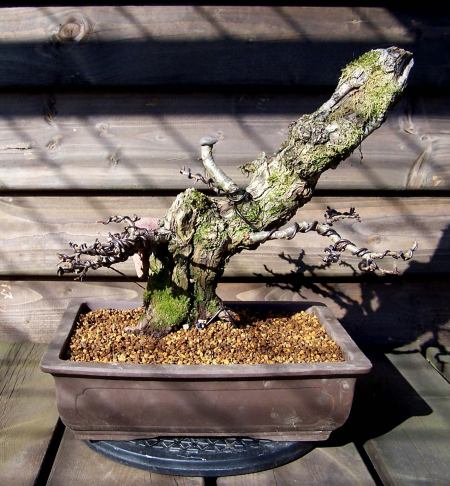
Look how flat the rootball is now, consisting of only small feeder roots! This means I can plant it deeper into its old pot and that the tree will look more balanced in it!
Here the tree is back in its old pot, as soon as it is settled down and showing lots of new growth, I will start to wire it and bring it back into its desired form again. I am glad this tree recovered from its ordeal so well, it holds a lot of good memories for me!
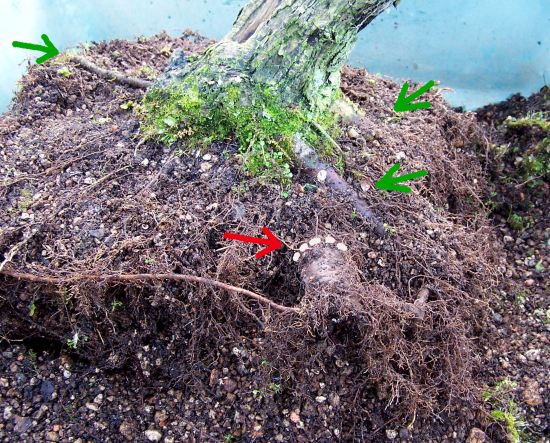
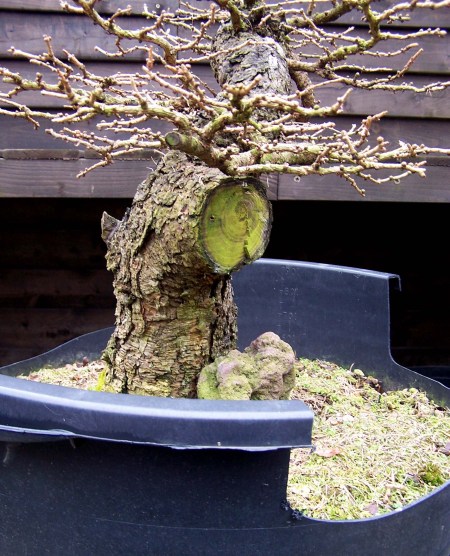
Above: This is the first transplanting for this Dutch “Hawthorn” Yamadori. As you can see the pot is full of healthy roots, so it was safe to remove the too thick root (red arrow) you can see in the second picture. The green arrow in that same picture, show some nice positioned strong roots. The next 2 picture s show how I removed that root. The last picture shows the tree in its new pot for now. For the next couple of seasons, I will concentrate on the growth of the relatively young branches, the need to thicken and mature. And of course, I have to work on the total ramification of the tree. This ugly duckling is quickly becoming one off the favourites trees to work on, in my collection! A couple of years ago I offered it for sale, still as raw material, during a big convention. For a very reasonable price, but nobody seemed to notice this oddly shaped tree, so full of natural mistakes. There and then, I drew a design on a small piece of paper, and afterwards, I gladly took the tree home with me, to style it myself! I have to admit though, it took a lot off imagination and even some optical tricks. But I seem to have overcome, some major design problems. Creating a thing of interest or even beauty, out of not too good material, is something I really love. Because these trees are not too obvious to style, you really have to look for that hidden Bonsai! But when you find it and everything turns out well, you will have a Bonsai that is often so much more interesting than the prefab ones. I enjoy it when a plan comes together! 🙂
Of course, I know, this tree has a very long way to go, but it is growing nicely into a “Mother and child” tree, with a twist. The mother leaning into the wind, protecting the little child that clings to her side, from the prevailing winds that torture the Dutch coastline were I actually collected this tree! I will keep you posted.
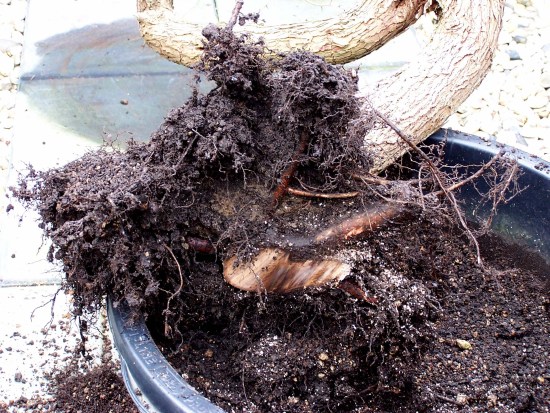
These roots, on one of my Acer palmatum, are beginning to look nice.
Above picture: This small tree is also a Dutch “Hawthorn” Yamadori.
Some serious bending going on.
Before We go any further,I would like to say, I am sorry that this post is dragging on so long. But it is the only way I am able to post anything new on my blog!
Hi Hans,
From Portugal, i wish you can kick off your back problem in the next operation. You are my inspiration for Crataegus and here we’ve loots of them, but are more straight.
Thanks you guy’s! I am still waiting and hoping for my insurance to give the green light. If they do, it is off to Belgium to say hi to the Doctor!
Hans.
Hans,
Greetings from the United States. I hope your back problems are under control. At the end I believe we all become Literati. Thank you for sharing your blogs. It is so nice to drop in on the lives of fellow bonsai enthusiasts. Mike.


 , I know! But I had to take a few steps back from the keyboard and try to focus on the more important things in life, mainly my health! These last few month’s, my back problems have become more severe and kept me more or less away from any real Bonsai work. But I did do some important small styling work and some repotting that could not wait any longer! At this moment I am gladly posting these pictures in the knowledge that there might be a solution for my back problems in the near future. I have found a great Doctor in Belgium that uses a new kind of operating technique! So now I only need the O.K from my insurance company and I am off to Belgium! So keep your fingers crossed for the next couple of days for me! 🙂
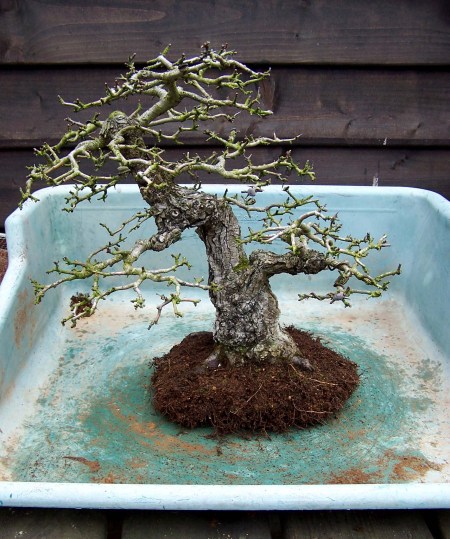


Hi, Hans!
I’ll be here in Portugal crossing my fingers so that the operation will come alright and you can continue your excelent work.
Cheers
LikeLike
Thank you Nuno,
That is appreciated! Not being able to lift your Bonsai is sad isn’t it? 🙂
Warm regards from Holland,
Hans.
LikeLike
Hope operation is a success so you can dance with your “dancing lady”
LikeLike
Hi Hans,
From Portugal, i wish you can kick off your back problem in the next operation. You are my inspiration for Crataegus and here we’ve loots of them, but are more straight.
Regards,
LikeLike
hi Hans,somme nice work there,good luck with the operation my friend,see you soon
LikeLike
Thanks you guy’s! I am still waiting and hoping for my insurance to give the green light. If they do, it is off to Belgium to say hi to the Doctor!
Hans.
LikeLike
Hoi Hans,ik vind de grote XL larix erg mooi geworden.
En ik zal voor je duimen,dat de operatie in Belgie voor je door gaat.
Groeten Ed
LikeLike
Hans,
Greetings from the United States. I hope your back problems are under control. At the end I believe we all become Literati. Thank you for sharing your blogs. It is so nice to drop in on the lives of fellow bonsai enthusiasts. Mike.
LikeLike