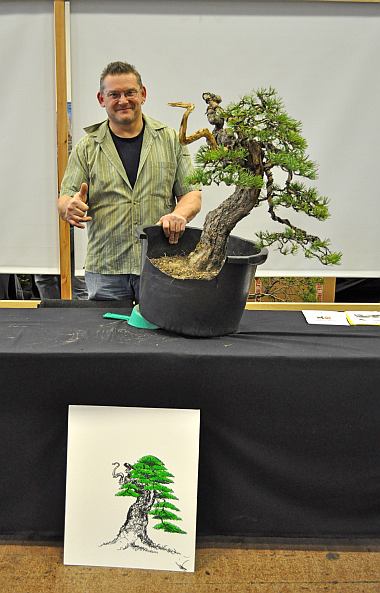
This morning I received a heart-breaking mail that my dear old Swiss Bonsai friend Serge Clement passed away. This friendly and gentle giant was an excellent Bonsai artist and demonstrator and one of the best Yamadori collectors I know! But above all a dear Bonsai friend! My big yamadori Larch (the Elephant) was many years ago collected by Serge in Switzerland! I made the below picture of him together with his amazing demo tree that he created at the “Joy of Bonsai show 2010” in Bath (U.K). I have fun and happy memories of that event where we both were demonstrators. During the evening gala dinner, the English students kept asking him questions that I had to try to translate into German for him and then had to translate his answers back into English for them! This was the first time I had ever spoken German in my life, so it was a miracle that it was understandable for him! After this event, we had a nice long conversation at the airport while waiting for our plains! He was an amazing artist and a true Bonsai friend! Rest in peace, my friend.
Normally to travel from the Netherlands to Japan to see a garden there, you’d have to cover a distance of more than 5,700 miles. But for my Dutch Bonsai friend Ramon, a trip to Japan is as easy as stepping out into his own backyard. While the distance is short, it took Smit over eight years to complete his journey. This is the amazing story of Ramon’s stunning Japanese Garden told in his own words, which he created himself from a blank canvas.
Almost 10 Years ago we decided to buy a house with a garden. We were living in an apartment on the 11th floor at the time and we started looking for affordable houses with a garden. We found a house in a place called Gouda an old red brick house from the 1920s (Yes the place famous for its cheese) with a very nice backyard ( 20m x 7m and by Dutch standards, that’s quite large). Even before we signed the contract I already made a drawing of the garden I had in my mind and was certain it must be a garden in the Japanese Style. My girlfriend was ok with it so (after I promised to make her a sunbathing spot) we did some work in the house and then broke the old garden down and started from scratch.
Above facing our house: The plants I did not want were dug up and taken by the old owner. (I only kept the boxwood shrubs). I dug out all of the grass and started to excavate the stream. I did this all by hand. I turned the grassupside down to make small hills and added the excavated soil. It took some time to finish because the stream was to be 30 meters long!
Below: The stream ends in a small canal that runs behind my garden (lucky me!).
Now it was time to buy some plants. I had done some research in my collection of Japanese garden books so I knew exactly what to buy – maples, azaleas, ferns, pine, hosta, Ginkgo and a 2-meter-tall yew Cloud Tree (which I shaped into a garden bonsai) so bought as much as my car could carry and planted them in the garden. Only to find with all the plants planted in the ground, that the garden looked still empty. I had only a small budget so it took a few months of saving before I could buy some more!
Now I needed rocks and stepping stones … a bridge, maybe a small lantern or two? It took me a few years to collect them but with some help from friends and my boss I bought everything wholesale. The rocks, all 10,600 kg I got thanks to my boss for half the price that a normal person would pay. The bridge and steppingstones I got thanks to my friend who owns a Bonsai studio (Bonsai is another hobby of mine & it’s thanks to that hobby that I became interested in Japanese gardens).
The rocks were delivered to the front of the house. My girlfriend and her mother carried most of the 10,600kg of rocks into the garden by wheelbarrows, except for the bigger ones which I carried into the garden and laid into the still-dry stream’s banks.
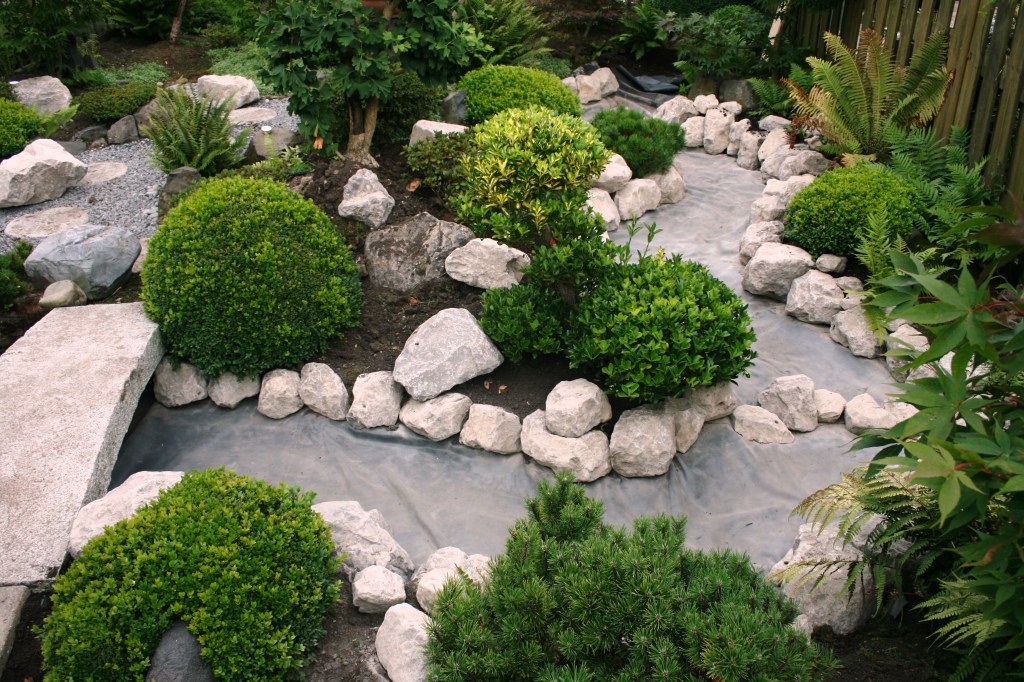
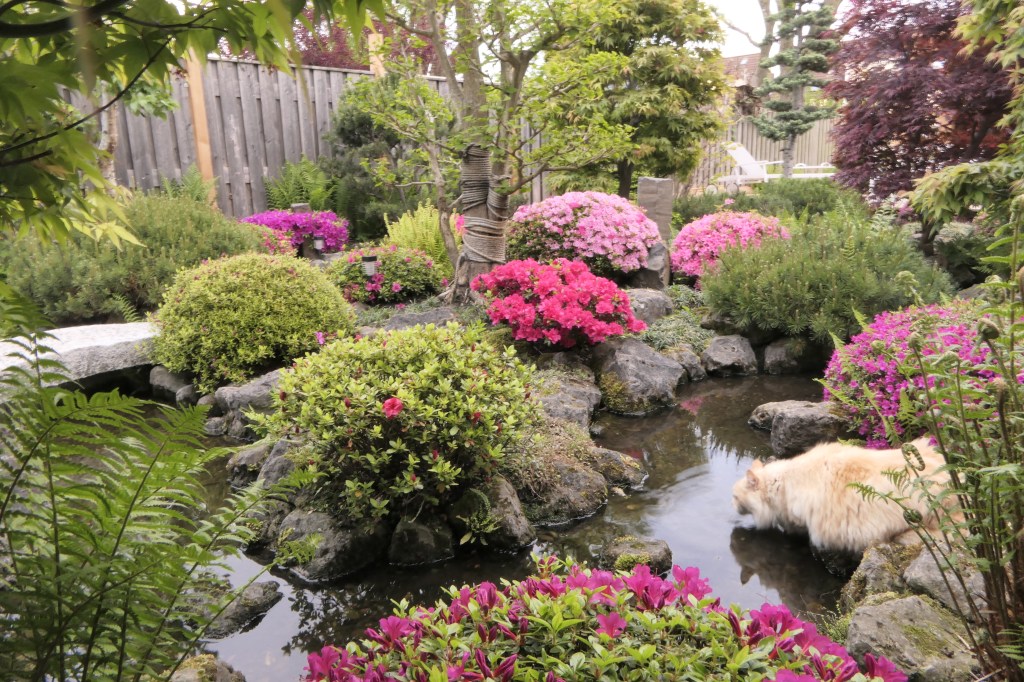
Below: I never really followed a plan, it was all in my head. I built the whole garden around the stream and tried to make it as natural looking as possible – all in the Japanese tradition as far as a non-Japanese person possibly can, that is! With the natural scenery in mind and the meandering stream, I was starting to realise my vision after I finally had the rocks to make it look great. I spent 3 weeks positioning the rocks along the stream’s banks and another week finishing the waterfall. I used a rubber butyl liner underneath the stream to hold the water in its place and also underneath the waterfall.
Below: I built the whole Japanese garden around the stream and tried to make it as natural looking as possible!
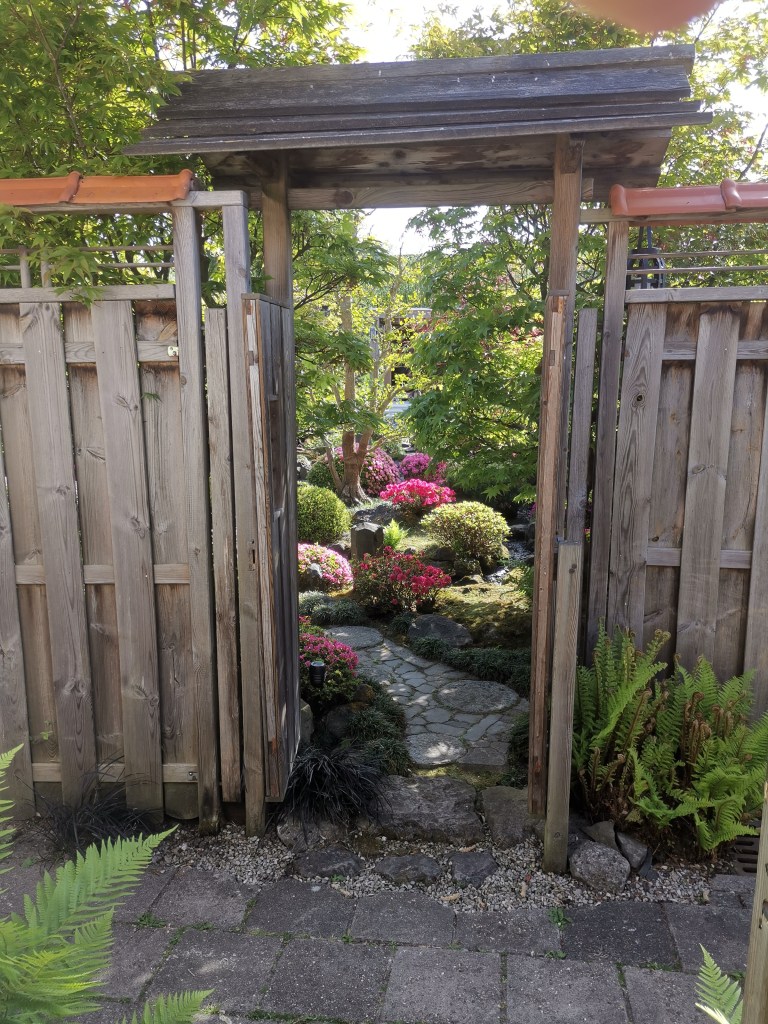
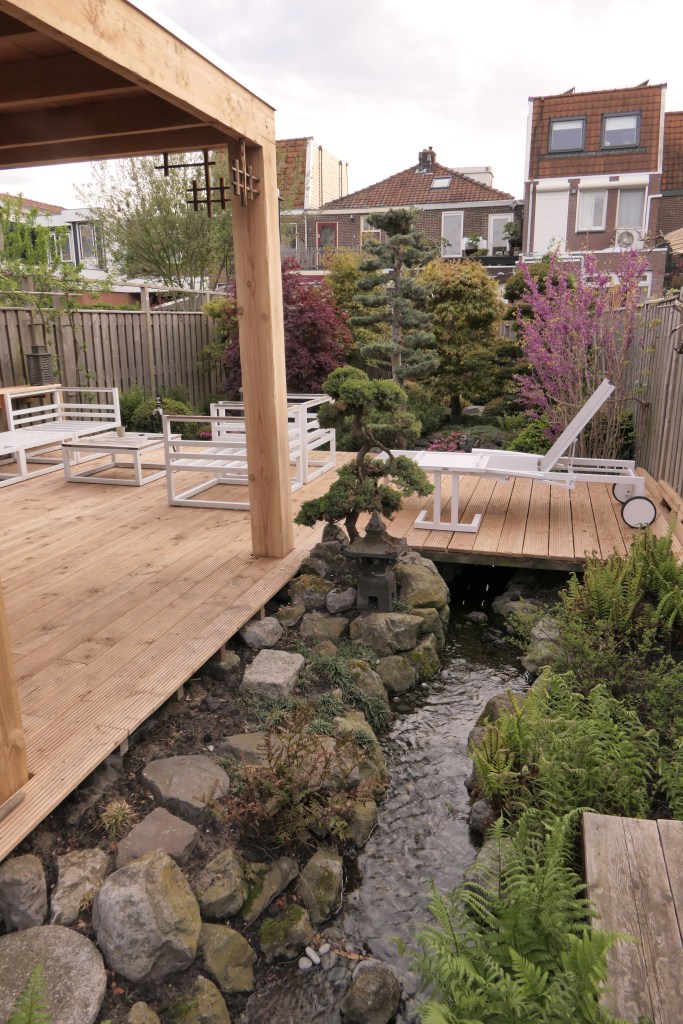
Below: Last year I built a Japanese gate and fence in the front of the backyard (getting rid of the old conifer hedge).
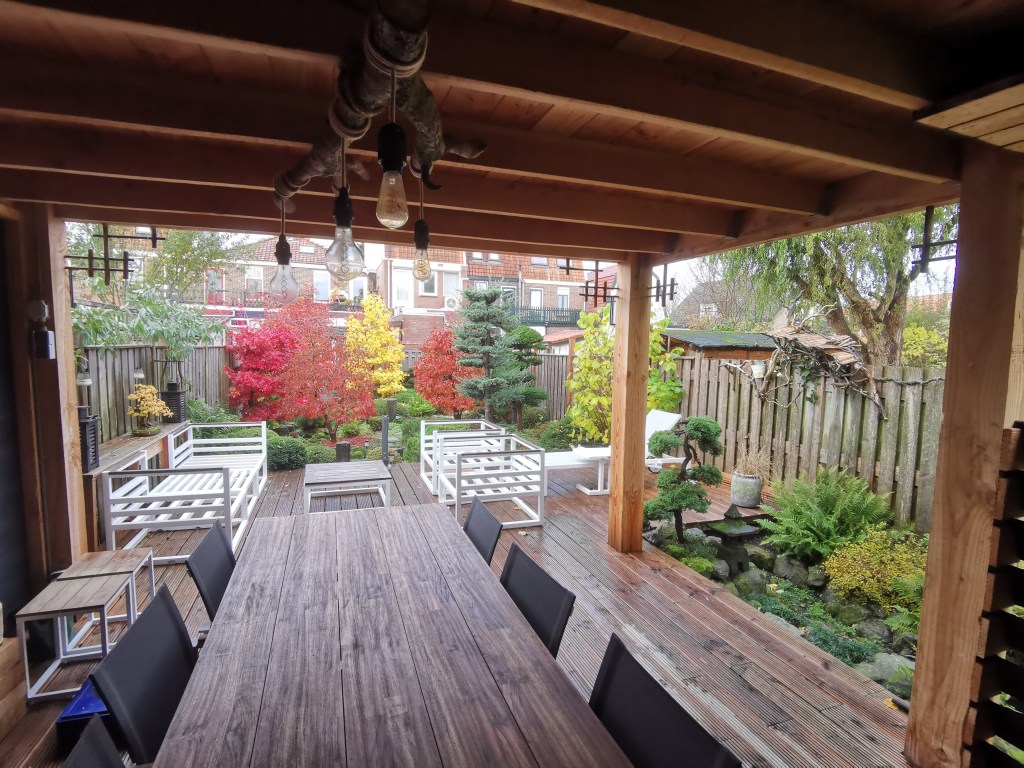
And I built a new terrace made of wood which expands over the stream and the garden!
And here are some more pictures of the whole Japanese garden and I hope that you like what I have created!
Here is a list of plants I used for the garden (most of the plants I bought – some of them I dug up out of the gardens of family and friends).
I pruned most of the plants into ball shapes. I pruned the azaleas and boxwood with a hedge clipper after the flowers were gone. You can do that until the end of August (because most azaleas produce new flower buds before winter). You can trim Boxwood maybe 3 times in the growing season followed by a hand of organic fertilizer on the roots.
Planning to Create a Japanese Garden from scratch in your own backyard?! My trees are shaped into garden Bonsai cloud shapes or as the Japanese call it ‘Niwaki’ (I chose to give it a try myself). Japanese Cloud Trees which can be purchased already shaped are expensive because of their age and the many years of work involved.
My inspiration comes entirely from Japanese garden books and pictures of Japanese gardens and natural scenery, like streams and waterfalls I found on the internet. The rest is all my imagination ….I’m just really fascinated by Japanese Gardens and I love the tranquillity and the serene looks they radiate …. hoping I could only come close to the real work of Japanese gardeners.I have a green background- I studied to be a gardener but never worked as one … so it’s just a hobby! I hope you enjoyed this little trip through my Japanese Urban garden?!
Hi everybody! We had nothing but rain the past few days, so as soon as the sun broke through the clouds, I grabbed my phone, a Bonsai table and my old double-sided Dutch Hawthorn with stunning Fall colours to make a few pictures that I could share with you all! I collected this old Hawthorn not far from where I live in a wet dune forest close to the sea. The poor tree was almost completely covered with sand and only a long battered branch with just a few leaves (now that Jin) grew above the soil line! The deer that roam free there had eaten most of its already spares foliage. And to make things even harder for this poor little tree, that protruding 1-meter-high almost dead branch was used as a scratching pole by the big buffalo that live there! This straight and half-death top section was all that I could see, so when I dug it up with only my hands, I was pleasantly surprised to discover a beautiful hidden trunk full of deadwood! Now decades later, he has become a mature old-looking Bonsai with two possible fronts! I think it looks really good in this beautiful pot by Graham Potter (UK)! So for now it can freely mature some more and developed more finner ramifications! And by then will decide what will be its front, or I will plant it in a beautiful round pot so I can turn it around and enjoy both fronts?! What do you Girls and Guys think is the best front??? Height: 38cm/15 Inch.
Hi everybody! My ribs and longs are still not healed from inhaling those Juniperus sabina pollen! So working on my trees is still out of the question because even breathing is still challenging and painful! But what I could do was make a cell phone picture of my Deshojo Palmatum in beautiful bright red autumn colours. Some 3 months ago I had to give her an emergency repotting because she had grown so much that she became potbound and her compact root ball had clocked all the holes in the pot! So much so that water could no longer run freely out of those blocked holes and that is something you should always prevent! So I freed her from the pot and then with a hook I carefully opened up the bottom part of those tightly tangled roots and cut them off. Then I planted her in this larger beautiful Isabelia pot with large holes in the bottom! Today a few months have passed and it’s clear that she suffered no ill effects from this emergency operation and is doing just fine! Although the pot is a bit too large for my taste…the shape and colour are a perfect match for her stunning red autumn colours! So I might let her grow a bit bigger or hope to find one with more or less the same shape and colour! She is the third Bonsai that I ever bought and has been with me since January 1990. Since then she has doubled in size! Height 68 cm / 27inch. Pot: Isabelia. Import from Japan. I hope you like her as much as I do?!
Note: Before you read the following serious health warning! Please know that I will still work with Sabina Junipers or any other poisonous Junipers for that matter!!! But I will do so with more care from now on! So this is by no means mend to scare you! But to warn you please be careful with Male Sabina Junipers around the month of May! Or whenever yours has the below Male pollen cones (strobila) in jour part of the world!!!
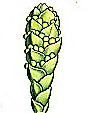
Below: Male Juniperus Sabina with still tiny jong Male pollen cones (strobilus).
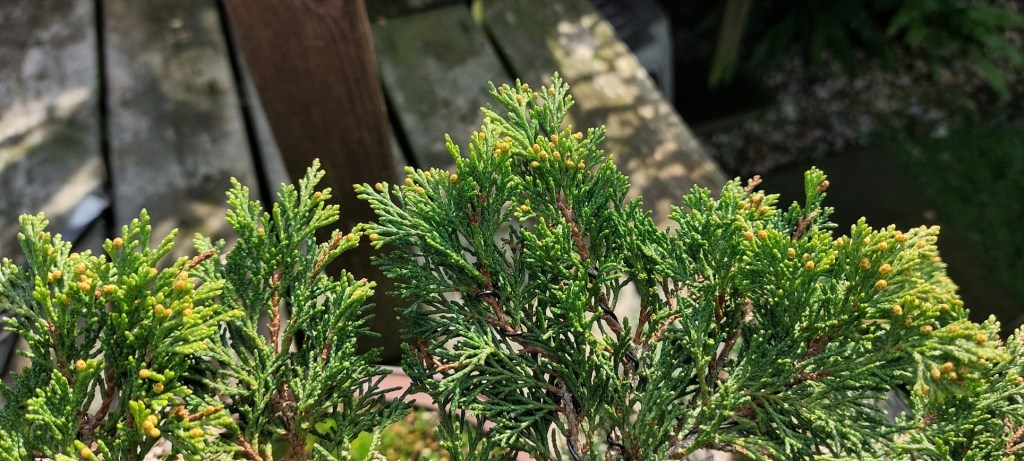
Below: A more mature Male Juniperus Sabina cone with pollen (strobilus).
Above: May 2022. The Juniperus Sabina from this warning! It was shot just before I inhaled the pollen cloud while working on it! In the left bottom corner of that large brown wooden plate, just below that cut-off branch, you can see a few of the tinny brown pollen pods that made me so sick!
Juniperus Sabina health warning! I thought hard and long about posting my warning about working on and with a male Juniperus Sabina during the period that they have very tiny male brown pollen cones or strobila at the tips of their foliage! My Sabina that’s from the south of Europe do then still tinny brightly green male flowers start to grow around the middle of September on the tips of its typical soft Sabina foliage. And the following year around the month of May, they had grown just a little and had turned into a light brown colour! And seemed to be dried out! And by then ( as I found out later ) were ready to disperse their powdery pollen content! And that was precisely the time that I decided to work on it, not knowing what would or could happen next?! During this wiring, it was inevitable to touch the foliage and while bending a branch a cloud of brown powder-like pollen was disparaged into the air right into my face and eyes! I un avoidable inhaled a large portion of this cloud and immediately started coughing like crazy! This went on for several minutes and then the gag reflexes started and I ended up on my knees on the ground contorting with every painful cough and gag! And this went on for at least ten painful minutes before I was able to stand up and painfully breathe a little without coughing and gagging! The pain in my chest was excruciating, so much so that the next day I had to visit my Dockter! After he examined my ribs and lungs, he told me I had several bruised ribs on both sides of my chest! Today as I write this warning, it is the end of September and four months after my misfortune and my ribs and longs are still very painful with every breath! So much so that next week I have to go to a long specialist for tests and a further examination to find out if my longs are damaged?! So please be very careful if you work on a Juniperus Sabina around May when you see those tiny light brown male pollen pods at the tips of the foliage! Or better still: do your styling or maintenance work earlier when they are still brightly green or later when those pods are empty and dried up!!! And if you do have to handle them during that risky period, well, then make sure to wear a mask and protecting classes and wash your hands when you finish! Believe me, you don’t want to inhale it or get it in your eyes!!! In the Netherlands, we have a saying:
A warned person counts for two!!! Cheers and stay safe, Hans van Meer.
Below: 30-9-2022. The same Sabina of this story is now already full of still jong and tinny yellowish-green male pollen pots!
A few weeks ago I had a long-awaited visit from my friend and student Diederick and his wife Miek Bovenlander. I spent a warm afternoon making sure that my trees were displayed as good as possible in the little space that I have in my small city garden! And I made a quick welcome display in my living room with (this time) one of my mid-sized Hawthorns and a pool stone that I found during my visit to Denmark. The background poster I had made of a picture that I shot during my visit to the amazing Japanese hill garden in Portland Oregon. I worked it over with my paint program to make it look like an oil painting! On the right side, you can see the famous Dutch pink cakes!👌 They liked the welcome and it proved to be a proper start to a fun and fruitful Bonsai day with friends!
It is near the end of August and my cascade Pinus sylvestris has grown well this Summer! And the foliage peds look more mature now! It still needs some light wiring but most branches are already fixed in their places! Meanwhile, I am on the lookout for a lovely handmade pot that is more or less the shape/idea of this plastic makeshift one!
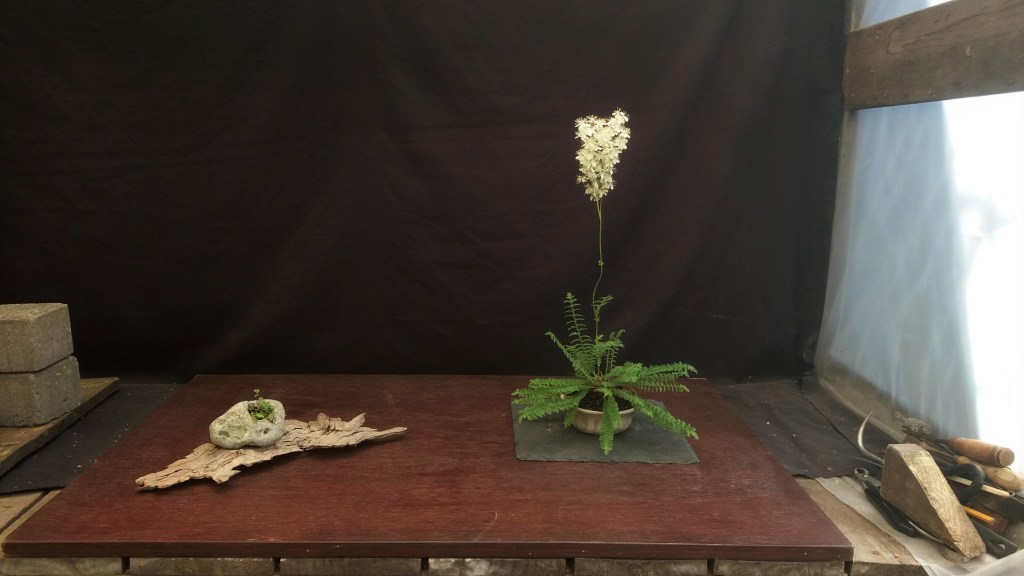
Below: it must have been 3 or 4 years ago that I noticed a small fern-like weed that was growing in between the gravel stones hidden underneath a long table full of Bonsai! So I carefully duck it up and planted it in the pot where it still lives today. And then this Spring a very thin stem started to grow and grow and bundles of small white buds started to form around the top of that still-growing stem! And even strong winds that battered it could not break or even bend it?! And then after a few weeks, all the flowers opened and an amazing perfume filled my working/foto aria! So I looked up some stuff to make this quick composition with…why you might ask? Well because I like to do this… it is a quick creating fix! The water stone on the left I found some 20 years ago on a beach in Denmark when I was there to do a demo and a workshop.
Below: This is a poor Cell phone picture and I just could not get the brightness of the reflecting flower petals down enough! I removed the plant identifier from my phone so I don’t have a clue what this little weed/plant’s name is?! So if anybody out there knows it! Then please let me know?!
I hope you liked this little post about the silly things that make me happy?! Ow…and a weed is just a plant that nobody wants!
Below: April 2018. Here is a picture of how I bought the Dubbel trunk, Juniper Sabina of this little story! Both trunks are connected underneath the soil line and I took a big gamble that I could separate them to get two very nice Yamadori for the price of one!
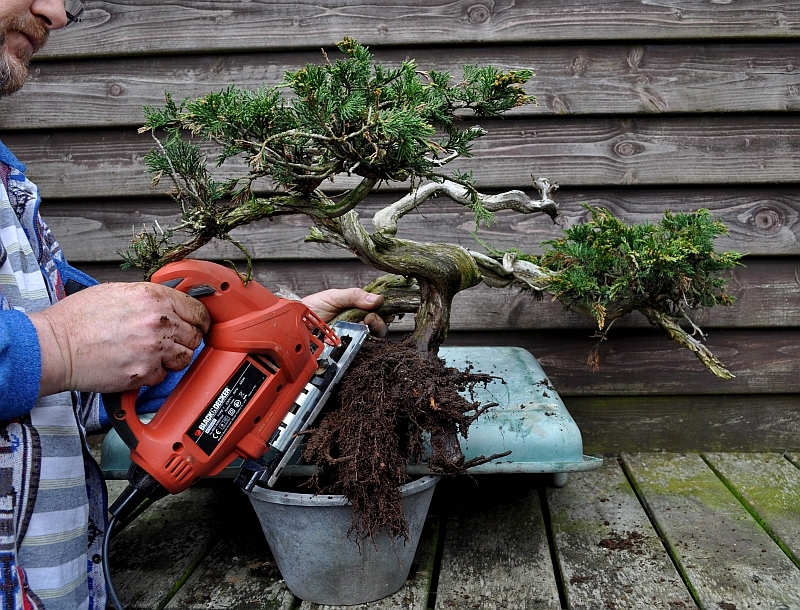
Below: After I first had made sure that the divided roots would be enough for both sides to survive on their own, I separated them with a power saw!
Below: And that is how one Juni became two Junipers!
Below: Next to each other in their new homes after a dust-removing shower!
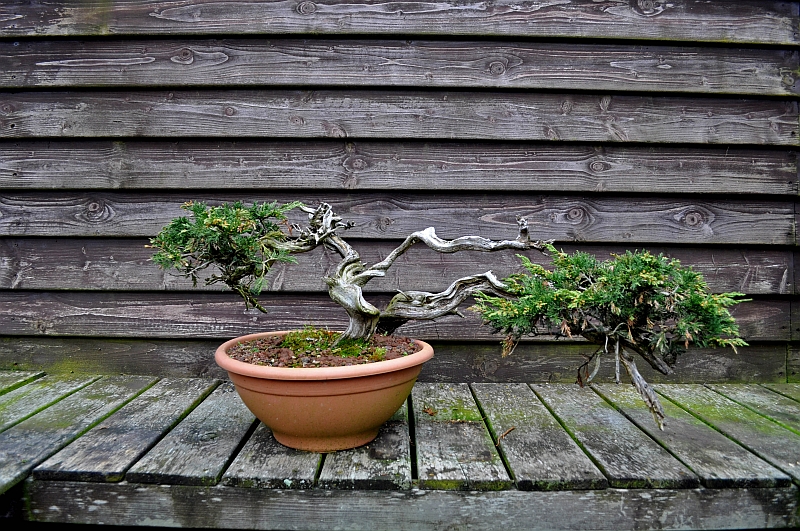
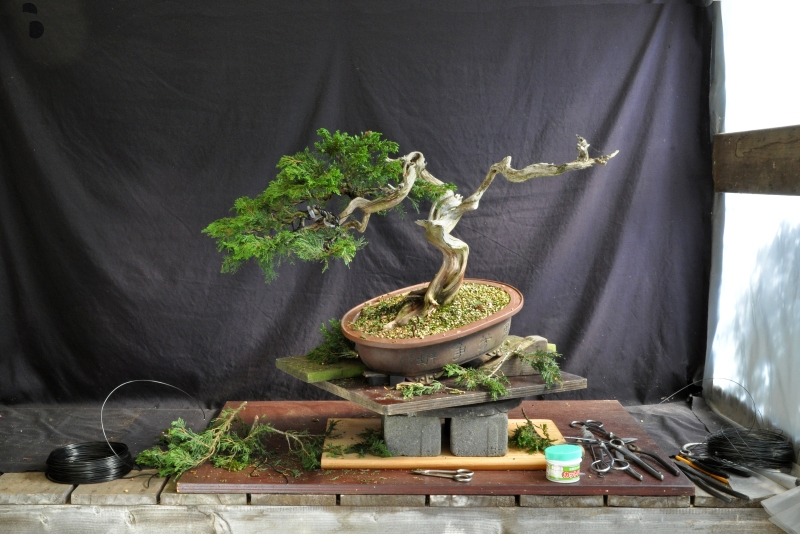
Below: fast forward to 17-5-2022. Before the work begins a quick picture! The tree is healthy with tons of foliage and more than enough (small) branches to choose from! But there is a problem! From this really only possible angle there is just one live line to see on the left bottom side and along the whole top section that is now all still hiding behind the lush foliage!
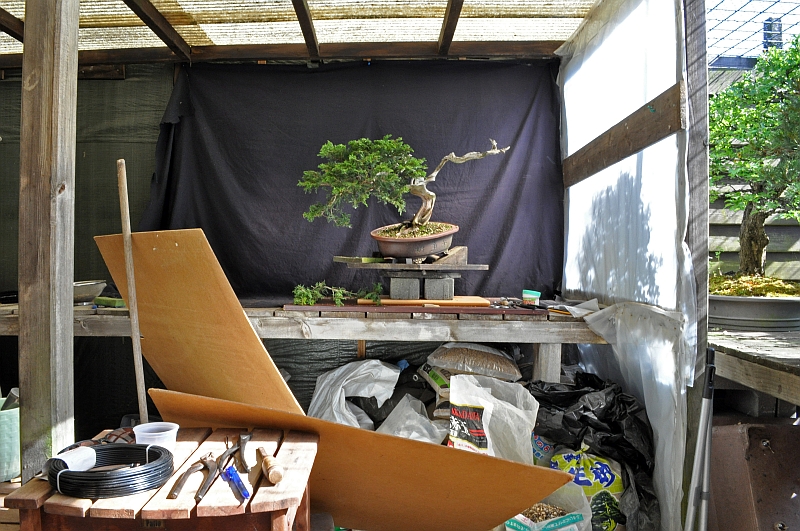
Below: Is an overview of my very professional working aria/foto studio!🤣😇
Below: Brach selection is always an exciting part of styling that needs to be done with confidence! I remember what the famous John Naka once set during a demonstration when he was about to cut off a major branch: “Let’s cut it off for now!” 😉
Below: More branches are removed or shortened until just the ones that are or could be useful are left!
Below: The all-important first styling work is done and now the tree needs some time to recover! But I can work on the deadwood and bleach it and with an old toothbrush carefully clean the life vein from its outer dirty skin layer to reveal its dark brown colour!
I hope that you like what I have done with this elegant Juni?! Cheers, Hans van Meer.
Below: I just wanted to share this cell phone picture that I made of 4 small candles hugging an apple on my old Pinus parviflora. She responds very well after her repotting and is covered with bright green candles! The 2 most minor will be removed in favour of the 2 stronger ones! Always leave a maximum of just 2 end buds at the end of each Pine branch so that they will not become too coarse in the future!