SOME BONSAI PICTURES FROM MY YESTER YEARS.

Hi, everybody,

for the last couple of days, I have been going through all my old Bonsai related pictures on paper, to look for ones I can use to accompany the new Bonsai stories I am planning to write and post on my website soon.  I would like to share with you some of this pictures I found because they hold precious memories of my beginning days in Bonsai.

IMG_0018 Juniperus regida 1994 Hans van Meer

Above: Juniperus regida. This small tree was one of my first attempts to style an imported tree from Japan. This picture is shot in 1994, during my monthly meeting at my first Bonsai club “Koya” in Bleiswijk Holland. Later that same year this tree was entered in the annual Bonsai show of the N.B.V (Dutch Bonsai Association). That was my first entry in an important show. Sadly this wonderful tree died in 1997.

                        IMG_0050 Juniperus regida 1994 Hans van Meer

Above: Picture of a other Juniperus regida, it was shot in 1998 in my garden. This is another early styling of an imported tree from Japan. 

                        IMG_0074 Pinus parviflora Edo bonsai Jan 1997 Hans van Meer

Above: Pinus parviflora from Japan that I styled in 1997. During that year 1997, my friend Ed de Groot, owner of EDO BONSAI CENTRE that in those day’s was still located in Boskoop Holland, invited me to work on some of his trees. He gave me complete freedom to choose anyone I liked to style, in the way I saw fit! That was a great opportunity for me because good material was pretty rare and expensive in those day’s, so to work on material of this calibre was a unique chance to practice my styling skills. I even took some of his best trees home and to my own place of work to style! I enjoyed working on his trees a lot and Ed wasn’t complaining either, those trees sold pretty quick and for a lot more money! Ed now still runs his EDO BONSAI business in Holland and in Indonesia, where he now lives. Thanks, Ed, for your trust in me!!

IMG_0043 Celtis chinensis Jan 2001 Hans van meer

Above: Picture from January 2001. Celtis sinensis from China, that I named “THE LION CRUSHER”. Even today, when I look around my garden, I still miss the real tree like images of this wonderful tree. This tree was back then, and would still be today, a rare side to see in my part of the world. That’s why I was so glad and proud to show it in a really great condition in the prestigious “GINKGO AWARDS” show. Yes I was really lucky to share its beauty for those few years it stayed in my too cold garden, but then I had to let it go to live happier in a warmer part of Europe. It ended up in Paris France, where I hope it still shines its awesome tree-like stature on every one that has the luck to looks at it!

Hope you enjoyed these old pictures as much as I did when I rediscovered them!

Cheers,

Hans van Meer.

Info: karamottobonsai@hotmail.com

————————————————————————

SOME PICTURES OF MY DUTCH HAWTHORN YAMADORI.

Hi, everybody,

yesterday I took  a picture of one of my Dutch Yamadori Hawthorns that I would like to share with you. I collected this trees a long time ago in the dunes close to were I live. Back than it was about 1.60 m high and now, after I chopped it down in several stages  that I spread out over several years, it measures about 82 cm in height. I am especially pleased with how it’s new top that I created is developing. The earlier too wide top without any taper now shows great taper and in some more years, it will look pretty convincing! The branches need much more growth and styling before this tree will fully reach what I have in mind for it, but it is already showing a lot of promise for the future. Dutch Yamadori Hawthorns, like any kind of Yamadori, are pretty hard to find and collect, so I am really happy I found this one and that it is doing so great. Especially the large natural deadwood section is unique on a small tree from Holland! I just love working on these Hawthorns, they are just perfect to creat Bonsai from!

13-9-2009 016 Hans van Meer

Above: There is hardly any wire in this tree at this moment, it will be rewired in early spring. As you can see, I use whatever is at hand to position branches in their place! The stick on the left that I used to hold that branch up,  is half a cloth hanger. 🙂

                       IMG_0002 Hans van Meer

Above: These Hawthorns grow in the dunes next to the see so only the top few inches are actually soil, under need that it is all sand. To free it from the ground,  I only had to use a small hook and my hands. I can clearly remember that while I was sitting on my knees concentrating on freeing the roots, some very big black highland bulls that room these dunes, thought it would be funny to suddenly appear right next to me and scare the shit out of me. We never saw or heard them coming!

                       IMG_0003 Hans van Meer

Above: After I cleaned my trousers, I proceeded to shorten the unwanted branches. This is by now means a simple task with all these very sharp needles!

                      IMG_0005 Hans van Meer

Above: The tree in my back garden. It is planted in a large tube, where the roots can grow freely in. The yellow arrow shows were the present day top is created.

                    IMG_0007 Hans van Meer

Above: A year later the too long and useless branches are shortened again. This forces the tree to back bud all over the lower parts. Then I only have to wait and hope that they will appear from just the right places to use in my design. This procedure is spread out over as many growing seasons as is necessary to keep the tree safe and healthy

acdc 094 Hans van Meer

Above: This is how the top section still looked only a few years ago. All these tiny branches you see here are new ones. As expected, they appeared after cutting back the thick top branches. Just look how ugly and too wide the top section looked in this picture. The green arrow shows the then still tiny present top! Amazing what you can do with some optical illusions, don’t you think?!

acdc 101 Hans van Meer

Above: Forgive me for not having all the dates of these pictures at hand, but this one is made the winter after the old top section was reduced. The tree looks so fragile in this picture if you compare it to the first picture! I still find the metamorphosis that a tree has to go through to become a Bonsai, unbelievable. It is good to keep taking and saving pictures to convince your self and others what really happened in the pre-Bonsai live of a tree! Although it takes forever to style a Bonsai, I would not want to miss it for the world! Patience will be rewarded in the end!

Cheers,

Hans van Meer.

Info: karamottobonsai@hotmail.com

——————————————————————————————-

EARLY PICTURES OF MY PINUS UNCINATA WITH OUT ROOTS!

Hi, everybody,

going through my old pictures, in preparation for the story of this Uncinata that I am currently writing for my website, I luckily came across these early pictures that I would like to show to you all.

Pius 11-01_0001 hans van meer

Above: The first picture is shot in my garden, just after we came back from our trip to Switzerland where we had bought this old Pine from a well know Bonsai artist/seller.

Pius 05-02_0002 Hans van Meer. virtual

Above: After a few months of waiting in vain for any growth and finding out that because of the terrible soil that was used, it was impossible to normally water the tree, I knew I had to act. So I started to carefully remove the top layer of the quicksand-like soil by hand, to check if there were any root problems. My worse nightmare came trough when I could not find any roots in the top layer. Or in the middle and not even at the bottom! All roots were simply sawed and cut off by the …… that collected it! The only thing that he had left on, was a soft to the touch and soaking wet sponge like tap root (yellow arrow), with one small root growing from it (green arrow). No wonder the tree was not growing!

Pius 05-02_0001 Hans van Meer

Above: Here you can clearly see the empty space with no roots under need this beautiful old Pine. It is a wonder that it has survived this ordeal and is doing so well today! The life force is very strong in this old wonder of nature!

30-8-2009 verpot dag 195 Hans van Meer

Above: I am so glad it is still alive today and that we are still able to enjoy the beauty of this at least 500+ years old tree! It is a real privilege and an honour to be able to work with this old survivor!

Cheers,

Hans van Meer.

Info: karamottobonsai@hotmail.com

—————————————————————————————-

A NEW POT FOR THE “PEE PINE”.

You can find my earlier post about the “PEE PINE” HERE!

 Hi, everybody,

here are some pictures of my “PEE PINE” that I repotted today into a nice Tokoname pot.

9-9-2009 pi pine repotting 001 Hans van Meer

Above: As you can see in this picture it was time to repot it. The strong roots had filed the whole bottom of the old pot it was growing in. I cut off that whole root mat you see laying in front of the tree. Leaving all the fine roots that grow closer to the root base.

9-9-2009 pi pine repotting 027 Hans van Meer

Above: A close up of the wonderful deadwood. It makes this small Pinus Sylvestris look so mature and old!

9-9-2009 pi pine 2 010 Hans van Meer

Pinus sylvestris.

                   35cm/14 inch high. Collected May 2004 in Austria.

                                                            Pot: Tokoname.

Above: And here is the “PEE PINE” in its new home. There is no fine wiring on this tree at this moment so it looks a bit rough. But even so, I do think that it has come a long way in the 5 years since I collected it. It already shows a lot of character for such a small and fragile tree.

Cheers,

Hans van Meer.

Info: karamottobonsai@hotmail.com

————————————————————————————————- 

A COMMUNIS WITH A TWIST!

Hi, everybody,

yesterday I took some pictures of one of my Juniperus communis Yamadori that I would like to share with you all.

07-09-2009 2 095 Hans van Meer

Above: This tree is a real problem child, design wise that is. (Yellow arrows) All live lines have died back and disappeared from this, it’s best front side!

07-09-2009 2 085 Hans van Meer

Above: And styling it from this side is, because of the strange way the long base of the trunk grows backwards and the straight first part, really difficult. But a styling possibility has come to me, but I will only know if it is possible to style it that way, when I repot the tree again in a few years time. This is why I like to work with virgin Yamadori material, they sometimes really make me stretch my imagination to solve or incorporate their wonderful problems into a successful Bonsai. And if it all works out in the end, the tree will be much more interesting and unique, because of all the natural but odd features that were used in its design! There is so much beauty to be found in imperfection!

Below: And a picture of a small planting on a piece of petrified wood. Some 5 years ago I found, close to where I live, this plant covering the ground surrounding a small pond in the dunes near the seaside. I took a small cutting and planted it on this piece of deadwood, it has been growing happily since then and it is covering it completely. I don’t know the name of this plant, but I do think it is a pretty combo!

07-09-2009 2 072 Hans van Meer

Cheers,

Hans van Meer.

Info: karamottobonsai@hotmail.com

—————————————————————————

MY VISIT TO BONSAI STUDIO DESHIMA.

Hi, everybody!

Today, after way too long, I visited my old Bonsai friend Teunis Jan Klein in his Bonsai studio “DESHIMA”. It’s was great to see him again after such a long time! Besides being a talented and successful Bonsai artist and teacher, T, J has also managed to build a wonderful Bonsai studio. He has accomplished what most off use dream of! Because he is a Bonsai artist, he has a very keen eye and a good nose for finding good raw material. And sure enough, after spending a lovely afternoon in his Bonsai studio,  I left his place with 4 very affordable and promising little urban Yamadori! He saved them from the shredder when a 45-year-old train station was torn down for a newer one. So all these trees are at least 45 years old.

First 4 pictures: Syringa microphylla “superba”. This is a real find in my eyes, I can’t wait to start working on this one!

Next 2 pictures: Weigelia florida “nana purpurea”. This is going to be a nice Shohin in the future.

Next 3 pictures: Berberis thunbergii. Hard to tell from this picture, but there is a lovely little cascade some were among those branches!

Last 5 pictures: Ilex verbicillata. Well, I think that the pictures say enough in this case! 🙂

5-9-2009 loder en tj 022 Hans van Meer    5-9-2009 loder en tj 024 Hans van Meer   5-9-2009 loder en tj 025 Hans van Meer

5-9-2009 loder en tj 030 Hans van Meer   5-9-2009 loder en tj 033 Hans van Meer   5-9-2009 loder en tj 036 Hans van meer

5-9-2009 loder en tj 040 hans van Meer   5-9-2009 loder en tj 042 Hans van Meer   5-9-2009 loder en tj 044 Hans van meer

5-9-2009 loder en tj 049 Hans van Meer   5-9-2009 loder en tj 048 Hans van meer   5-9-2009 loder en tj 054 Han svan Meer

5-9-2009 loder en tj 056 Hans van Meer   5-9-2009 loder en tj 061 Hans van Meer

I am really pleased with these little trees, it is a long time ago that I bought any trees and I am looking forward to starting designing and working on these new Bonsai projects!

If you are in search for good raw material, I can certainly recommend a visit to Teunis Jan Klein’s “DESHIMA” Bonsai Studio and School!

Wie op zoek is naar goed en betaalbaar ruw materiaal en nog veel meer op Bonsai gebied, kan ik zeker aan raden om eens langs te gaan!

“DESHIMA” Bonsai side: HERE.

Cheers,

Hans van Meer.

Info: karamottobonsai@hotmail.com

——————————————————————————————-

REPOTTING MY OLD MUGO UNCINATA.

Note: You can find an earlier post from 2007 on this tree HERE.

Hi, everybody,

here is the short version of the repotting story of my Mugo uncinata.

30-8-2009 verpot dag 121 Hans van Meer

Above:  The tree had no roots what so ever to hold it up when I planted it in this plastic container, but luckily it had on bought sides two thick deadwood roots sticking out that I could use to secure it tightly to the rim of the pot! The one on the left side was removed a couple of years ago, leaving only the one on the right to hold the tree in place. Because a lot of roots were even showing through the soil surface, I took a chance to cut the one on the right and repot the tree into the Tokoname pot that, until a few hours ago,  the “SWAN” used as a home.

              30-8-2009 verpot dag 129 Hans van Meer

            Above: Cutting the roots free from the side of the pot.

             30-8-2009 verpot dag 140 Hans van Meer

Above: Lifting the tree to one side to free it from the pot. Look at my anxious face! 🙂 

30-8-2009 verpot dag 143 Hans van Meer

I could not believe my luck! Look at a number of new roots the tree had managed to produce out off noting!

30-8-2009 verpot dag 145 Hans van Meer

Above: Close up of the only old root that this tree had when I repotted it the first time, all the others had been cut and sawed off by the ….. that collected it!

30-8-2009 verpot dag 167 Hans van Meer

  Above: Close up of the cutoff remains of the one and only root this tree had when I repotted it the first time! It is so amazing that this tree survived and is doing so well!

             30-8-2009 verpot dag 148 Hans van Meer

  Above: Look how nice all these new roots have grown around that supporting block of wood in the middle.

             30-8-2009 verpot dag 150 Hans van Meer

 Above: Lifting it up to put it into its new pot had to be don really carefully. All these roots you see here are really young and thin, and there was a serious change that they could break off when they were not enough supported by me!

30-8-2009 verpot dag 153 Hans van Meer

Above: I find it still amazing how many roots this old survivor has produced from nothing!

30-8-2009 verpot dag 154 Hans van Meer

Above: This is how the tree produced all these new roots, they grow out of the bark that was covered under the soil line, amazing isn’t it?!

                30-8-2009 verpot dag 160 Hans van Meer

              Above: Working the soil in between the roots with a chopstick.

30-8-2009 verpot dag 166 Hans van Meer

          Above: Still working the soil in between the roots with a chopstick.


               30-8-2009 verpot dag 174 Hans van Meer

              Above: Happy happy happy, happy happy happy! 🙂

30-8-2009 verpot dag 192 Hans van Meer

Above: Because the planting angle is changed so much, I had to reposition one of the main branches. I used a wood clamp to bring the thick branch into place, then I secured it with a wire to another thick branch to hold it in place.

               30-8-2009 verpot dag 195 Hans van Meer

Above: I am really pleased with how the tree looks for now. From now on it will only receive a lot of T.L.C!

Next year I will start working on the foliage and at the end of that same year I will start working on the deadwood and rewire the tree.

The longer version of this story will be posted soon on my Karamotto Bonsai site!

 It is a real honour to work on such a miracle of mother nature, it makes me realise how lucky I am!

Hope you like this amazing tree just as much as I do?!

Cheers,

Hans van Meer.

Info: karamottobonsai@hotmail.com


REPOTTING MY MUGO PINE “THE SWAN”.

Hi, everybody.

Its a bit later than was expected, but here is as promised the short version of the repotting of the “SWAN”!

az 13

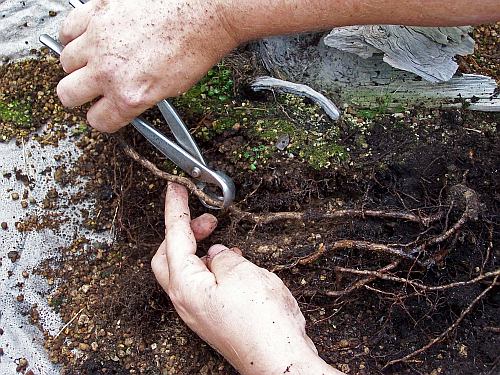
Above: With a special tool the roots are separated from the sides of the pot.

az 14

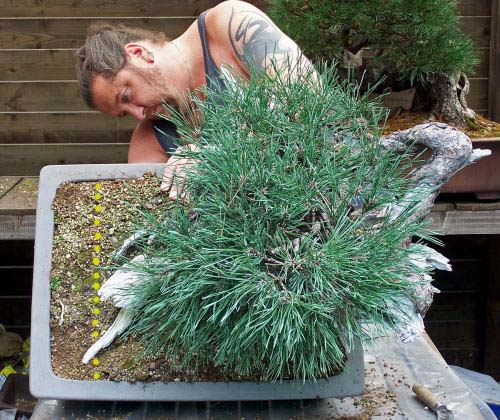
Above: The yellow line shows more or less the desired pot size. So this repotting I want to look how close I can get to that imaginary line, without harming the tree of course! During the first repotting of the “SWAN”, I had seen that most strong roots grew just from that side of the tree, so I knew that this never was going to be easy! I would soon see how ready this tree was to fit into this smaller pot. It was all very exciting, to be honest! 🙂

az 15

Above: looking for my keys. 🙂

az 17

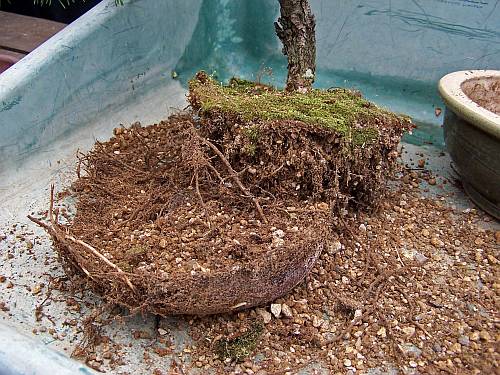
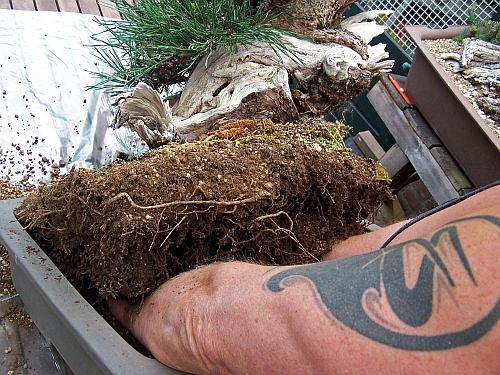
Above: Were necessary, roots were cut to free the tree from its pot.

az 19

Above: This darker soil in my hand is still the original soil from the mountainside where this old Pine grew. I had to remove all of it this time, to prevent the possibility of future root rot!

az 21

Above: Too long roots were cut back.

az 22

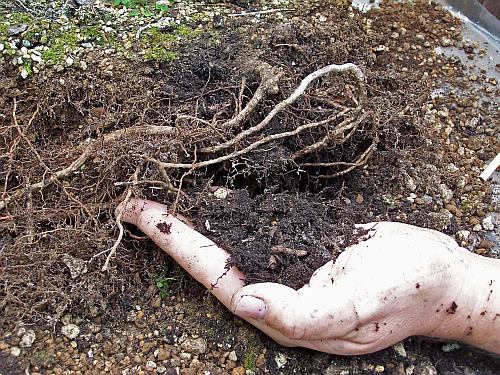
Above: This is a problem root! It sticks out way to far to be able to fit the tree in this smaller pot. But is too important for the health of the tree to just cut it off! So I wired it, just like you would do with a branch if you want to bend it!

az 23

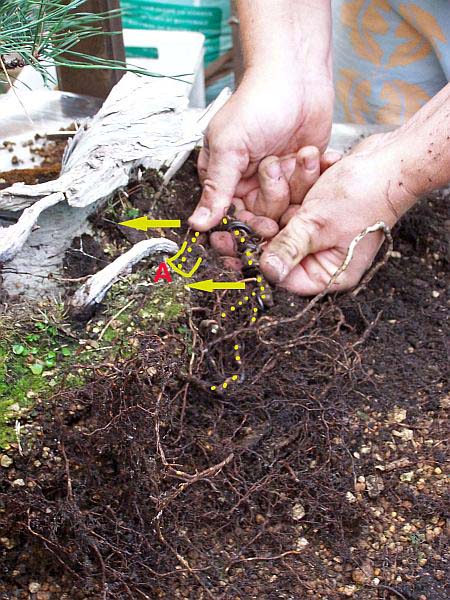
Above: (Yellow arrows) Here I am carefully bending the branch inwards towards the base of the tree. (A) shows were this thick root grows from. The yellow dots show just how much the roots were bent!

az 6

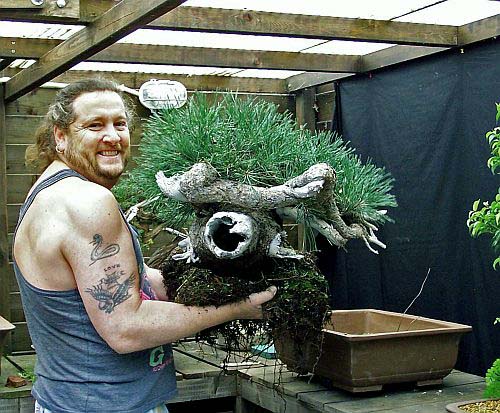
Above: Quick dear, this thing is really heavy! 🙂

az 8

Above: Next time, if possible, the tree will be planted just that little bit more to the left side. But for now, this is as far as was safe. But even like this, the tree looks more balanced than ever before. That is what makes Bonsai designing so interesting when you start working on a tree, you have to create a future image for your Bonsai in your mind. With only that mental image, you have to make all kinds of big decisions and then you wait and work for half a century or so, to find out if the plans you made all those years ago were any good! That is what makes this art form so special to me!

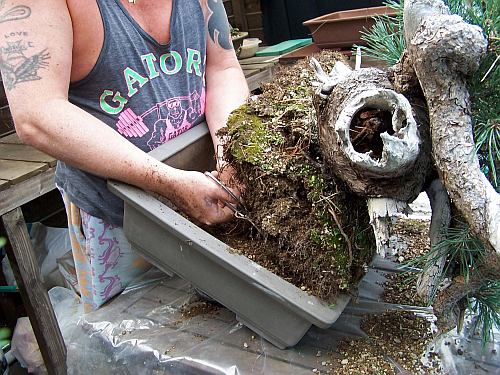
The piece of wood holds the tree into its place, so I can carefully work the soil in between the roots. Making sure no air pockets are left between the roots.

az 9

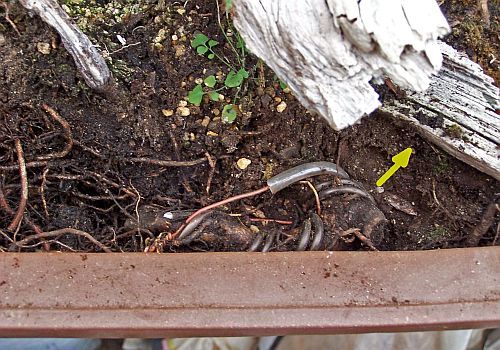
Above: Close up of how the problem root is bent. The whole tree is pushed as much as possible against the left side of the pot, This squeezes the thick root against the pot side, making it move even more inwards (yellow arrow).

az 10

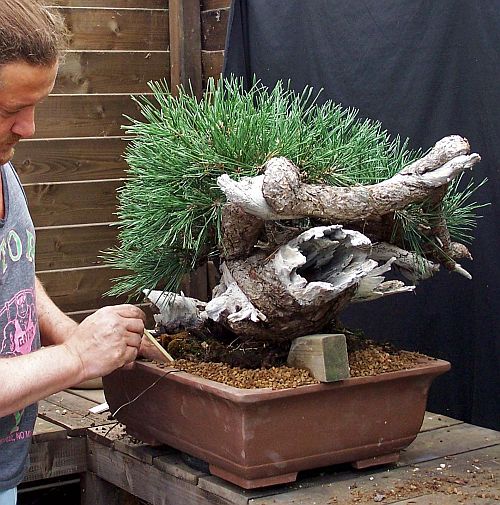
Above: Working the soil in between every root, with a chopstick. It took ages, but it is a to important task to rush!

az 2

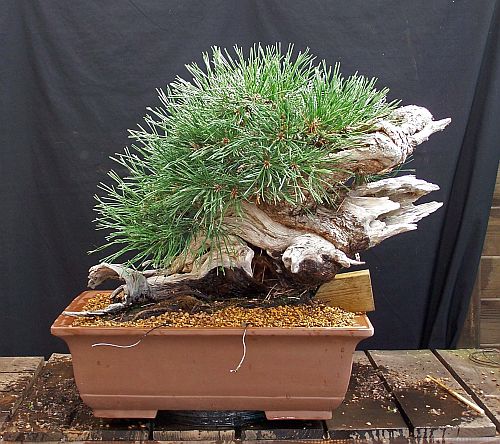
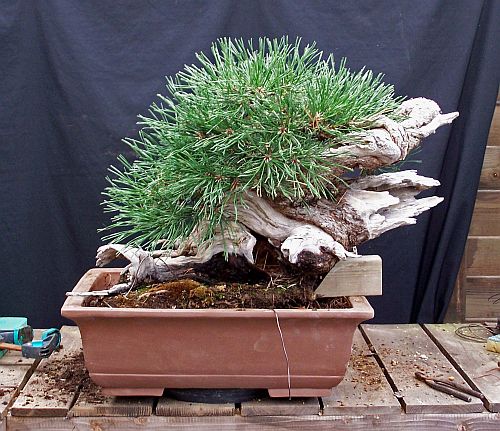
Above: The “SWAN” in his new (temporary) pot. It was watered until the water that runs out of the pot was clear. The wires that you see hanging out of the pot were there to secure the tree. but they were not necessary and will be removed.

I have to admit that I am over the moon with this result. The tree is now already planted more to the left than I had hoped for before I started!  If I can manage to planed it about 2,5 cm/1 inch more to the left in the next repotting it would just be perfect! The wooden block will stay there until I know for sure that the tree can hold this position by itself.

In a few days the complete story of this repotting, with much more pics, will be posted on my Karamotto website. So if you like it, go check it out in a few days time.

Tomorrow I will post the pictures of the other big Pine repotting I did on this same day.

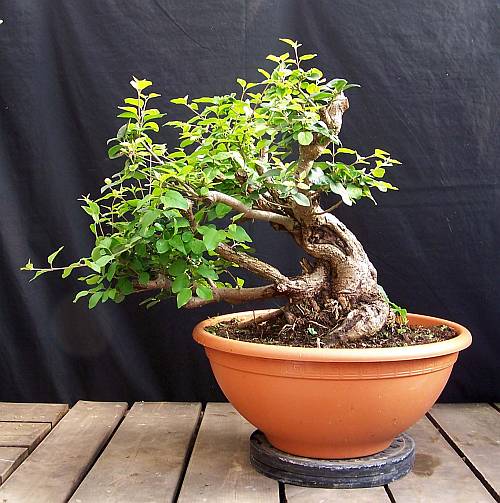
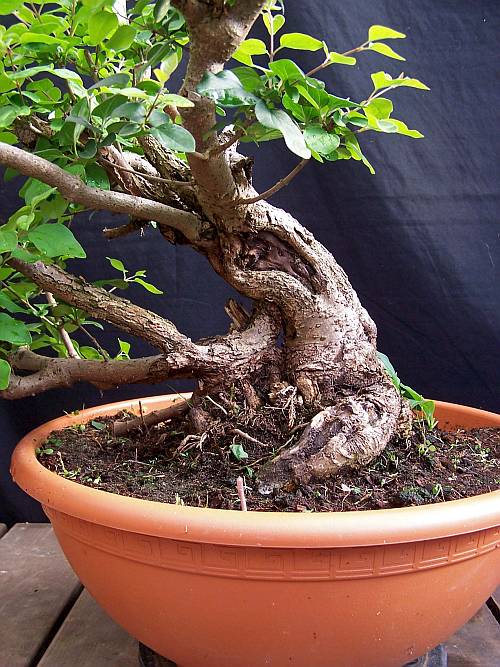
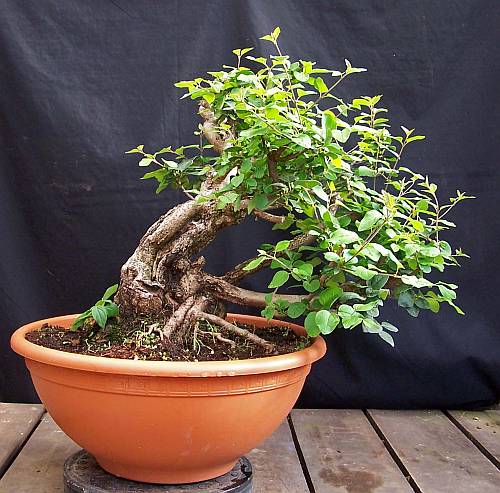
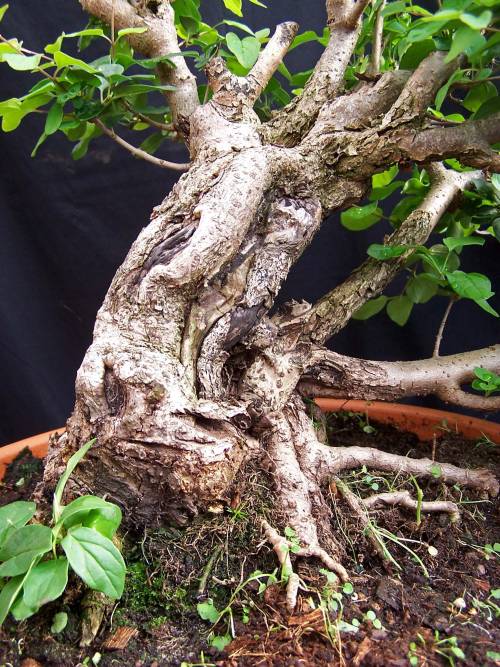
Hope you like how much the tree has changed already?

Cheers,

Hans van Meer.

Info: karamottobonsai@hotmail.com

———————————————————————————————

SORRY! BUT I COULD ONLY RECOVER A FEW!

Hi, everybody,

well, as good a day as yesterday was, today was a #*x# day! I spent most of this sunny day selecting, working and resizing the best pics for yesterdays repotting story! This night I had planned to post some here on my blog, but as always, something went wrong again. My adobe photoshop program had filed all the pictures, some 83 I had worked on, as empty files. This has never happened before and I have no idea why it did it now??? But luckily I was able to recover 15 or so of them through the “resend worked on” option in my photoshop, but all the others I had worked on are lost! If I am op to it, I will start working again on them tomorrow.  For now, I have seen more than enough of my PC, I am off to bed. So, SORRY! But you guy’s will have to wait a day longer, but here are 2 pics that I managed to save! 

az5

Here is a close up picture of the soil mixture I used in more or less equal parts. I used it well sifted into 3 different sizes. A layer of pretty large sized particles on the bottom of the pot, then a thicker layer with large sized particles and than the rest of the pot is filed up with the biggest layer of medium-sized particles. With this soil mixture, you can water every day if necessary!

       az 3

Halfway through cleaning out the old mountain soil that is left in the rootball. On the right front side of the rootball you can just make out the thick problem root that I have bent with the help of wire. All the pictures I prepared of this process are lost, but I will post them as soon as I finished working on them.

So I hope 2 C U all later with more!

Cheers,

Hans van Meer.

Info: karamottobonsai@hotmail.com

———————————————————————————————