
This a must-see video for all the people with the wrong idea about collecting Yamadori!
Well, don BonsaiTalk!
Cheers,
Hans van Meer.
———————————————————————————————————
This a must-see video for all the people with the wrong idea about collecting Yamadori!
Well, don BonsaiTalk!
Cheers,
Hans van Meer.
———————————————————————————————————
Hi, again everybody,
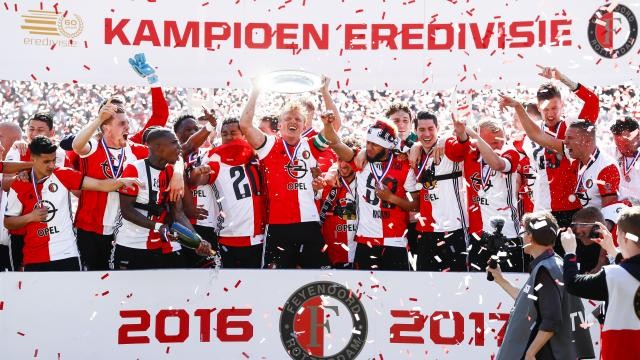
I know it is off-topic…but I have to show you just how special FEYENOORD FANS and people from ROTTERDAM ARE! 150.000 supporters in front of our City Hall that waited since early in the morning and another 50.000+ that were watching it on big screens around the city, gave their heroes and the TROPHY a welcome they will never forget….and neither will we watching it live on the TV!!! Lee Towers sang our anthem “YOU NEVER WALK ALONE” and then 200.000 fans jumped on the booming sounds of happy hardcore, gabber and hardcore another great thing invented in Rotterdam! This was unique in Holland and I do believe that it is unique in the world of sports?! Especially if you realize that Holland is not that big a country! I hope you enjoy the amazing images and forgive me that it is for once not about Bonsai?!

Thanks for letting me share this unique moment with you! This was a great moment of brotherhood and friendship in these difficult times we live in and I just wanted to share this positive moment with you all!
Cheers
Hans van Meer.
—————————————————————————————————-
Hi, everybody,
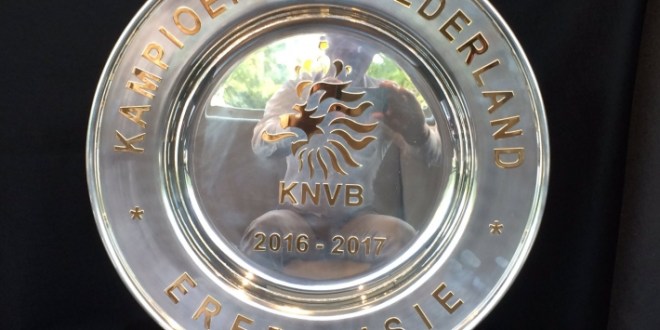
I am a lifelong fan of the only real soccer club of Rotterdam, FEYENOORD!!! And today my dream of them winning the Dutch championship once again, after waiting for it for 18 years, finally came through!!! They were number one from day one of the competition and won the trophy today on the last day of the competition! Winning 3-1 on their home ground, the famous soccer stadium the “KUIP” is located on the south side of Rotterdam. Our hero, old-timer Dirk Kuit scored all goals…and then Rotterdam exploded!!! 45.000+ fans in de “KUIP”, 5000 fans in the indoor stadium “Ahoy”, that were watching it live on an enormous screen and in the centre of Rotterdam, in front of the city hall, the long “Stadhuis plein” square, were a lot of pubs are located was transformed to one big in an outdoor party centre. With several enormous screens so that 10.000+ fans could watch the game and get pissed!!! After they won, the party started for real and the city centre fountain and the normally busy roads around it were taken over by a few hundred partying fans!!!
See what happened at the “Stadhuis plein” (city hall square), when the first goal was made after less than 1 minute by Dirk Kuit!!! (this is where I use to be a DJ for many years)!
And the 2-0 by Dirk Kuit as seen from another point….brilliant!!!


What a great day for my hometown Rotterdam which I love so much and for all the Feyenoord fans that were so loyal for all those waiting years!!! A pleasing day indeed!!!
WE ARE THE CHAMPIONS MY FRIEND AND WE KEEP ON FIGHTING TO THE END!!! 🙂
![]()
Hi, everybody,
last week I made some pictures of my small Hawthorn Yamadori that I collected many years ago with dear friends Tony Tickle and Terry Foster in Wales. Up to now it is almost always shown on the web and in shows without any foliage….so here it finally is with its Summer foliage!
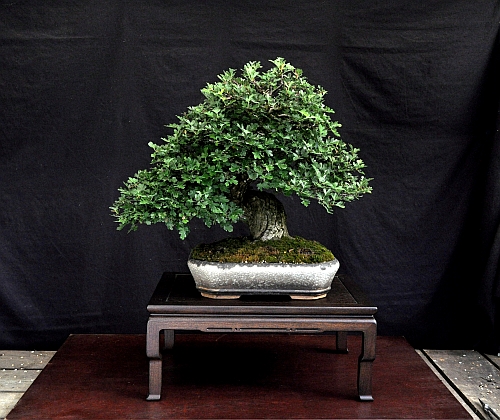 And a close-up of its nicely ageing bark.

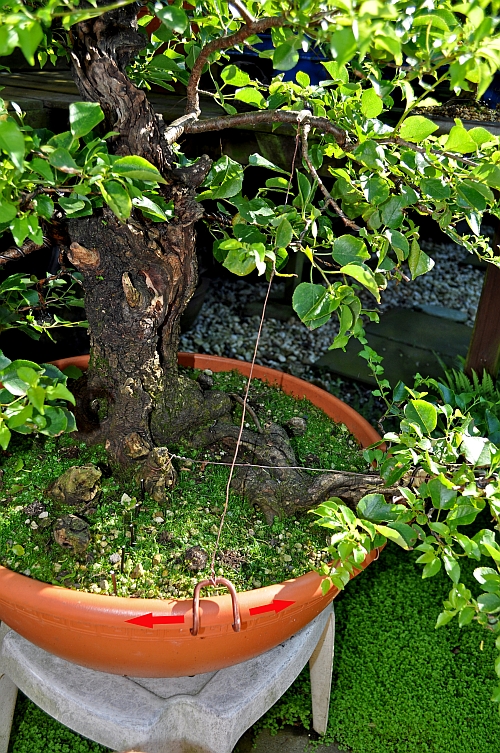
Below: I know that just like me many of you use different kinds of plastic tubs or pots for your pre-Bonsai! Most of those containers have some sort of rim around them on top! When we need to secure a recent potted plant or tree in one of these containers or when we need to pull down a branch with wire, we have a problem! That is then solved by making some holes in those rims with scissors, knives or power drills to run the wires through and secure them! This is often hard work that needs to be done in exactly the right place to work and it means most times that this container can be used a second time because it is weakened! Well here is a simple solution that prevents this and makes it possible to adjust the wire when needed! Cut a 3MM up to 5MM (old piece) of wire to length and with a plier bent it like in the picture below! Secure your (in this case copper) wire to it as close to the needed length as secure it! Now if your wire is too short or too long and your branch needs to be bent more or less, just slide the hook you have made to the left or right side! Simple but effective! And those hooks are reusable so handy in your toolbox when you need them the next time!
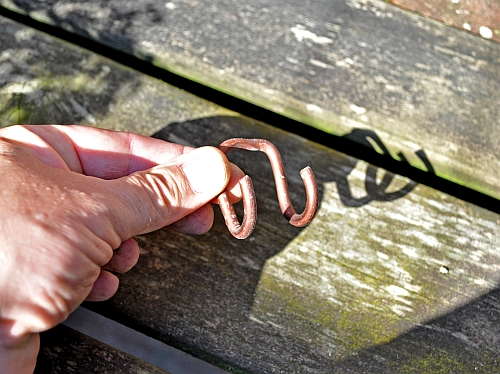 Below: this is how it works! More bend to the left! Less bend to the right! And no harm to the container!
I hope you like the pictures of my Hawthorn and that this is a helpful tip you can use sometime?!
Cheers,
Hans van Meer.
Info: karamottobonsai@hotmail.com
————————————————————————————–
Hi, everybody,
I just uploaded Part III of “The story of XL my Larch Yamadori Bonsai” Part III onto youtube!!! The final Part IV will be uploaded later this day! It was a lot of work making this story and I really hope you like it?! I will be posting pictures of the work that I did during the last weeks later this week here on my blog again! So watch this space!
Cheers,
Hans van Meer.
Info: karamottobonsai@hotmail.com
Hi every body,
just to let you all know that Part II of “The Story of XL” my Larch Yamadori Bonsai is on line! And that part III with moving footage of styling, repotting and shows is in the making! So watch this space if you are interested in my work! I hope you like it this far?!
Cheers,
Hans van Meer.
Hi, everybody,
after a lot of work, I just posted “THE STORY of XL” my Larch Yamadori Bonsai Part I on YOUTUBE!!! This progressive story in words, pictures and film follows this tree from collecting as a Yamadori in Austria in 2004 right up to the present day 2016 as a Bonsai in a major Bonsai show! In short…the life of a tree that becomes a Bonsai in 12 years’ time is told as a story for you all to enjoy…hopefully?! 🙂 Part II will be uploaded soon (I hope ?!)! It is a lot of surging troughs and improving old pictures, text, film and music and then the editing!! Boy o Boy! But seriously I enjoyed doing it and it is fun to see for myself just how much happened in the life of this old tree in all these years! And how amazing that process actually is! So I hope you will enjoy this story as much as I did making it?!
Cheers,
Hans van Meer.
Info: karamottobonsai@hotmail.com
Hi everybody,
I am happy to say that the “MOSHI MOSHI” Bonsai video was lost after the Dutch television organisation N.C.R.V. stopped the site that showed all the famous video’s from the Dutch television program “Man bijt Hond” (man bites dog) that was broadcasted for years around dinner time on the Dutch television and showed unique normal Dutch people and made them stars for a few minutes, is found again and translated by me so that I can show it to you all!!! This funny video was shot in 2000 because our then-still Prince Willem Alexander visited Japan because of the 400 years of friendship between Holland and Japan and shows Carlos van der Vaart and myself working in Danny Use his Bonsai museum and his “GINKGO” Bonsai centre in Belgium! Well, you have to see it for yourself and I hope you enjoy it as much as we did making it?!
Cheers,
Hans van Meer.
Info: karamottobonsai@hotmail.com
Hi everybody,
today is the Sunday after my visit to the long-awaited “KEI BONSAI KAI” exhibition that my dear old friends Danny Use his wife Ingrid and their amazing club members staged last Saturday in their famous Bonsai Centre “GINKGO” in Laarne Belgium! Danny staged this unique Bonsai show to commemorate the first friendships that were made when he, almost 20 years ago, staged his now legendary first “Ginkgo award back in 1997! In February this year, some 10 years after the last “GINKGO” Award was staged, friends from these early hours and from all around Europe were called by Danny and were to their surprise invited to exhibit there by now matured work at this “KEI BONSAI KAI” exhibition and one of them was little old me! So I prepared 4 of my show-worthy Bonsai for this one-off show, from which 2 Hawthorns had to be cancelled because they were attacked by insects that caused bums on most of the foliage! But XL my big Yamadori Larch and Wolfie my Mugo Pine were show worthy! On the Friday before the show, both trees, tables and other accessories were carried into my car to arrive some 2 hours later at the “Ginkgo Bonsai centre”! I had not seen Danny and Ingrid for almost 10 years, but was greeted by them as if we had seen each other only yesterday…..that was very heartwarming!!! We have a long and intense history together and it was good to see and feel that nothing has changed since then!!! From all sides, Danny’s helpers jumped out to help me lift the big Larch and heavy table chest onto trolleys and they drove them for me past the hundreds of stunning Bonsai that were already on display…..I was immediately amazed by all their quality!!

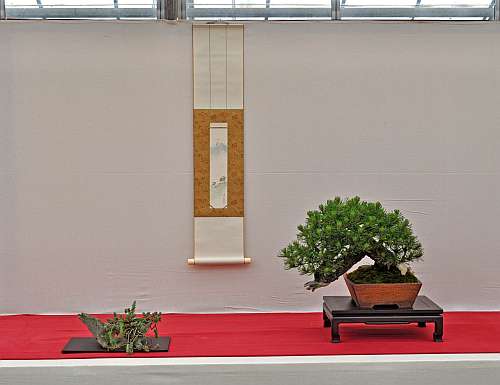
Danny had saved a beautiful Tokonoma for my big Larch and it was the first time for me to be able to do that!!! Creating my composition in this special space was a first for me and therefore very exciting and a real honour! As you can see here, I am happy with the way it all looks! And I am especially proud that this is a Bonsai from a tree that I collected myself all those years ago and that almost all branches and the top section were created from nothing! Later that evening my friend Mario Komstra, for who I have the highest regard, discussed with me this tree and he gave me an honour that surpasses for me every award there is to win! He called this old larch a Bonsai and an important European tree! Coming from him, I think this tree and me did all right up to now! But he also pointed out that there are still things that could and should be improved! Like the thickness of some of the branches and the top trunk section and maybe a shallower pot in the future! Points are taken Mario and thanks for the discussion and talk we had…you are an inspiration in many ways my friend and I do hope to visit you sometime, when things are better!!! 😉
This is a picture of the second Bonsai that I brought along with me! This is “Wolfie” the Mugo pine that I swapped so many years ago with another old friend Wolfgang Putz when my dear friend Tony Tickle (UK) and I visit him in his beautiful place in Austria! The beautiful accent stone is yet another gift from another old Bonsai friend from the UK, Terry Foster!
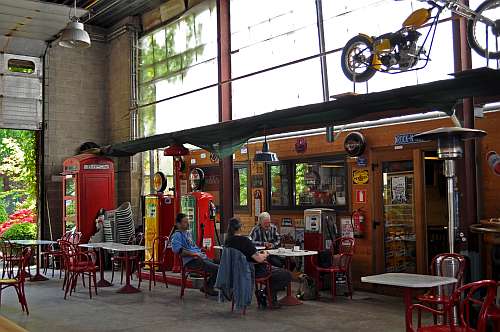
It was very intense and hot work building up my compositions underneath all that glass of the greenhouses that make up a large section of the “GINKGO” Bonsai centre! So I was glad to be able to sit down with my old friend Danny and my new friend, the very talented Frederic Chenal from France! This picture is taken in front of Danny’s unique “Route 66” roadhouse music bar that is built right in the middle of his Bonsai centre! Above the entrance, you can see one of Danny’s many hotrod bikes that he collects along with all kinds of paraphernalia that has to do with it! You got to love this guy!!! 🙂
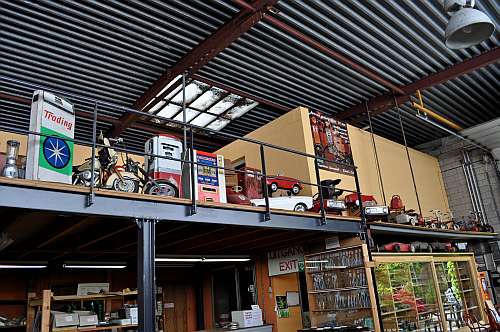
Across from the roadhouse, above the entrance and the pay desk, there are loads more of Danny’s collected stuff! Ranging from petrol pumps to children’s miniature cars and bikes!
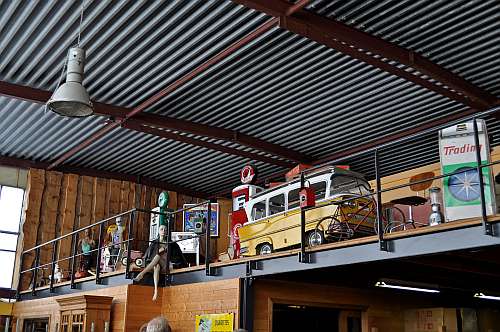
More to the left even more collected stuff! Just underneath this, you can see the entrance to space where Danny’s students made a very inspiring exposition of Bonsai in the dark!
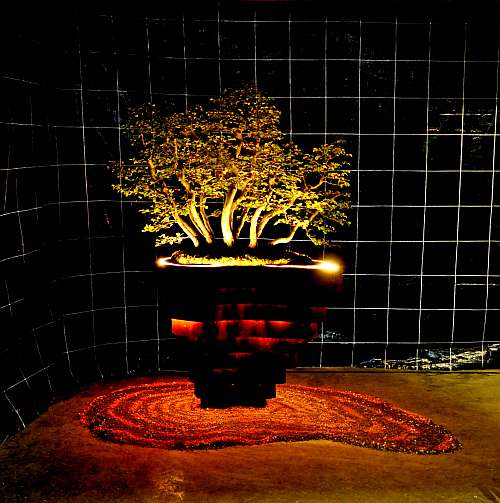
Imagine this composition in complete darkness, which was impossible to capture with my camera, because it kept on using its flashlight! But I hope you get the idea. It was all so inventive and uniquely made, really breathtaking and inspiring!
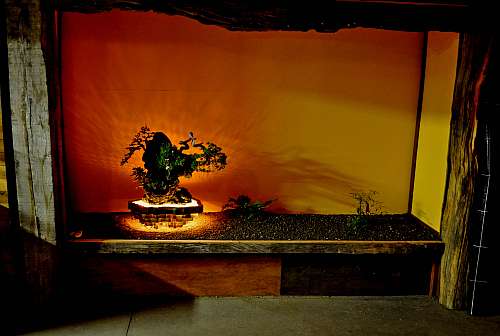
And here is another picture I made in that dark room! just look at that amazing old wood they used to create that Tokonoma and the contrast it makes with that modern lighted base where the Bonsai stands…great stuff!!!
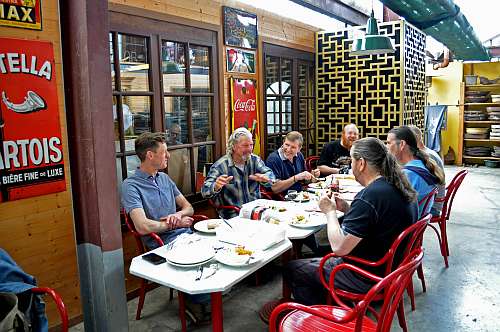
Lunch among friends during the show on Saturday. Danny is here telling the great story, of how he, me, Ludo and Carlos drove all through the UK to convince and invite artists like Colin Lewis, Harry Tomlinson, Dan Barton, Salvatore, John Hanby and Marco Invernizzi to come to the first “GINKGO AWARDS” in 1997! We drove about twice the distance then was really necessary and the way that happened is a classic story that still makes everybody who hears it laugh! It was good to hear about the adventures Danny and I had all those years ago! I am so glad we got reacquainted again and that nothing has changed, besides the colour of our hair and the shape of our bellies!! 🙂 He and Ingrid are indeed great friends and I am very grateful that I had the chance to spend this wonderful weekend with them again!!! Thanks, Danny, Ingrid and all who made this wonderful show possible…..and I will see you soon!!!
In the next couple of days, I will work on a video that I shot of this great event and of all the wonderful trees on display! This is a first for me so it might take me a while….but watch this space for the link!
I was smiling when writing this! Bonsai, Bonsai friends and everything that’s got to do with it is so special and uplifting! I wish the whole world could do it! Keep them small!!
Cheers,
Hans van Meer.
Info: karamottobonsai@hotmail.com
Hi, everybody,
today I would like to share with you the Air Layering or Marcot that I performed yesterday on one of the mine Prunes mahaleb Yamadoris.
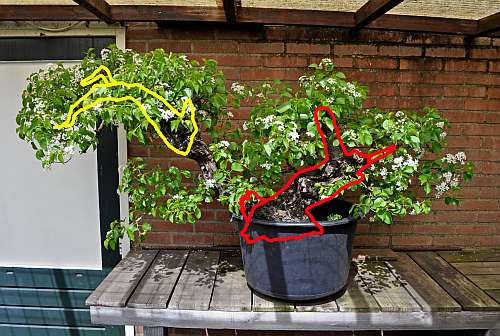
Remember this picture? This is the Prunus mahaleb that is about to be air layered. The left (yellow) section needs to be separated from the right (red) section! This beautiful left section, full of age-old death wood, goes to my dear friend Tony Tickle (UK) and the right trunk/tree section stays with me in Holland…if all goes well that is?!
 Before I start a little explanation about the different layers that make up a trunk and branch.
Just look at the quick drawing I made to explain. The bark on the outside of the tree protects the living cambium layer that lies under need it. This cambium layer produces the growth rings adding each season new layers of phloem and xylem to the tree. The cambium layer is a very thin living layer that produces phloem towards the outside where it eventually becomes bark and xylem towards the inside where it becomes sapwood. This all-important cambium layer is responsible for the growth of stems and, important for the technique that I am going to use, the roots! The phloem transports all the food and hormones that are produced by the leaves downwards to the roots. The xylem is basically vascular tissue that carries the water and other dissolved nutrients all the way up to the leaves.
So now we know this, how does those air layering work?! Where new roots have wanted a strip of bark is removed with the help of a sharp knife or in my case a small iron saw! After the strip of bark with the phloem is removed with the help of a sharp chisel (this was very easy on this Prunus) the thin layer of cambium is scrapped off with a sharp and clean knife! This is very important to do because if the cambium layer is left intact the tree or branch will not be fooled because the flow is not disrupted and most likely will not produce new roots if only the bark and phloem are removed! A sticky paste is made by adding the rooting hormone to water and that is then applied generously around the edge of the wound (on the side closest to the top of the branch or trunk). Then a thick layer of moist (but not soaking wet) sphagnum moss is applied all around the wound. This all is packed in with a piece of transparent plastic that works as a water barrier and allows the sunlight to come through. Holes can easily be made at the top of this plastic if watering the sphagnum moss is later necessary! When enough roots have grown from the wound, this depends on the species and the vigour of the parent tree, the trunk or stem is removed carefully with a saw from the mother tree and is then planted in a training pot. So now we know how to let us see what I did with this old Prunus yamadori?!

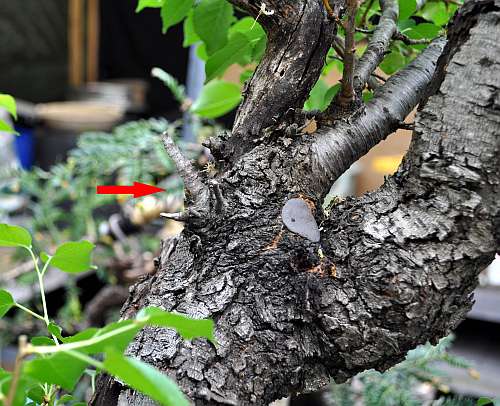
The red arrow shows the point where the air layering needs to be made. This is a thick and old side branch that grows from the lower left side of this massive trunk. This long branch or almost trunk is full of old deadwood and although it those not fit into the design that I have planned for this tree, it would be a shame and almost criminal not to try to save it to become a future Bonsai of its own!!

This is more or less where the air layering will be made! This is the widest part of this trunk and therefore will be the best future root base of the new tree when it is separated! This site consists mostly of deadwood and the 2,5 Inch live fain grows mostly on the other side!

A look at the future air layering from the other side of the trunk. The red arrow points at two branches that need to be removed because they are in the way and because they don’t have a future growing near the future new root base!

With a concave cutter, they are cut flush with the trunk line and sealed with cut paste. I don’t want any change of infections that close to the new roots!
The wound is properly treated and sealed with cut paste! The red arrow points at a Jin that is also in the way of the future marcot and therefore also needs to be removed! Here you can clearly see that this section of the trunk is the widest and there for the logical choice!
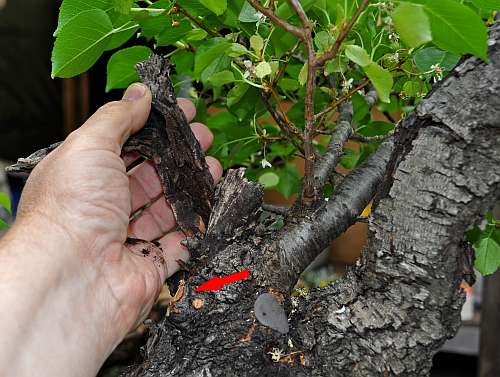
Red arrow points at the Jin that is just removed. The old Jin just above it proved to be almost completely rotten and broke off easily when I checked it with my hand! A little stump that still was hard is left for Tony to decide if he wants to use in the future when this trunk is separated and starts its new life in his garden in the UK…if all goes well that is?!

Here that rotted old Jin is removed up to where the hardwood started! The branch growing to the right side of it is left as an engine for the new roots that hopefully will grow below it! It is again up to Tony what to do with this branch in the future?!

A closer look from the other side. That jin stump could be interesting in the future and that branch that is left can be left and used in a design or be transformed into a Jin as well in the future?!

With the use of a wire, the angle of the air layering is checked from both sides until I was satisfied! Red arrow: Then with the help of a thick black marker two lines were drawn, one next to the wire and the other one about 2 Inches further down the trunk.

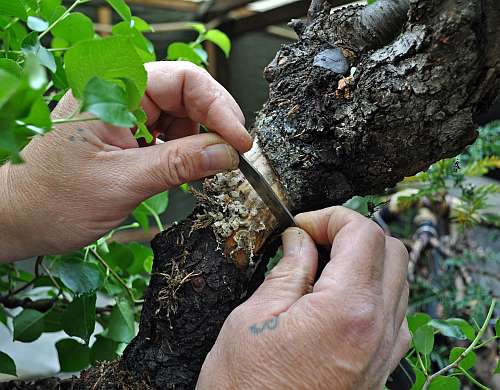
With the help of a small iron saw, I carefully sawed through the bark! using this saw was an experiment because in the past I had struggled to make a clean cut when I used a sharp knife and I was right…it worked like a charm! Straight lines and a clean cut without the chance of cutting off a finger or damaging the bark! Red arrow points at the bottom cut!

With a just sharpened chisel, the bark was piece by piece carefully removed. At the top of the fresh air layering, you can see where the life section stops and the (brown) deadwood part starts!
With a sharp and clean knife, the cambium layer is carefully scraped away everywhere along the top incision! Making sure that nothing is left so that there will be no cambium flow possible between the top and bottom incision! This now will trigger the tree to make new roots along that top incision….if all goes well that is?! 😉
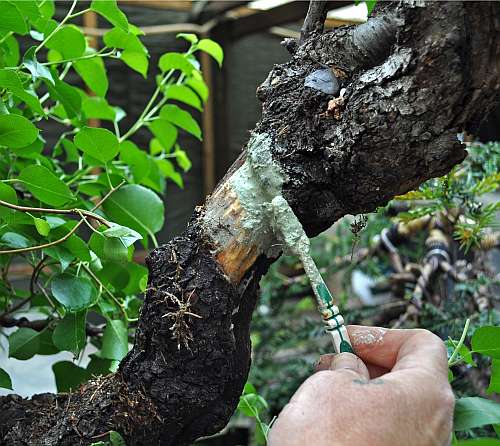
Then a paste of rooting hormone and water was applied to the top cut and below it. This was left to dry so that it would stick to the surface even when the wet sphagnum moss is applied! This rooting hormone powder (from Bayer) will stimulate and help the production of new roots!
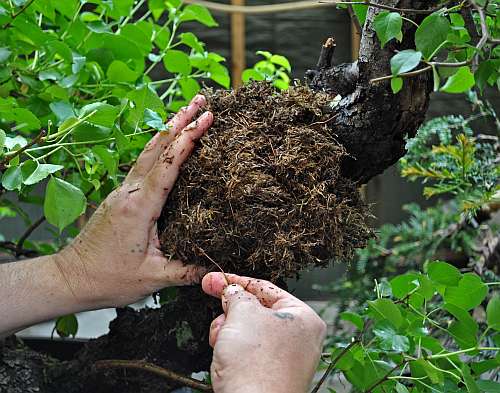
First, a layer of water and rooting hormone-soaked sphagnum moss is applied and held in place by a strain of 1 mm aluminium wire. Then the second layer of in-water-soaked sphagnum is applied on top of the first layer and is also held in place with wire.
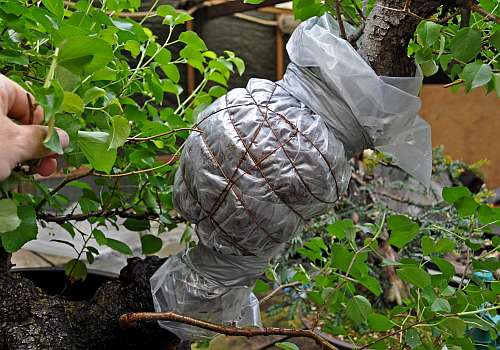
Then the sphagnum is completely covered by a double layer of strong transparent plastic that is tightly held in place with aluminium 1mm wire. Both ends of the plastic are tightly taped shut to make sure that nothing will move. In the future when the sphagnum gets too dry, small holes can and will be made at the top of the plastic ball to be able to insert water to wet the sphagnum!

The whole air layering is seen from the front side of this old Prunus. From now on it is fingers crossed and anxious waiting and watching until the first roots appear through the plastic! I forgot to tell you that all the foliage above the air layering is cut back to 2 leaves to minimise the need for water! I will try to keep this heavy monster and its air layering out off too much direct summer sun heat and hope for the best!! 🙂
I will keep you all informed if there is any progress and I hope you enjoyed this little story this far?!
Cheers,
Hans van Meer.
Info: karamottobonsai@hotmail.com
