Hi everybody,
a few weeks ago during my visit to the New Years’ reception at my dear friend Teunis Jan Klein’s “DESHIMA” Bonsai centre, two Bonsai friends asked me if I had any other artful hobbies besides Bonsai? I answered: yes a few every now and then! Let me explain, I have tried over the last 45+ years many different artistic expression forms, but only Bonsai and drawing have really hit the keep-on-doing spot! And even drawing is only regularly practised by me because I use it as a guide and blueprint for my and others their’s Bonsai designs! But there are still some examples of my various attempts in existence and some go way back to my early teens! And I thought that it might interest you to see what I have made over the last 45 years?!
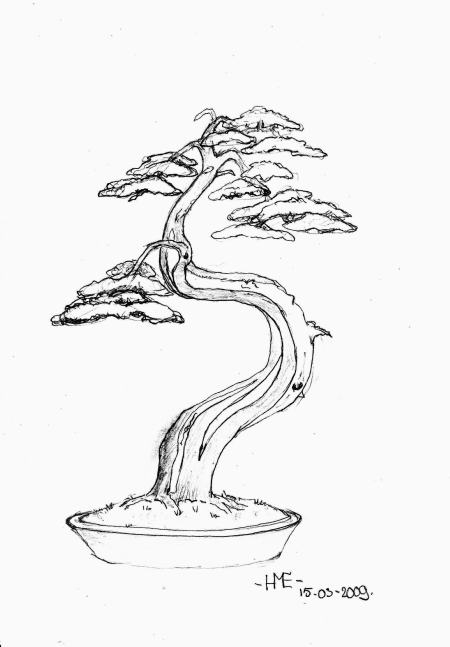
I must have been around 13 or 14 years old when I (out of the blue) made this drawing. This was such a rare occasion that I have always kept it and later one framed it in this frame. (17×11 cm)

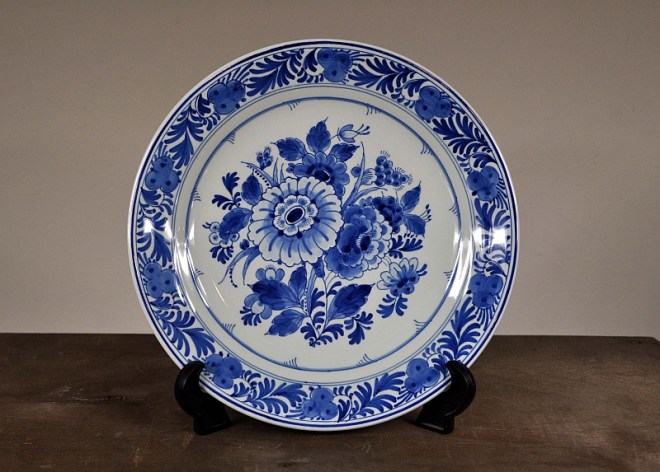
I was 17 years old when I along with two dozen other boys and girls were selected out of well over a thousand applicants for admission to the Royal School for Delfts blue porcelain painting (De Porceleyne Fles in Delft). This Delfts Blue porcelain factory those exist since 1653 and I was over the moon when after a few days of tests I was allowed to be an apprentice in their prestigious school! One of the successful tests that I had to do was to draw a tree…and that must have been a sign for my later life in Bonsai! Being an apprentice meant that after a few successful mounts you were allowed to paint among other things plates, vases and the world-famous windmills and clogs for the worldwide market! Here is one of those plates that I painted way back in 1979, this one I proudly bought for my Mother and that was no small thing way back then because original Delfts Blue was then and still is pretty expensive and I was making absolute minimum wages! 😉 30cm/12 Inch in diameter.
If I remember correctly we had once a month after worktime the chance to design and paint our own designs on whatever we wanted as long as it did not resemble any original design of the factory! This was always great fun to do with all the other jong colleagues! Below: is a fantasy SF creation I made during one of these free sessions.

Below: and another one that I made of our old dog an English-born English setter that was originally named (believe it or not) Lord Cedogan the third! We just called him “Ducky”! 😊

At the end of that same year, I successfully finished second of my glass and was hired for real…but I was the only one who was not allowed to go as promised to a follow-up art school because my earlier education was not sufficient enough to be admitted?! So I shook my boss his hand and hi to my colleagues and walked out and never looked back… a few days later I was hired as a roadmaker earning in a week what I use to make in a month as a so-called artist! But still, after all these years it makes me a bit sad because it was really special to do…but hey that’s me…impulsive and strongminded!😉
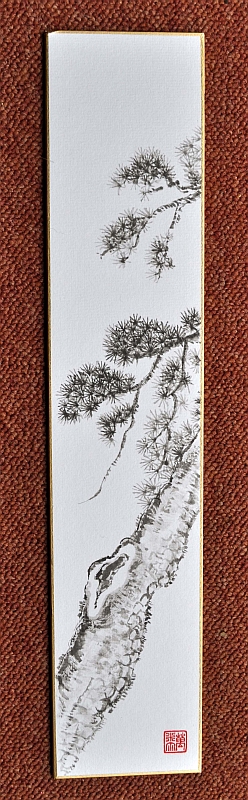
Then some 15 years ago after I had been doing Bonsai for some 10 or 11 years I started buying and collecting Japanese hand-painted Shikishi and Tanzaku via eBay to hang behind my Bonsai and in my living room. They were so beautifully painted and I just loved the way those amazing artists managed with just a few simple strokes to depict a whole scenery. I then started to realise just how those paintings could inspire those great artists like van Gogh all those years ago when they first were seen in Europe! And it was around that time when I thought that I would like to make my own to hang behind my own Bonsai, which was then still allowed at most big Bonsai shows in Europe! So I copied many many pictures of those little paintings on eBay to study and bought online Blanco old linen and new paper Shikishi and Tanzaku and brushes and Sumi ink an ink stone and even my own custom-made stamp and red ink to sign my work!
Below: Shikishi with a pine painting and (the story of my life) this is the first and only one I ever made!
What I still do very often is make Bonsai design drawings for myself and for my students! And I must have made a few hundred by now and luckily I made some pictures of them so that I can show you some of them here. Drawing your vision of the tree/Bonsai you are about to style is very helpful no matter how good you can draw! Just a simple sketch of your idea helps you to visualize your thought and judge and remember it in your mind! Especially as a novice, it prevents your mind from getting cluttered with all the different impressions and your different ideas! The proverbial: can’t see the forest through all the trees comes to mind here! And another thing is that when you use your hands to draw your vision onto paper it will become imprinted in your mind much better, as a sort of blueprint! You will remember it much clearer and much longer! The fun thing when you practise this technique is when the future Bonsai that you have made looks a lot like your original drawing! My advice to you all is: start drawing your designs…it helps enormously!!! And they are fun to keep as a memory of the birth of your Bonsai design! Here are just some of the many drawings that I have made over the past 28 years in Bonsai.
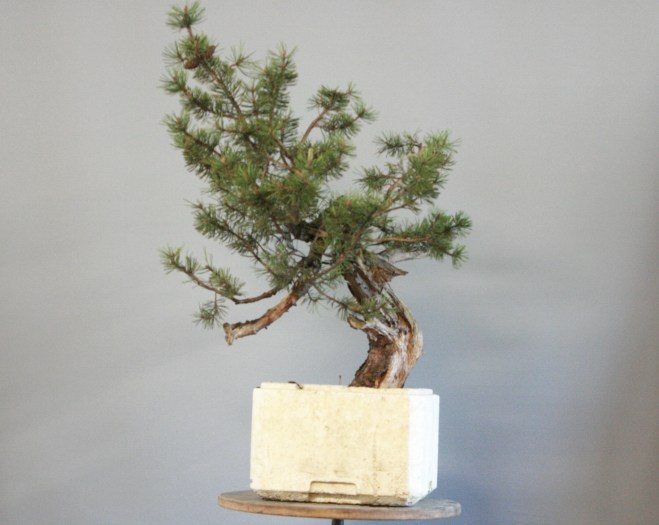
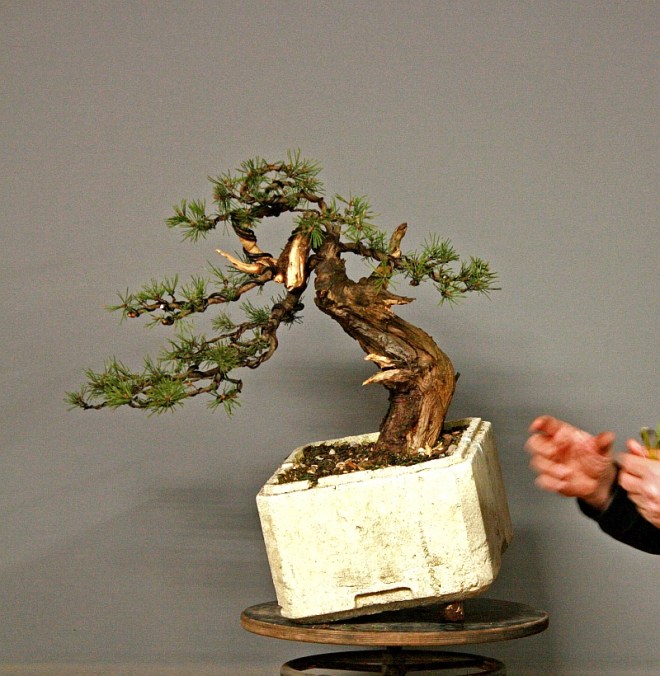
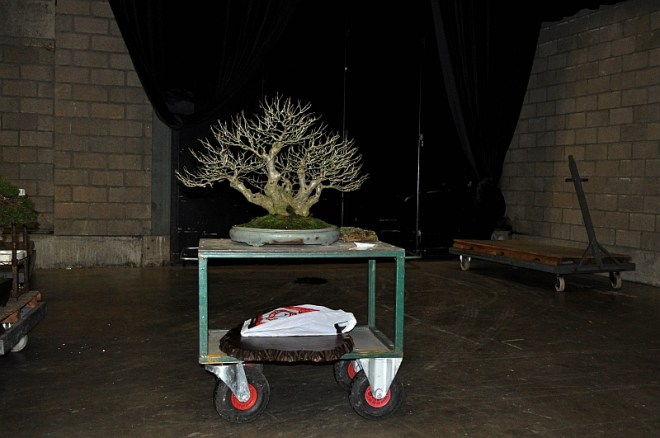
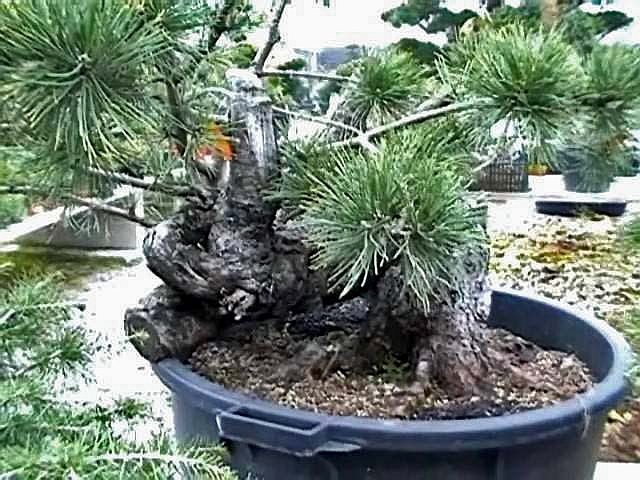
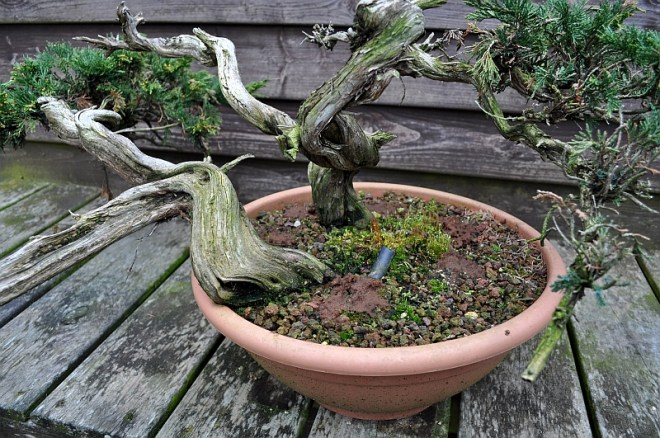
Below: this big old Mugo Yamadori was discovered by me at the amazing Bonsai centre Nippon-en in the suburbs of Milan Italy during a Bonsai and Bonsai material trip that I made in 2001 with my oldest Bonsai friends Teunis Jan Klein en Carlos van de Vaart. This beautiful monster was all I could ever want in raw Bonsai material and although it had only a few tin stalky branches with only some spars foliage on the end, and on top of that was way more expensive than I had ever spent on a Yamadori…I just had to have it!!! So I made a small down payment and sent the rest when I got home. A few weeks later I drove all the way back again to Milan to collect it and take it to its new home in Holland! This picture below was taken at Nippon-en in Milan just after I fell in love with this old Mugo that I would later name “Big Ron” in honour of the brave but sadly deceased Ron from the old Bonsai forum “Bonsai Talk” where my online Bonsai adventure started all those years ago!
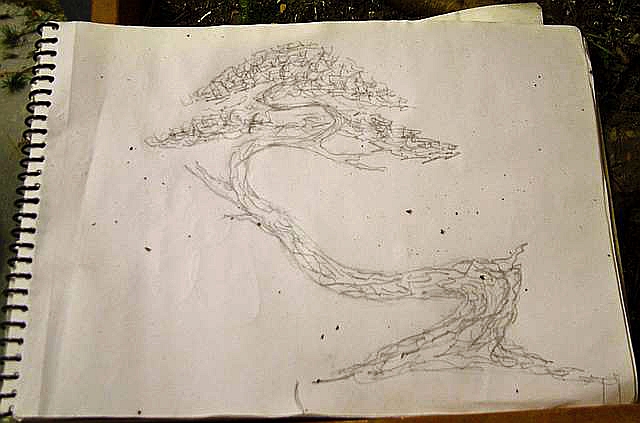
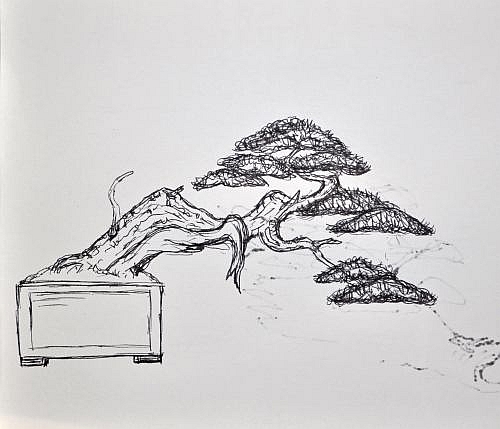
Below: this was with only the above picture as a reference the first simple sketch that I made when I got home and had to explain what my plans were for the future and why I bought it.
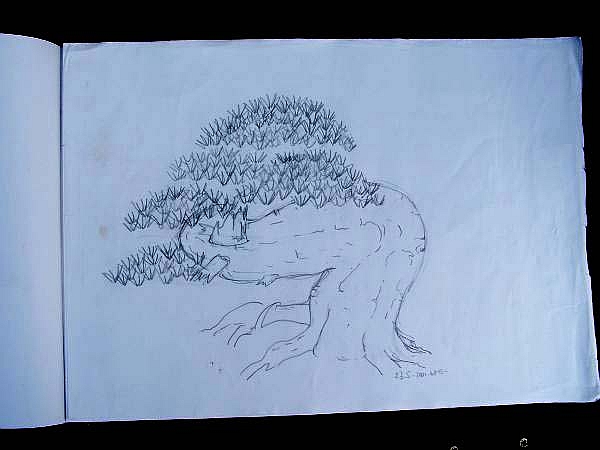
Below: a few months later in 2001 when the tree was in my garden, I made this clearer drawing with a thick felt pen and a few beers.

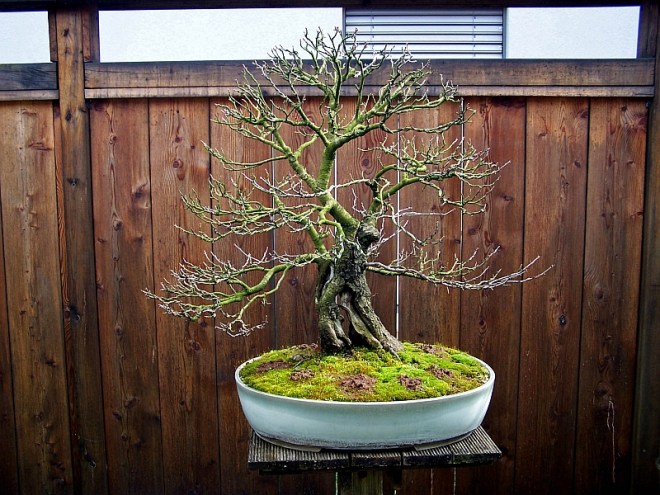
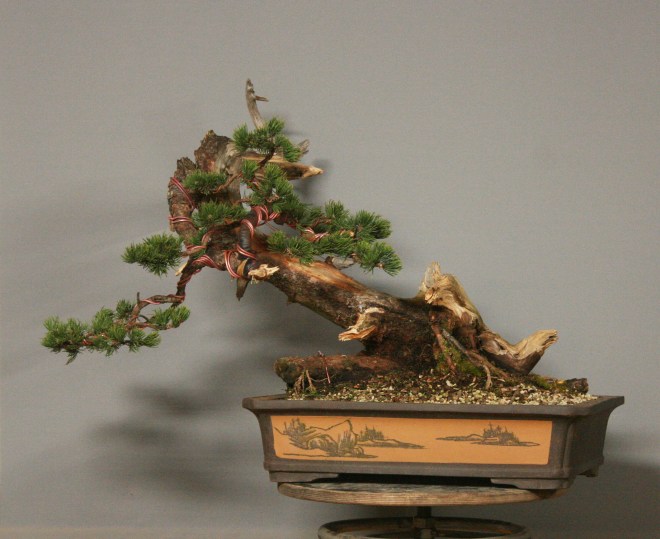
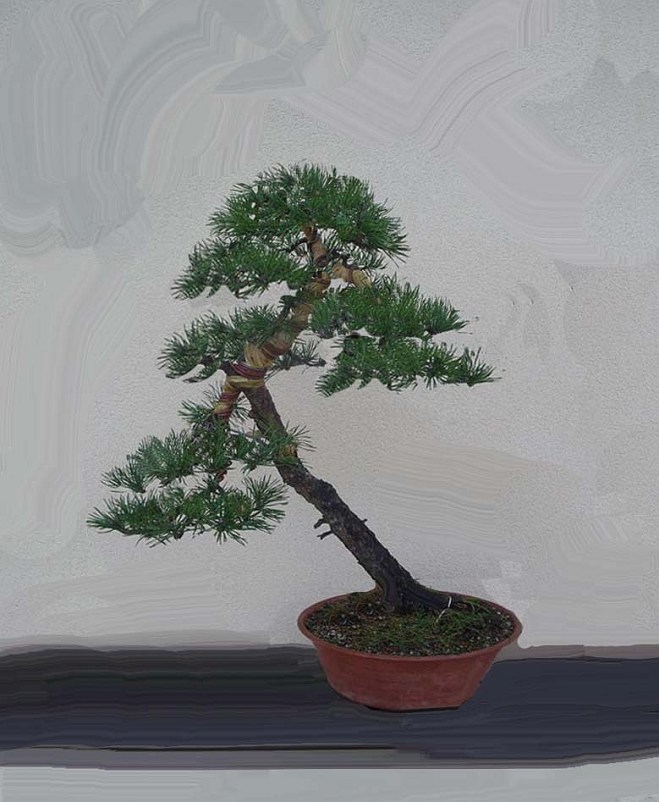
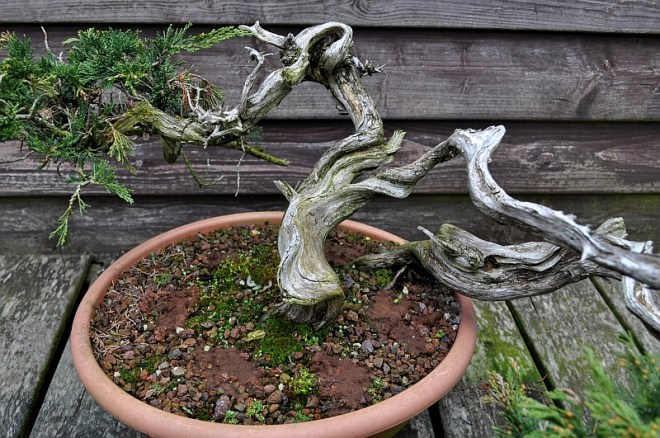
Below: and this is how Big Ron looked years later…pretty close right! 😉
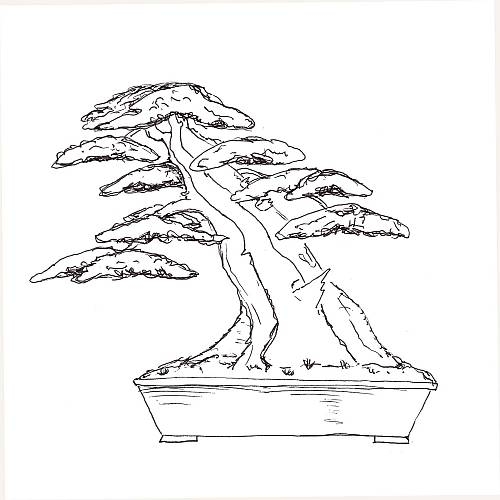
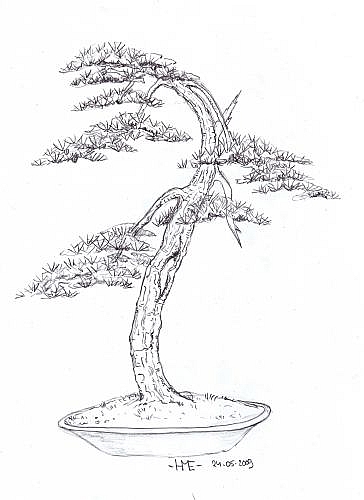
 Below: this Sylvestris pine design I made for one of the students at the 2008 edition of Tony Tickles amazing “BURRS” Bonsai weekends in the UK.

Below: is a simple drawing for a Juniper design that I also made at “BURSS”. In a drawing of a slender tree like this, I wound botter drawing the back branches even though they exist on the tree in reality because that will clutter up the image and will make it less seeable and understandable for the student!

Below: as a former member of online Bonsai forums like BonsaiTalk and IBC. I helped many Bonsai friends with their questions and with their styling problems or possibilities. This one I made when someone asked for styling advice when he posted a picture of his pine. With the help of photoshop, I made this suggestion for him. In this way, I did help many with their questions and that was very much fun for me and a pleasure to do!
Below: this drawing was made just for my evening demo at “BURRS” in 2007. Those demos were always fun to do with a lot of humour between us demonstrators and the students who were completely relaxed after a day-long of hard work on their trees, a great meal in their stomachs and a fine selection of different kinds of beer and hard liquor and snacks from all around this great planet close at hand!
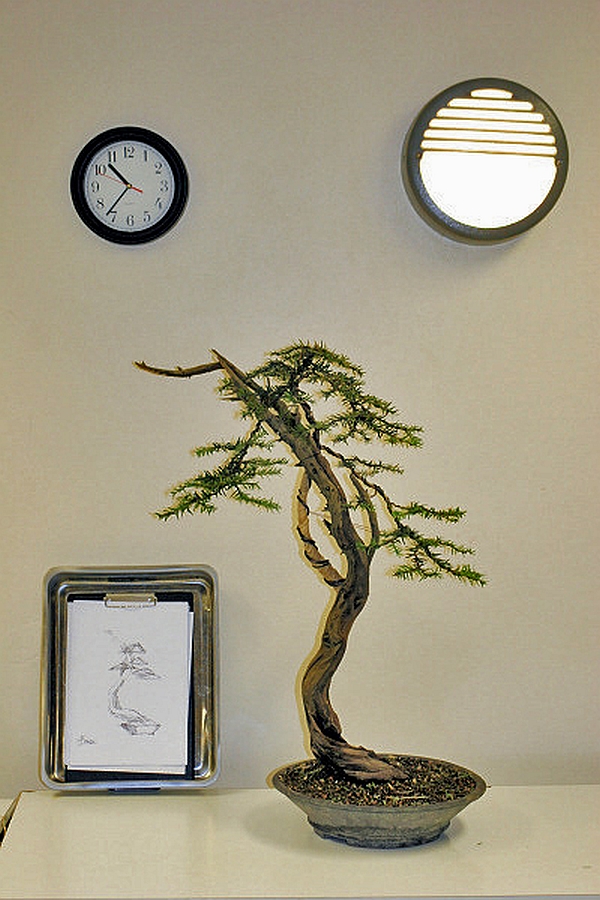
Below: this design was exciting and a bit controversial because this Yew Yamadori from old and very dear friend Terry Foster was made up of one tall tin Jin and just one tall tin branch!

Below: so I did what should normally not be done and crossed the long Jin close from behind with that long branch and bent the top section of it and the two long right and left branches slightly in front of it! Before that I started there were a lot of questions and some doubt about my plan for this tree… that made it very satisfying that afterwards, everybody really liked how it turned out! Sometimes it is good to break or bend the rules because the outcome might surprise you and others! This Bonsai is today still in Terry’s beautiful collection and he shows it to me every time I have visited his garden since then and always says “look at my original “van Meer”! 🙏😊
Below: is another “BURRS” 2008 design I made for a student.
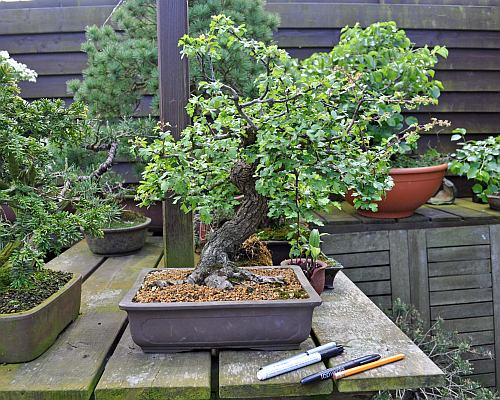
In early May 2014, I had my German Bonsai friend Dirk over for what we both call: another day of Bonsai fun in the sun! That day he fell in love with my midsize Wells Yamadori Hawthorn that I had collected years earlier and had since then prepared for its first real styling. Because of (in this case) her sexy trunk movement I named it after the old sexy Movie star “Mae West”! The one from the immortal film phrase: is that a gun in your pocket? Or are you just happy to see me?! She is famous for wearing low-cut ultra tight long dresses that became wide from just below her knees and a thick Boa around her shoulders. That iconic image stout model for the original Coca-Cola bottle and resemblance the trunk line and the base of this Hawthorn that you can see in the below picture!

Below: see the resemblance?! Another one of her famous sayings was:
Curves: the loveliest distance between two points!
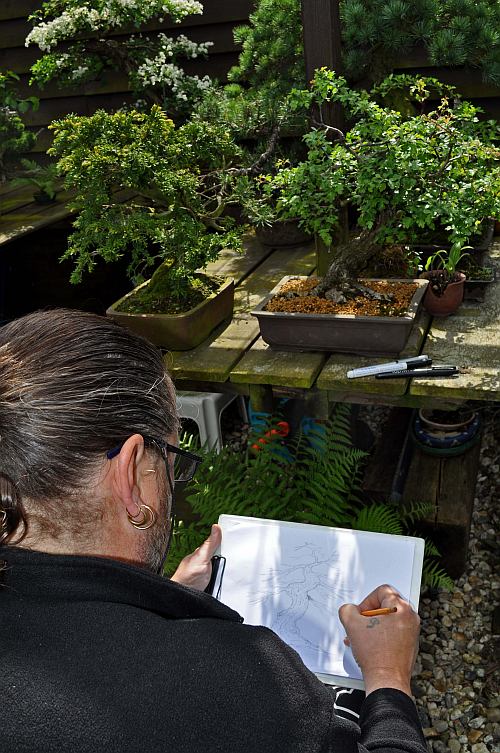
Below: Dirk and I came to an agreement that he would become the new owner of “May West” and that he would style her that same day he asked me to draw a design for it as a guide and as a keepsake for the future!
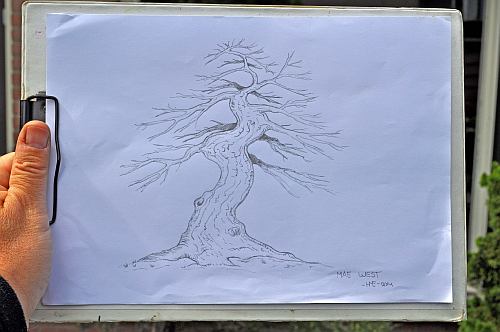
Below: is the design for May west.
Below: and after a few hours of prickly work for Dirk, the finished result.
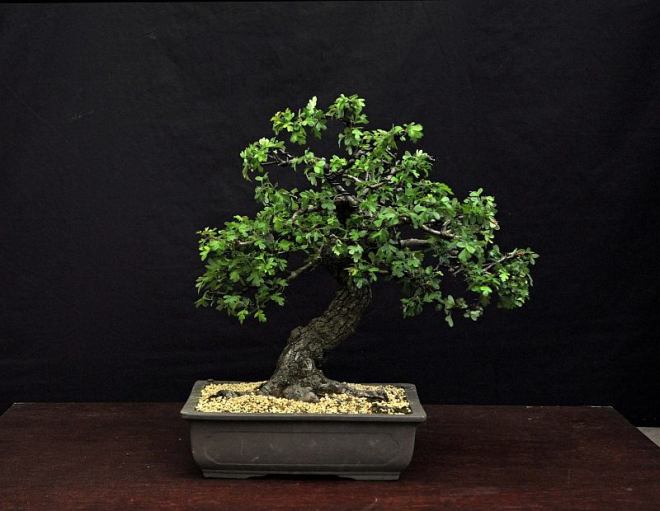
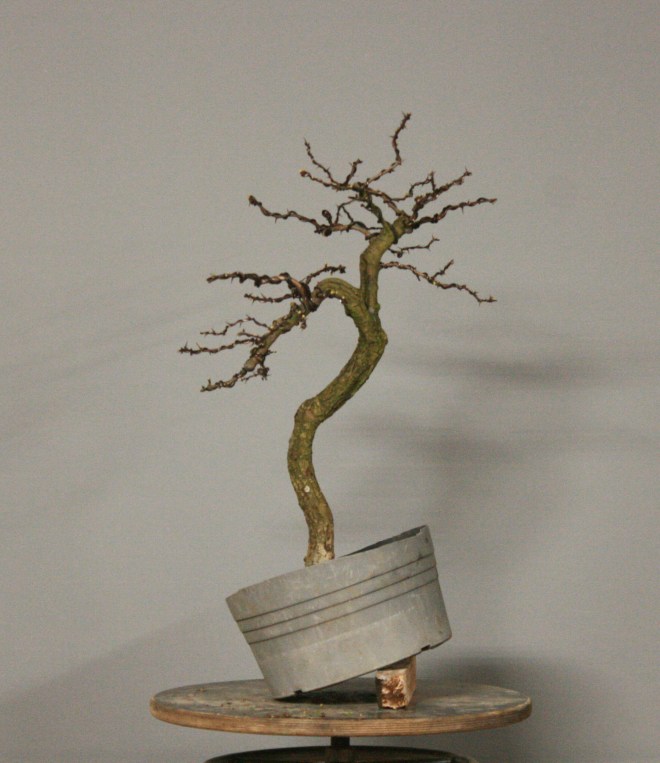
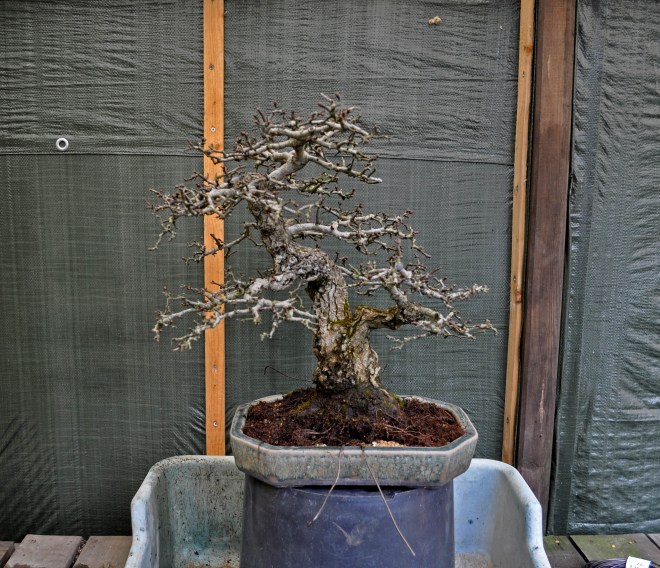
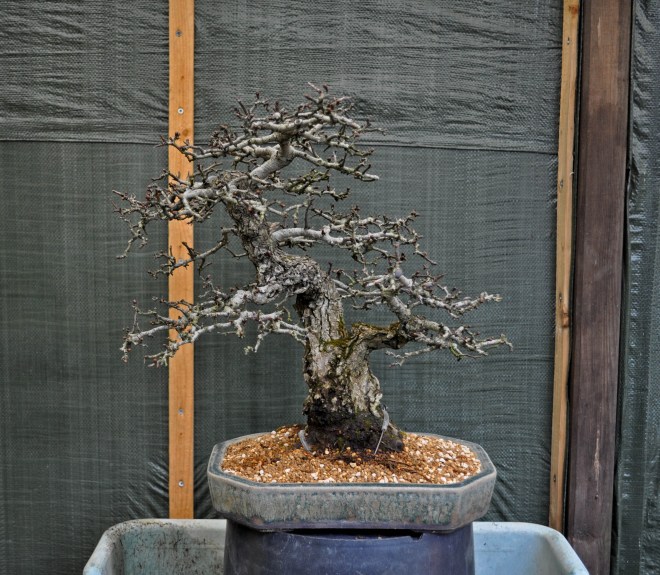
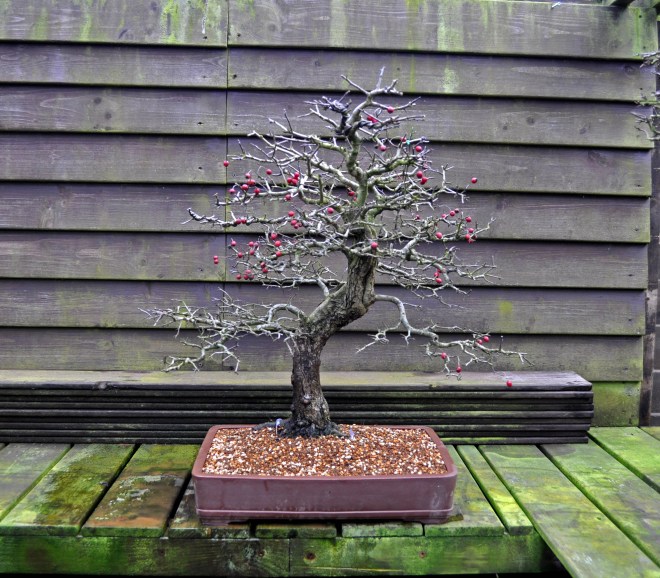
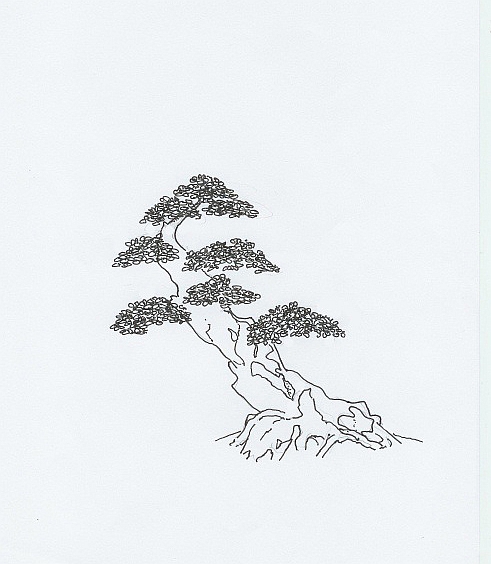
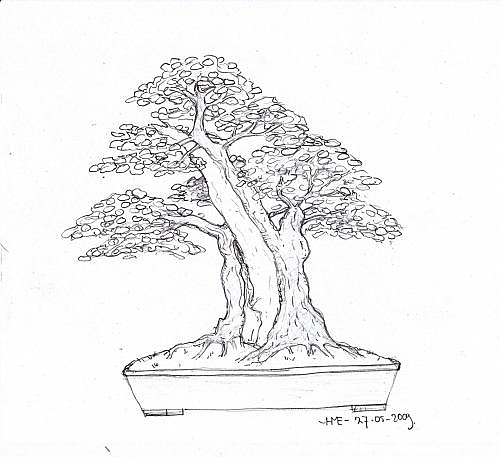
Below: is the design drawing for one of my pretty rare Dutch Hawthorn Yamadori in my collection. Rare because we don’t have many suitable Yamadori at all over here and to find anything with natural deadwood is even rarer and this old tree has plenty of that all over its trunk line! It was almost 1.7 meters/6.7 Inches tall when I collected it and it was cut down to 75cm/29.5 Inches! Every branch you see on this Bonsai is newly grown and she is formed in the “Mother and child” style.

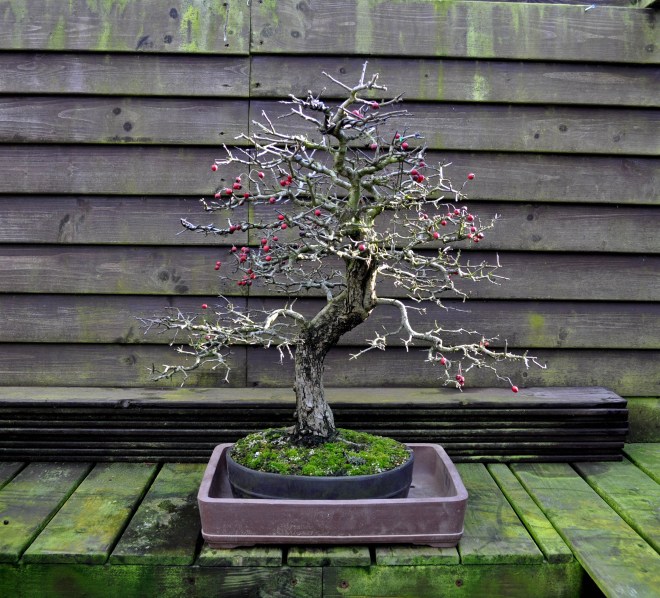
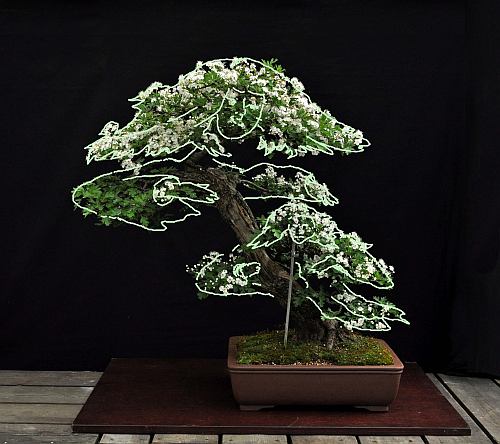
Below: May 2014, the Bonsai is in full bloom.

Below: here I have drawn over the outlines of the tree, the Mother that is protecting her little child from the storm. It is heartwarming to see that the vision of this image that I had a decade ago became a reality for everybody with Bonsai eyes and some imagination!
Below: and some more designs that I made for my students.
Below: Dirk’s Yew design.

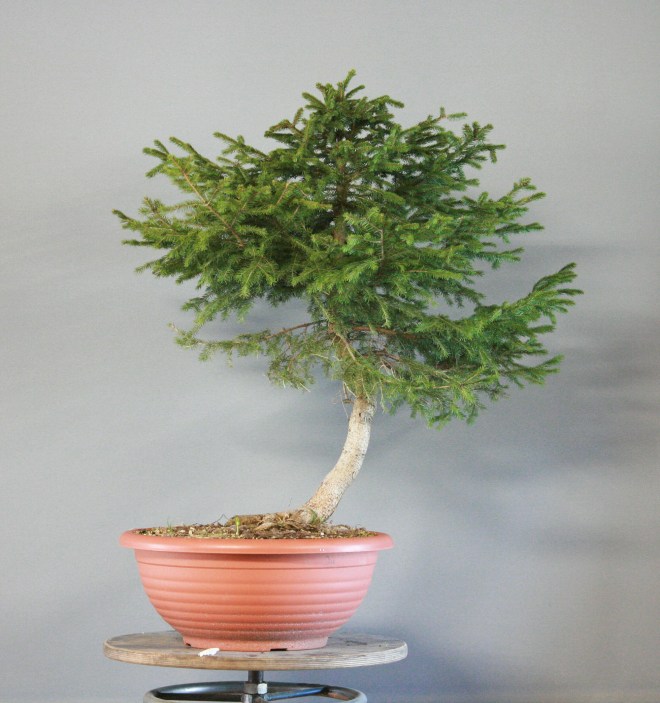
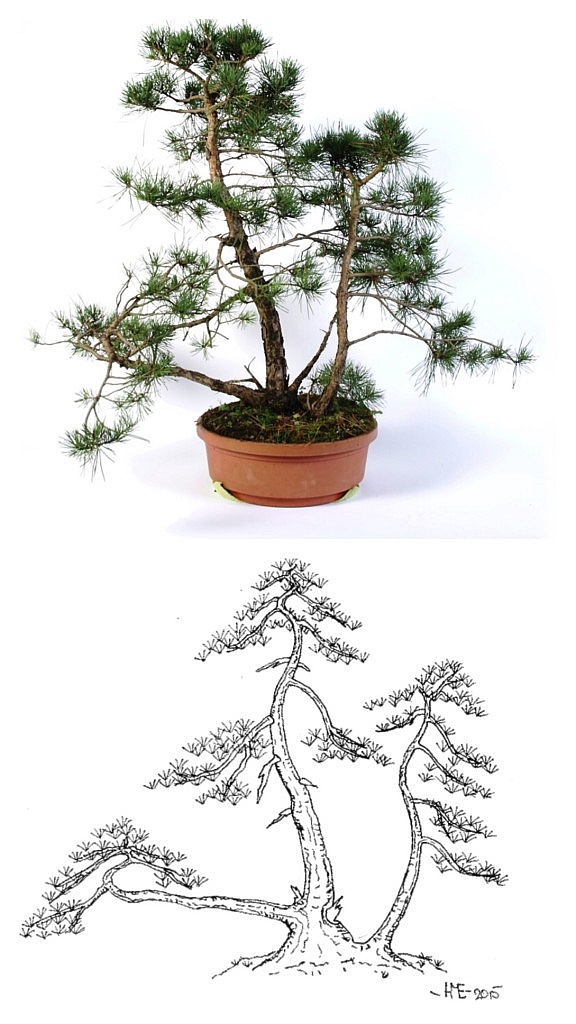
Below: A design for one of my own Yamadori sylvestris Pines.
Below: Desing for Ed’s Purple Smokebush.
Below: 2015. Design for my demo tree at “DESHIMA” Bonsai centre (NL).
Below: Desing for my demo Sylvestris at “Joy of Bonsai” in Bath (UK).
Below: and the result after an afternoon of work.

Below: are two Juniper designs.

Below: is my design for my Pinus Uncinate Yamadori that so sadly died before I could finish it. I bought it as a virgin Yamadori from a very well-known and famous Bonsai artist who told me it had grown for years in the plastic pot where it was in! 2 years later when I wanted to re-pot it because it was doing poorly I discovered that it hat almost now roots…they were simply all cut off when it was collected! The few tiny roots that were on there had grown in the period that it was in my garden under my care! It died slowly in a few mounts! Mails to this famous so-called Bonsai professional have never been answered and driving to the other end of Europe was not an option then in my own condition! And believe me, that was his luck! So I lost a beautiful amazing old tree and a lot of money! I could have named and shamed him…but I am not that kind of person! But this way more than 200 years old tree did not deserve this and neither did I!

Below: and two possible designs for the one and the same Yew Yamadori from my American hostess and friend “Mom” Irene.


Below: 2010. And one of the few drawings that I made. My little nephew “Jelle”.

Below: 2010. A drawing of my still young dear Father. 15x15cm.

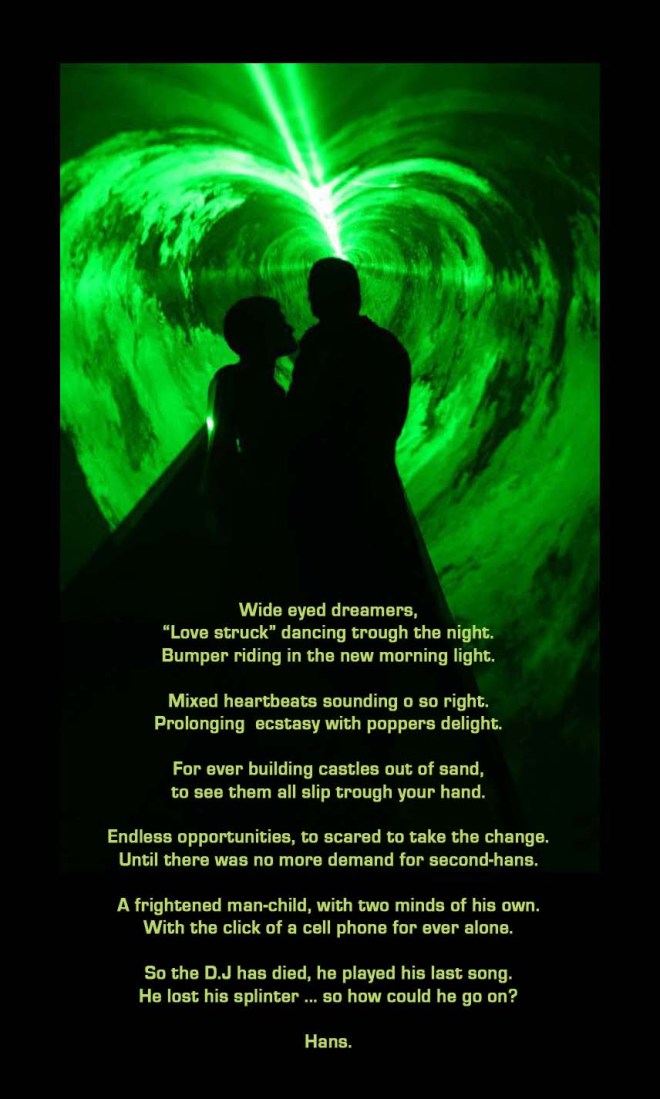
Below: A drawing and poem that I made on the computer years ago after I stopped being a DJ after many very happy years.
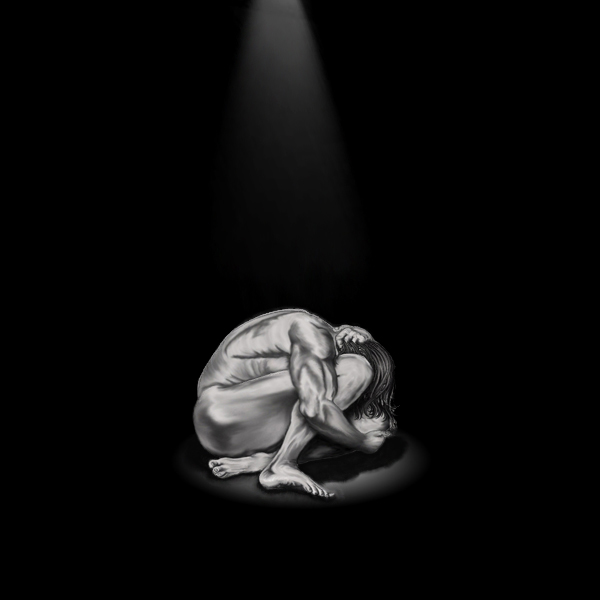
And last but not least something close to my heart: There is now in Holland a nationwide campaign going on to raise awareness to make depression more discussable and to help the people who suffer from it and the people who direct or indirectly come in contact with those people. I find this an extremely good and very necessary campaign because depression and other related diseases are most often hidden and unspoken life-altering illnesses that are suffered by more than 35 % of the European population! That is 1 in every 3 persons!!! The simple fact is that although you can nowadays freely talk about other life-altering diseases like for example cancer, depression is still a bit of a taboo and is mostly suffered in silence and animosity and if it is brought out in the open is often trivialized, talked down or not taken seriously! But like with other life-altering and disabling diseases we all need to recognize this fact and take sufferers of depression and other sicknesses of the mind seriously and give them the attention, a helping hand and an understanding ear that they like any other sick person need, but so often do not get! And last bud not least: please don’t judge them…they are sick and that can happen to anybody! Now you might ask yourself what does talking about depression have to do with Hans van Meer his artwork? Well, this important campaign made me decide to come out and say that I myself have been suffering from depression for most of my adult life and therefore know just how difficult it is to talk about this illness! And the few people that I did tell about it, almost always replied in disbelief with you?! Such a tough guy? Or with you? Such a happy and always funny guy? And that makes that I like a lot of other depression sufferers keep it so often to ourselves and that makes you even more depressed! So a willing and understanding listener is sometimes all that we need…just like any other sick person would! That’s all! And now back to the art part: about 10 years ago after the second failed lower back operation and in a lot of pain and unable to sleep and really down low I started to make a self-portrait or one of those days drawing with a drawing tabled linked to the computer. I wanted to express how I felt at that moment in time through a drawing, something that was and still is not possible for me in Bonsai because that is simply not the right medium to express those kinds of feelings! I had never before used a drawing pad to make a drawing like this so it was one big adventure and exploring trip that helped me through a couple of sleepless nights and created maybe my best and most meaningful artwork up to then!
Below: I first started with a sketch of a still muscular me in an anxious fetal position. Big and strong on the outside because that is how everybody mostly thinks of me!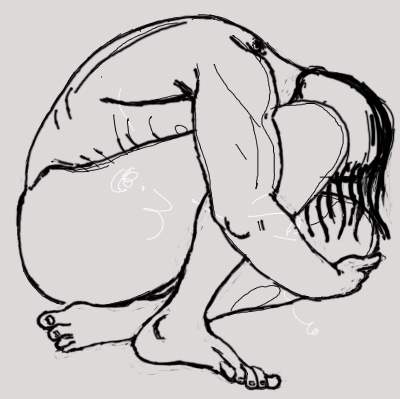
Below: a few nights later, it is slowly getting there. Only the top hand needs to be finished. It took a long time because it is all drawn on just one page/layer because I did not then and still don’t know how to work on multiple pages/layers! For example, I can not at this below stage go back several steps/layers to correct, change, remove or add anything! This makes it more like painting or drawing on a real canvas or piece of paper! Working like this with building layers upon layers was very interesting and almost magical when you do this for the first time and see what is happening before your own eyes!
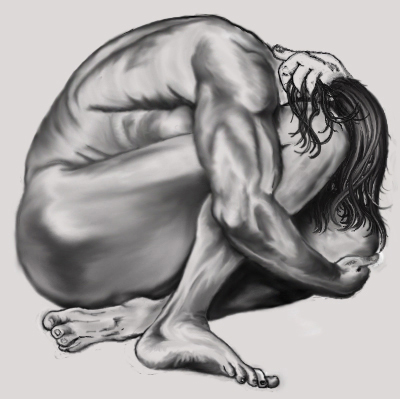
Below: and this is the end result after many long nights… but I would not have wanted to miss it for the world!!! It may be quite simple…but now that it’s done…I think that this is the closest I have ever been to creating meaningful art from the heart?!
Note that the first one that I ever showed this personal drawing was a dear and wise friend from Slovenia who as one of the few knew about my sometimes occurring anxieties and depressions. A bit worried I told him: please don’t be worried or upset about what I am going to show you! Later that day he wrote me back saying something that makes me wish that all depressed people in the world could meet such a wise and empathic friend to talk to in their hours of need!
This is what he sat: Why should I be depressed by your painting? I see a dark stage…the light is slowly going on and it captures a beautiful man…he slowly rises to the sound of bombastic music and then gives the best performance of his life and gets a standing ovation!!! ….How cool is that?!
I do hope you like this post about my artwork and my little coming out about my condition and what makes me…me?! I am still the same then I was before you read this post…but now you only know me a little bit better! And it was some sort of relief to finally write it and show my work!
Next on the agenda will be to go next Wednesday to an evening meet and greet with Kunio Kobayashi and to see his demo at “DESHIMA” Bonsai centre! And then next Thursday I will be bringing in my Bonsai for the “Noelanders trophy” in Belgium that will be staged on the 3rd and 4th of February. I will post pictures and a video of both events as soon as possible! So watch this space and my youtube video channel!!!
Cheers,
Hans van Meer.
Info: karamottobonsai@hotmail.com
———————————————————————————————


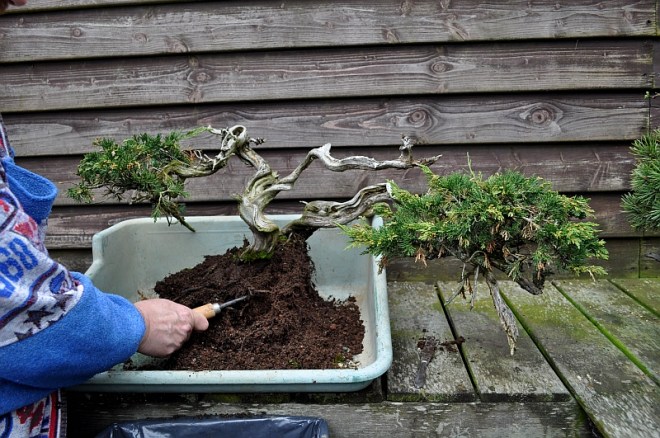


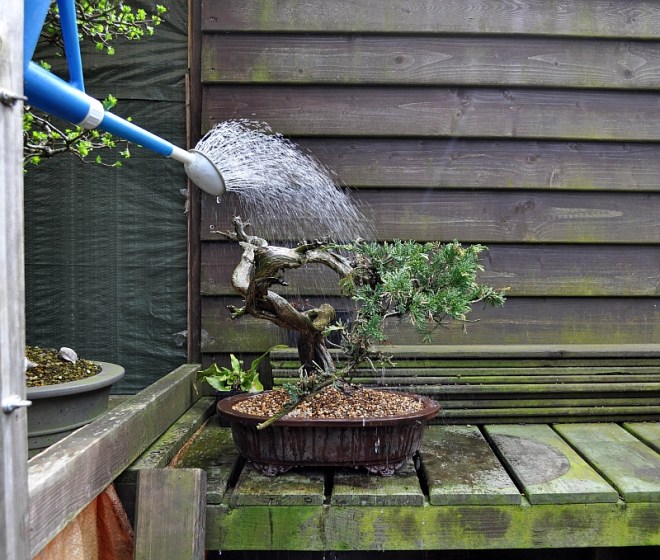
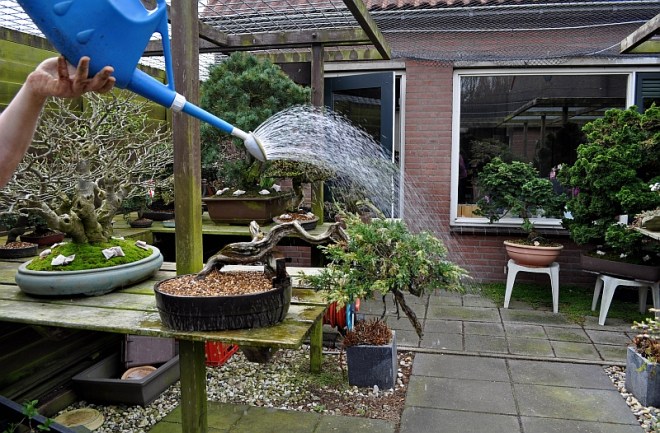
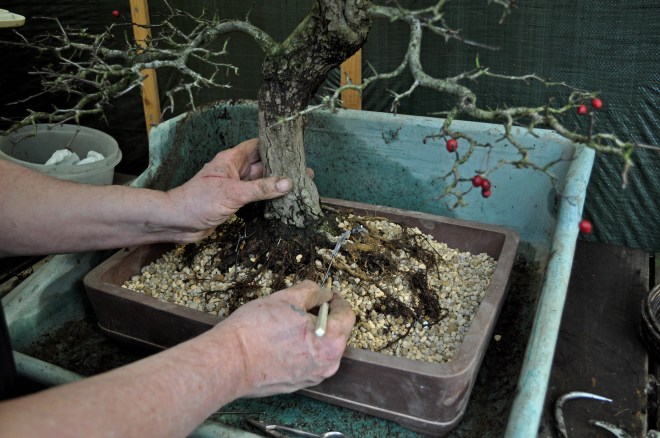
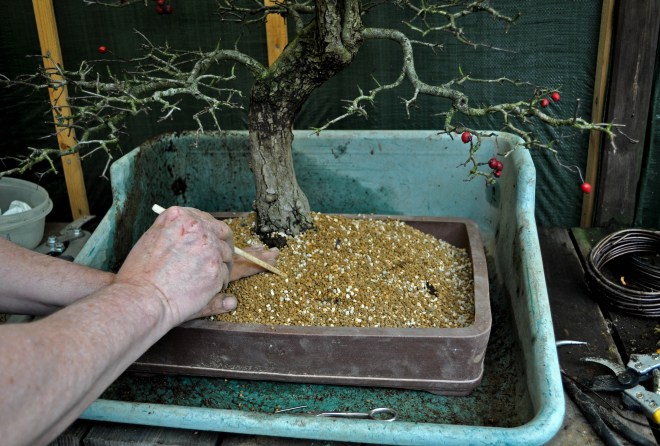
 Below: then watering it like before. In the next couple of weeks, the trees will be kept in a warm spot with filtered sunlight and their foliage will be misted a couple of times a day to help them safely through this period