PICTURES OF MY BLACKTORN’S IN BLOOM.

Hi, everybody,

here are two pictures I made today of my Blackthorns in full bloom. The lighting was not ideal, but I still hope you can enjoy the beauty of their fragile blossom that contrasts the black rough bark so much that they almost jump out towards you! So sweat!

Above: This little Blackthorn was a present from my old Bonsai friend Tony Tickle when he came over to stay with me, now more than a decade ago! The amazing pot is by another friend of my Potter and Bonsai artist John Pitt (UK).

Above: Many years ago I got this little Blackthorn as a gift from Terry Foster another dear Bonsai friend of mine. The odd thin section, just under the top, is actually created by the tree corkscrewing itself twice around there. After many years the deadwood that was created because of this weathered away, leaving that thin-looking section. But it looks better in real life than in this picture! 🙂 I repotted it two weeks ago into this gorgeous pot by Slovenia.

Hope you like the pictures?!

Cheers,

Hans van Meer.

Info: karamottobonsai@hotmail.com

 ————————————————————————

PICTURES OF MY SMALL HAWTHORN IN IT’S NEW POT.

Hi, everybody,

two weeks ago I repotted my small Hawthorn and I wanted to show you some pictures I shot that day. Unfortunately, it was too big a risk to plant the Hawthorn into the planned Dan Barton pot, it was just too shallow to house the root mass that is clinging onto a large stone. So I planted it in a temporary and a bit oversized pot. Next repotting I might be able to remove that rock and then I plant it in Dan’s pot!

Below: The small Hawthorn released from its ugly plastic container.


Below: A small detail I did not expect or had forgotten about! A rock holds firmly by thick roots. Those two roots (yellow arrows) might be useful in the future to replace that thick root. For now, the thick root will be shortened.

Below: The thick root is shortened. (Yellow arrow) The second thick root holding one to the root is not cut back, for now, there were just too many small roots growing from it. Next repotting time, when more fine roots have grown from the top thick roots it will be removed and then the stone might be removed as well!


            Below: On the backside of the tree another thick root is shortened.

                                        Below:  And another one is removed!

Below: After all is done, the tree gets a well-deserved shower, that removes all the dust and small particles from the soil.

Below: This picture was made a few days later. I know that the tree needs a lot more work and that the top section needs to thicken and fill out more, But I do feel it is heading in the right direction. I love to work on Hawthorns!

Hope you like where this little Hawthorn is going?! I will keep you posted on its future developments.

Cheers,

Hans van Meer.

Info: karamottobonsai@hotmail.com

======================================================

PICTURES OF MY DUTCH HAWTHORN YAMADORI IN IT’S NEW POT.

Hi, everybody,

as promised, I would like to share some pictures of the repotting of my “DUTCH” Hawthorn yamadori. I collected it way back in ( will find out tomorrow)  in a dune forest close to the sea and not too far from where I live. It took me three seasons to downsize it to the height I wanted and all but a few branches were removed. So I created a blank canvas and basically had to hope for new buds to appear in just the right places to create the new branches with.

Now after all these years of working on the ramification, the tree is heading in the right direction. It will take another 4 to 5 years of growth and wiring to fill out the desired image, but the basic branch structure to work from is there already.

I hope you like this little story of this Hawthorn, the rest you can find soon on my website!

                                              Above: Collecting the tree.

Above: The tree is freed from the sandy soil, and now I am cutting the tree down to a more liftable size!

Above: A year later, The yellow arrow shows where I want my future apex to grow from.

Above: All the unwanted branches are removed or shortened. Only one original branch remains on the left middle side of the trunk!

Above: A few days ago. The larger roots were shortened. This is done with every repotting until the roots are in proportion with the base of the tree.

                                   Above: Carefully remove the old soil.

Above: My student Ed van der Reek is helping me to carefully work the fresh soil in between the roots.

Above: I am pleased with how this tree is progressing. There is still a lot of growing and work to be done, but it already looks promising.

Above: Close-up of the natural deadwood. This tree has come far in just a short time and I can’t wait to see how it looks in 5 years?! I love this hobby! 🙂

I hope you like where this pre-bonsai is going?!

Cheers,
Hans van Meer.

Info: karamottobonsai@hotmail.com

———————————————————————————————

—————————————————————————————————

PICTURES OF “XL” MY LARCH IN IT’S NEW POT.

Hi, everybody,

well, it took a few days, but yesterday was finally the sunny day that I was waiting for to make some decent pictures of my Larch (XL) in its new pot! So with the help of a few light-reflecting pieces of white hardboard, to illuminate the tree, I managed to make some good enough shots to show to you all! 🙂

I think he looks great in this Brian Allbright pot! It gives the tree stature and both an elegant and powerful image! This next growing season is spent keeping the new growth under control!  Where I need some more branches, I will let the new shoots grow until it has the length that I need. But the number one thing that I am after, is lots and lots of upwards growing thin short branches to fill out the winter silhouette of this majestic tree! This should be the final step towards showing XL at next year’s “Noelanders Trophy”!

I hope that XL is happy in his new home and will grow strong so that I can show and share him with you all for the very first time!

                                   Below: Collecting XL in Austria May 2004.

                                                      Below: February 2006.

                             Below: XL has gone a long way in a short time

Above: The pot is still a bit dirty from the akadama dust, but I was not able to clean the rough texture any better in this spot! And carrying this tree around is not a wise thing to do with that back of mine! 🙂

Above: Close-up of the area where this tree, in my fantasy, in the past was hit by lightning and lost its old top! From that spot, as in nature, lots of new branches emerged. And the strongest top branch grew out to be the new top! Still looks relatively young, but the texture of the bark on these new branches ages rapidly. Becoming more and more believable every year!

I hope you like the new look of  XL ?! And I will keep you all posted on his progress through this new growing season!

I will post some more repotting stories here tomorrow!

Cheers,

Hans van Meer.

Info: karamottobonsai@hotmail.com

————————————————————————————————-

REPOTTING MY LARCH “XL”.

Hi, everybody,

2 days ago, the weather forecast predicted that last Sunday would be a day full of rain. But when I woke up that morning, it was lovely weather! So I immediately phoned my friend/student Ed van der Reek and asked if he could help me to repot my old Larch named “XL”. He made it to my house in just under half an hour! This repotting was I bit of a gamble for me, pot size wise that is. I collected this massive old tree with a large compact rootball, that way the tree has a greater chance of survival and it recovered just fine! But there is one problem with this technique and that is that you don’t know what is hidden in that rootball. It could be filled with large roots! So you can imagine that selecting a proper-sized pot was a bit of a gamble. Well, the rootball proved to be OK and not too many large roots had to be removed to fit “XL” in the smallest and best-suited one of the 3 pots that I had selected! This is a beautiful pot made by my good friend Brian Allbright. Here are some impressions of that wonderful and exciting repotting.

Above: Backside of the tree. Removing the plastic container with a power saw. This way the rootball will stay intact.

Above: Now that the rim of the container is removed, we carefully start to work our way inward.

                             Above: This root was a bit bigger than I thought!

Above: Almost all the old mountain soil was removed. And a lot of rocks as well!

Above: Birdseye view of “XL”. I am really happy with the way its ramification looks! Next year, I plan to show “XL” for the very first time and by then its ramification will look even better with this coming season’s new finer growth added to these almost fixed branches.

Ed and I had a lovely and exciting Bonsai day! At the end of the day I was really tired, but it was good to do some serious work again! I hope that “XL” will do well in its new home and I can’t wait to finally show it next year!

Cheers,

Hans van Meer.

Info: karamottobonsai@hotmail.com

———————————————————————————————–

WIRING MY LARCH “XL”.

Hi, everybody.

Last 2 days, I spend a couple of freezing hours rewiring my Larch named “XL”.  All the older branches were still in their place, even though it was not wired last year!  So I hope that after this ongoing restyling I can repot it into the pot I bought for it a few days ago!  When they hopefully make a good combo and after one more year of new growth added to the foliage pads, I plan to show it next year for the first time! So fingers crossed that all works out! And if not, there is always the next year! I will post the story of that repotting as soon as it’s done! I hope that tomorrow will be a bit warmer, I can’t feel my fingers anymore! 🙂

Below: Where possible, the thicker-sized wire is applied directly from the roll. This way you have to use less power and you never will cut off too much or too little wire!

Thick wire is applied directly from the roll.

Cheers,

Hans van Meer.

Info: karamottobonsai@hotmail.com

———————————————————————————————

THE START OF A NEW BONSAI SEASON IS HERE!

Hi, everybody,

I was thrilled that the time had finally arrived to be able to do some work on my trees again! And early this week, whenever the weather allowed for it,  I rewired and restyled  3 of my deciduous trees.  And for today, after two days of bad storms, I planned to rewire my small Hawthorn again and reposition all the branches into their desired places. Well, the day started out as a mild and even sunny day, but unfortunately, that did not last very long! At the end of the 2 hours wiring and styling session, I was half frozen and glad to get indoors again where it was warm!  

     Below: This is how this tree looked in February 2008.

 
1-augustus-076-hans-van-meer.jpg

 Although I realize that this little tree needs a lot more work and growing time to fill out correctly, I am still pretty happy with the result for now!


This little Hawthorn will feature in a progressive styling story that I am writing for a bonsai magazine, and in a few week’s time,  I hope to repot it into the lovely Chinese green-coloured pot that my dear friend Dan Barton gave to me as a present, the last time I was a guest at his house! I will let you all know how that works out! 

Cheers,   

 Hans van Meer.   

Info: karamottobonsai@hotmail.com

—————————————————————————————————-

RESTYLING MY SMALL “P. PINE”.

 *note: This story has been posted earlier on 27-8-2010.


Hi, everybody,
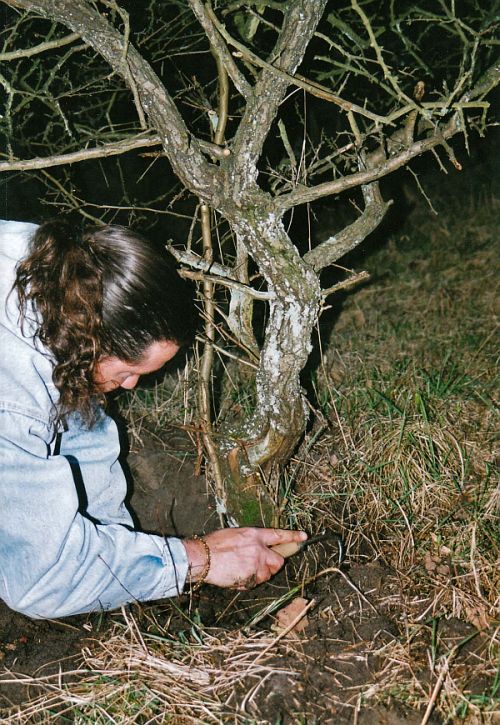
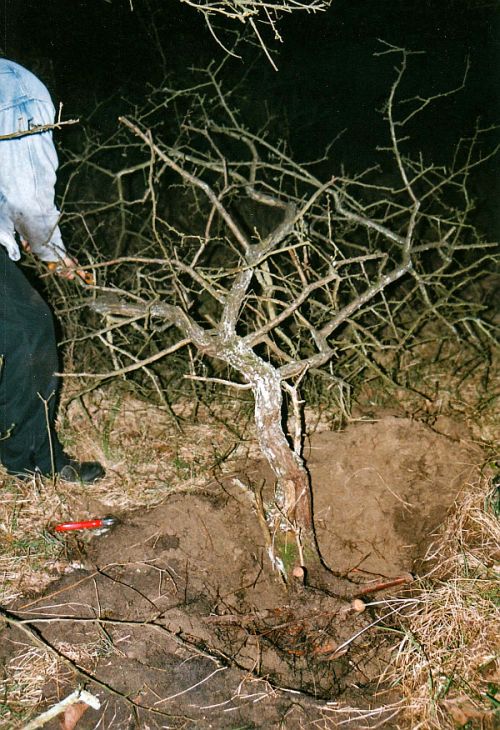
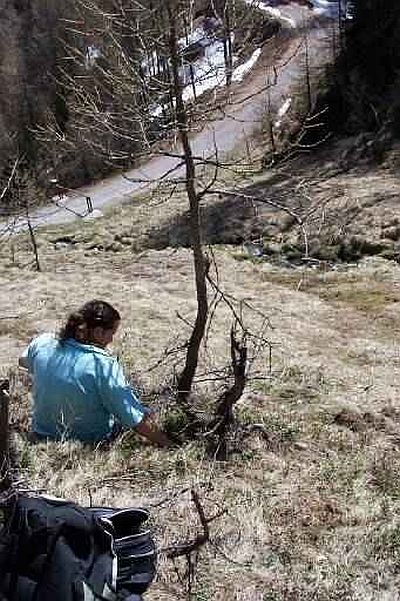
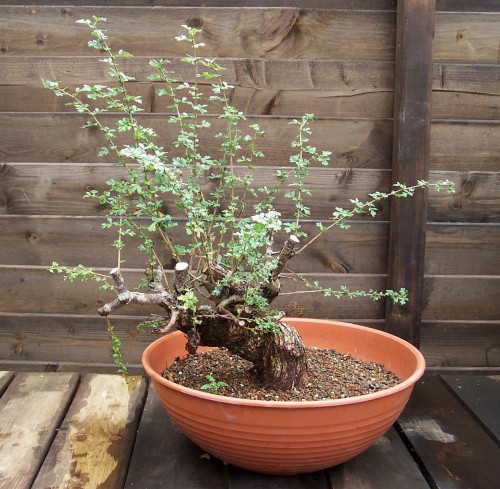
I would like to share these pictures that I made this afternoon during the restyling of my small 37cm/14,1 inch Pinus sylvestris named “P. PINE”, that I found and collected In Austria in May 2002. Well, I found it, is not completely true! My wife actually drew my intention to this tree first! We were just taking a well-deserved rest after a very long climb up one of the many beautiful mountains that surrounded the cabin where we stayed during that week. And while my wife was enjoying the magnificent views, I took the opportunity to get rid of some of the excess water that I had drunk so much of during the long climb up (if you know what I mean?). I had just assumed the wide stand manly position when my wife said “ you might want to stop what you are doing and lift up your left foot” ?! I looked down to discover that my left foot was resting on a very small Pine, which I had totally not noticed, because of the knee-high grass it grew in. So I stopped in the middle, which is not that easy, what I was doing!  Then after a closer look, I collected the tree without any problem and took it home where it has been living in my small garden ever since. So now you know why this little tree is called “P. PINE”!

                                    Below: 21-1-2003 the year after collecting.

Below: Unwanted branches were removed and others were cut back to promote back budding.


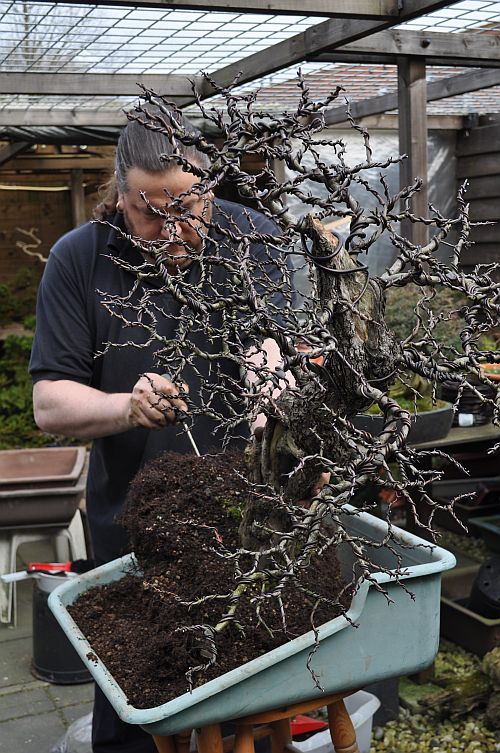
Below: Very carefully the tree is wired, and that is hard to do with my big fingers! Smile And then the branches were brought into position.

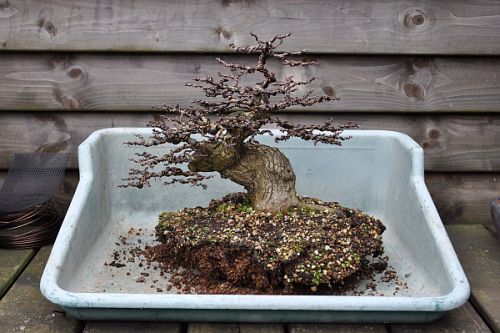
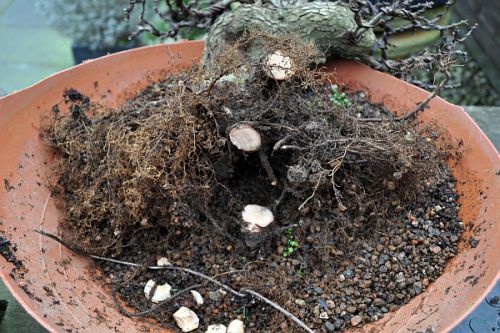
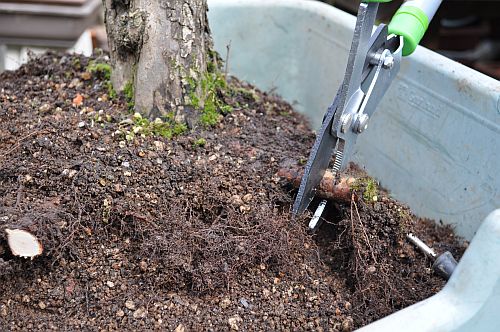
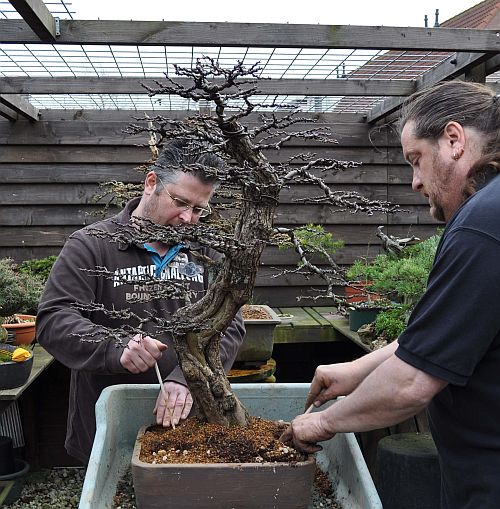
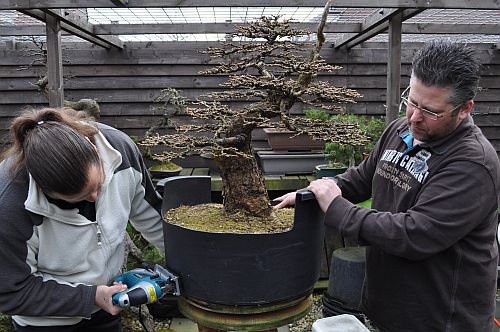
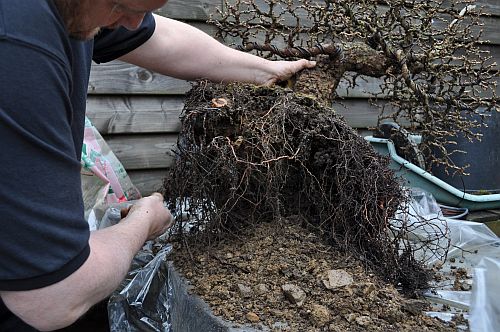
                  Below: Then the tree was re-potted into a larger training pot.

Below: May 2006. Still in that same bigger training pot.

                                                                   PART II.

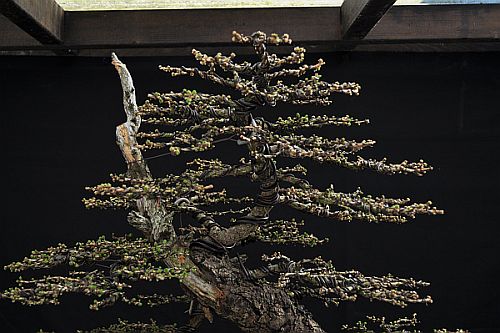
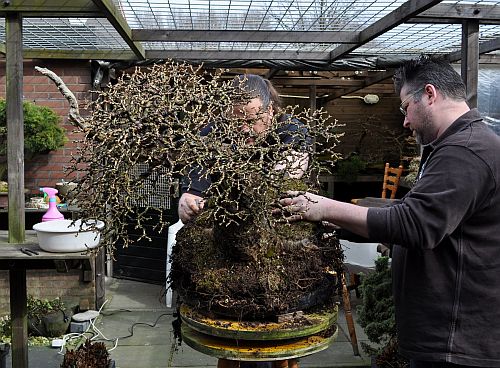
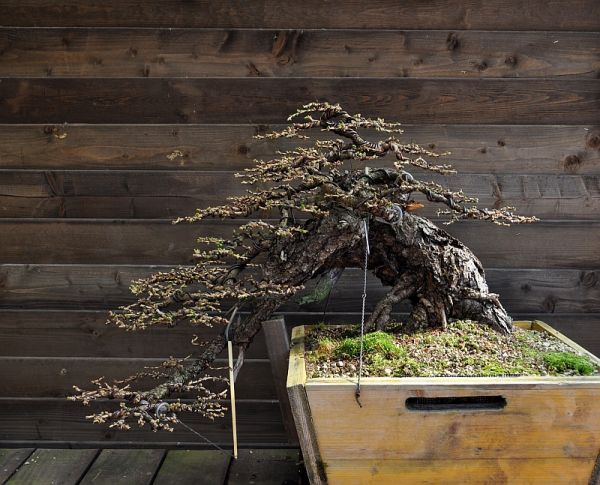
Below: Yesterday, the needles from last year were one by one, carefully removed. Unwanted branches were removed and others were shortened again. Now the tree is ready to be wired again.

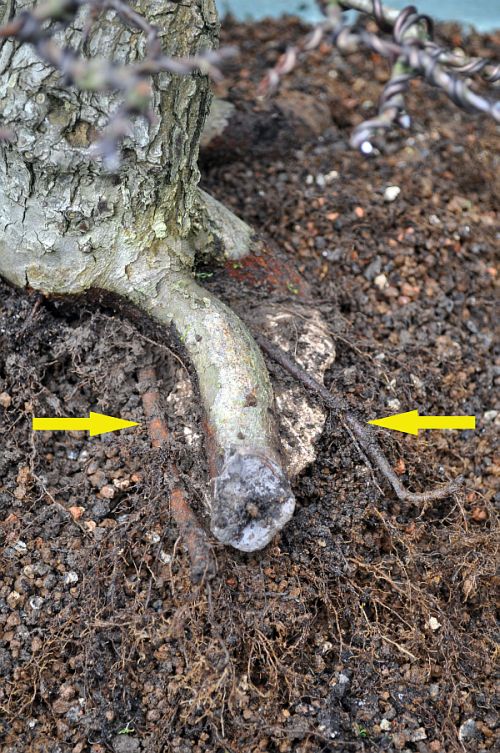
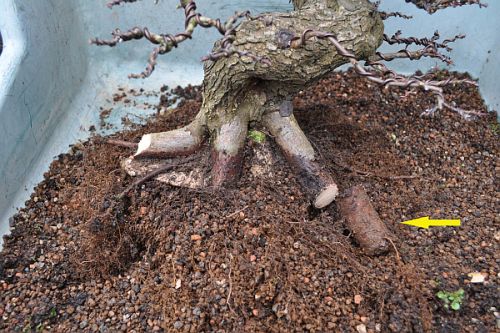
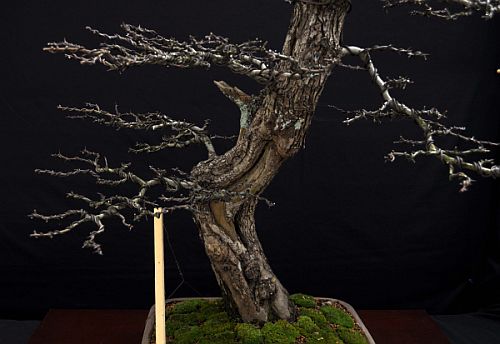
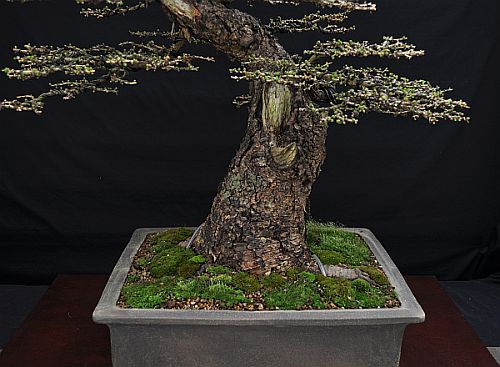
Below: Close up. I love that dark colour of that weathered and old deadwood!

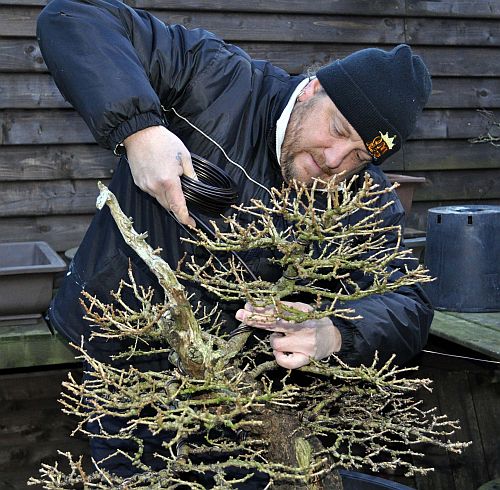
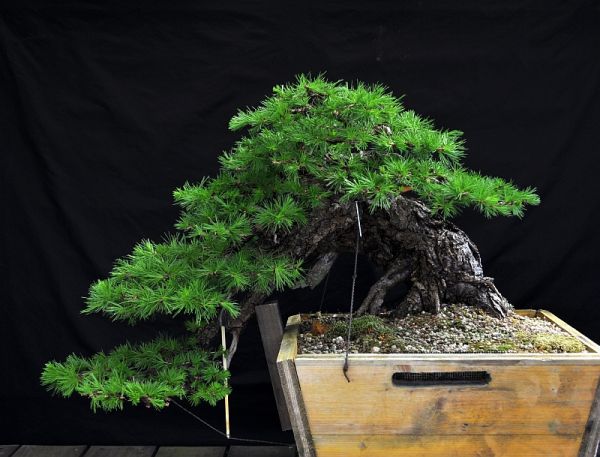
Below: Here the tree is wired. And now the fun part is about to start, the actual styling!

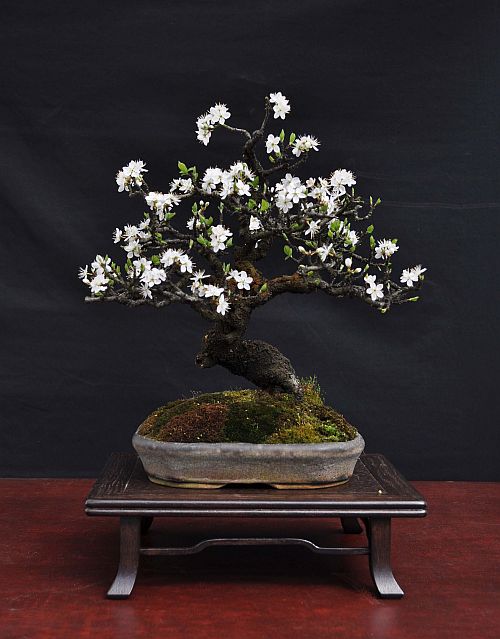
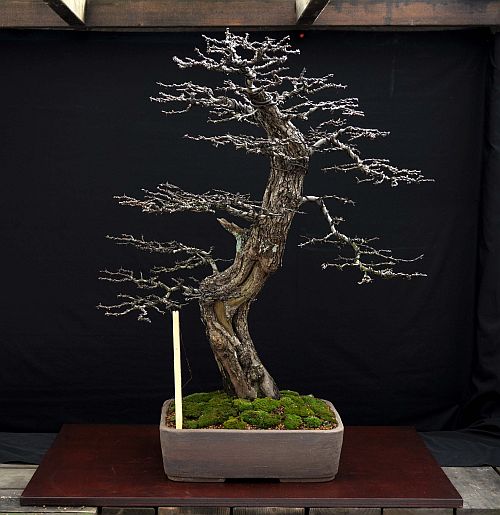
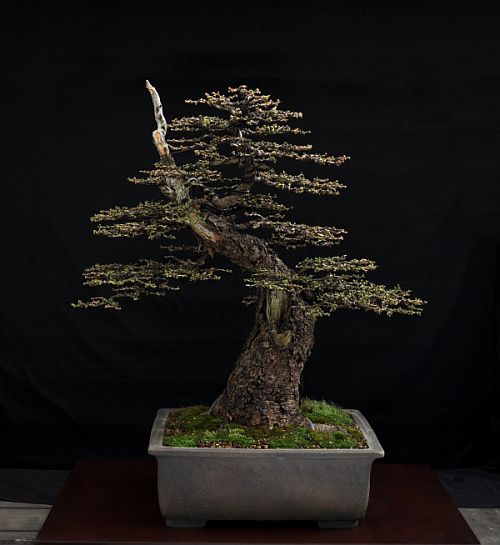
                       Below: The finished new look of the “P. PINE” for now!

In the near future, “P. PINE” will be planted deeper in a smaller and more suited pot. But that is for later! Until then I have to concentrate on getting some more foliage and better ramification. But even though she is a long way from finished, I am already pretty happy with the mature and tall tree look and feel that she is slowly acquiring! I think she is becoming a very elegant little Bonsai!
I hope you enjoyed this little story of my “P. PINE”?
Cheers,
Hans van Meer.

Info: karamottobonsai@hotmail.com

———————————————————————————————–

PICTURE OF MY PUNICA YAMADORI SHOHIN.

*Note: This is posted before early Sept. 2010.

Hi, everybody,
today I shot some pictures of my trees and I would love to show you two that I made of my old Punica yamadori Shohin that I have been caring for more than 15 years now. I especial like the mature root base on this small tree that only measures 21cm/8.4inch. I find the colour and texture of this pot from John Pitt stunning and they match the tree perfectly! This little tree has given us a lot of pleasure over the years! I hope you enjoy the pictures?

Cheers,

Hans van Meer.

Info: karamottobonsai@hotmail.com

—————————————————————————————-

————————————————————————————————

A YEAR IN THE LIFE OF “THE ELEPHANT” LARCH.

This post was previously posted on Sept 02, 2010.

Hi, everybody,
I am currently working on part IV of my “ELEPHANT” story to post onto my karamotto bonsai website HERE and while going through all the photo’s I shot this year, I thought it might be a nice idea to post here 3 of the progressing pictures from this growing season for my friends who visit my blog.
I have been working on this old Larch since 2004 and next season it is finally time to plant it into a nice pot! I can’t wait to see how it will look in a proper pot! I hope that the “ELEPHANT’ will be showable in 2013. But I don’t mind the waiting at all and I look forward to working those few years on improving this fine tree!
Above: 10-4-2010. After more than 2 days of wiring. Still, without, its new foliage, you can better see just how many layers and levels I created in every main branch. I know it is far from perfect yet, but it is slowly getting there! Very Happy

                                                     Above: 24-4-2010.
                                                        Above: 10-5-2010.

                                                       Above: 29-9-2010.

Here is a close-up of the partially exposed root base. Over the years several large obstructive roots were removed from the front side. This was done in several steps, spread out over two years. Doing it this way, most of the otherwise large wound, had time to close itself, leaving only a small wound when the rest of the root was removed. If you look at the middle of the picture you can see some cut-paste from one I recently removed. The small scare that is now left is 4 times smaller than when I would have cut it off in one go! I love that flaky bark!

Cheers,
Hans van Meer.

Info: karamottobonsai@hotmail.com

——————————————————————————————–

I hope you enjoyed this little update on the “ELEPHANT” ?!
Cheers,
Hans van Meer.
———————————————————————————————————