
Hi, everybody,
last week it was time to cut back all the strong new growth on all my Yamadori Taxus baccata’s that I collected many, many years ago in Wales with my dear friends Tony Tickle, Terry Foster and Mike Sullivan. Last year they were all heavily fed and allowed to grow freely to build up their strength and that resulted in this year in strong growth all over all of them! So like I mentioned before, last week was the right time to cut back all the new strong growth! How do you know when the right time has arrived? Easy, when the new growth has become harder and stiffer to the touch and has become a darker colour green! Then it is time to cut back into that new growth with very sharp and clean scissors, leaving 3 pairs of needles on a strong shoot and 4 or 5 pairs of the weaker ones! But IMPORTANT: you don’t cut back the new growth on branches that are weak or the ones that you want to thicken or extend!!! But even on branches that need to grow, you should remove some/most of the old needles to promote back budding!!! After all, this is done, you give the trees at least a week time to recover from the stress and to close all the wounds from cutting them! Then you carefully pick/pull off the old needles from last season, making sure that you pull in the direction they grow! This reduces the chance of damage to the often thin branches! After all, if this is done and all goes well then many new strong buds will start to appear at the end of this season, and for sure in the next growing season! The other advantage is that because most branches are now without needles sunlight can reach all areas better and it has become much easier to select and wire them all! All this will result in healthy and strong growth closer to the trunk and main branches and the fuller appearance that we seek in Yew Bonsai and Bonsai in general!
Here are my own Yew Bonsai as an example of how it is done.
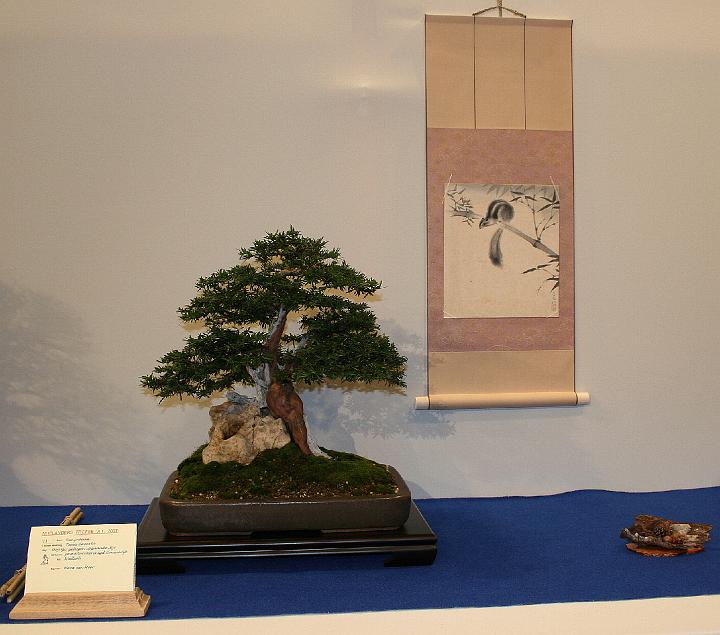
Below: The first one that I like to show you is a Yamadori baccata that was given to me as a present by Tony Tickle when he visited my house almost 20 years ago now! He had collected it himself a few years earlier and I remember him smiling when he gave it to me and said: “let’s see what you can make out of this”?! When I later took it out of its plastic training pot, I understood exactly what he meant when he said this! Underneath the wide base of the tree grew a 15 cm long thick root with only roots at the end….it looked like a lollypop! It took me the better part of 4 years to force the tree to make roots higher and closer to the trunk base so that I could finally shorten that long root and plant the tree in a more normal pot! But during those years I had already started to style the tree and found a solution to make good use of that bulging trunk section and the Jin that emerged from it on the left! And that solution was all the time lying on my garden floor! It was a viewing stone from Indonesia which, when I held them together, fitted like a clove! The small base of the tree fell exactly into a cavity in the stone and the Jin rested on top of it, like a big branch that had died back many years ago….amazing! 🙂 Then in February 2007, the Bonsai made it through the tough pre-selection of the prestigious “Noelanders Trophy” in Heusden/Zolder Belgium. The lollypop Yew had become a Bonsai! 🙂
Height 55 cm/22 Inch. Table, scroll and Shikishi Japan.
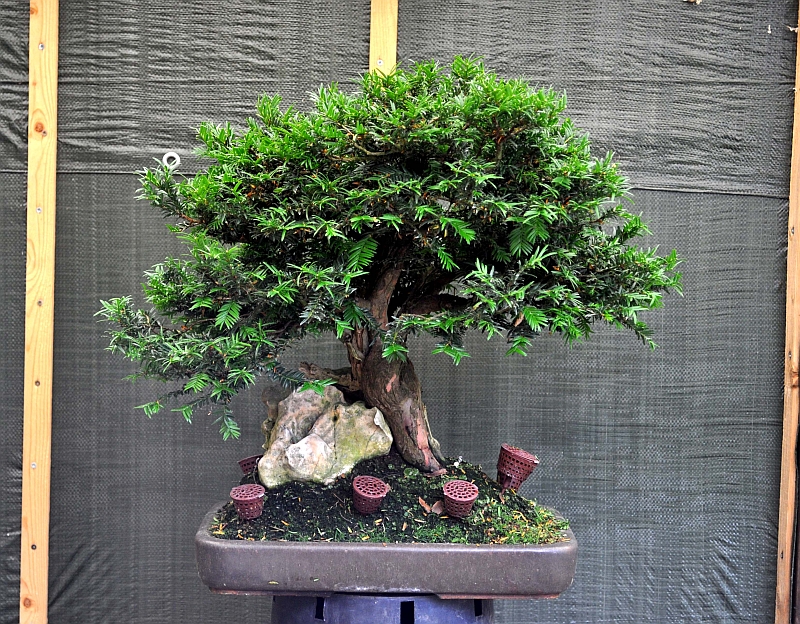
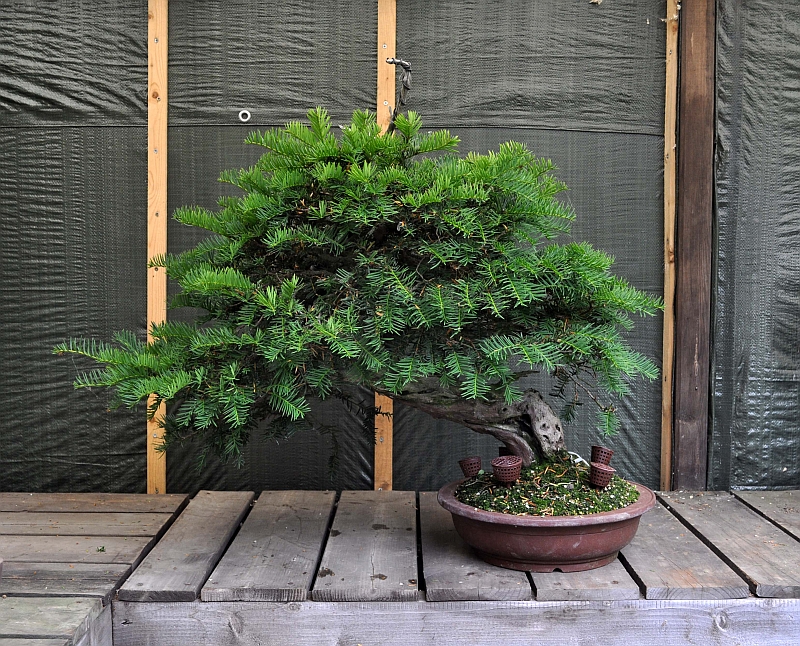
Below: The same tree 10 years later! Healthy…but in need of a haircut and complete wiring!

Below: Side view

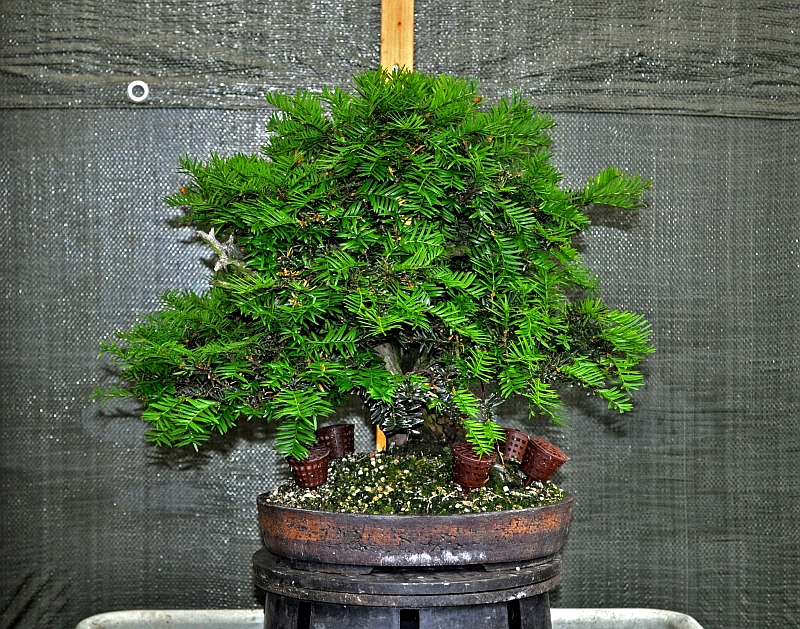
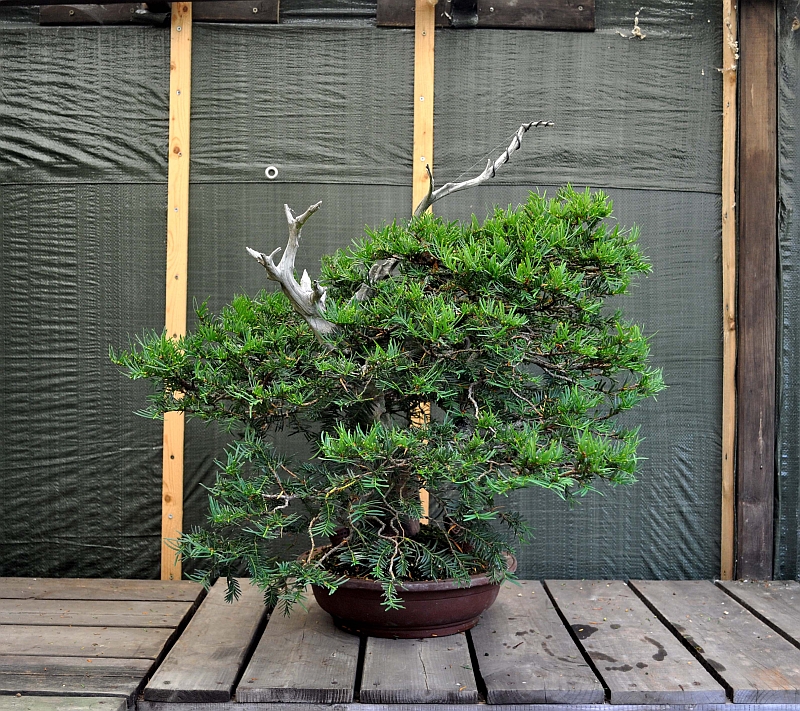
Below: After shortening all the healthy shoots! Next, on the agenda is pinching most of the old needles and then rewiring the whole tree and cleaning the live section and the deadwood section and applying lime sulphur.
Below: Side view. Out of model….but he looks healthy enough!

Below: The second one that I like to show was in 1999 given to me (again) as a gift from Tony Tickle when we said ower goodbyes at the end of the historic second “Ginkgo Awards” in Belgium. This next year’s picture was taken in my garden just after I repotted it. The left arrow points at the large Jin that you can see on the left in the second picture below. The bottom arrow points at the large branch that I removed completely so that I would be able to create a more compact middle-size Bonsai (Chuhin)! The large Jin/Shari section that you can see in the middle of the trunk in that same second picture is all that remains of this large branch!

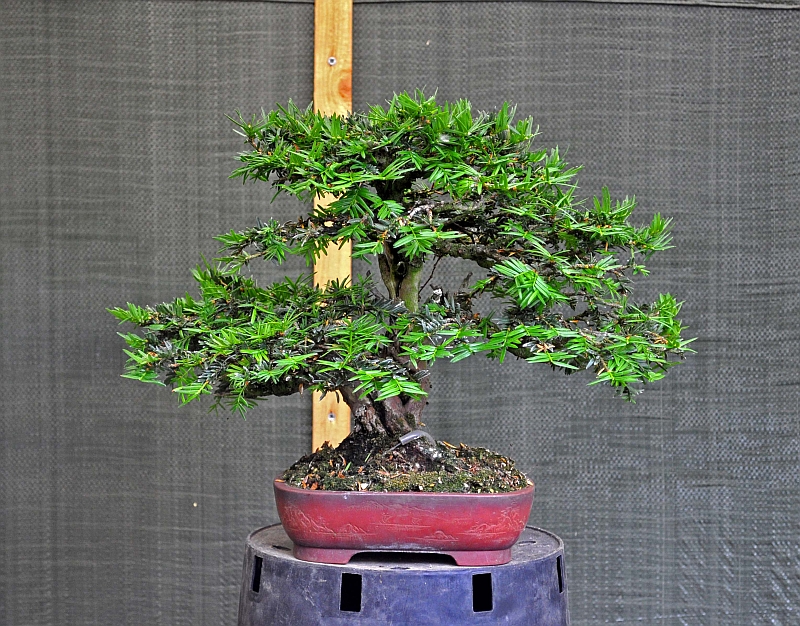
Below: September 2007. The same tree, but now as a Bonsai! It was earlier also shown in one of the “Noelanders trophies” together with another small size Yew that I will show you next! Height: 35 cm/14 Inch. Pot: Klika & Kuratkova Table: CHR furniture (B)

Below: The same tree before cutting the new shoots. The right bottom branch has lost some thicker branches on the backside that need to be replaced and filled with new young branches in the next seasons! The ones growing from there are left alone to thicken and extend, so no cutting or pinching! The rest of the tree will be treated as explained before!
Below: Right side view of the tree. Note how the top leans towards the front…like in most of my Bonsai designs!

Below: After cutting the new shoots. The length of the branches is like in the first tree too long and the desired silhouette is lost! But after the new buds that will appear have opened and grown enough, well then all these too-long branches will be cut back so that the proper silhouette will return!

Below: 1999. A young and thinner me and my dear old friend Tony Tickle on a collecting trip in Wales…good times! 🙂

Below: The third example. Here is one that I collected myself during one of those exciting trips late last century with Tony, Terry and friends!

Below: And this is how it looked in September 2007. In a custom-made pot by old friend Brian Allbright (UK) and another table custom-made by CHR furniture (B). Height 28 cm/11.2 Inch. This Bonsai was shown together with the one before this in the Noelanders trophy.

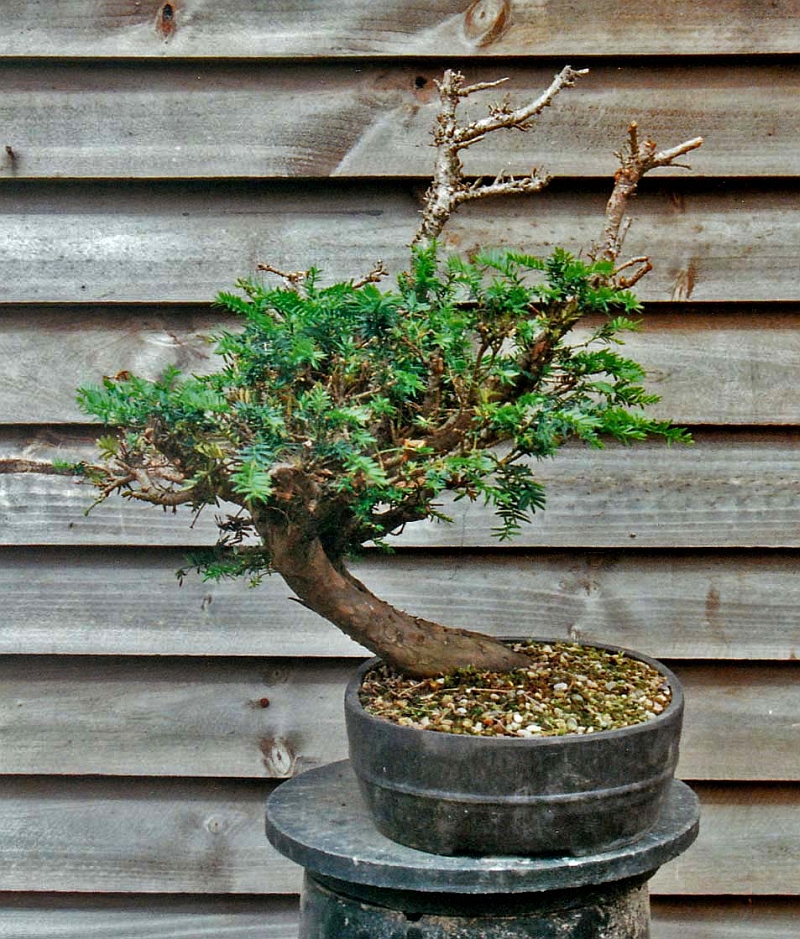
Below: And this is how it looked before pruning began. It has outgrown its beautiful Tokename pot, where it has been growing for almost a decade! So I have to start looking for a new beautiful and more spacious one!

Below: Right side view.

Below: After cutting the new shoots. It is obvious that the left side of the top needs to be wired and repositioned!
Below: In this left-side shot it is even more obvious that the left side of that top needs to be filled up by lowering the branch above that big gap! This open space arose when a major branch died back!

Below: Collecting one of the Yews from this post!

Below: The fourth example. This one was collected by myself during one of the collecting trips I made with Tony and friends during the late nineties in Wales. As soon as I got home it was planted in a hard plastic Bonsai container and then left alone to recover!

Below: After the first signs of recovery I removed all the useless growth of those long branches so that all the energy would go to the foliage that matters! And then the tree was left alone again to get stronger for its first real styling!
Below: The tree consists of left and right sections with a strip of deadwood running in between from top to bottom. A year later, when the tree was looking very vigorous, I decided that it was safe to perform a drastic pruning! So I cut off all the foliage and branches from the left section of the tree, leaving the stumps so that they could be turned into Jins. And I removed all the bark from that left section, creating a nice contrast between the live (brown) section and the deadwood (white) section! The branches that were useful for my design were wired and then the tree was left alone (as long as it needed) to recover from it all!

Below: A year later it was doing just fine so I planted it in a proper Bonsai pot.
Below: And this is how that same Bonsai looked in September 2007. That same year it was proudly exhibited in the fifth and last edition of the now legendaries “Ginkgo Awards” in Belgium. I like the contrast of colours in this tree and the circular design! Almost like yin yang…live and dead! But what I like most is that I created a design with an otherwise big no-no….the right bottom branch that grows directly out of the inside of that curve! And still, it works and makes you look twice because it is so unconventional! And that was just what I hoped to achieve with this design!
Height: 35 cm/ 14 Inch. Pot: Tokoname. Table: CHR furniture (B)

Below: The tree before shortening most of the new growth. And after that, it is time to rewire and restyle the whole tree again!
Below: Left side view showing the deadwood/Shari and Jins.

Below: After cutting most of the new shoots.

Below: It is thinned out a lot! Now it is time to remove most of the older needles from the strong branches so that light can reach in and new buds can appear!
Below: The fifth and last example. This Yew was actually the first tree that I ever collected and yes it was Tony Tickle again who made that possible for me! I met Tony for the first time in 1997 at the first-ever “Ginkgo Bonsai show” in Belgium and we have been great friends ever since and had some amazing Bonsai adventures together since then! It was during that first meeting that Tony invited me to come to collect with him in the UK! I could not believe my luck and sure enough in early 1998, I drove all the way to the north of England! And the next day, the first tree I ever collected, was the Yew that I am next going to show and discuss!
Below: Happy me with my first collected Yamadori ever!!! This Yew marks an all-important turning point in my Bonsai life….sins then on I decided that this was what I wanted to do Bonsai! And since then I have nearly always worked exclusively on raw unstyled material that I often found and collected myself! I wanted to have all the excitement from the beginning to the end…I choose the long way…but my way! And this Yew started that all of, so you can imagine that it holds a warm spot in my heart! 🙂

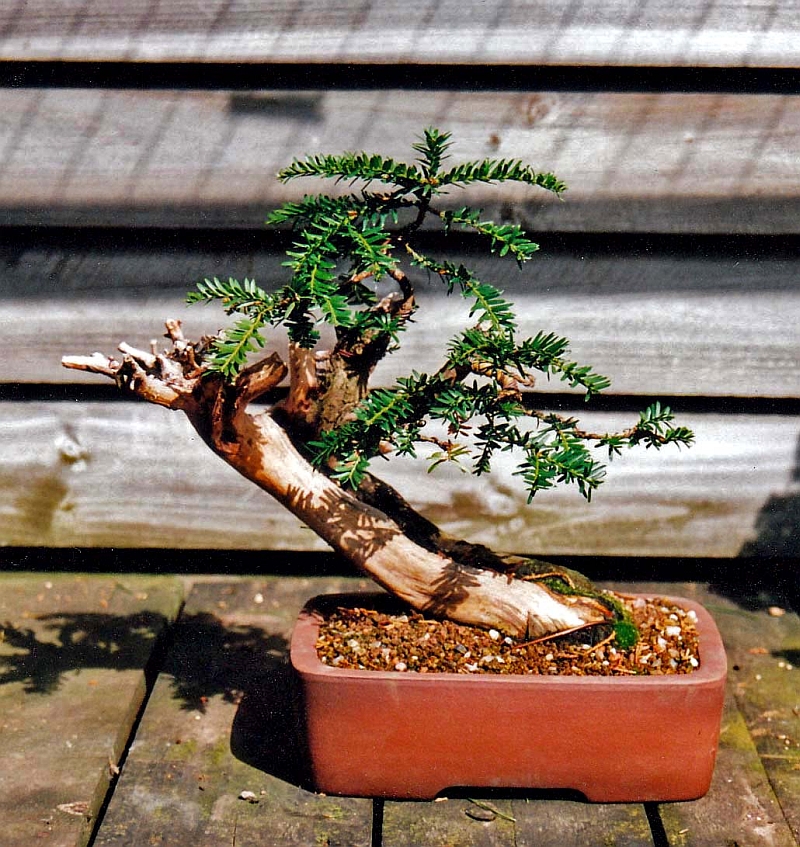
Below: In my garden, it lost the whole top section, but luckily the bottom foliage survived!
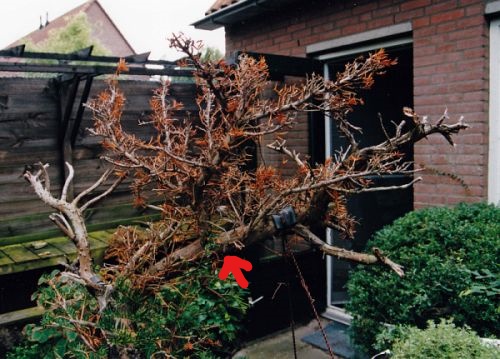
Below: A not-so-good picture made inside my house in 2003. As you can see that half of the dead top section was removed right up to the red arrow in the above picture, and only a small Jin remains! The large upwards-going Jin you see in the below picture is the dead upwards-going branch that starts just above that red arrow in the above picture!

Below: September 2007. Just rewired, repositioned, live wood cleaned and Jins and Shari’s treated with lime sulphur. Table: CHR furniture (B)

Below: Early 2008 in its present pot. From here on it was all keeping it very happy, and healthy with the main focus on fuller and better branch structure! Growing, cutting, pinching and wiring etc. etc…..ect.😉

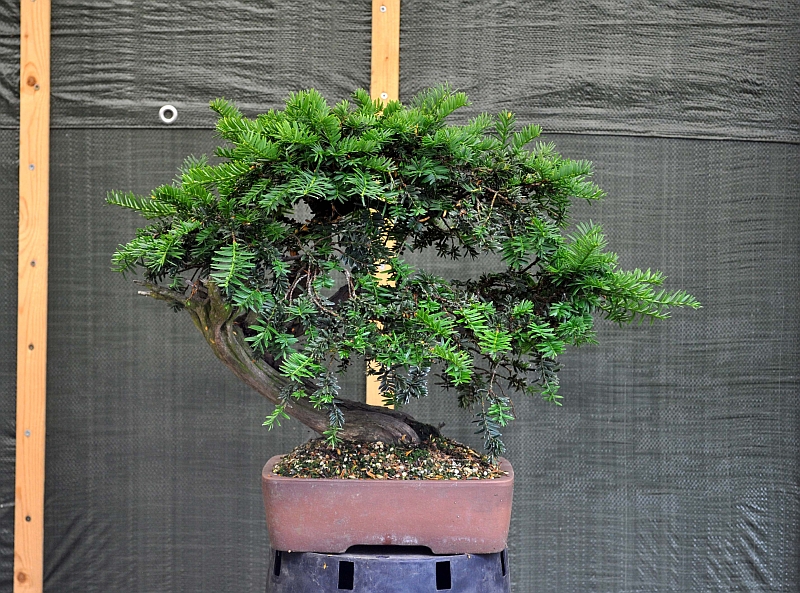
Below: Just look at how full the tree is today! Now there is more than enough foliage to work with and to bring the Bonsai further and closer to the end image that I had in mind all those years ago when I gave it its first styling! This pot is by now a bit too small, but is in the style that I would like to use when the Bonsai is finally ready to show…so the search is on! And the tree needs to be tilted more to the right when it is repotted back in this or in its new pot!
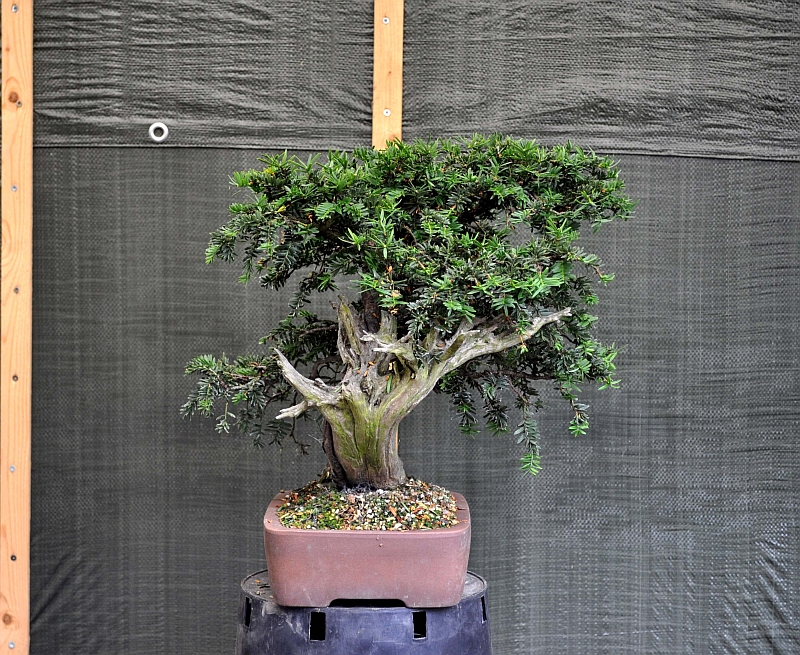
Below: After cutting and pinching. The copper wire in the top of that Jin is there to prevent it from accidentally breaking when I move it around! My garden is covered with galvanized iron gauze (normally used in concrete walls), so a mistake is easily made when lifting up a tree too high!

Below: Left side view of the tree. Again notice how far my Bonsai lean forwards! This, in my mind, creates a lot of depth and creates a feeling as if the tree leans over you. If I learned one thing from looking at hundreds of Japanese Bonsai in books and in real life then it is this principle! Depth creates a sense of reality…even in pictures!
In between writing this, I spent a lot of fun time with the all-important task of the branch and new growth selection and branch shortening or removing on all the Yews! And although it is a sign of good health, a lot of growth of small and larger branches is useless or unwanted. It blocks out sunlight for the new growth and the branches that are important in your design! So it should be removed or shortened! Then there is branch shortening to reduce the overall size and mass of your design! And last but not least, branch shortening to create better branch structure and ramifications! By cutting back a larger branch right up to where there is a strong shoot or even bud, you will create shorter and better ramification branches and better taper! This should be one of the main objectives of Bonsai and is in modern Bonsai often neglected! You should not be only proud of the outside image of your Bonsai, but also of your branch structure!!! And it is very important for the well-being of your Bonsai! For example, the first Bonsai from this post was after this (long) branch selection round reduced by some 20% !! After all the here discussed Bonsai have gone through this same procedure, they will all be wired, styled, cleaned and treated with Lime sulphur. After that, I will make new pictures and show them to you! I hope you enjoyed this post and found it useful and interesting?!
Now I will start to work again on my new Bonsai video that is almost finished…it only needs music underneath it! That might sound easy to some…but for a novice like me, it all is a big difficult puzzle?! 🙂 It is Part I of the story of “the Elephant” my big Yamadori Larch. So watch this space!
Cheers,
Hans van Meer.
Info: karamottobonsai@hotmail.com
—————————————————————————————————-
