MY WORKSHOP AT “ISS HOGAI” IN SUNNY EMMEN (HOLLAND)!


Hi, everybody,

I met Henk Steneker, the organizer of this workshop, during the Masterclass I did last year. There he asked if I would like to give a workshop in the following year at his relative new Bonsai shop “Iss Hogai” that is based in his new house in Emmen (Holland). Well, of course, I said yes and last weekend it was time for me to make the 2 and a half hour long trip to the North East of Holland. I made it in one go and arrived right in time for a warm welcome by Henk and a cup of coffee with cake! He showed me around his large garden that is being converted to a Bonsai garden with benches for his and his club members Bonsai and a large area to work. There is a nice indoor section in his garden to work when it is cold and raining or as in this case, rather hot! His club consists of a small but very enthusiastic group of Bonsai junkies, that had a great time during this sunny day! It is good to know, that there are so many people in Holland that are willing to make that extra effort to progress in their hobby! Because I know that improvement through working on Bonsai, will make this magnificent hobby, even more, enjoyable for them!

Below: First we started with discussing the trees that the students had brought along.

Below: One by one the unworked material, pre Bonsai or Bonsai were discussed by me.

Below: Rene pulling my leg when he brought with a straight face a half-dead Ulmus to see how I would react and talked my way out of it without hurting any one’s feelings! 🙂

               Below: Rene’s very promising Yamadori, Mugo Pine.

A very promizing Mugo pine!

                  Below picture: discussing the trees possibilities.

                                                     Below picture: WHAT ?!


                 Above: Harry Gerdes concentrated at work on his Juniper.

              Monique van Ommen, working indoor were it was much cooler!

Rene Bakker was very eager to start working on his Pine. I cant blame him! 🙂

Above: Henk Steneker, founder of this club and organizer, hard at work on his “Taxus”.


Above: Anneke van Lintum, enjoying Bonsai! A picture that speaks for itself!

Above: Rene, bless his heart, did not hesitate to cut off and bend some major branches, after we discussed where we could go with his magnificent old “Mugo”!

Above: Wet raffia was applied to prevent branches to break when they were severely bent.

                          Above picture: Bram de Visser working on his tree.

     Above picture: Bram’s “Chamaecyparis” obtusa before his work started.

                                      Above: The cut off branch is Jinned.

Above: The well-protected branch is slowly brought into its desired position.

 Above: Even after all of the students were gone we went on wiring and styling…we both wanted to see this great tree finished! 😉

    Above: Almost everything wired and brought into its desired position.!

After a long day of bonsai work, it was nice to finish off with a promising tree like this one! And than it was time for a nice cold beer with my new Bonsai friends from up North!

Above: Bending the last branches of the top into place! After a long day of bonsai work, it was nice to finish off with a promising tree like this one! And then it was time for a nice cold beer with my new Bonsai friends from up North! And then it was off for the long trip home…tired but very happy and satisfied!

Hope you enjoy the images as much as I enjoyed this day!

Cheers,

Hans van Meer.

Info: karamottobonsai@hotmail.com

——————————————————————————————–


SOME STYLING WORK ON “X.L” MY BIG YAMADORI LARCH.

Hi, everybody,

Above pictures: The secondary branch structure is getting better on all the branches, but the straight line of the first branch on the right is bothering me. This is the only older branch on this tree and it needs a bit off help to get some gentle movement. This way it looks less boring and will fit the rest of the branch structure of this tree. Straight lines must be avoided at all times in a successful design, the stick out like a sore thumb! So I wrapped it in water soaked raffia and bent some movement in it.

I know! I'm a tree hugger!

                                       Above: I know! I’m a tree hugger!

Above pictures: It was hard to place my hands on this branch to bend it, but you can see I managed to great a gentle curve in that straight and thick branch in the end! Now it fits the rest of my branch structure. In Bonsai you have to pay attention to every little detail, even if you think no one will knottiest what you are doing. A lot of small mistakes will make a big one!

                             Above: Bird’s eye view of the branch structure.

Above; I made this picture with a backdrop to make the branches stand more out. I am really happy how the image of “X.L” is progressing. I can’t wait to see how he will look in a few weeks, when the brightly, and still very small, green needles start appearing. Then the scale of this old Larch is at it best! Maybe next year, if possible, I will plant him in a nice pot? I hope you like the progress so far?

Cheers,

Hans van Meer.

I FINALLY FINISHED THE WORK ON MY PINUS UNCINATA.


Hi, everybody,

Yesterday I finally had the change to finish the work on my Pinus Uncinata. Although it took me a month or so too long to do it all, I am glad about the outcome of my work. The tree had enough growth and new foliage for me to give the image more height and width, I even removed a major branch from the left bottom branch. There was no more need for heavy wire, every main branch is fixated, more or less, in its right place. I tried to create more layers in the separate foliage pads and more open spaces between the foliage, these details create a whole new feeling when I look at it. The tree, now, looks taller and more like it is growing in the distance. I feel this is very important part of the future process of trying to find some sort of believable balance in this extreme Bonsai design I have in my mind for this Pine! The right Jin on the ground is already half cut to give me a better impression of how it will look in the near future! I left it like this because that part of the Jin that is left on is used to tie down the tree to the rim of the pot to hold it upright and secure!

More to come!


*

*

Above picture: I placed the tree in a virtual pot to get a feel of how it will look, in a more upright position. As you can see, the open spaces increased a lot between the bottom branches and the soil level. And that is something to take along in the next restyling session. This is not a pot I would go for, but it will do for this purpose.

I hope you like this old Pine as much as I do,

Hans van Meer.

Info: karamottobonsai@hotmail.com

———————————————————————————————-


REMOVING NEEDLES, BEFORE WIRING, ON MY PINUS UNCINATA.

Hi, everybody,

A few days ago, during a short sunny dry spell, I removed all of the last years and some of this year’s needles. To control and promote growth and to make it easier to wire the branches.

When I feel up to it, I hope to start to wire the tree! This picture is a rare shot of the backside of this old Pine.

Regards,

Hans van Meer.

Info: karamottobonsai@hotmail.com

————————————————————————————————-


The styling of my new Shohin Yew, “Little Terry”!


Hi, everybody,
a few weeks ago, when I was in the UK to do another “BURRS” weekend, I stayed as a guest in the warm home of my dear friends Charlot and Terry Foster. Every year they spoil me half to death when I visit them and this year I even was surprised with a real Halloween party (my first), with great food and light refreshments! 🙂  All too soon this weekend with my talented friend ended and I probably won’t see him until next year, for the next “BURRS” event. But he took care of that problem as well for me! The last morning, during a wonderful breakfast, he surprised me completely again! He gave me this lovely little Yamadori “Yew”, he collected himself 6 years ago. He said, here is something to remind you, of this fun time we spent together. Once again this modest man had struck a nerve in me and I just had not enough words to take him for his wonderful gift! You got to love him!
I am because of my back problems, still not being able to do much work at once, so I decided to work on this little gem. Trying to honour Terry’s design, but with a little twist of the Hans. 🙂

I removed unnecessary foliage and some branches that did back, then wired every branch, which, because of the dense foliage, was not so easy as it sounds. I had to be extra careful with those big hands of mine. I put all the branches into there desired place. I cleaned the deadwood and live bark with a toothbrush and some water then applied lime sulphur to protect and whiten the deadwood. Took these picture for my weblog and of course, I named this Shohin: “LITTLE TERRY”!!!
Thanks, Terry!!!!

                                        Above picture: Before the work began.

Above picture: Here you can see how small she actually is.


                                        Above picture: Left side of the tree.

                                        Above picture: Back side of the tree.

                                   Right picture: Right side of the tree.

Above Picture: A branch has died back, so the live bark will shift more to the right in the future, but this is something the tree will do by itself!


                       Above picture: Close up of the deadwood.

                                                          “LITTLE TERRY”


Hope you like it?

Cheers,
Hans van Meer.

Info: karamotto@hotmail.com

————————————————————————————-


THE 2008 “BURRS” RESIDENTIAL BONSAI WORSHOP WEEKEND REVISITED!!!


THE 2008 “BURRS” RESIDENTIAL BONSAI WORKSHOP WEEKEND !!!

Hi everybody,

this weekend I had the immense pleasure to be a part again of the, 2008 “BURRS” residential bonsai workshop weekend, that Tony Tickle organize every year. This was already my 3 time there and I am already committed to doing the next one in 2009. And it is almost fully booked, so if you are interested to join us next year, you can find more Information here: http://www.bonsaischool.co.uk/

I must admit that lately, I have lost my belief in a part of the bonsai community. I was so very disheartened by the behaviour and attitude of some, that I decided to stay out of any debate in the future, that could not be won, even if I was right! So I have stopped posting on some forums to avoid temptation and aggravation. My precious time is better spent on my own Bonsai and Bonsai friends. It just wasn’t worth any more of my good intended time!

But after this weekend in “BURRS”, being an intimate part of this large group of egoless and pretentious Bonsai lovers, that I call my friends, I know again, where I can find the true heart and soil of Bonsai.

They all come every year to this magical place in the U.K, from different countries in Europe, to teach, learn, eat and drink and have immense fun while creating beautiful stuff!!!

I thank all these dear Bonsai friends for their trust in us. This weekend was like a warm bath for me and you all revived my spirit and believes! Thanks Tony for organizing this event so well every year! And thanks to Ivo, Enrico and my dear friend Terry for their love of Bonsai!

I will see you all next year in magical “BURRS”!!!

                                                “Turkey Cats” Rules !!!

Have fun,

Hans van Meer.


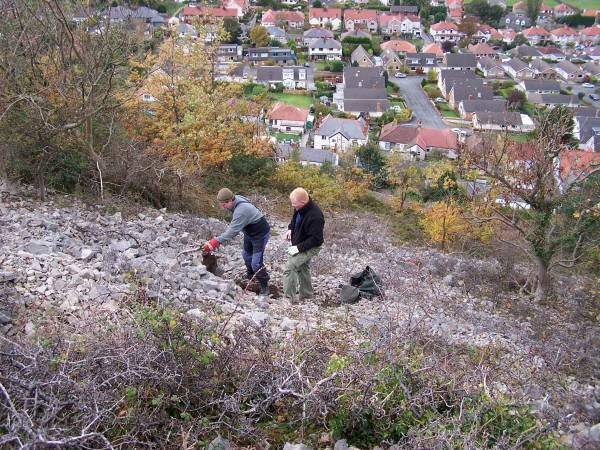
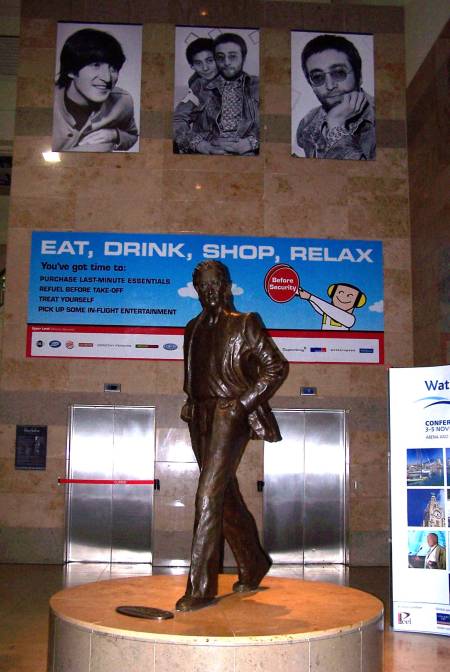
The picture above: I arrived at the “John Lennon” airport in Liverpool early Friday morning, where my dear friend Tony Tickle was waiting for me. We then drove up North, had a typical English breakfast in a fully for Halloween converted diner, while we waited for my other friends Lee and Simon to arrive. From there we drove up to a wonderful place to collect some Yamadori from a rather steep and hard to climb mountain. This picture tells how lucky I felled to be able to do that because only a week ago my back problems became so bad that I could hardly sit up, let along climb up a mountainside. It took some heavy medication, but I made it up there! The Bonsai gods were with me again on this one!

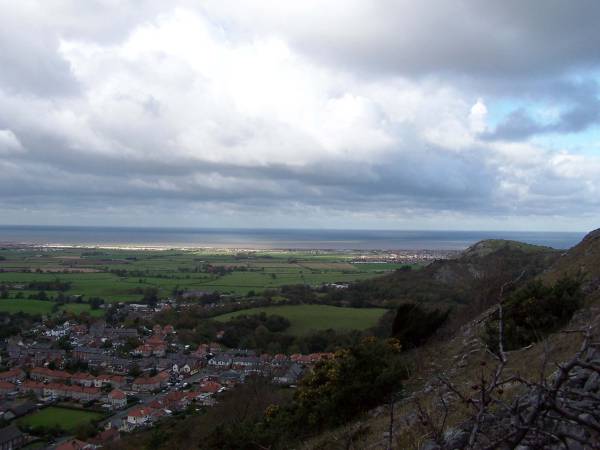
          Below: The view was breathtakingly beautiful and worth the struggle!

Below: I took this other lovely view after I had to climb down most of the way to find my camera that had fallen out of my broken backpack. I was lucky again to find it back amongst all the Black and Hawthorns, but having to struggle all the way up again was no walk in the park for me!

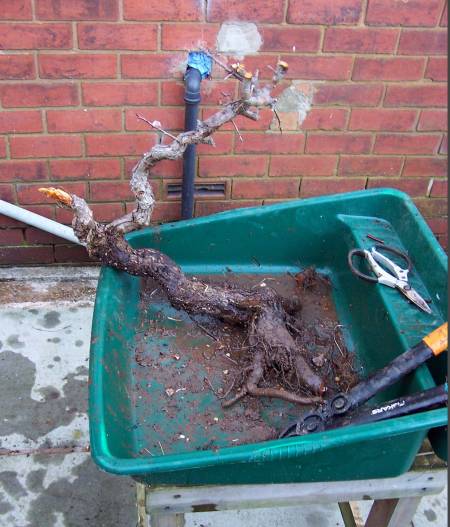
              Below: picture: Tony and Simon found their first Hawthorn.

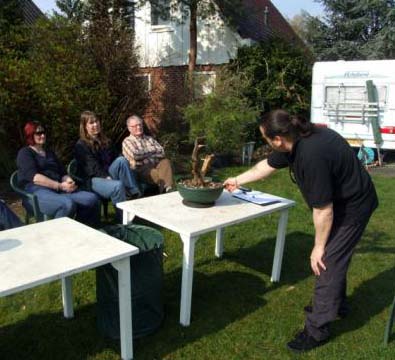
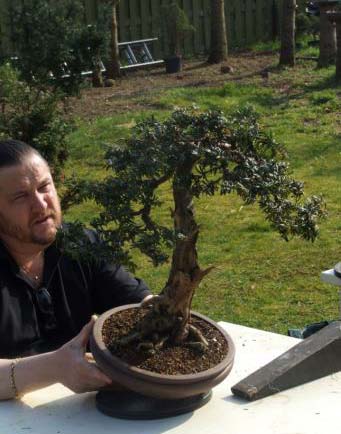
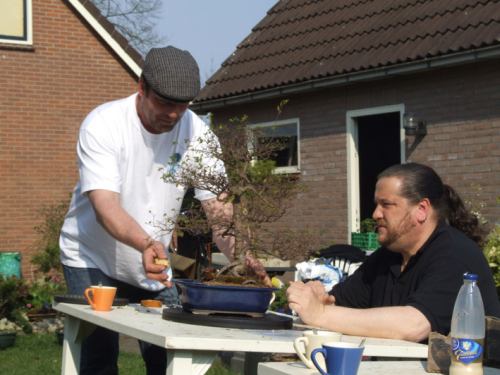
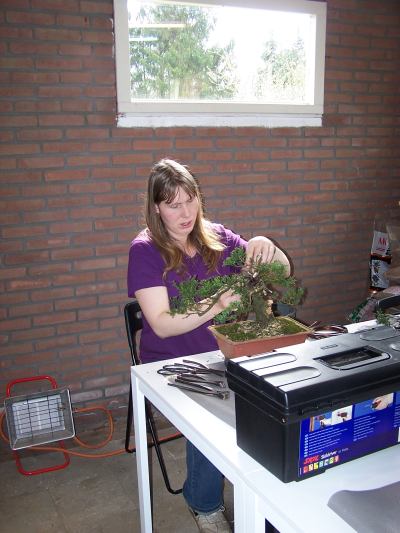
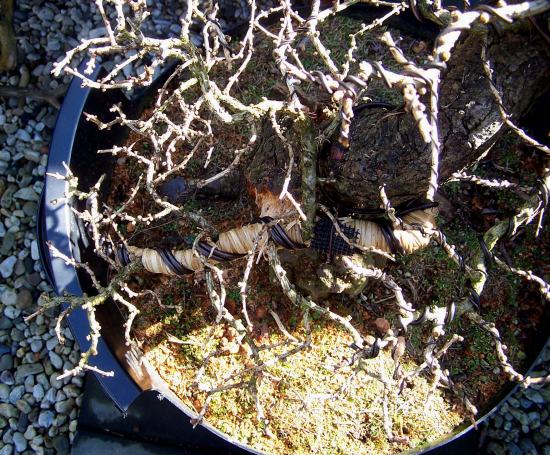
Below: Early next Saturday morning at Terry’s place, while he allowed me to get a bit more sleep, he prepared everything to pot my collected trees in plastic containers. Then he woke me up, and with a warm cup of real thee, we started to do this exciting work! This promising Hawthorn was collected by Simon and Tony for me.

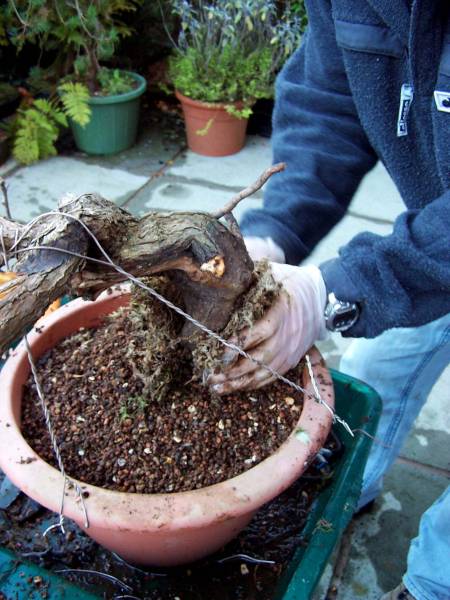
Below: After a fitting container was found, the tree was firmly secured from 4 sides to prevent any movement. Then it was filed up with a mixture of Akadama and Biosorb.

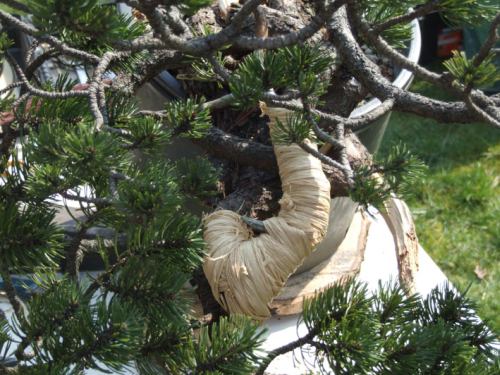
Below: This Hawthorn is planted in a cascading style, this meant some roots up the trunk were exposed to the air. That’s why Terry placed some Sphagnum moss around it, so they would stay alive to help the recovery of the tree next growing season. Later on, when the tree shows enough signs of recovering, they could be removed!

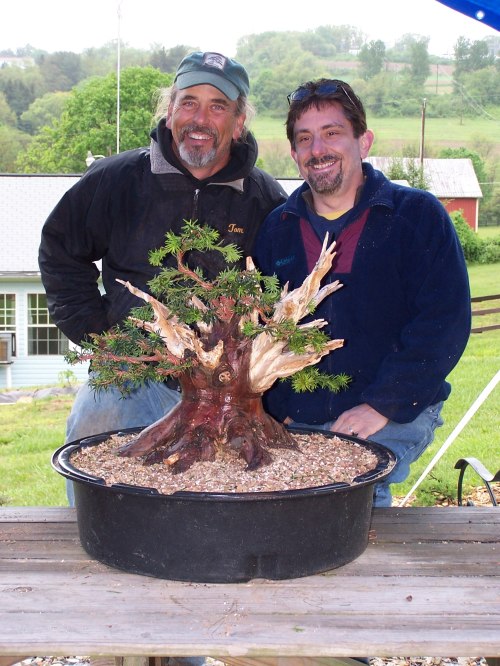
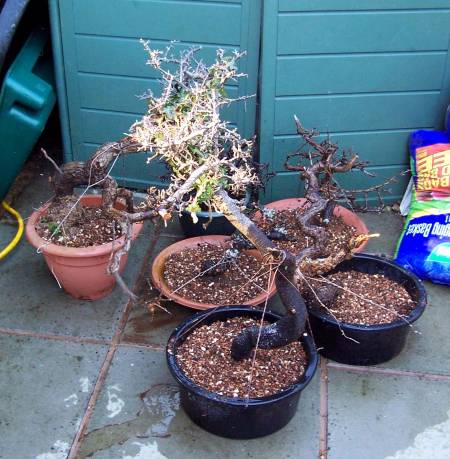
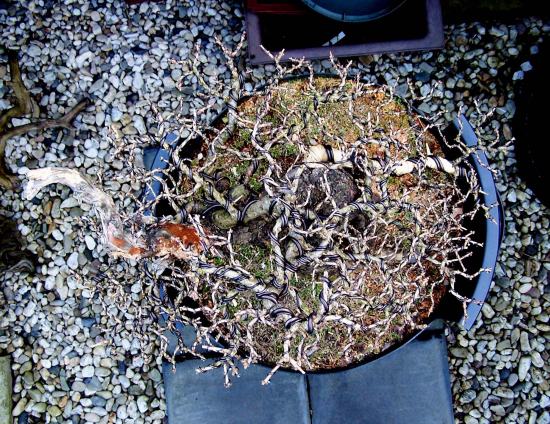
Below: Here are my 6 Yamadori potted up. So it was time for the lovely breakfast that Terry prepared as well for us! You got to love this guy!!!

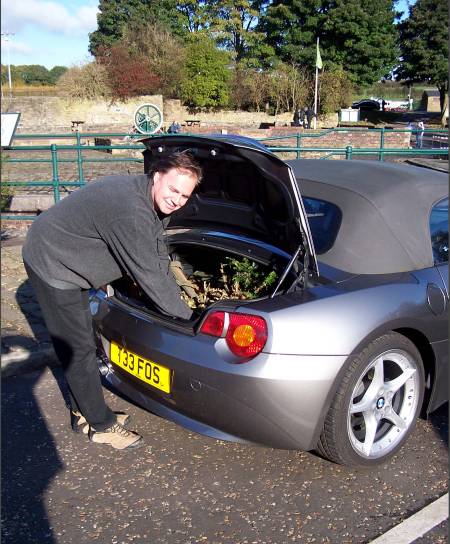
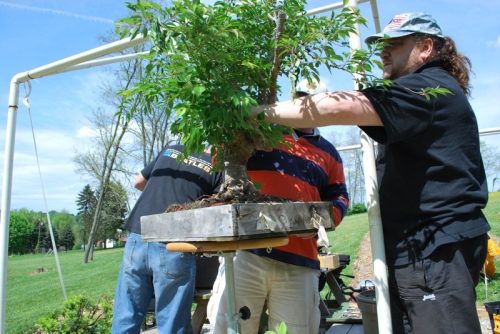
 Below: Here we just arrived at the “BURRS” venue. Isn’t this a fitting way to move a great talent and his wonderful material! 🙂  

                                 Below: Hawthorn after first serious cutting.

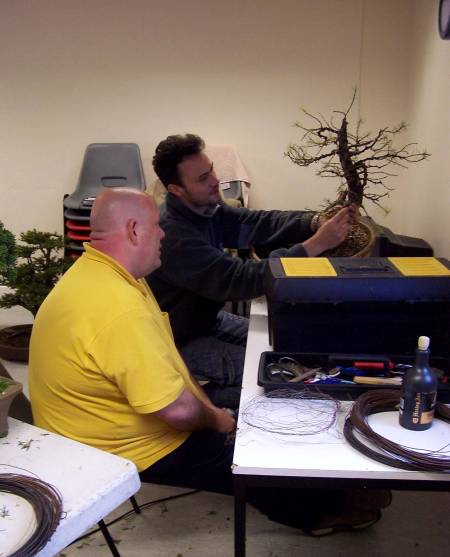
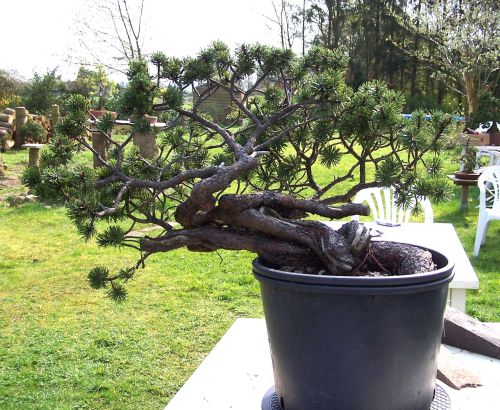
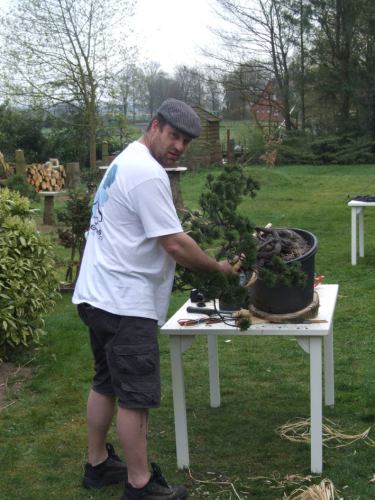
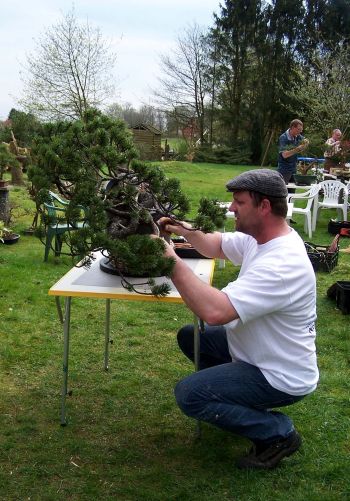
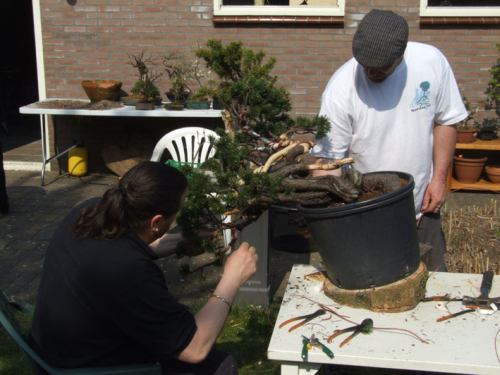
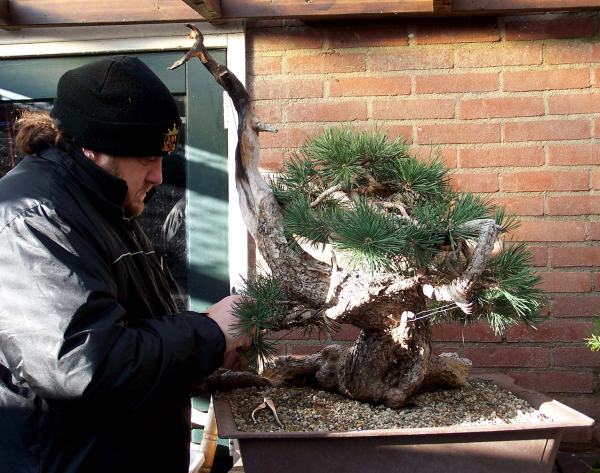
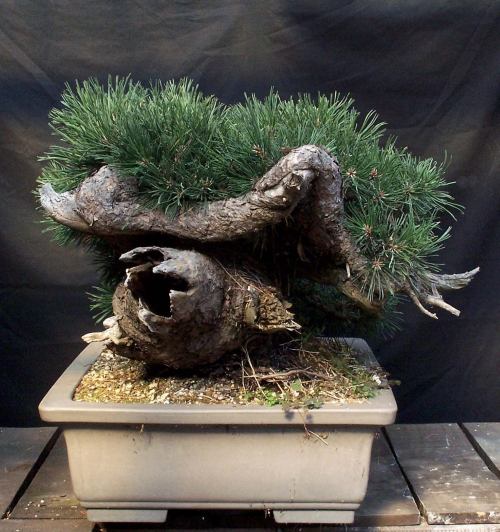
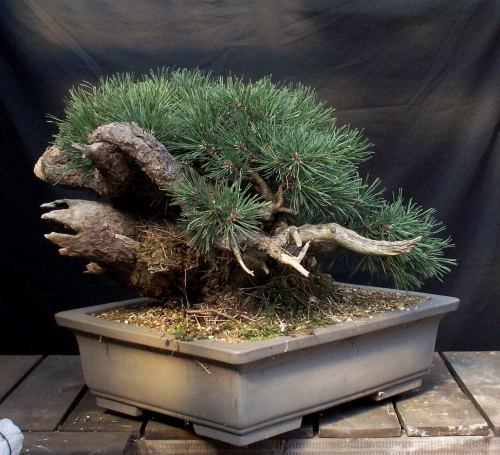
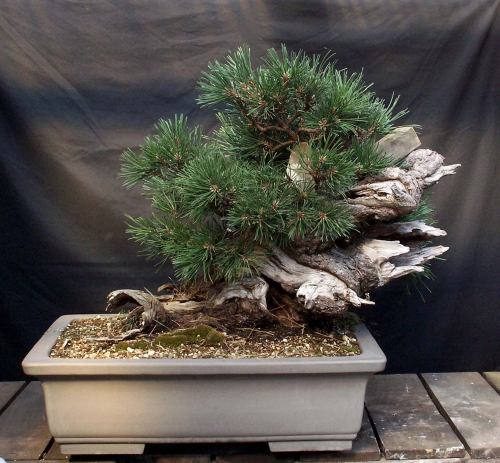
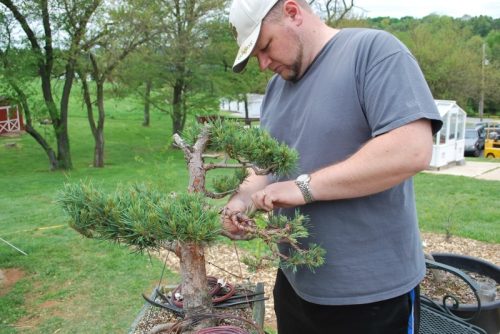
Below: Simon wiring his Pine. This odd-looking Yamadori turned out to be rather stunning in the end!

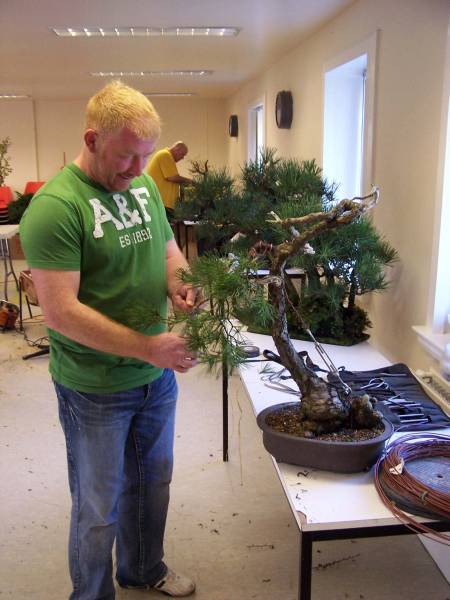
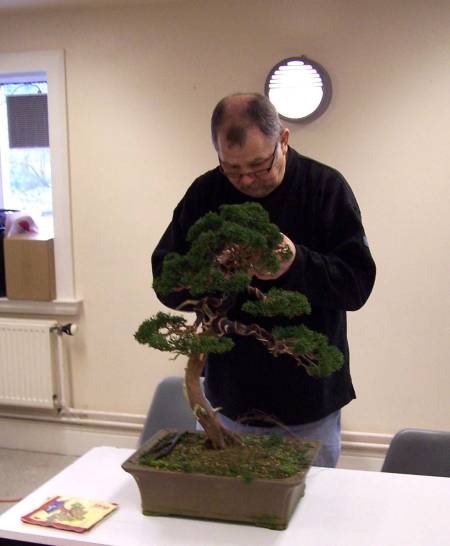
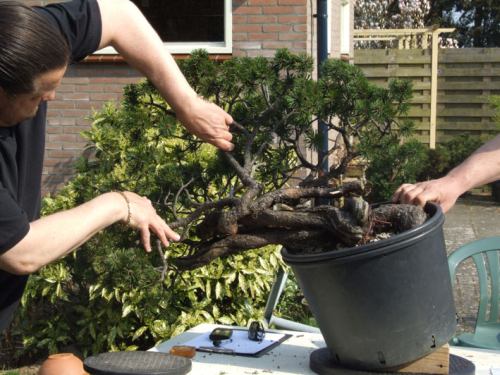
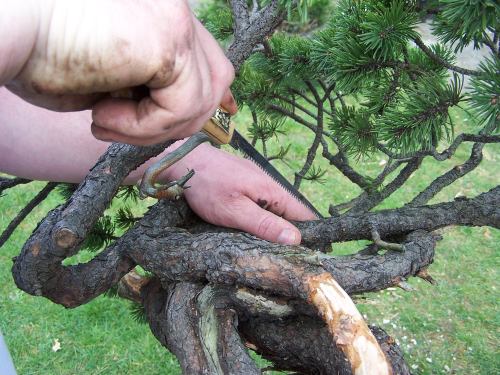
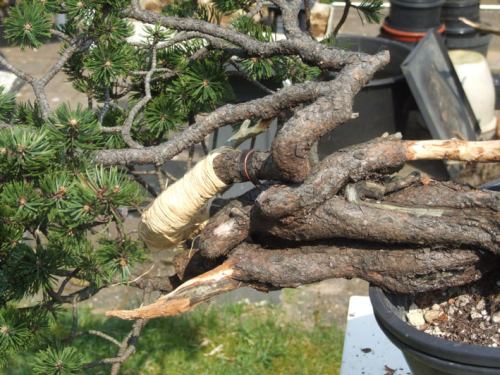
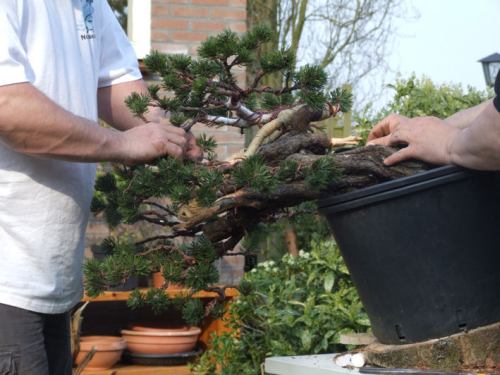
Below: Mister Tickle googling over the bulging root base of Simons Pine. Note the screw that is placed in the deadwood section to help pull down the whole top section to enhance the movement.

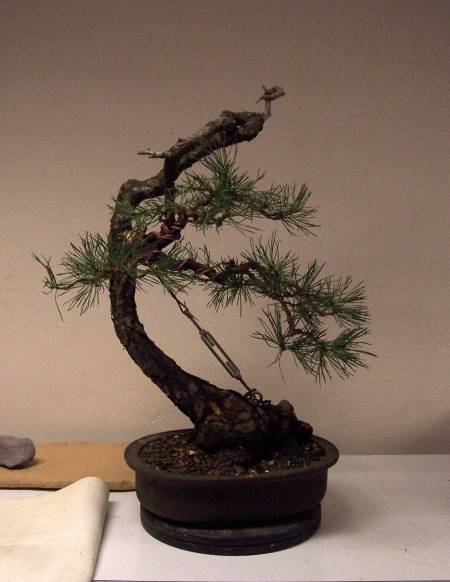
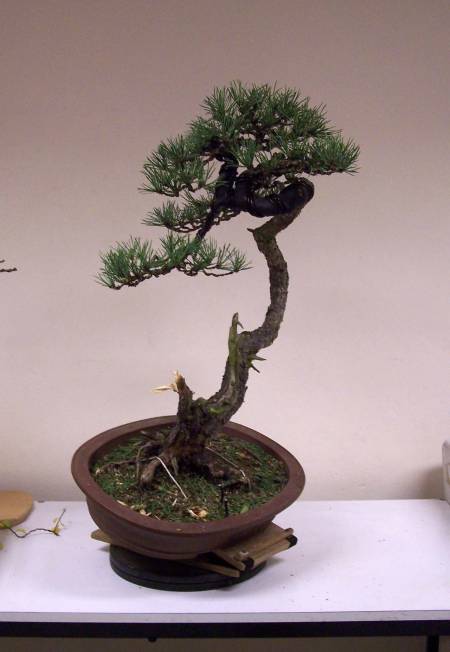
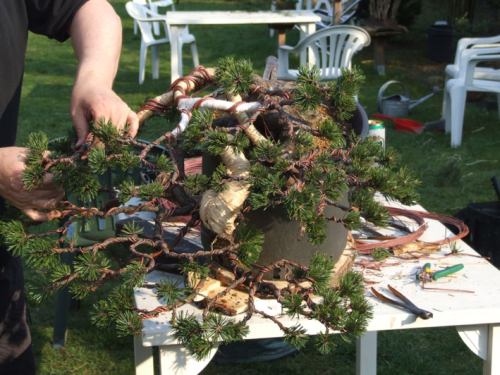
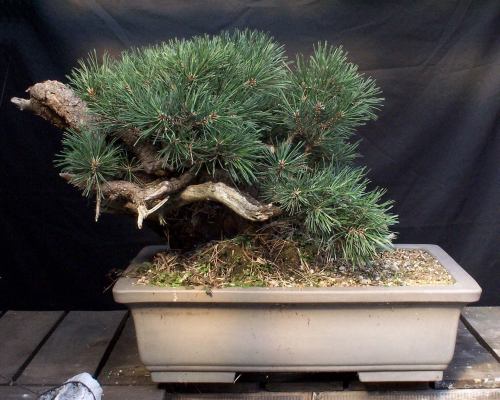
              The surprising end result, a promising stylish Literati Bonsai!

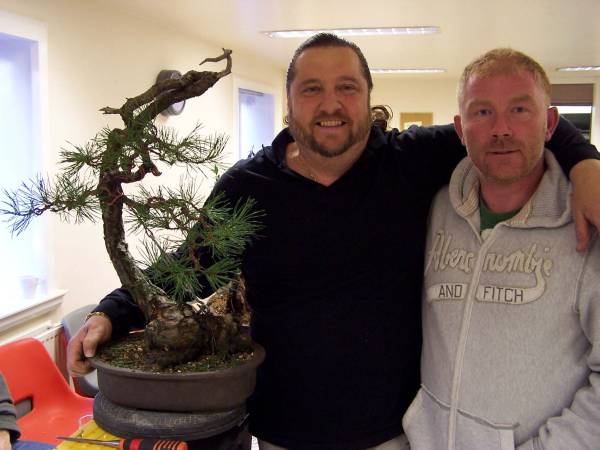
           Simon and his little helper are proud of what they accomplished! 🙂

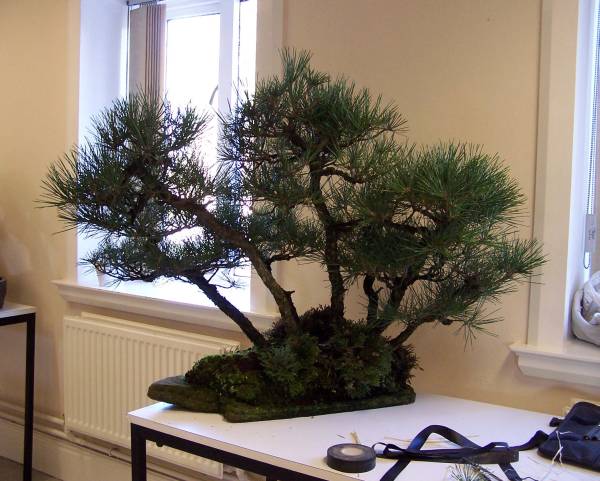
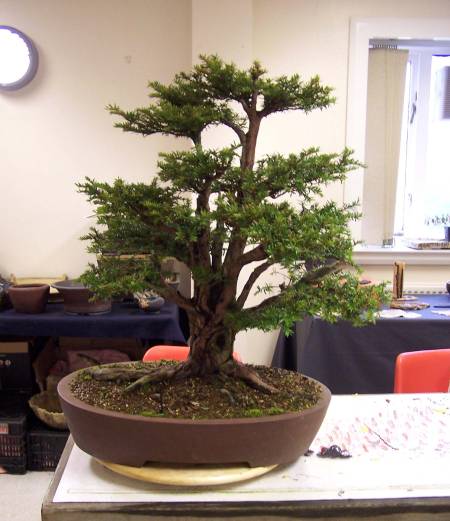
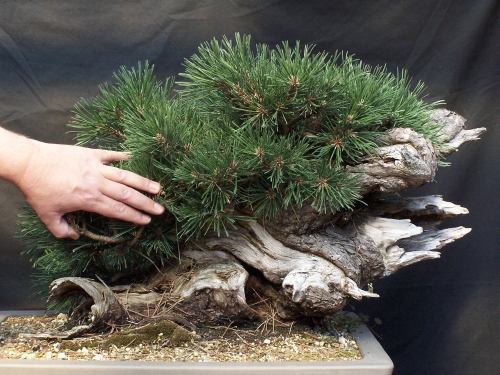
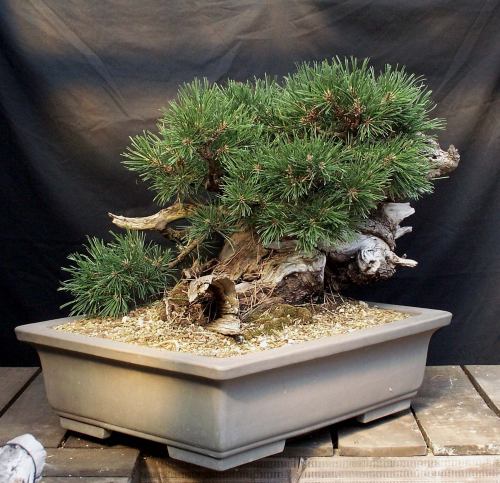
                                          Below: Pine forest on a natural slab.

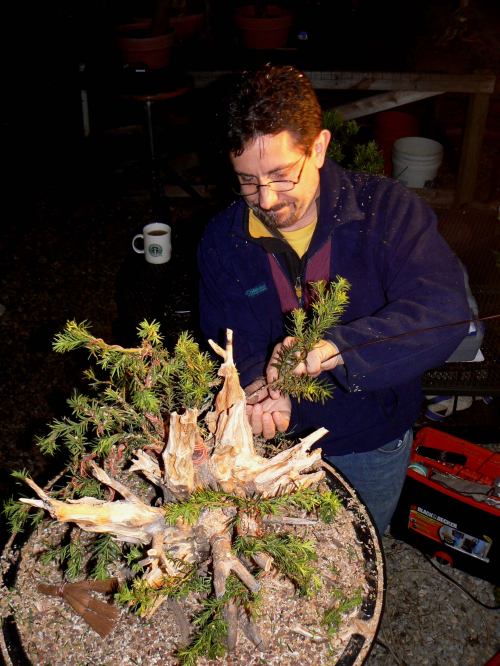
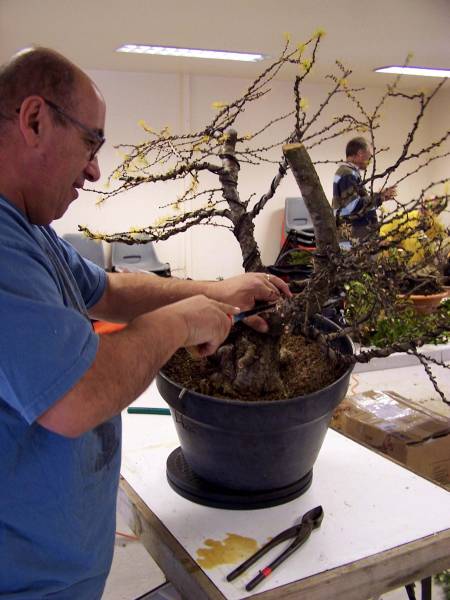
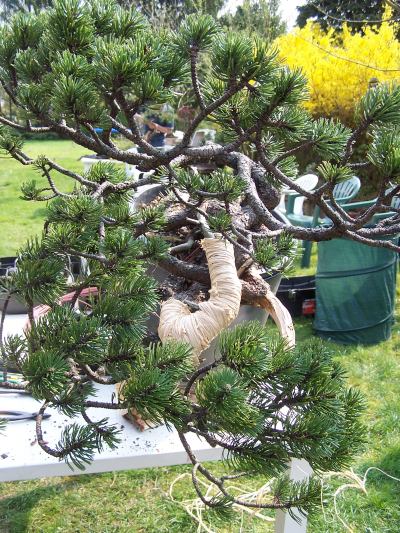
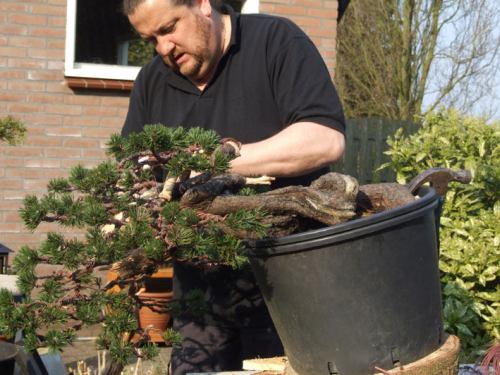
            Below: Ivo working on the deadwood of Jerry’s Mugo Yamadori.

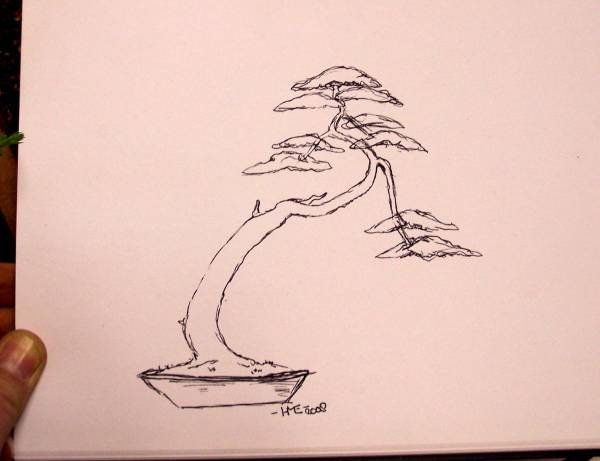
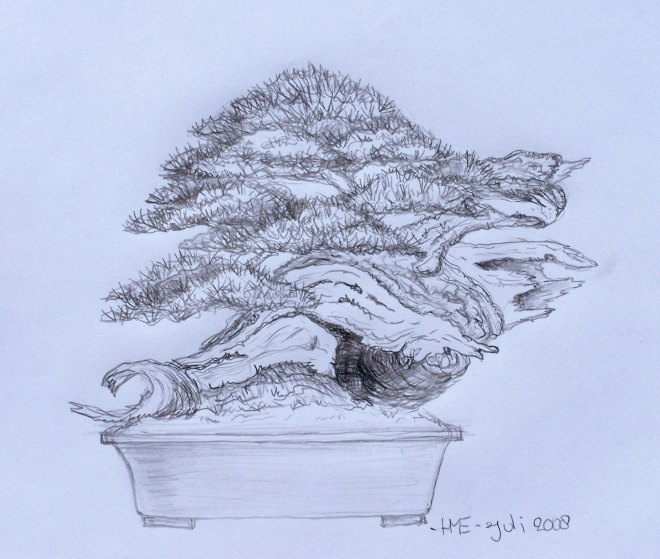
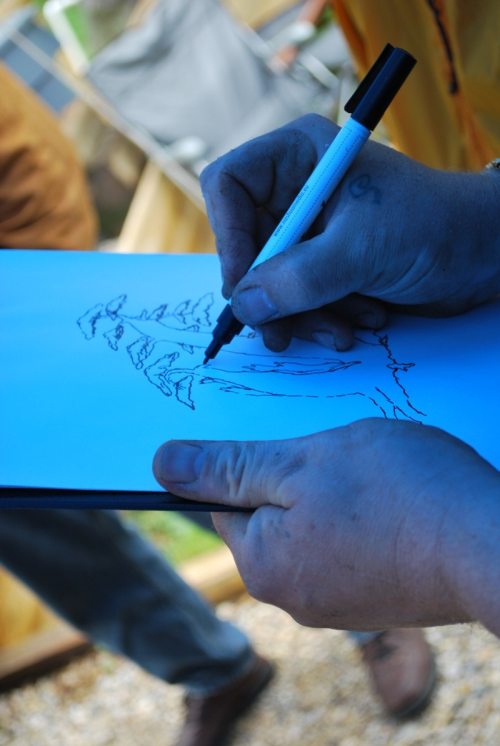
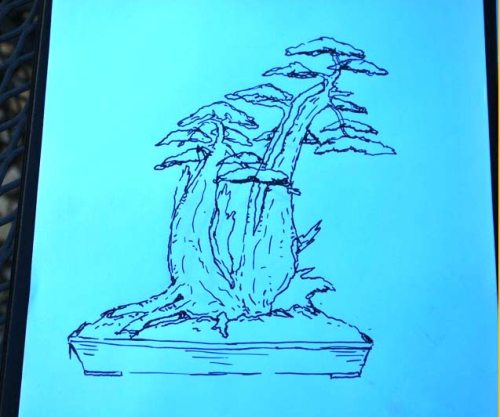
Below: My quick drawing, of a possible future, for  Jerry’s Mugo(the one above). He was very excited about it, I hope he brings the tree with him next year?!

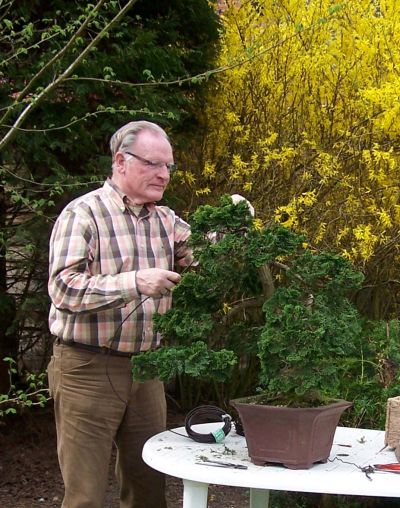
 Below: Cutting away this to thick and straight cascading branch on this Juniper, instantly created a very exciting fat Shohin!

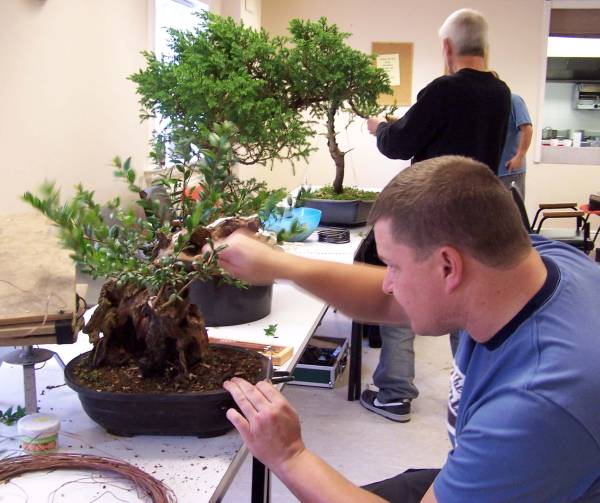
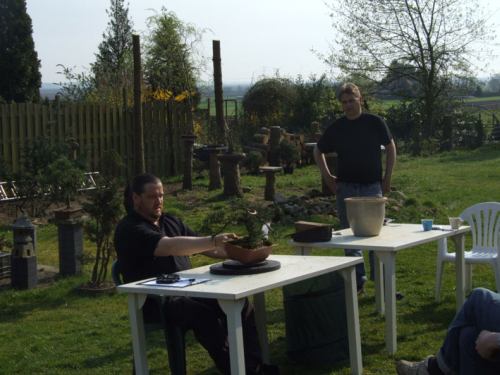
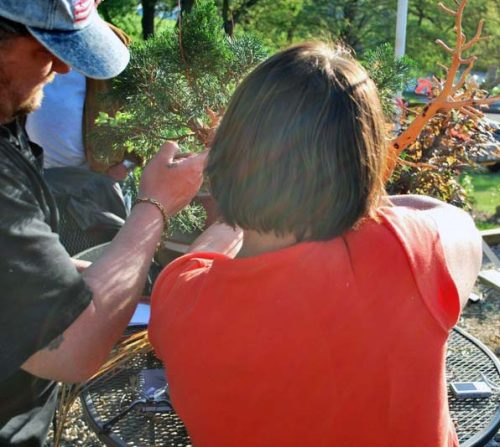
                  Below: Eric and Ivo, having a get to getter, over Eric’s Larch.

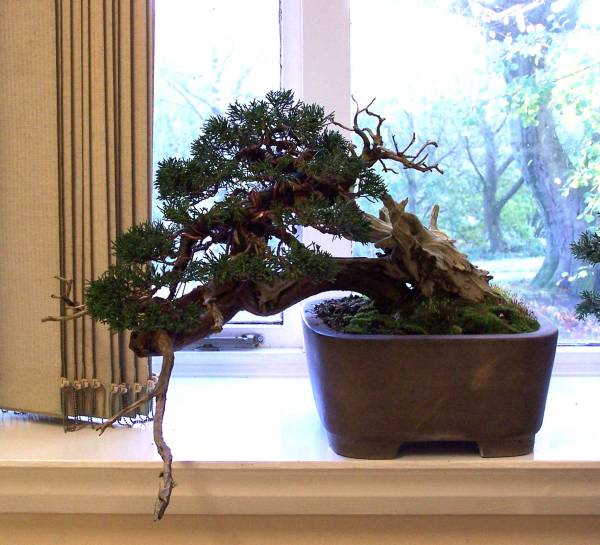
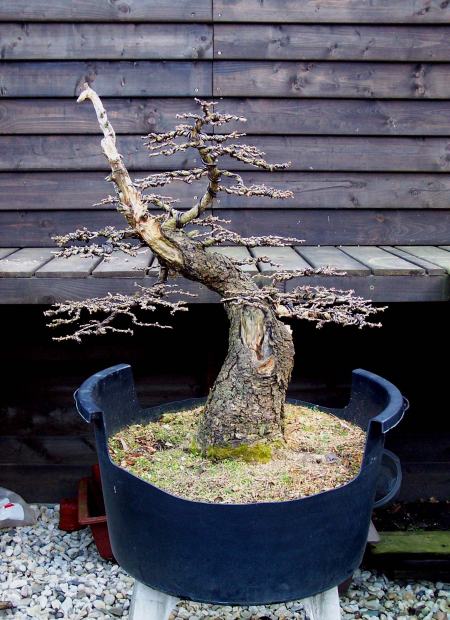
Below: Like in earlier editions, Potter and Bonsai artist John Pitt had brought along an import tree for Enrico and a Yamadori tree for me to help to style. This unique larch turned out very nice and looks very natural.

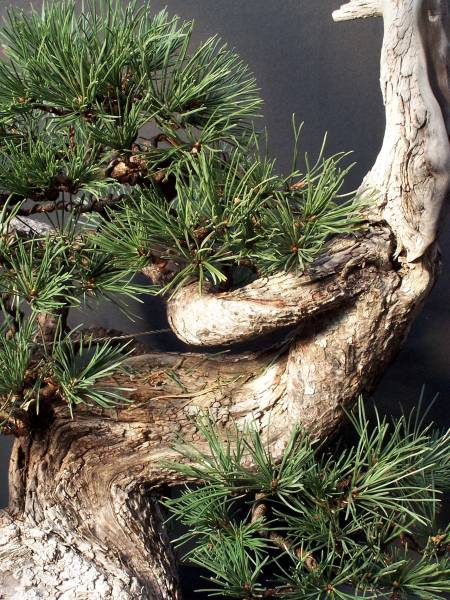
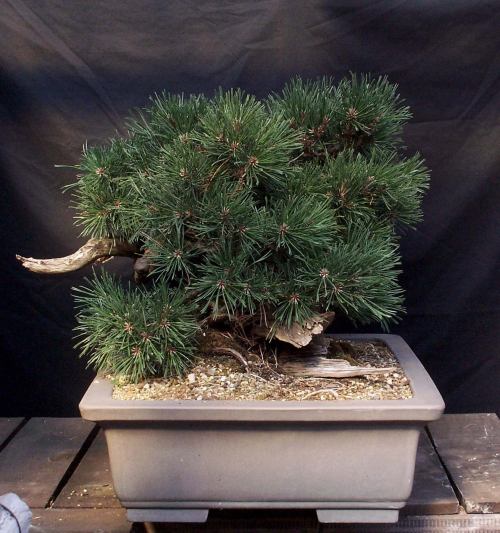
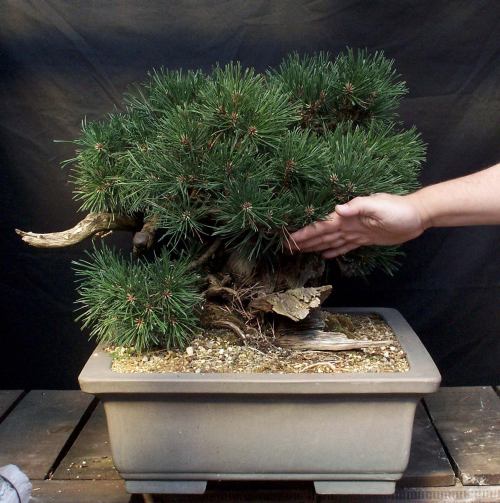
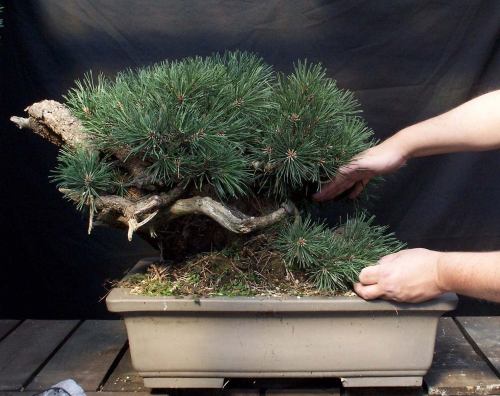
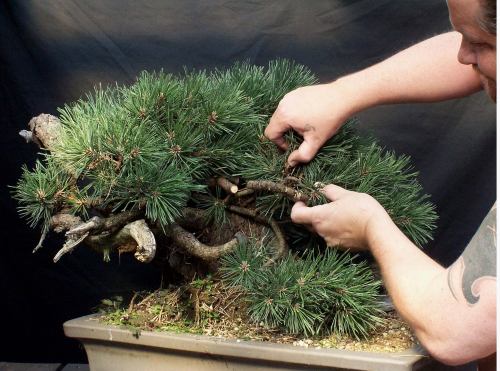
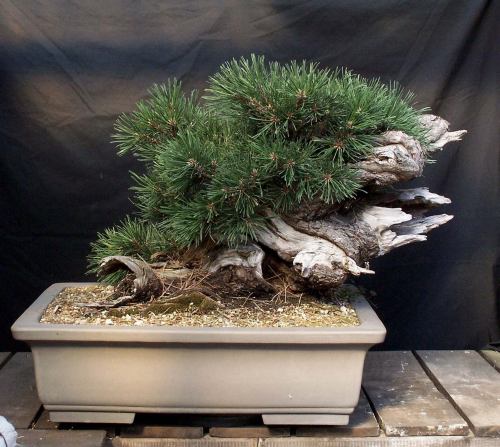
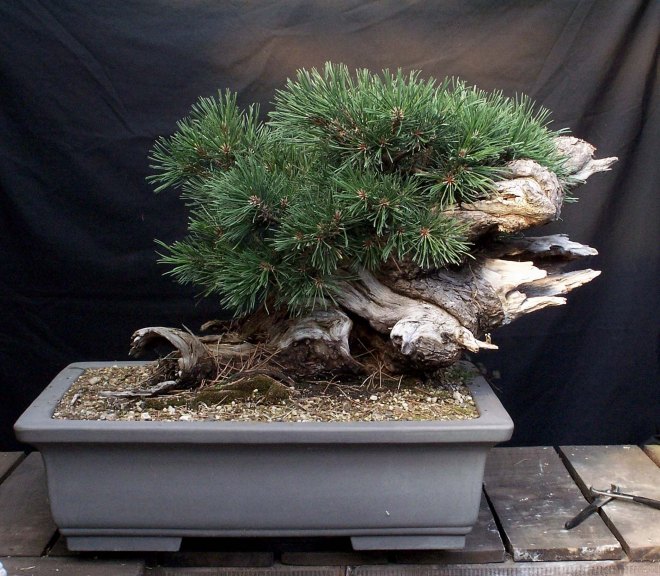
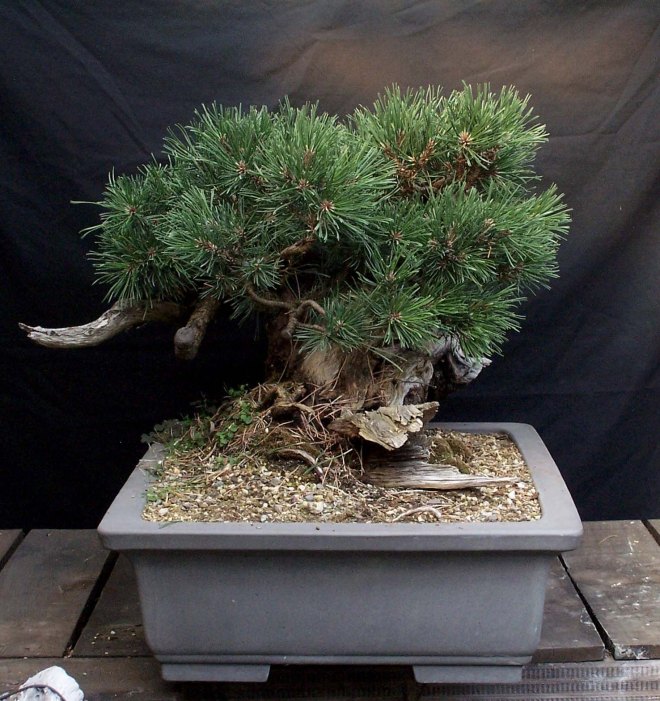
                                            Below: A stunning Sylvestris Pine.

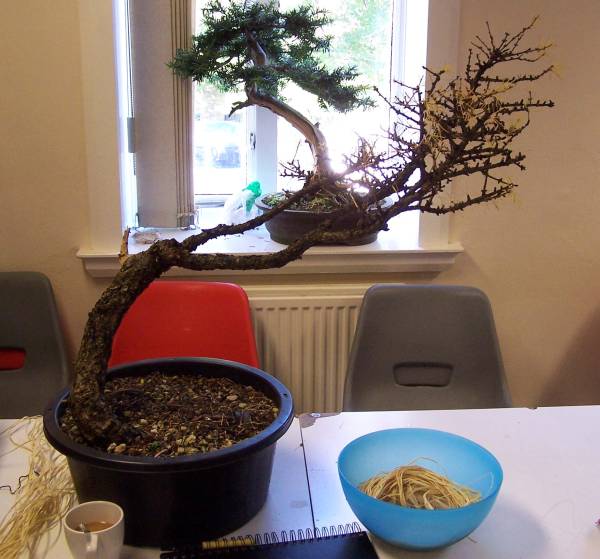
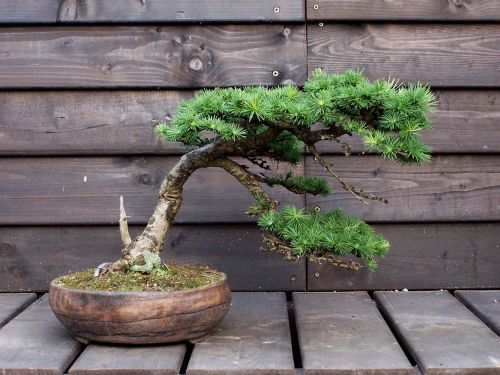
                                          Below: A typical Yamadori Larch.

  Below: My quick design drawing as a possibility and a guide for the student.

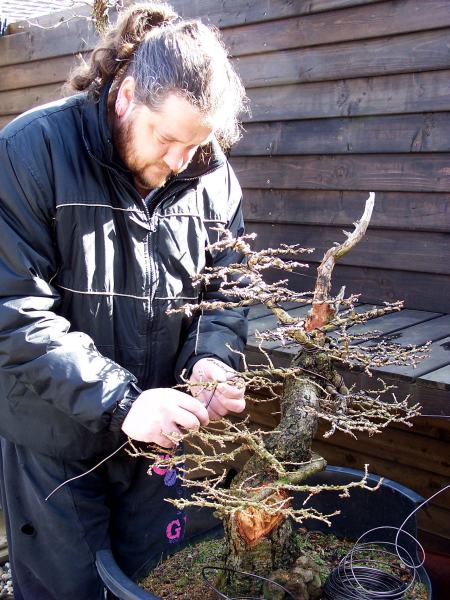
Below: With the help of wet raffia and copper wire the tree is already brought an end in the right direction.

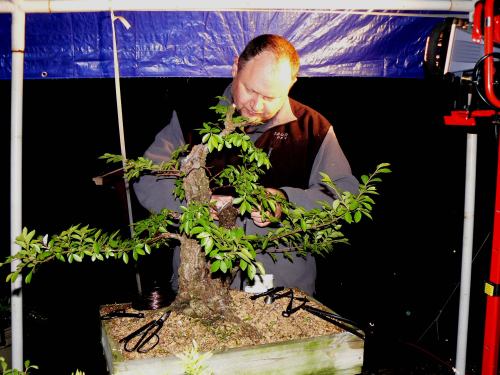
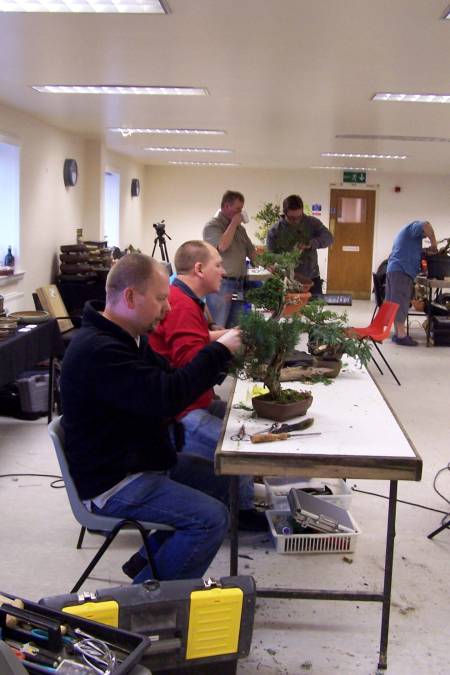
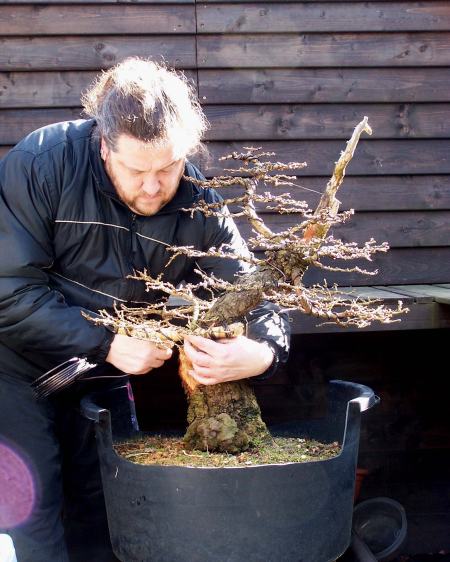
                              Below: Concentrated at work…I love to see that!

                           Below: And yet another finished promising Bonsai!

                                                              Below: SWEAT!!

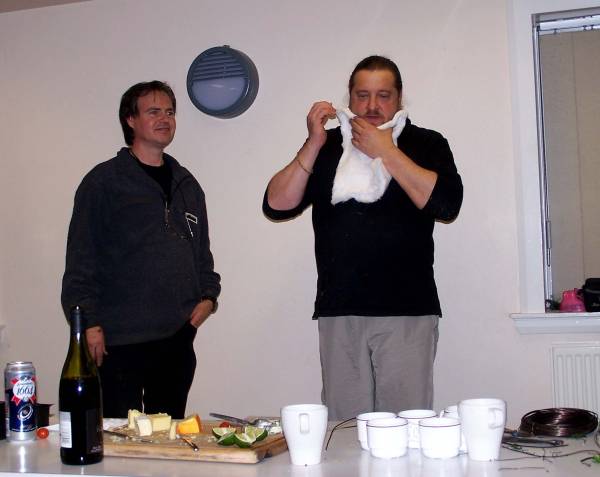
Below: Then on Saturday evening the very tasty traditional Diner as always prepared by Tony’s lovely wife Carolyn.

                     Below: Andrew “stone monkey” concentrated as always.

Below: Me clowning around like most of the time before the evening demo of Terry Foster and little old me!

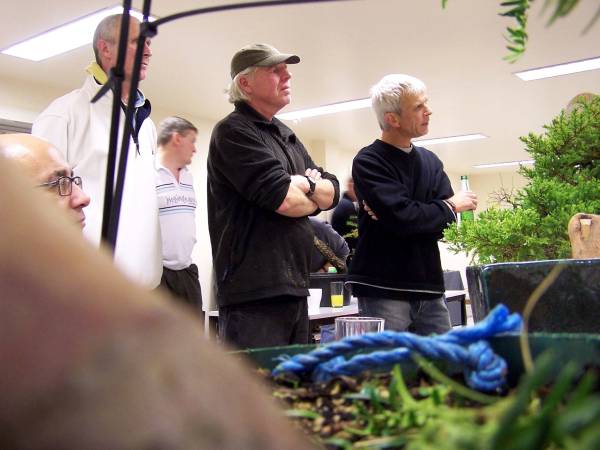
            Below: The students looking and listening on during our demo’s.

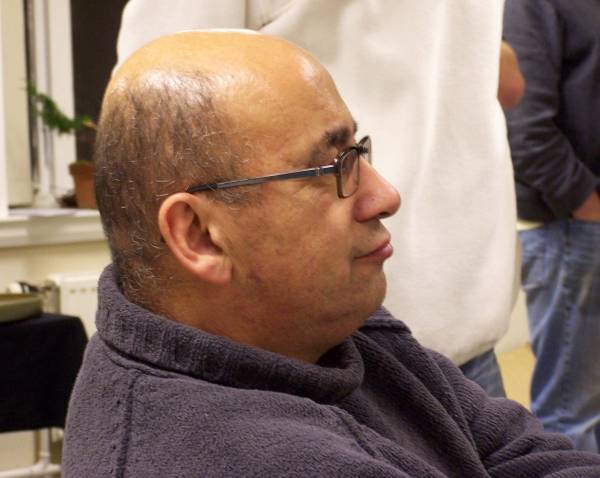
                  Below: Jerry looking at what we are doing and explaining.

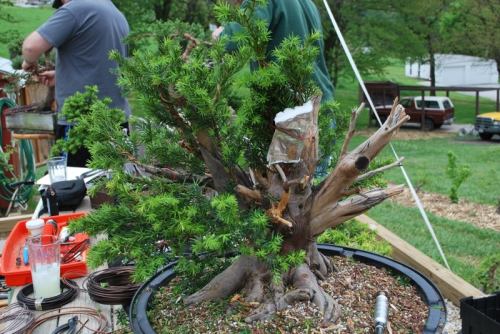
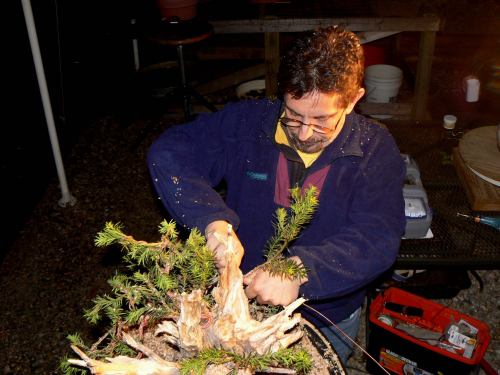
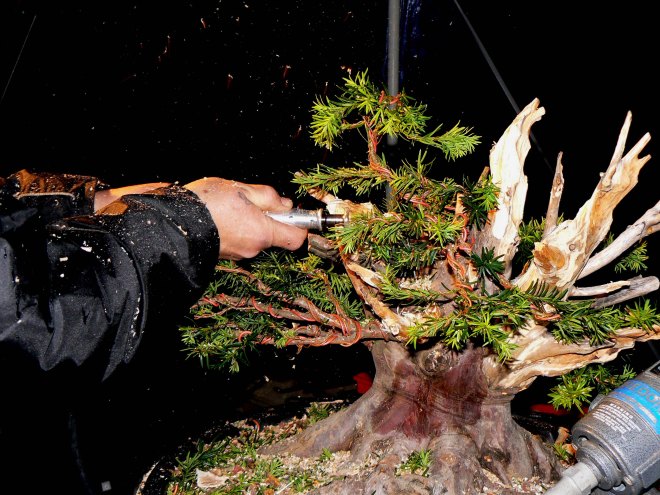
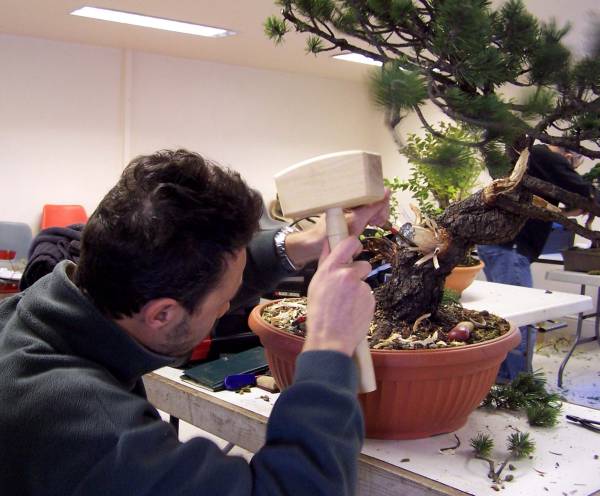
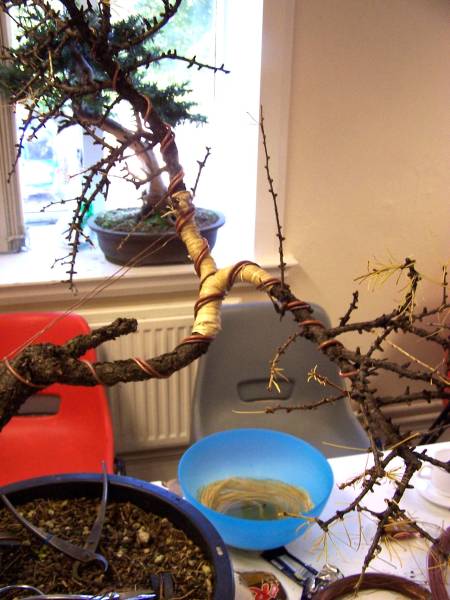
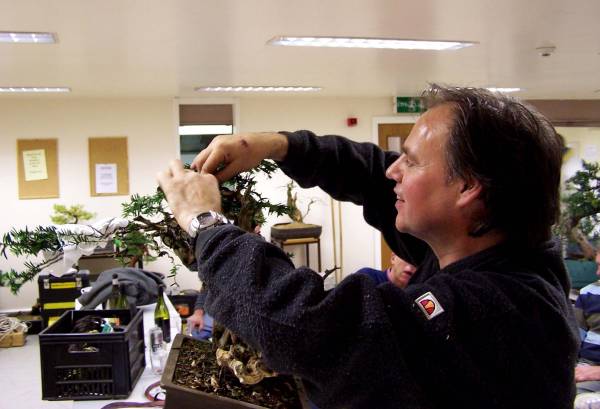
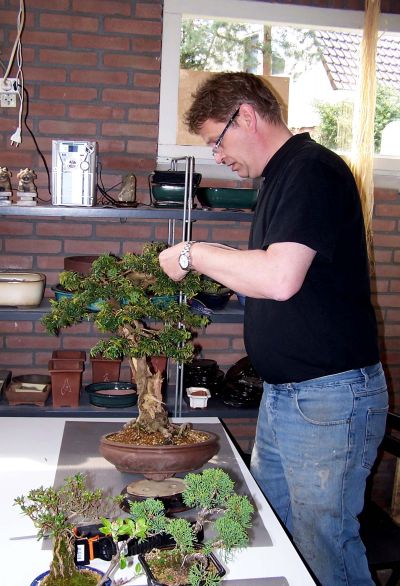
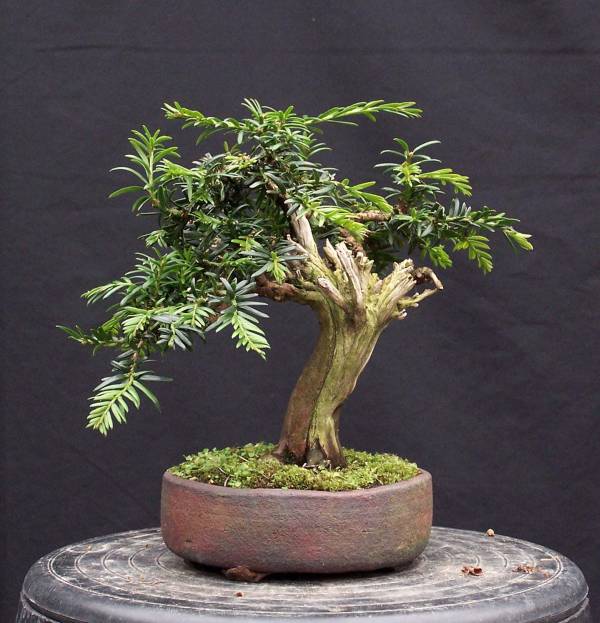
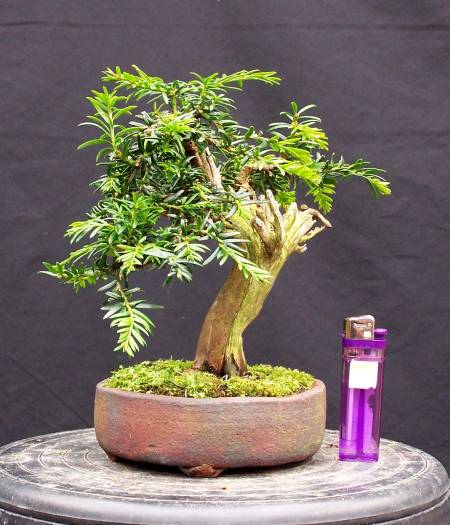
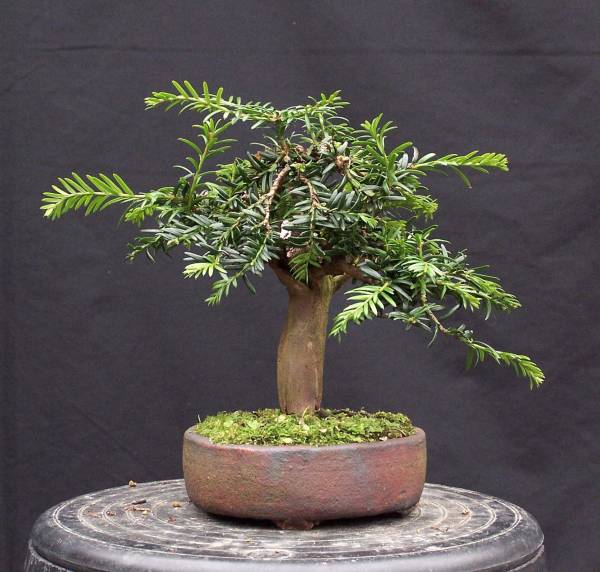
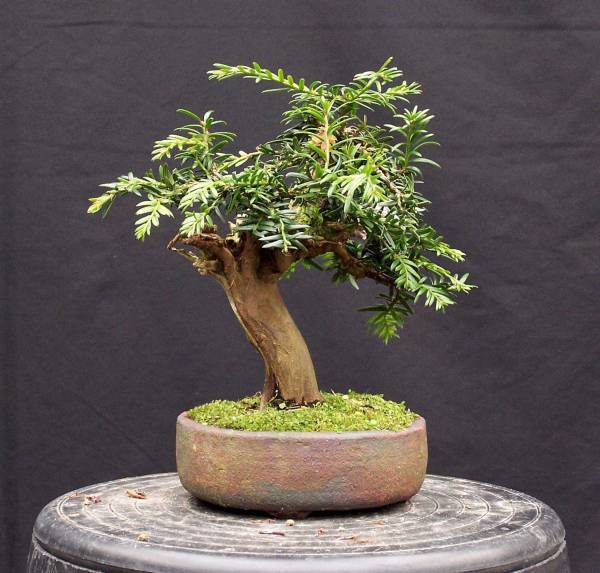
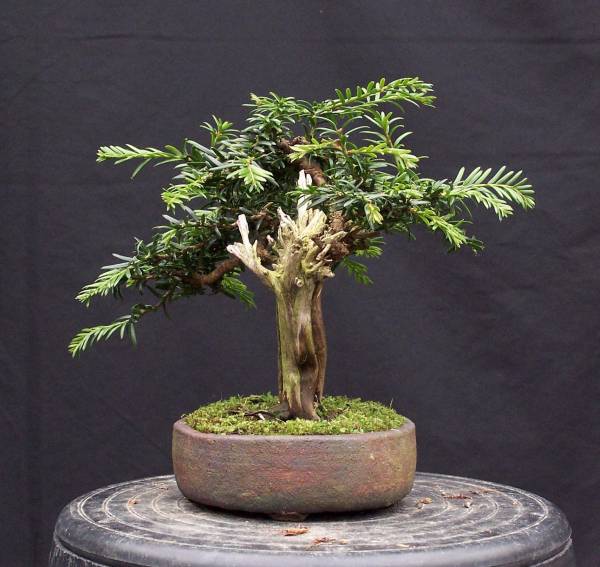
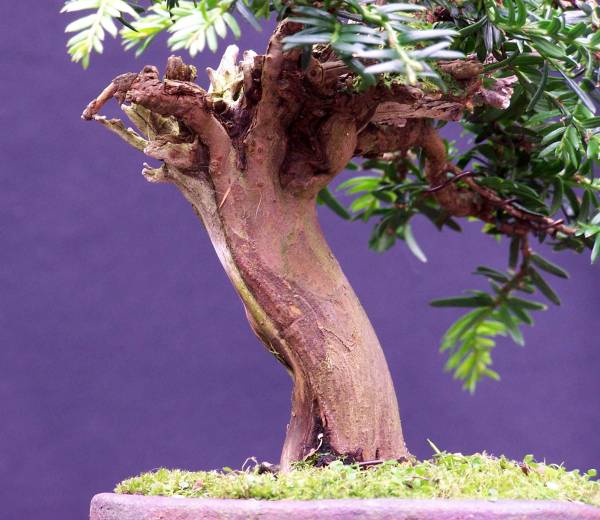
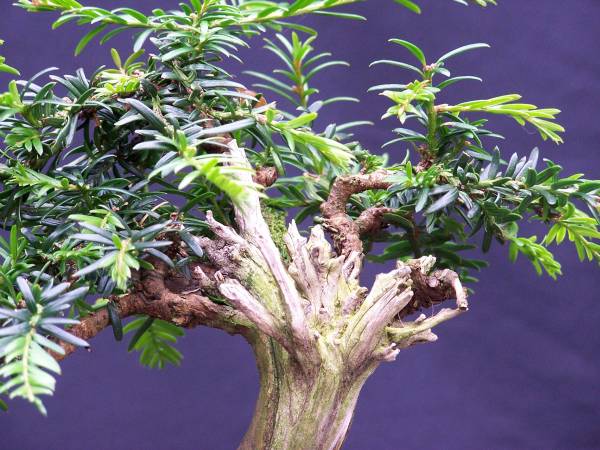
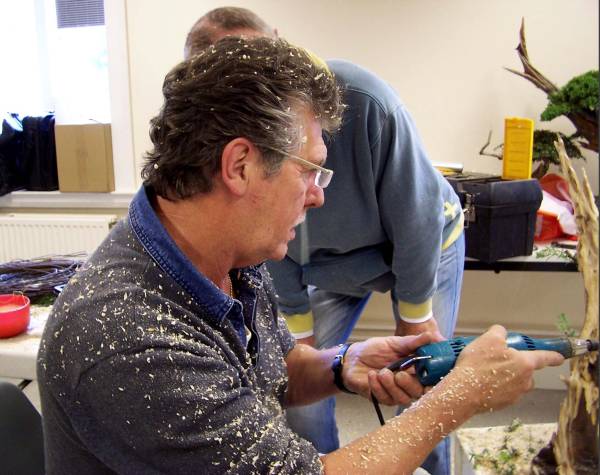
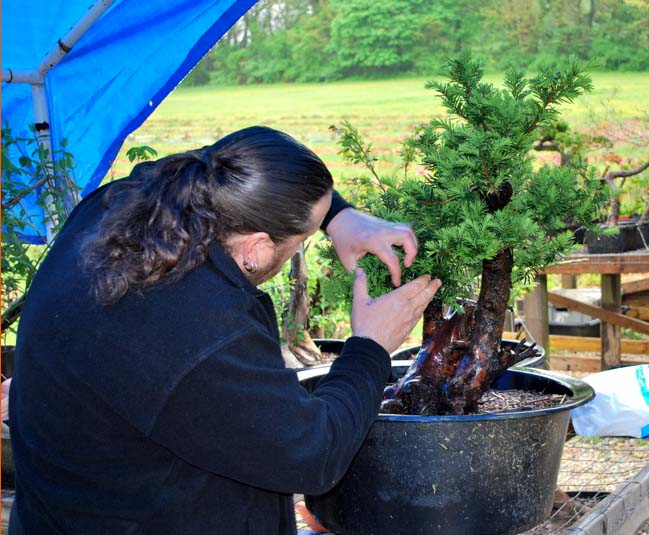
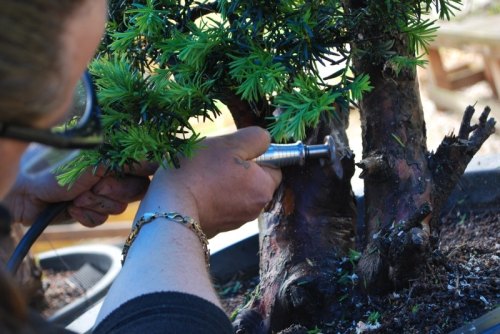
Below: Terry did a lot of the wiring while I did sitting down most of the deadwood! And there was a lot of it on this unique old Yew from Terry’s own collection.

Below: Every big decision was discussed by me or terry and explained with the students before they were actually done!

Below: I have placed the tree in front of a white wall and covered the back branch to show and discuss how it would look with or without it?!

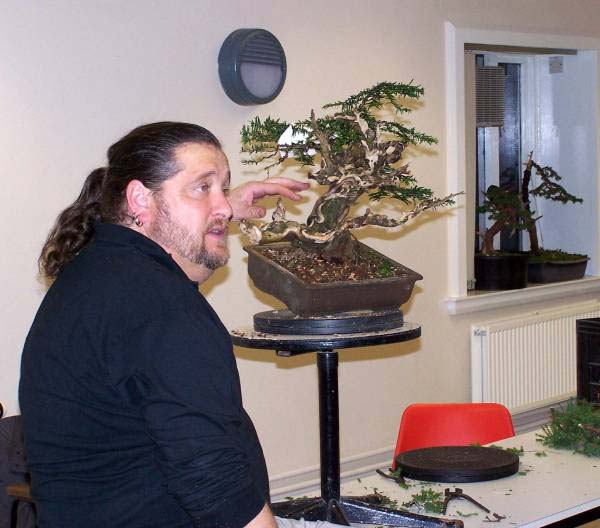
Below: Asking the audience what they think about removing that left side branch?! Enrico and Jihn are debating it together.

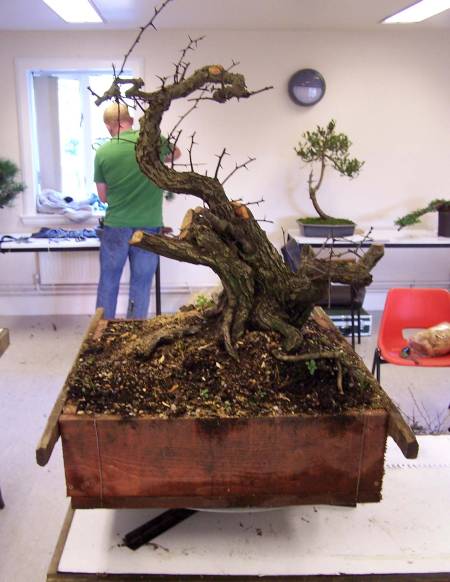
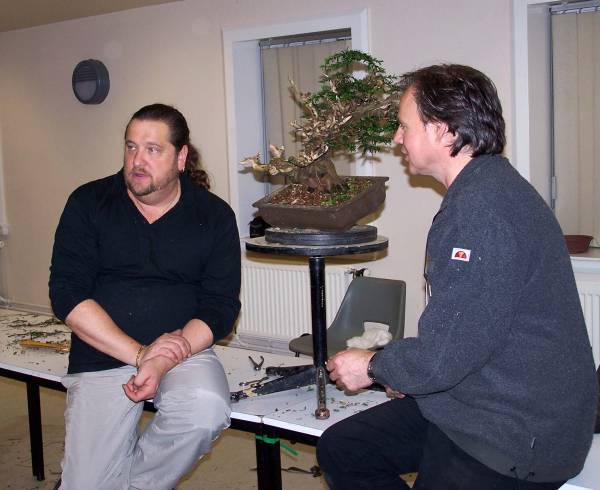
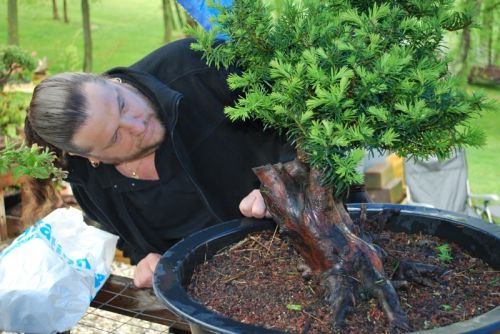
Below: You can see just how tired I am after this long day! Here we are discussing the end result of a not so usual styling of a unique Yew.

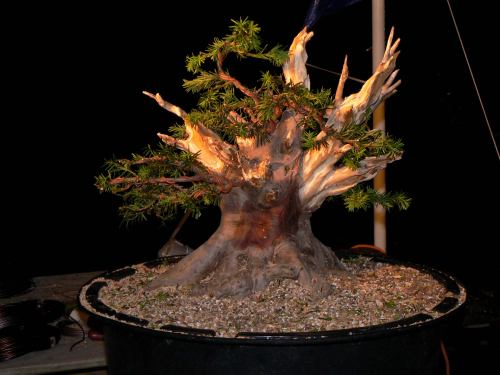
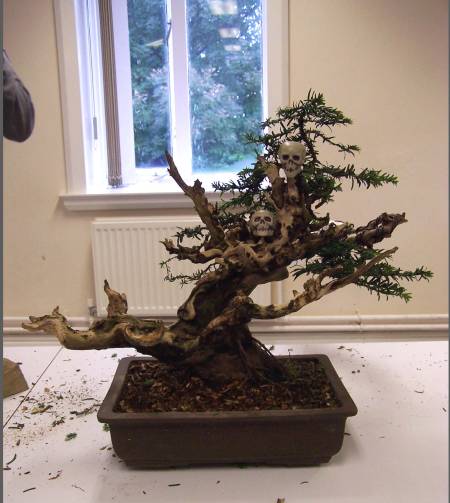
Below: The end result for now. A not twelve in a dozen Pre Bonsai with a lot of character and flair!

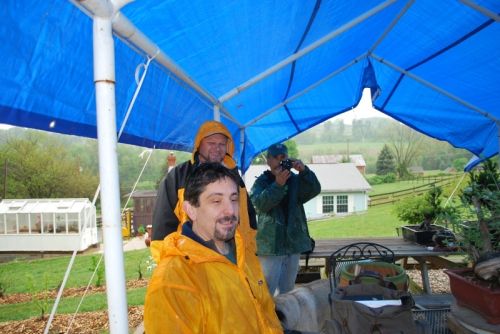
                                            Below: The guy’s being funny! 🙂

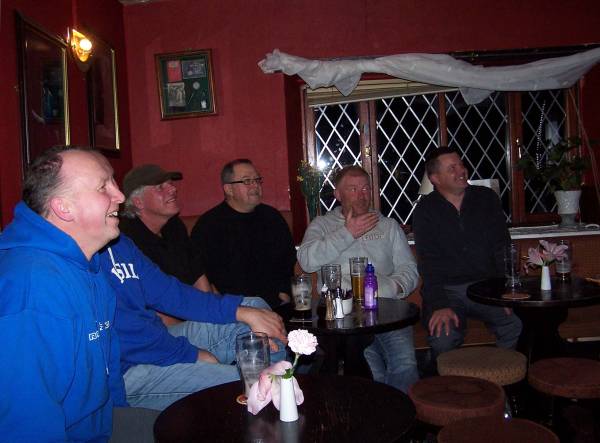
Below: The Dutch posy!  Finally everybody, in the pub 25 meters across the road for a beer or two…tree…four…who is counting anyway?! 


We had a great evening/night and Terry and I went on at his place until deep in the night, sampling fine Scottie’s Whiskey and talking like the good friends that we are for such a long time now! The Sunday session was over before we knew it and then it all ends so fast and I had to walk past my great hero John Lennon again entering the Liverpool airport! Yet another magnificent “BURRS” weekend is over and what a great experience it was again! Thanks, Tony, Carolyn, Terry, Charlotte and thanks, Enrico, Ivo and all student for making this such a amazing experiance again!

                                                 “AND ABOVE US ONLY SKY”

Cheers,

Hans van Meer.

Info: karamottobonsai@hotmail.com

—————————————————————————————


                                                     “And above us only sky”

*more to come!

Hans van Meer.

——————————————————————————————————————-

A UPDATE ON THE “SWAN”.


Hi, everybody,

27 July 2008

Above picture: The last major work that was done on this old Pine dates back to its first styling in *2004! All this time up to now, the tree was pampered to encourage back budding as close as possible to the trunk line. Well, as you can see, I got more than enough new foliage and buds to give the tree it second major styling in late fall this year! But there were some major decisions to be made right now as well!

In the first styling, 2 back branches were used to build up the lower left front section, so I could visualise and check my vision of the future bonsai. But now, because of all this incredible growth, I have so much more better-placed branches and foliage to replace them with, that they have become unnecessary. In the above picture, where I raise this frond branch, you can see just how much beautiful deadwood was hidden from view!

Above picture: Left side view of the tree, you can see just how much deadwood is blocked from view.

Above picture: Lifting up the heavier frond branch makes a big improvement. You can see the other branch that has to go, on the left of my fingertips.

Above picture: Here you can see the second branch better. It is blocking out all the empty backspace, that you need to see from the front side.

Above picture: Here you can clearly see the difference it makes when I lift it up!


Above picture: This is the thick branch I need to remove first. Under need it, you can see the second one that needs to go.

                            Above picture: Judging were to cut that branch.

Above right: Heavy cutters were used to cut off that branch in one go.

                                Above picture: So, the first one is removed!

                            Above picture: Looks better already from the front.

Above picture: You can see clearly here, that when we now stand in front of the tree, there is almost a clear pathway under need the foliage, for the eye to wander off into the distance.

Above two pictures: Yes, that branch definitely has to go to!

                             Above two pictures: Right and backside view.

                                                 Above picture: Backside view.

Above picture: The yellow dots show how long this branch really is. Because of the constant cutting back into new growth and pinching back that I did in the seasons after it’s first styling, the 3 small branches, just above the red line, have grown enough to now be used as the new branch tips of the future first branch.

                           Above picture: Close up of those 3 small branches.

Above picture: The branch is cut leaving a small stump so that there is enough room for it to dry back naturally, without harming those all important small branches.


                       Above picture: The wounds are sealed with cut paste.

                                  Above pictures show the removed branches.

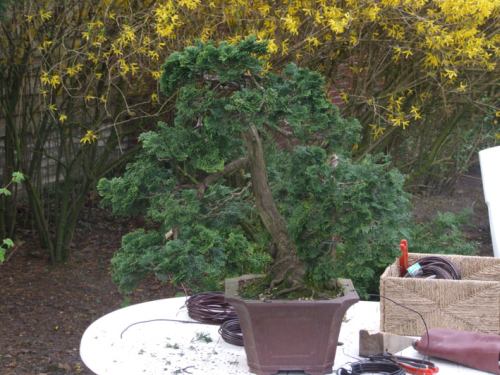
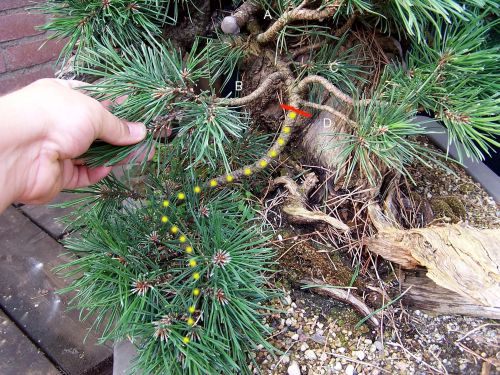
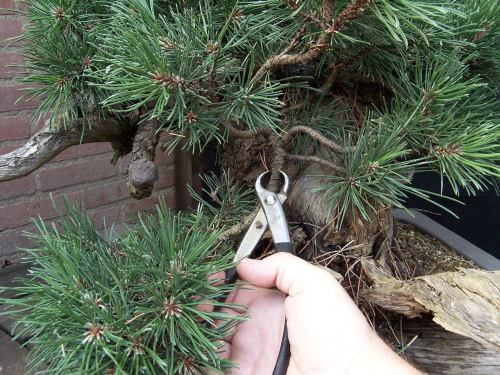
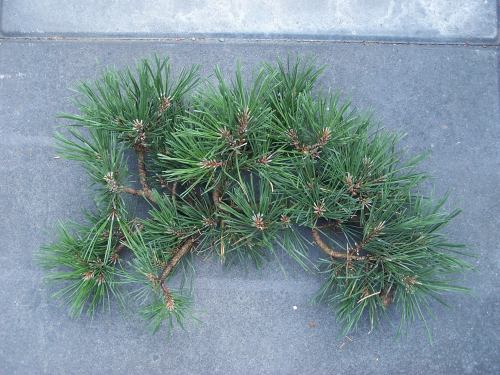
Above pictures show, that by just removing those two branches the beautiful deadwood is more open. The open space that now is created, provides the necessary see trough, that creates dept and open space under need this future first branch.
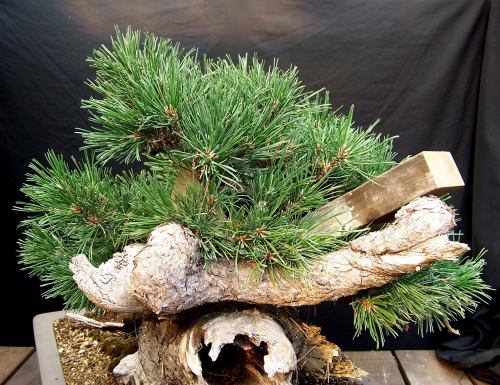
Above picture: With the help of 2 wooden blocks, some branches were lifted, so that light and air can better reach the inner buds and smaller branches that I need for my second styling.

Above picture: These blocks created new height in the foliage and a new image!

Below picture: So that triggered me, to make a quick drawing of a possible design. Having done this, I realise that the foliage is too high in this new idea and that the tree image should be more compact. So this drawing helped me to decide to stick to the original plan I made when I started to style this tree.

Now the tree is left alone until I will start the second styling in early Winter. I can hardly wait for that time to arrive!

Cheers,

Hans van Meer.

Info: karamottobonsai@hotmail.com

—————————————————————————-

UPDATE ON “THE ELEPHANT”.

22 Juli.

Hi, everybody,

although it is not much of a summer right now here in Holland, it has been raining for weeks on end, this is usually a slow period in bonsai. But still, important tasks have to be done regularly, like checking all your trees, to make sure that the wire is not digging into the bark. My Larch “THE ELEPHANT” has been wired in late winter, but has grown really a lot, so the wire was starting to cut in, especially in the fast-growing top section. Some off the ticker wire that was holding the top up in place, was already cut off a month ago, that’s why it looks a bit collapsed in this picture. Yesterday my student/friend Ed came over to help me lift this monster to a place where I can remove all the wire more easily! Today it is lovely weather so I don’t mind doing that at all. I shot this picture 2 days ago and I hope you like the progress of “THE ELEPHANT” so fare? I am off to cut some wires now!

Cheers,

Hans van Meer.

Info: karamottobonsai@hotmail.com

—————————————————————————-

LIVE AND DEATH, BEAUTY IN STRUGLE.

Hi, everybody,

this Larch lost a lot of its branches during an unusually long period of extremely hot weather in early Summer 2 seasons ago. So last year I repotted it in a (to) large pot, so it could regain its strength and it did. I left the dead branches on the tree because they actually tell the story that I was meaning to show in this creation from the start. An image of an old tree high on the mountain, bettered by strong winds, snow and dry head during the short summers. Almost falling into the debts below it, but still clinging on to the rock’s, not willing to give in!

I hope you like it,

Hans.

Info: karamottobonsai@hotmail.com

—————————————————————————-


MY WORKSHOP AT “SHADY SIDE BONSAI” IN GLEN ROCK PENNSYLVANIA

 Hi, everybody

here at “SHADY SIDE BONSAI” in Glen Roch Pennsylvania starts the third stop of my demo and workshop tour around the USA. 


Saturday, May 10.

Day 1:

Below: Early in the morning and the first students for the demo and workshop arrive. Tom’s “SHADY SIDE BONSAI” is so big that he (on the left) and Rich (on the right) had to load Rich his BIG Yew onto the back of a small tractor to bring it up the hill, to his outdoor working area.

Below: Here I am checking out the possibilities for this lovely but difficult two trunk Yew Tom provided me with for my morning demo. 

                                   Below: Looking how and where to start.

Below: Although the weather was letting us down a bid, people were still waiting with anticipation.

                     Below: Discussing all the possibilities with the students.

Below: First the tree was cleaned of all unwanted branches to get a better view of the frame of the tree. Then because the base of the left trunk was too thick in comparison with the right trunk, the too large pies of deadwood on the left trunk was reduced, to open up the empty space between the two trunks.

Below: After most of that excess wood was reduced and the trunks looked better in balance with its other I was able to make my design for this mother and child Yew. This is the drawing of the design I came up with. I almost always make these sketches of my designs. It helps me to remember my first thought, like a blueprint, before I start to think too much about thinks! Because of the lake of time and the health of the tree that should be protected at all times, most first styling during these demo’s are a bit rough and unfinished and don’t always show clearly what the end result of the future bonsai will be in a few years. These drawings are also pretty handy to show people what your future plans are with your tree! It makes explaining why I am using certain techniques to get to a certain point a lot easier if those people have a clear view of where I am working towards!


Below: After lunch, we had a great afternoon workshop and lovely weather!

                                                  Below: Before and after.

                                                          Sunday, May 11.

                                                                 Day 2.

———————————————————————————————————-

THE STORY OF THE “H.O.G” (or, how Richy saw the light! Used the force and fell asleep)!!!

You might ask: why is this story in a section of its own? Well because this is a story about courage, stubbornness, hesitation, and overcoming to be rewarded! In short: creating a very promising pre-bonsai!

Everybody else walked past this enormous Yew when they were collecting, simply because it was too big! But no, not Richy! Even when everybody said, don’t Rich! It is too big, too heavy and too hard to collect, leave it! This only fired him up to do it anyway. I came to find out that Rich is a bit stubborn sometimes and what he lakes in height, he easily makes up with courage! So he went for it! All alone and for many hours! If you look at the next picture and compare the height of the tree to that of the shovel,  you can fully understand the enormous task he had to perform to get this monster Yew out!

                  GGGRRUZZEL! #*#FRRUCKELSS! #*## GGODDSSFRIZLE!

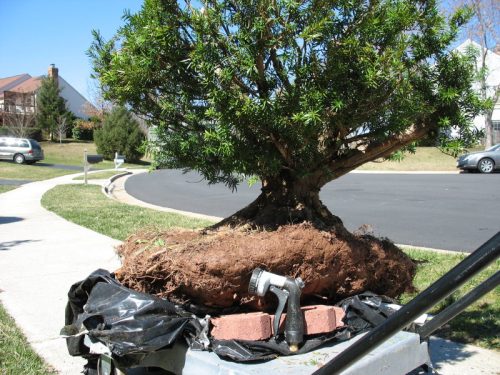
 The above picture is titled:   Yew in front of its new home. Or: How Richy scared the neighbours!

Richy, (with the help of a water jet stream) managed to clean off all of the hardened old soil of the massive roots! But, by doing this, he created a  bit of a mud stream, that because of the sloping street, quickly grew into an all-engulfing mudslide! Twiggels, the cat from Misses Brown, from down the street, is still missing! And even further downtown, many a toilet got clocked up for weeks!

 Saturday, day one. THE PRELUDE.

After discussing with him about how and what to do with the massive amount of deadwood on this Mother of a tree, he bravely started to freestyle with a courage you would not expect from someone who never had handled such a large power tool or created much deadwood before! Every now and then he asked for help or advice and then bravely went on with this huge task!

                                   Below: All geared up for the task ahead! 

        Below: Richy concentrated at work on the massive deadwood section                                             
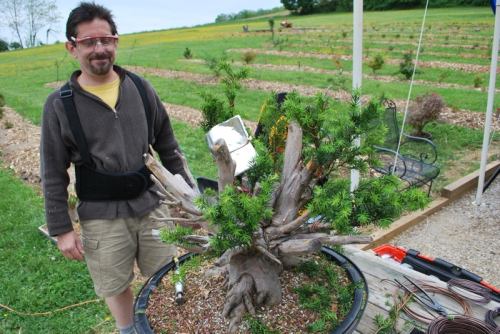
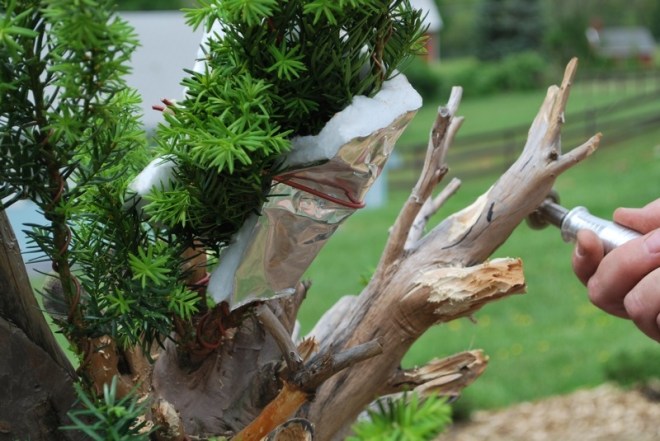
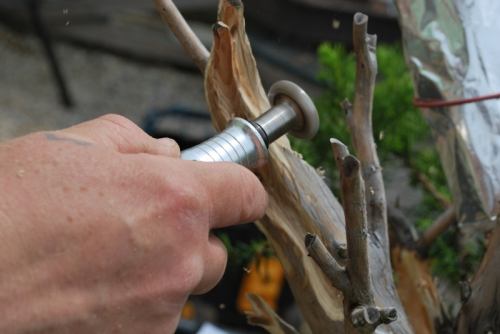
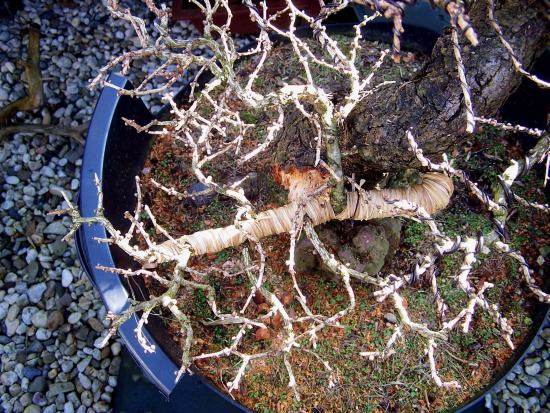
Below: With markers, lines were drawn on as a guideline for what Richy should remove and what not! Creating the rough shapes that later on (much later) would be refined into stunning Jin and Shari sections! 

Below: Every now and then I would jump in to refine certain arias and to give Richy a well-deserved break!

After a long day of hard work we allowed our selfs a short break for a nice dinner and then it was back to our waiting Bonsai work and fun! It was raining, storming and freezing that whole evening and the early night…but nothing could stop us…we were in the zone!!!

                                         Below: Richy wiring the branches.

Below: Me carving away and refining while Richy takes a break and looks on and learns.

   Below: Cold but concentrated at work, I love freestyle deadwood styling!!!

              Below: Then back to wiring again while I help the other students.

Below: Despite all the cold and tiredness everybody was still hard at work and enjoying the moment!

                   Below: After many hours, slowly but steadily getting there!

Below: The end result after a long day of hard work! I believe that this monster pre-Bonsai has a great future ahead of it and that Richy should be very proud of his work and his eagerness to learn and work hard! And for those who wondered about the name H.O.G for this tree? Look at the right top Jin, Richy said after I had finished it: it looks like the Hand Of God.. H.O.G!!!

Below: One of my proudest moments! Me happy, Richy happy and a whopper of a tree to boost!!! Later indoors while looking at the pictures we made with a whisky in our hand, poor Richy fell asleep…with a big smile on his face! 🙏😁

Below: Next morning after a short night sleep, the H.O.G. looks even better in the daylight and we are still happy! Two new friends that shared an amazing experience together! I love Bonsai!!!!

                                                 Above:  THE “H.O.G.” SQUAT.

                       Below: Two amazing people my host Tom and Richy.

——————————————————————————————————-

I had a great time at “SHADY SIDE BONSAI” And would like to thank Tom and his lovely wife for there hospitality and for giving me the opportunity to work in the USA.

Cheers,

Hans van Meer.

Info: karamottobonsai@hotmail.com

—————————————————————————————————-

More pictures can be found on this next link to “SHADY SIDE BONSAI”.

http://www.shadysidebonsai.com/id122.html