RESTYLING MY JAPANESE BLACK PINE YAMADORI (FINALY).

Hi, everybody,

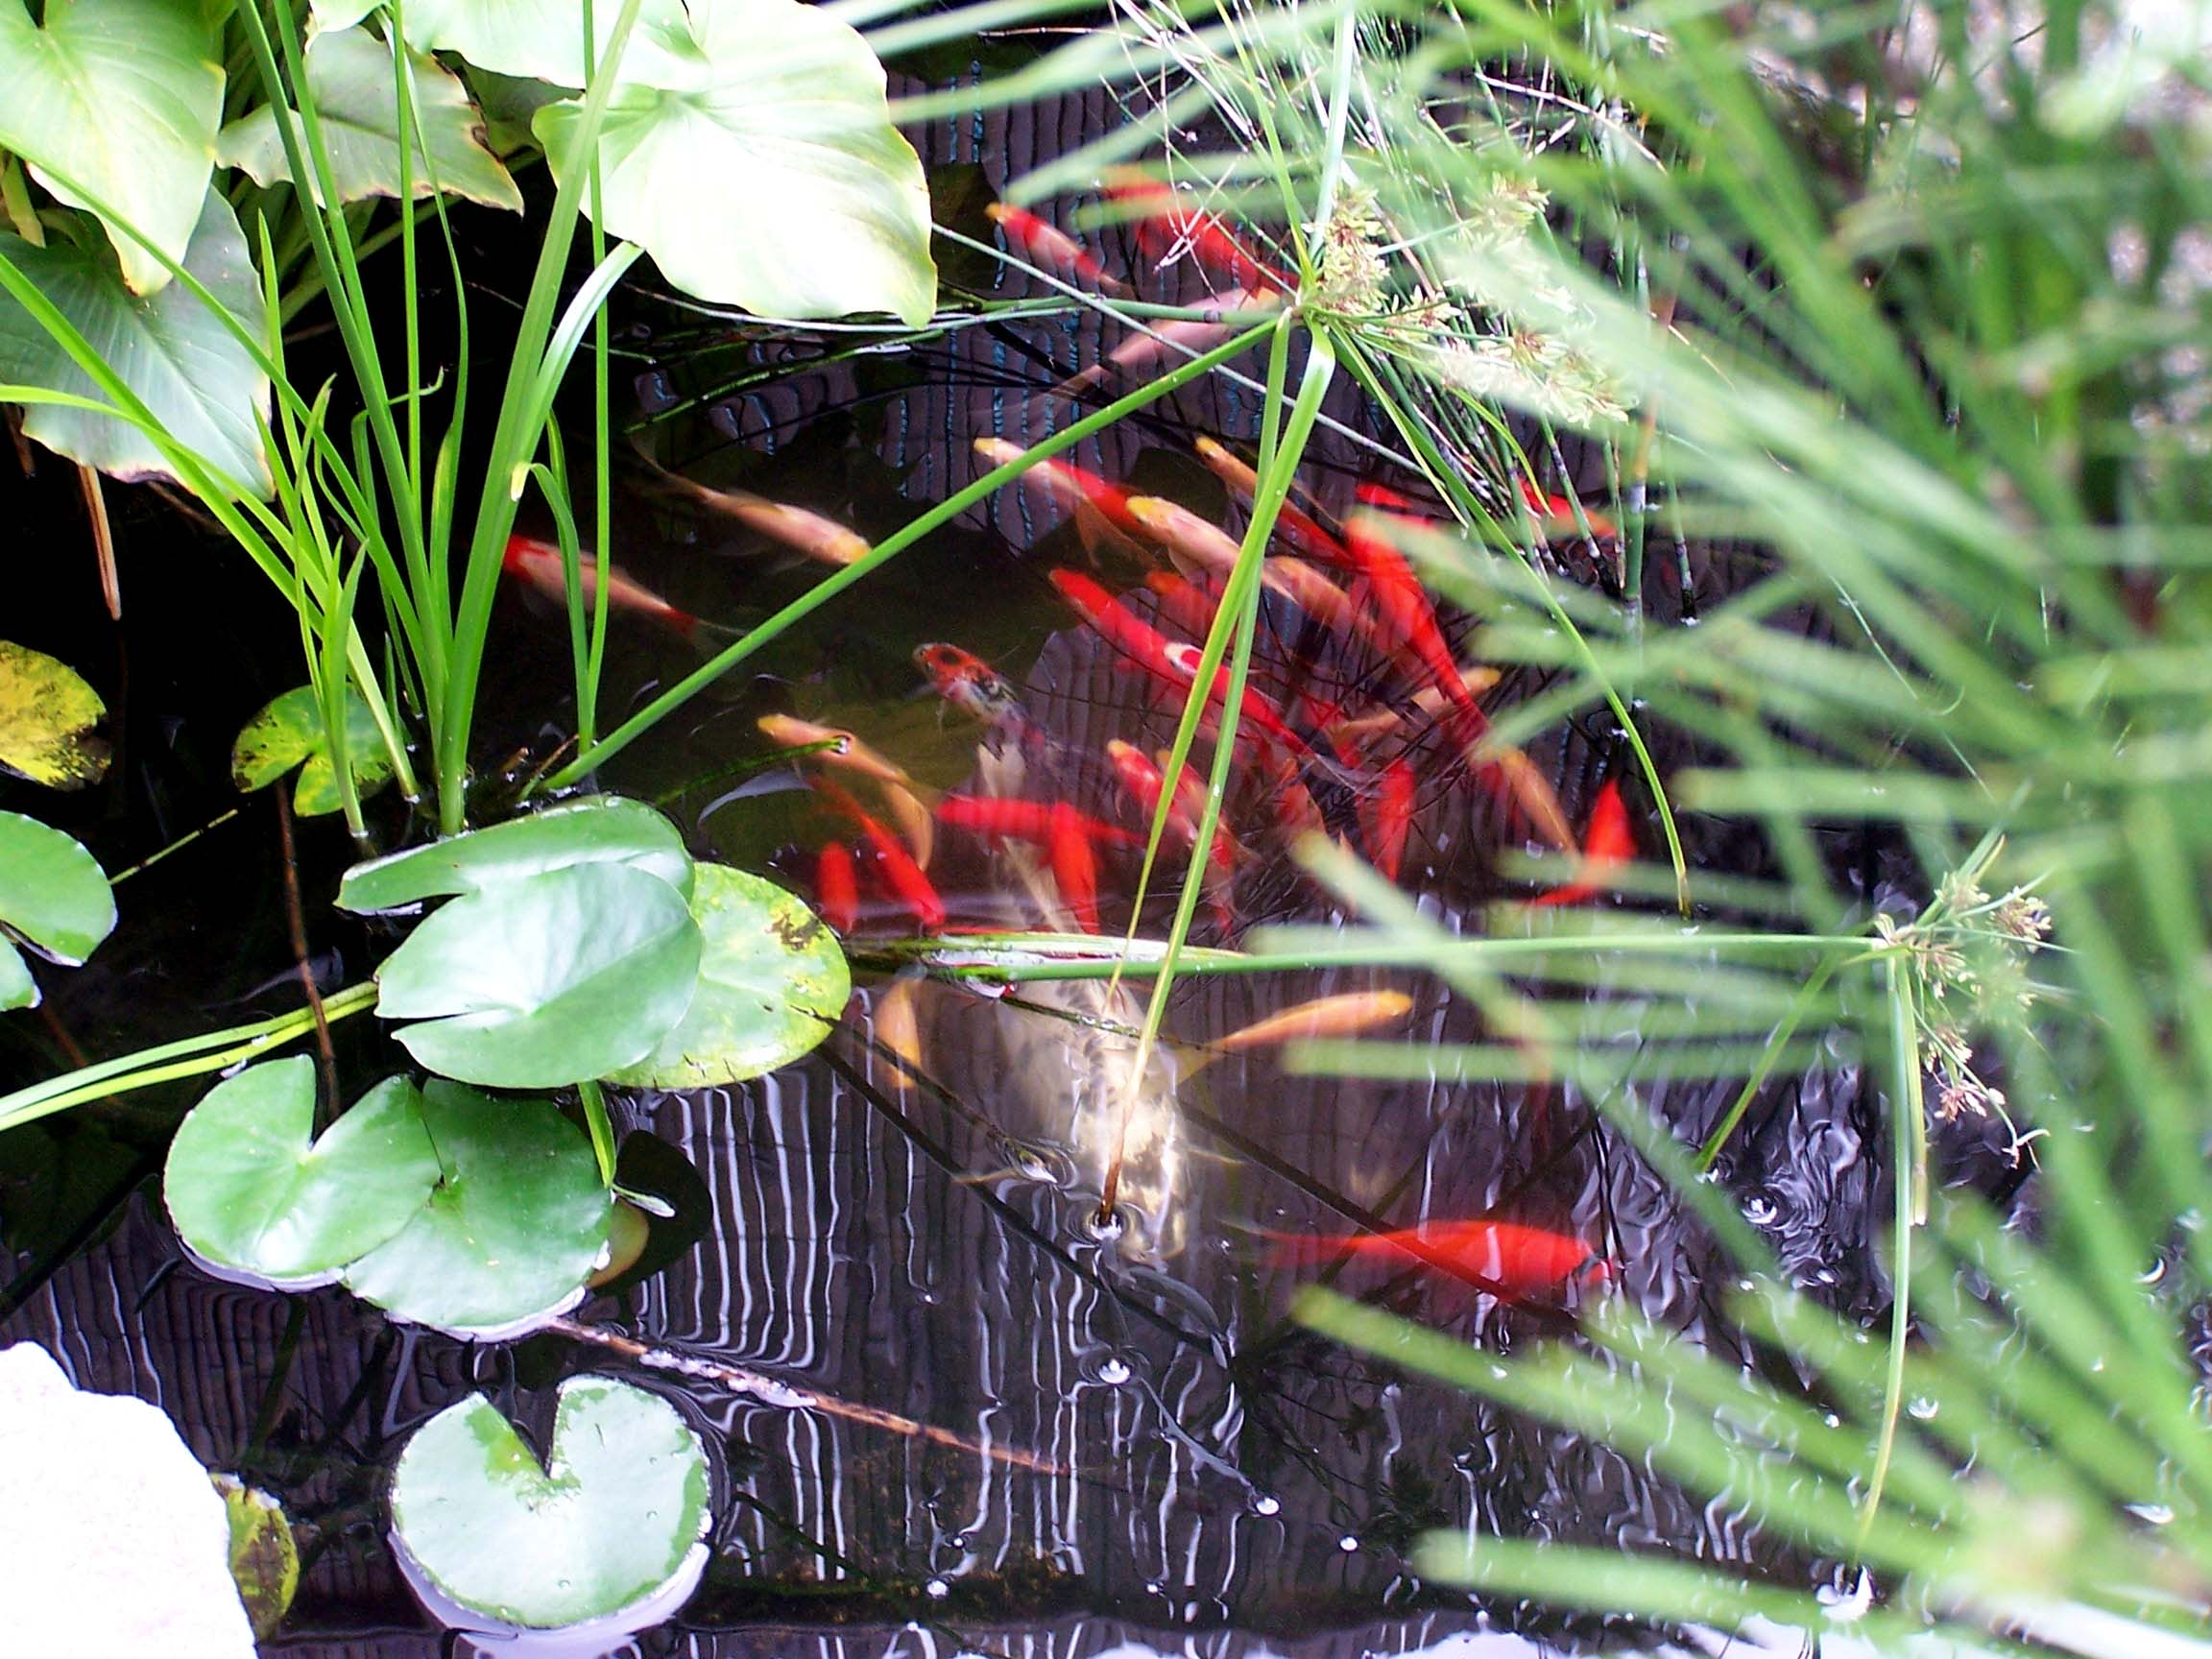
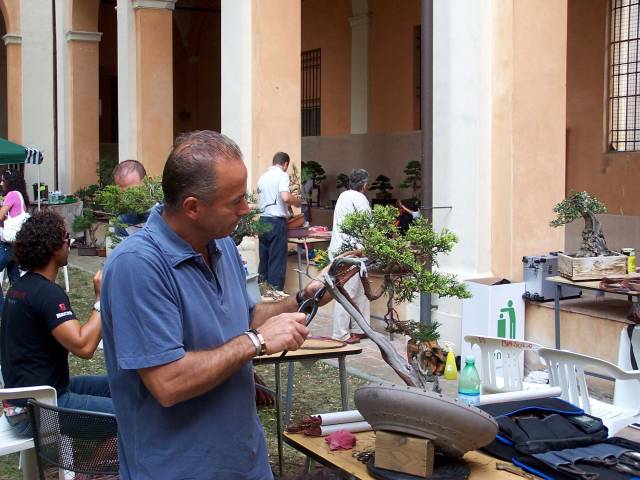
Today I finally started the first real styling of this Japanese Black Pine Yamadori. This tree is in my collection for many years now. When I bought it all those years ago from my birthday money, I could not for see all the mishap that would happened to this sweat little cascading Pine. The tree had all the character of a Yamadori, beautiful old bark and a natural Shari running down most of the trunk line. But it also had some major design problem in store for me to solve or incorporate. It had strange looking spider like exposed roots and the base of the tree was much thinner than the rest of the trunk. So I decided to let the tree grow freely for a view seasons and only work on growth to thicken the base of the trunk. Since that decision, the tree spent a few weeks laying, half frozen, on the bottom of my pond, was blown over 2 times in a storm and just 3 years ago, lost all its needles in mid Summer! And every time it recuperated from its ordeals, showing a immense live force and will to live!

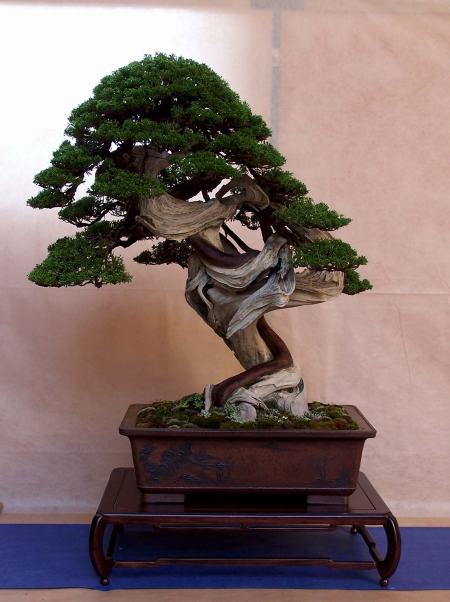
And now finally, after all this, the tree looks healthy again and the base of the tree had thickened enough, for me, to now finally start styling this tree. in a way this little wonder deserves! A decade too late…but here we go anyway! 🙂

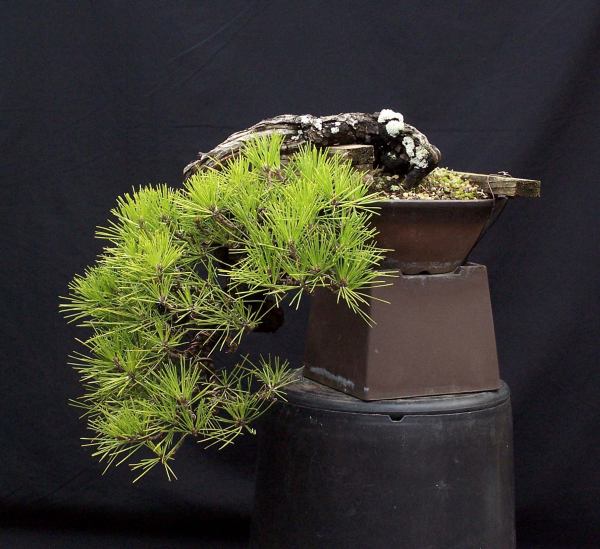
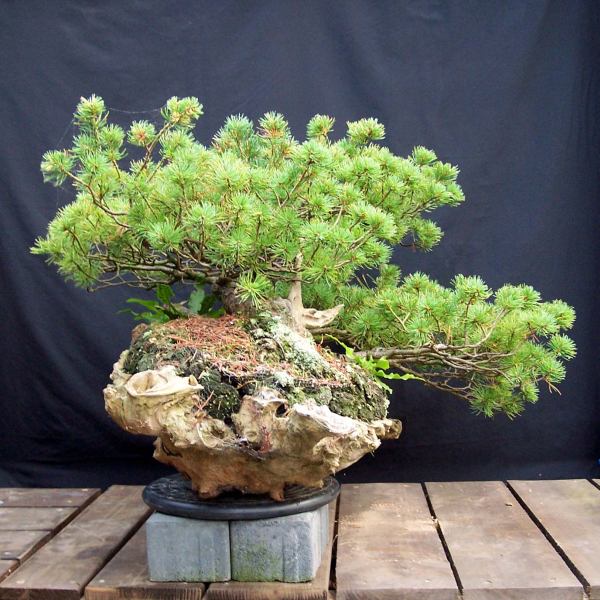
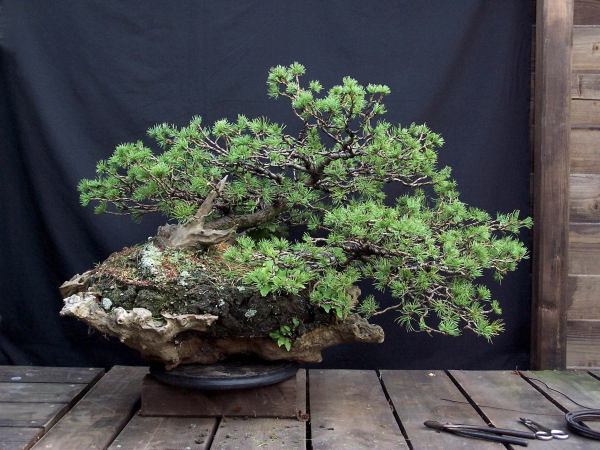
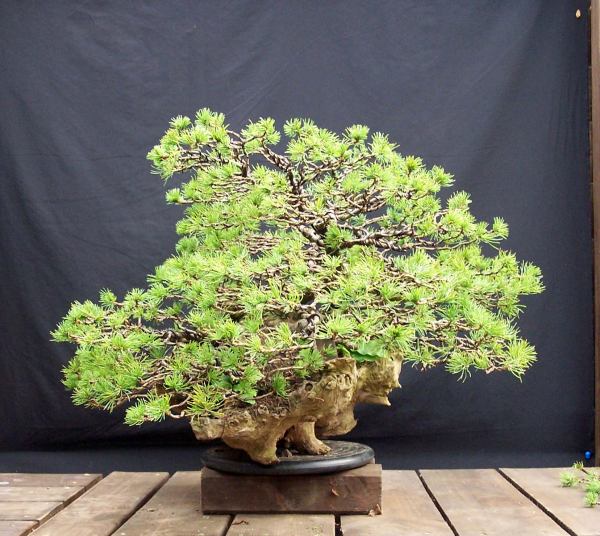
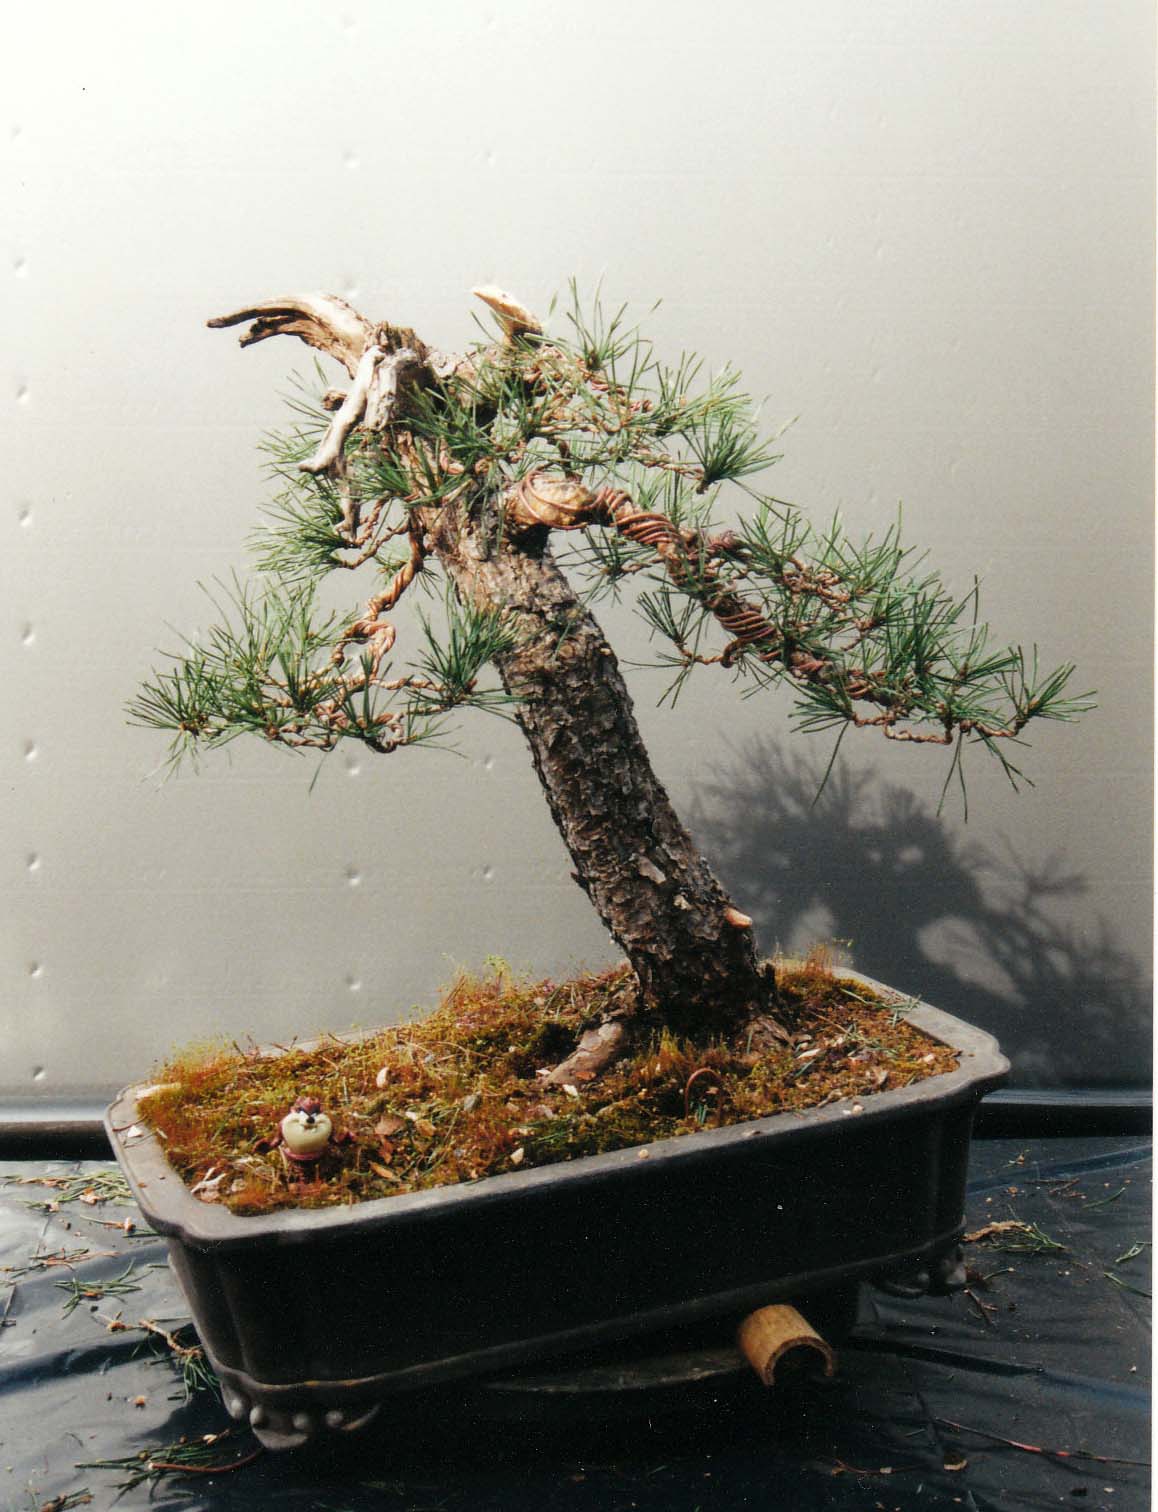
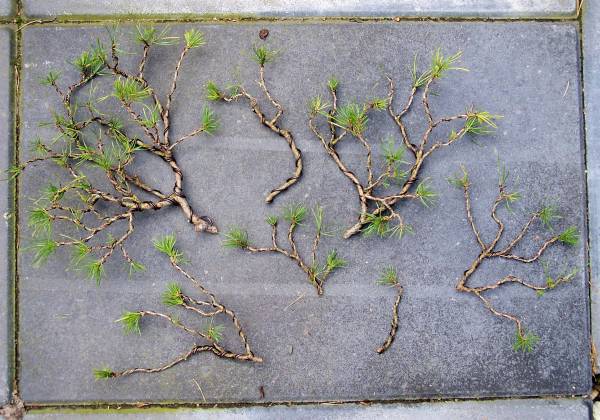
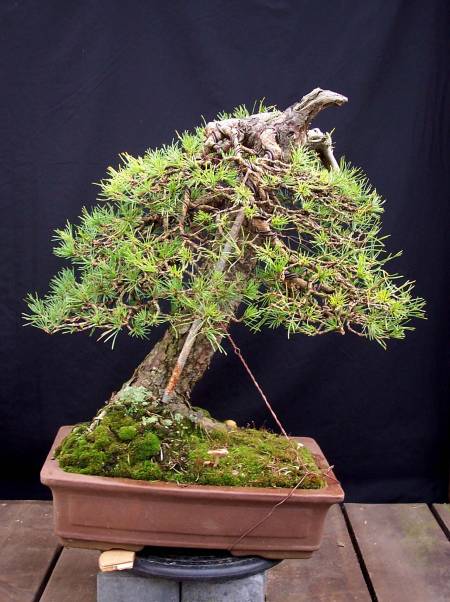
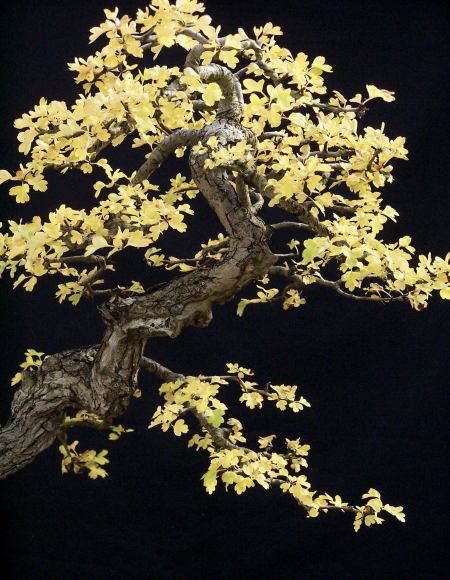
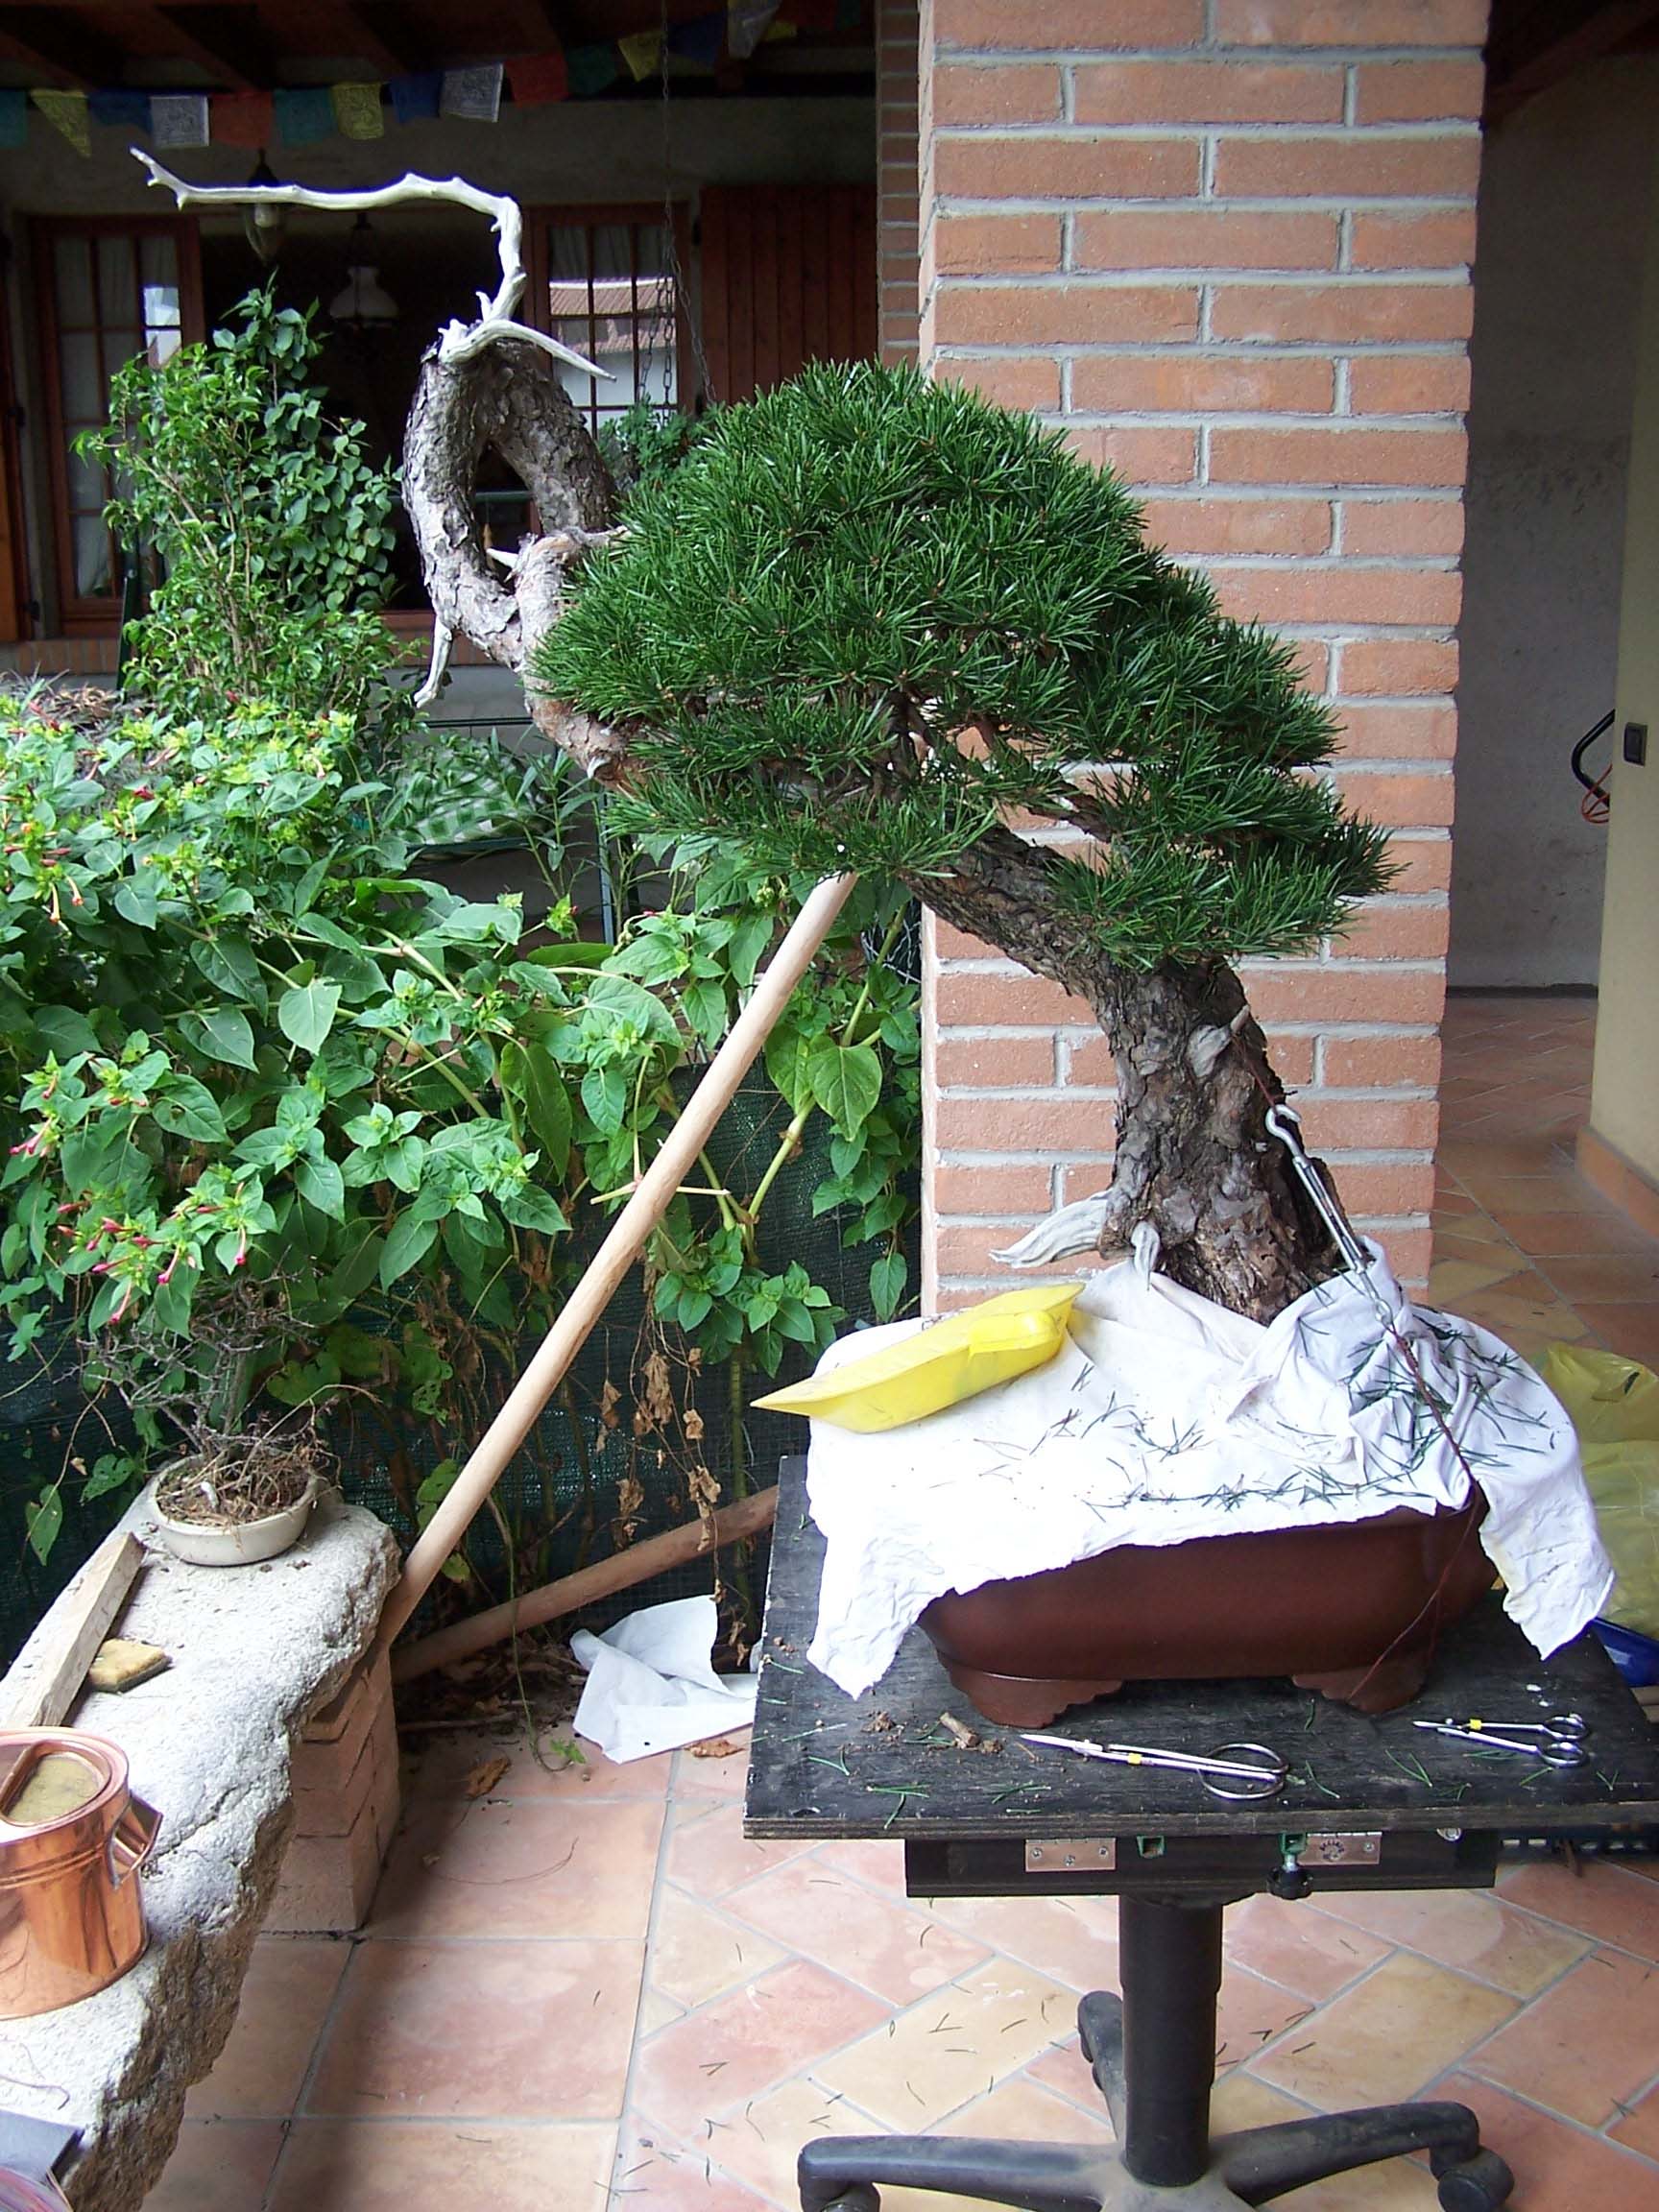
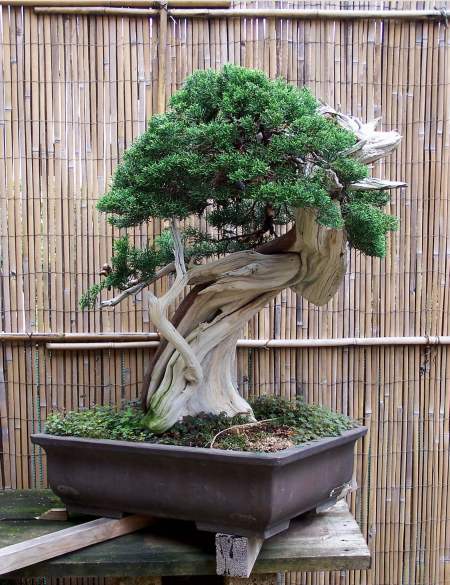
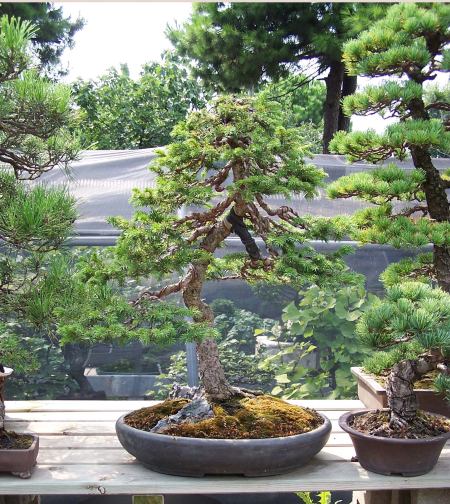
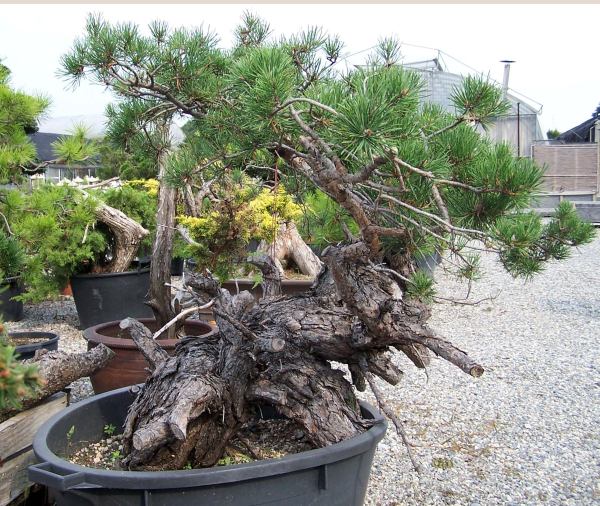
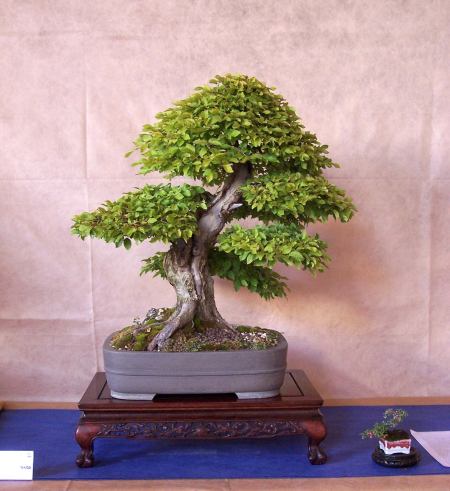
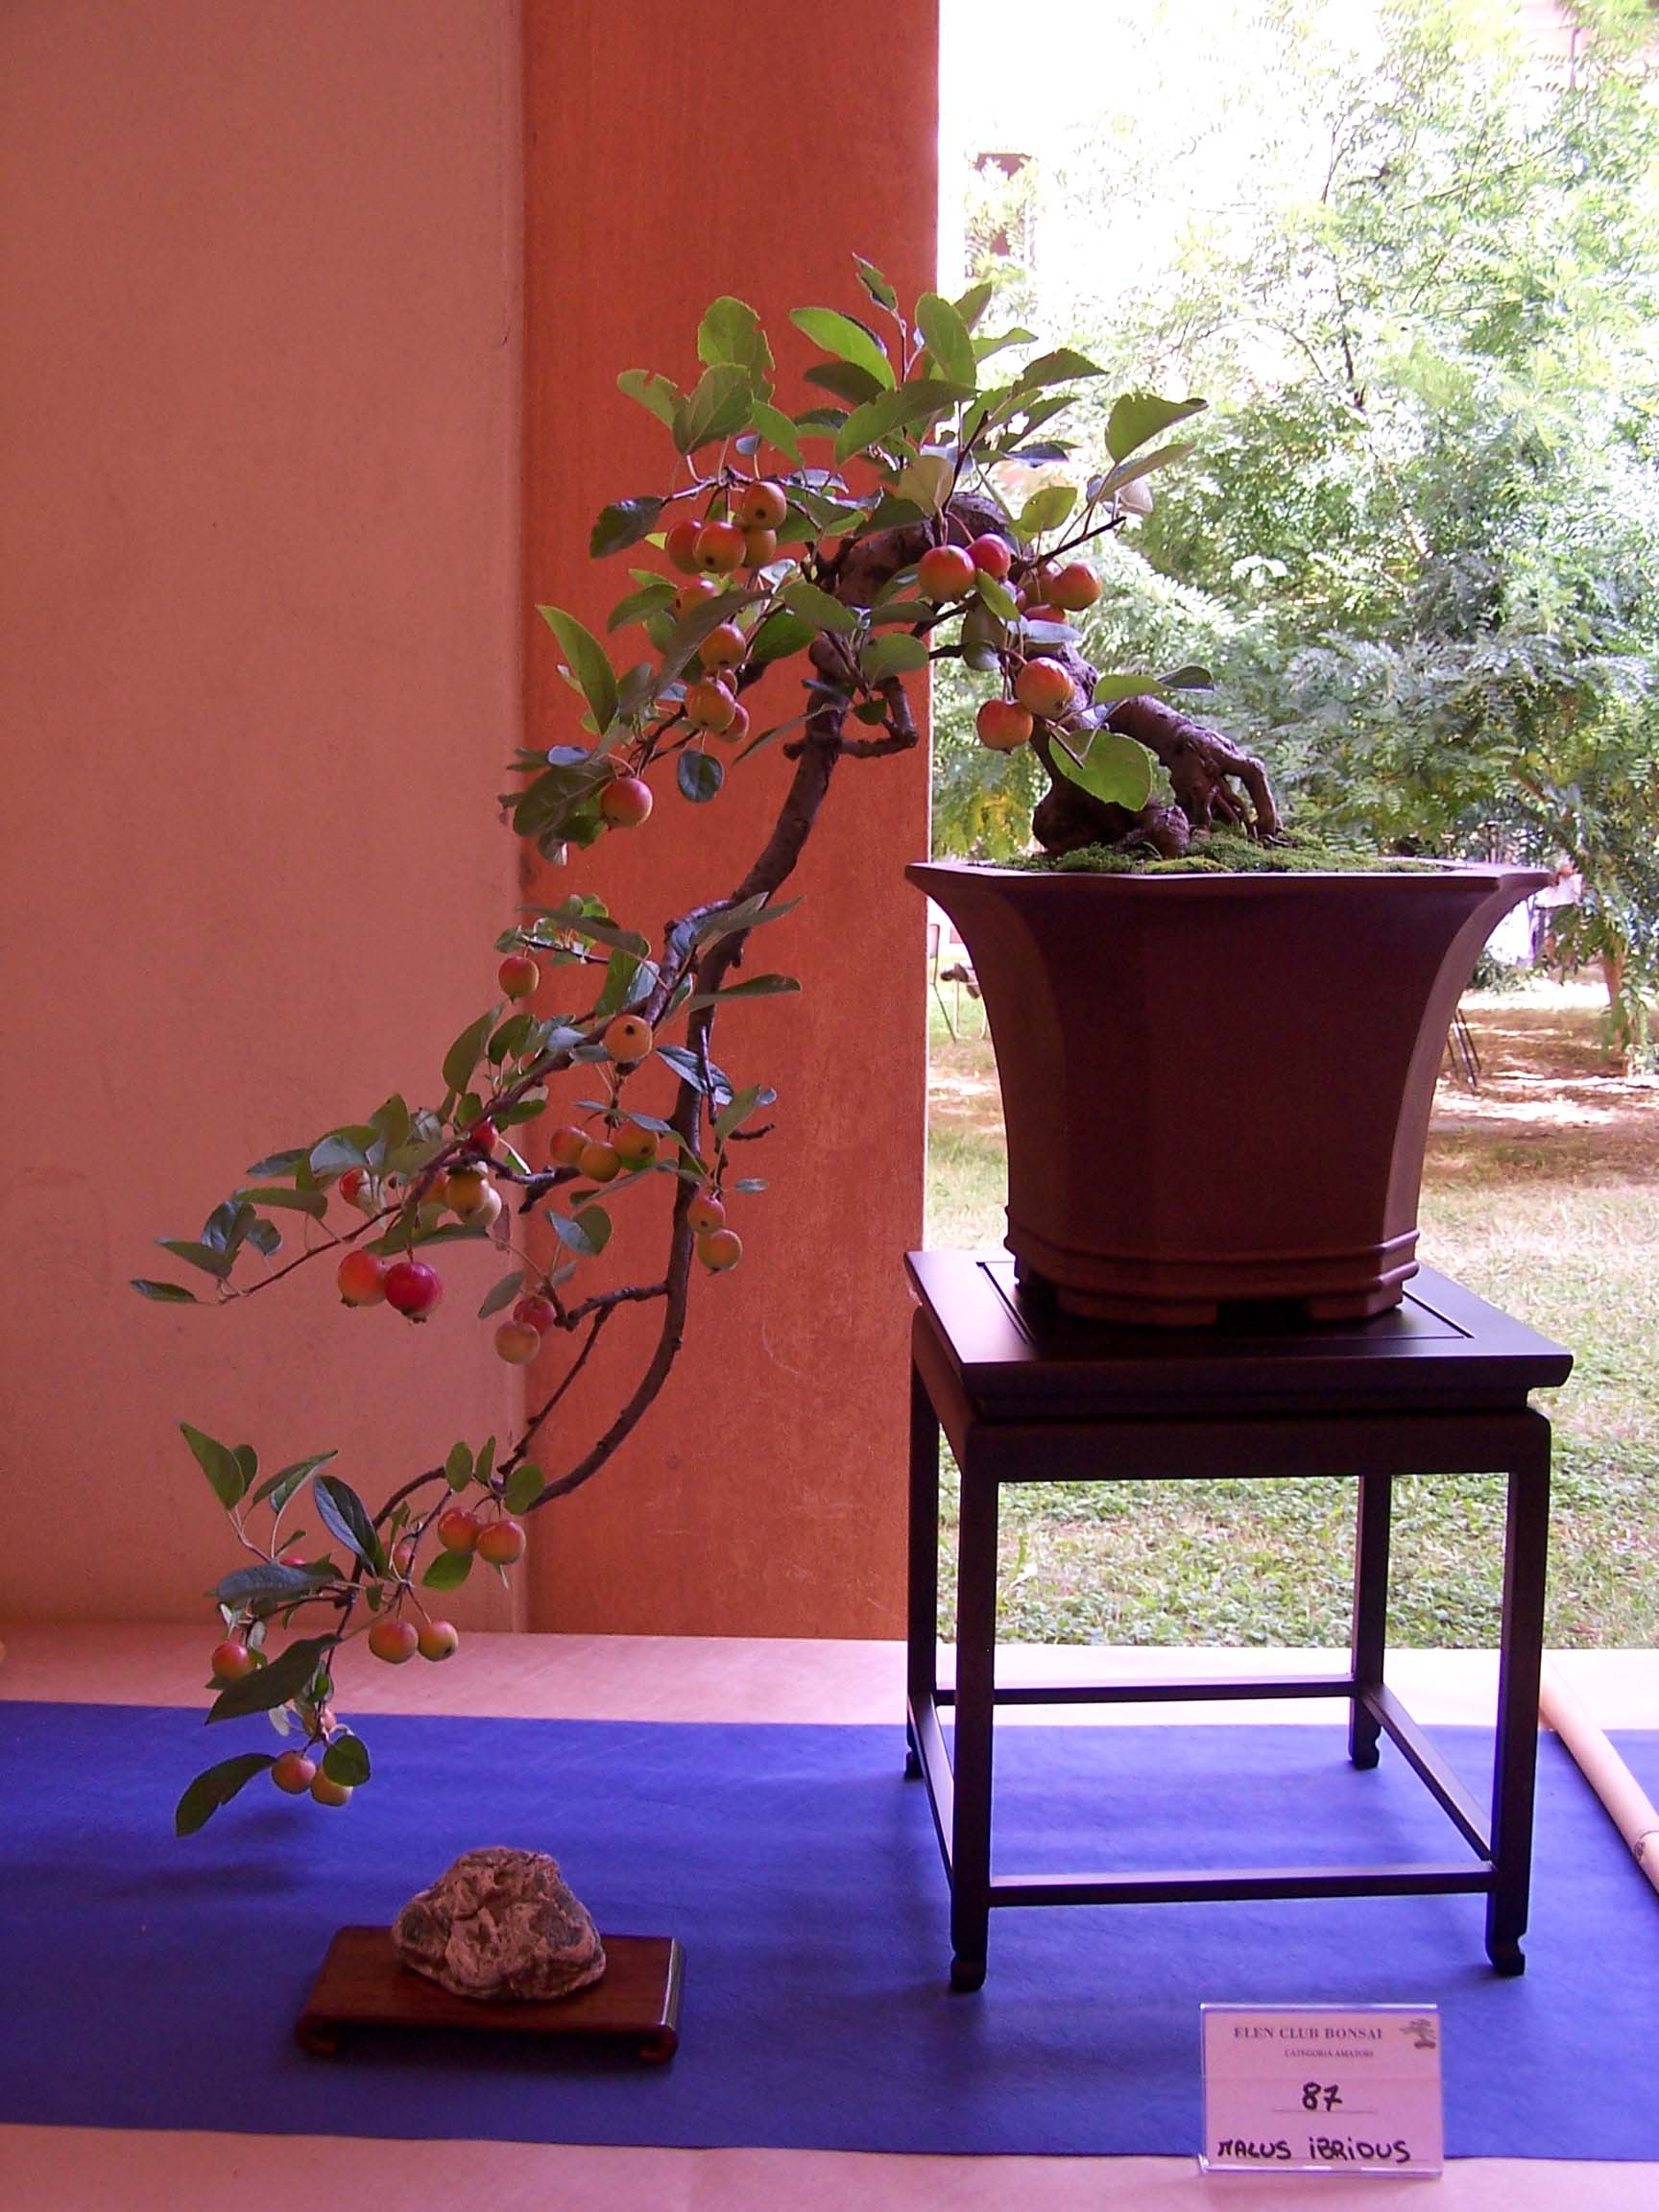
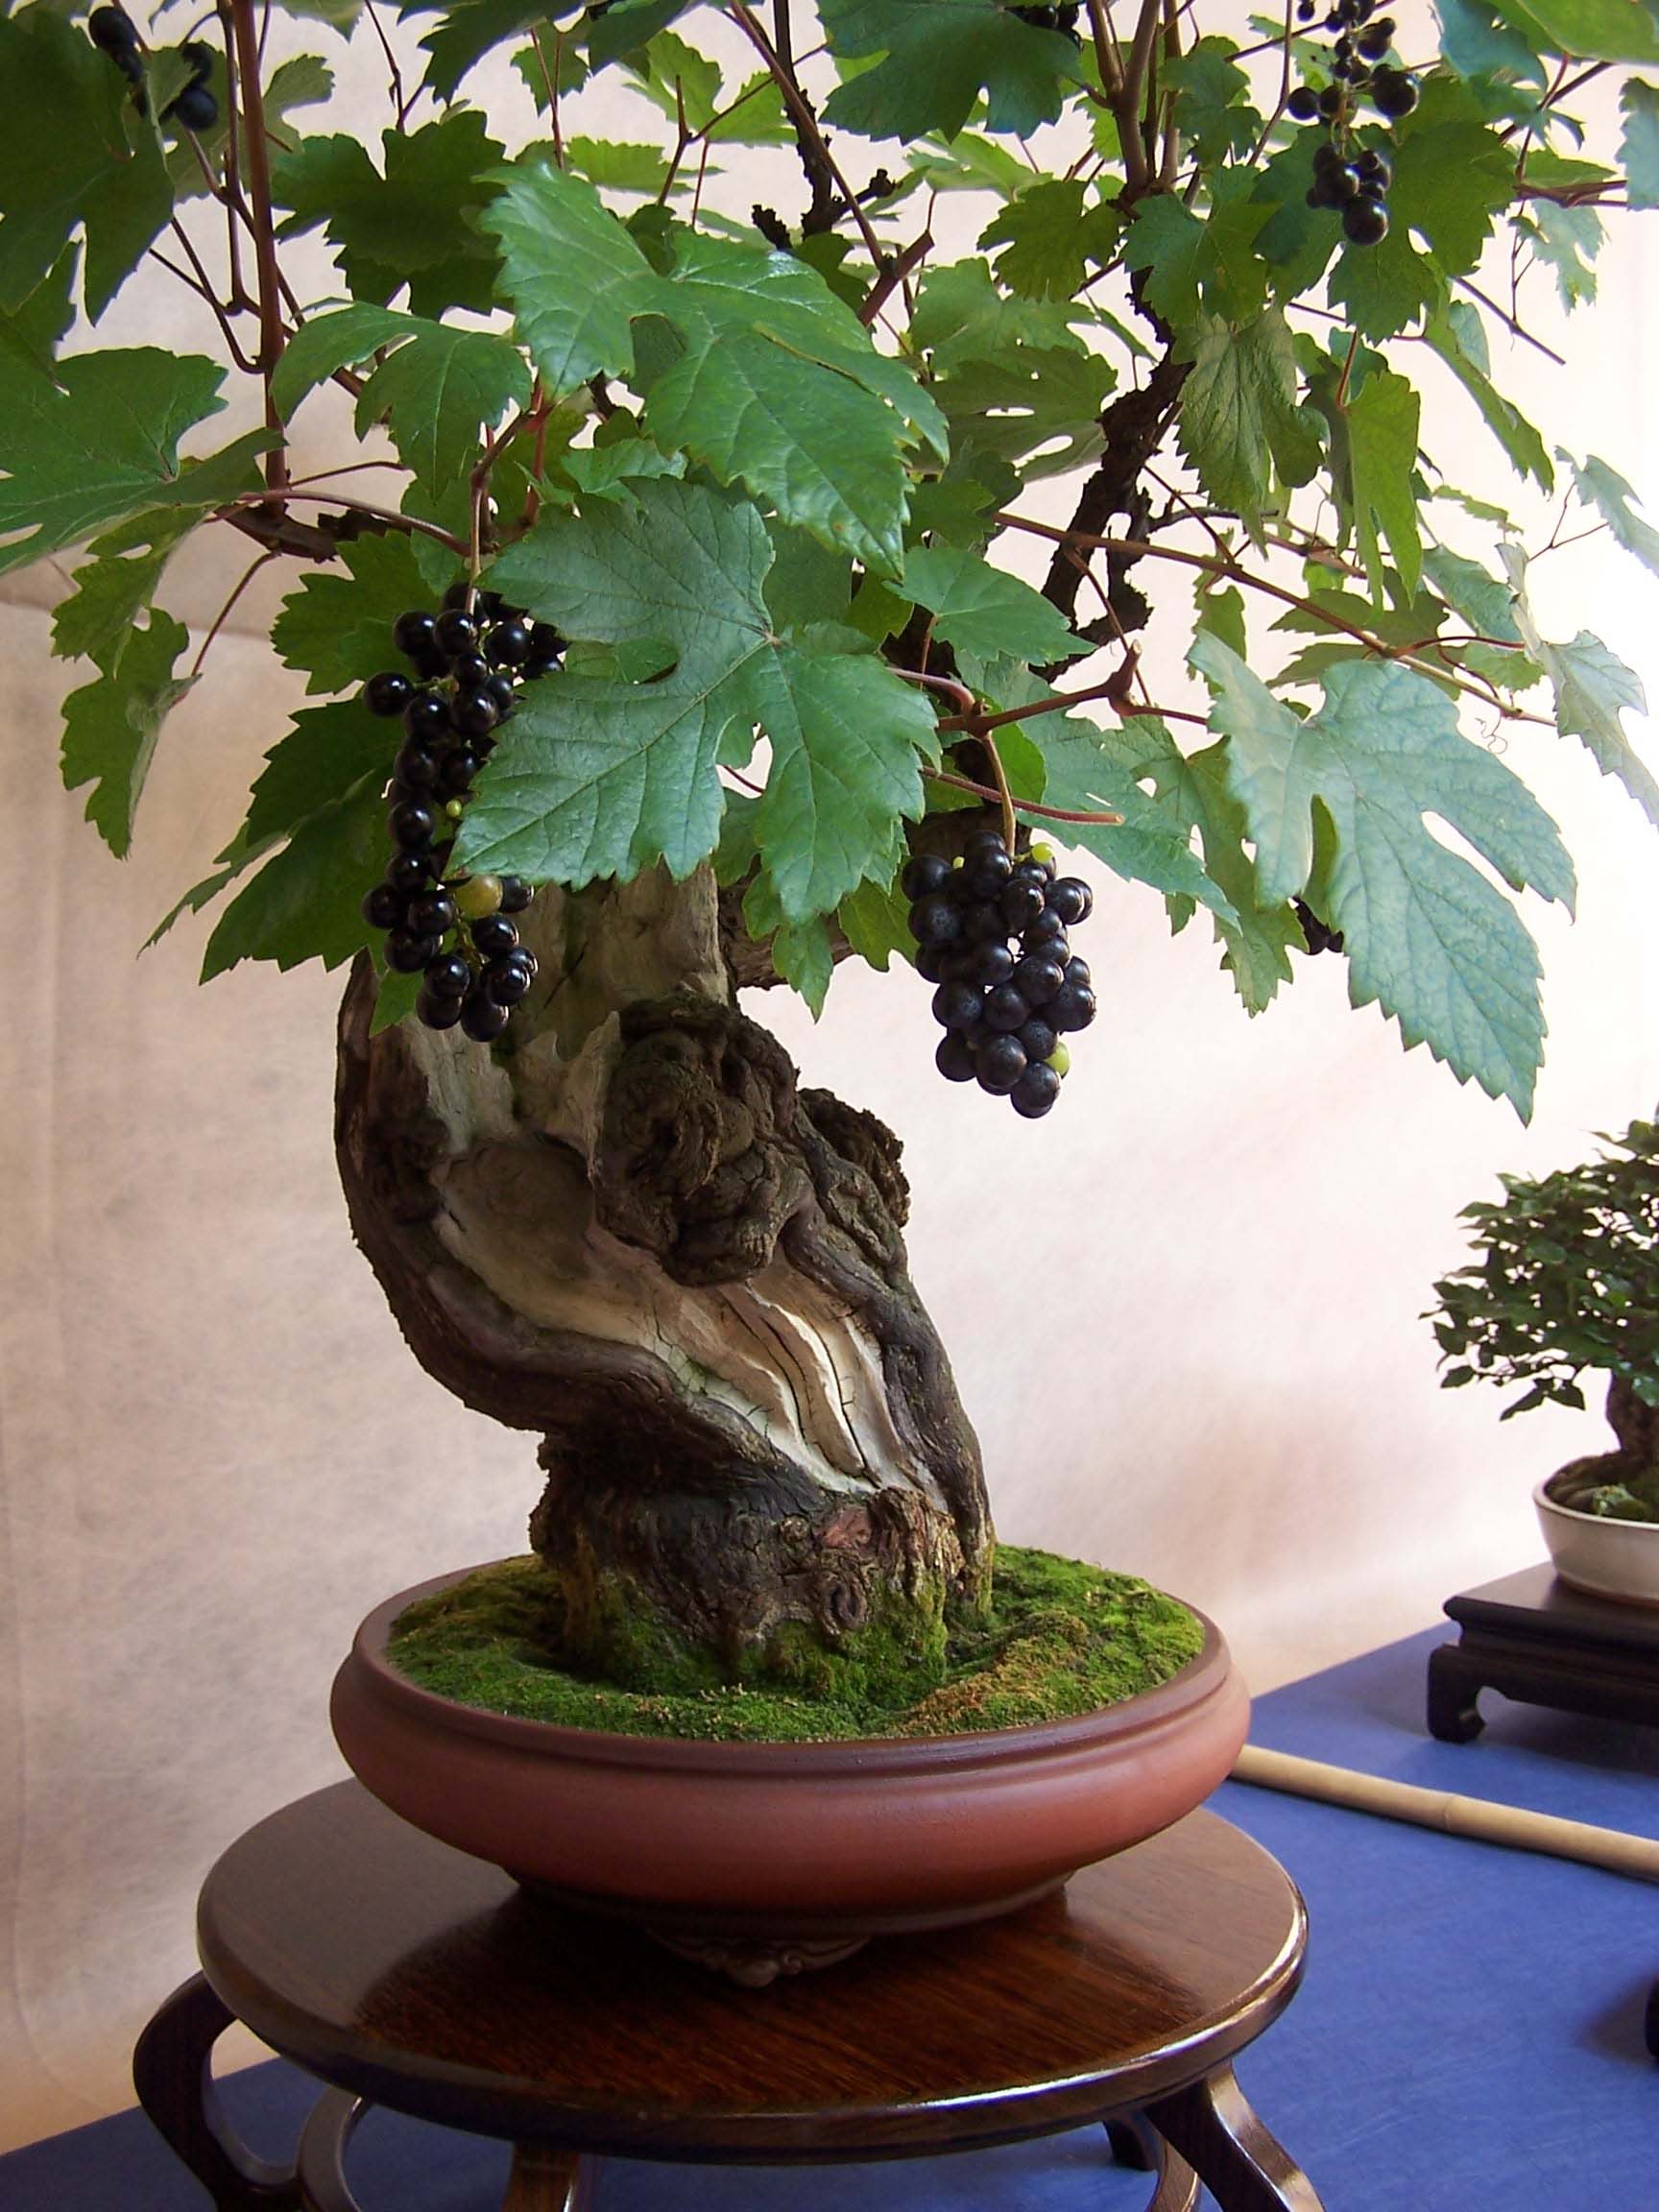
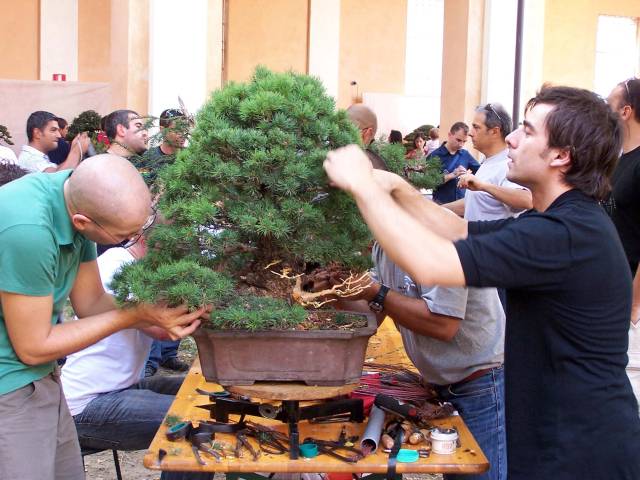
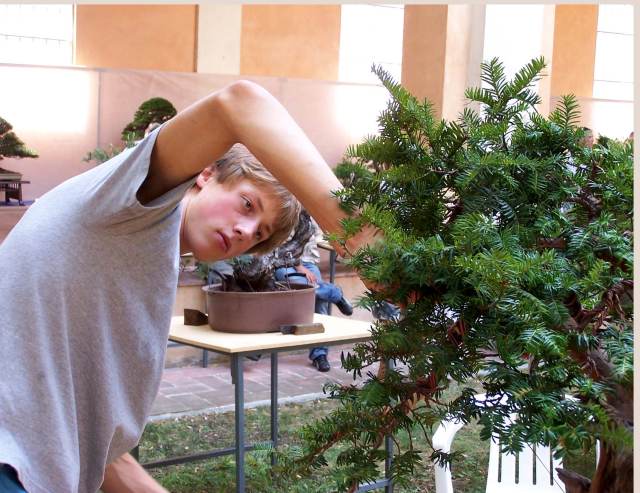
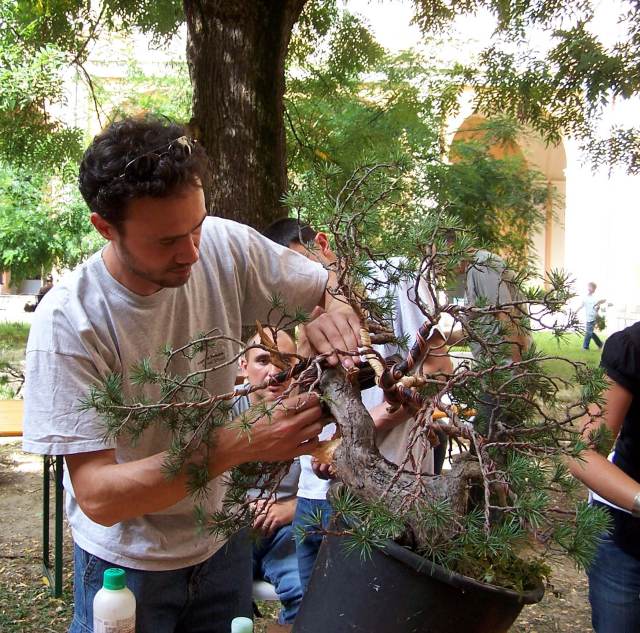
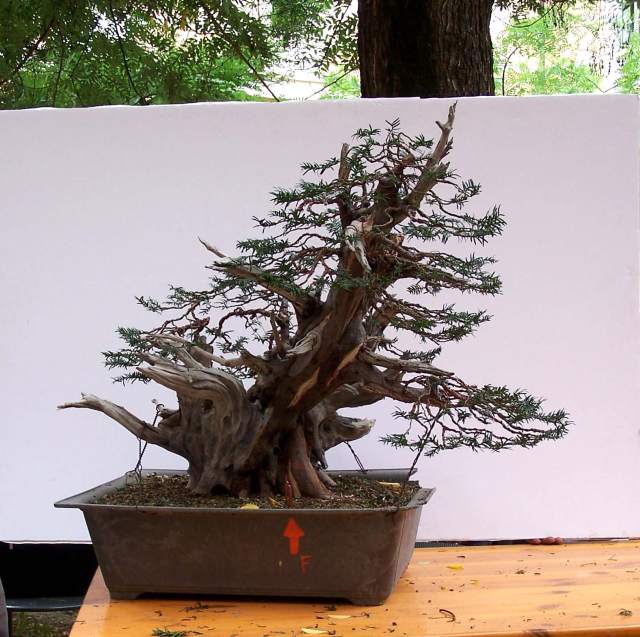
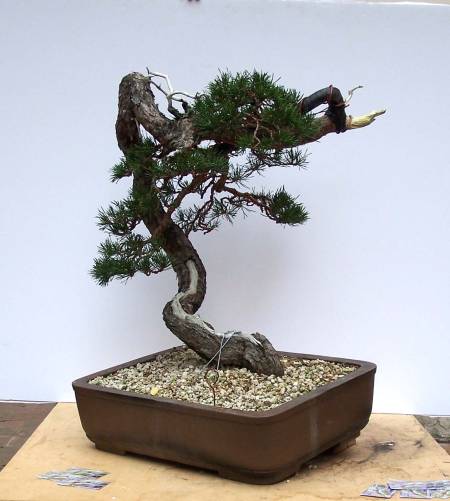
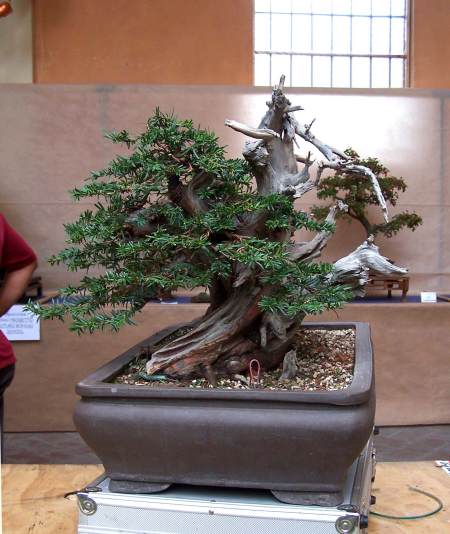
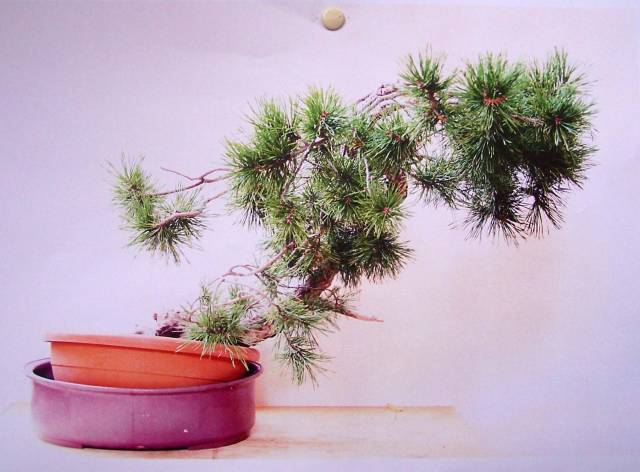
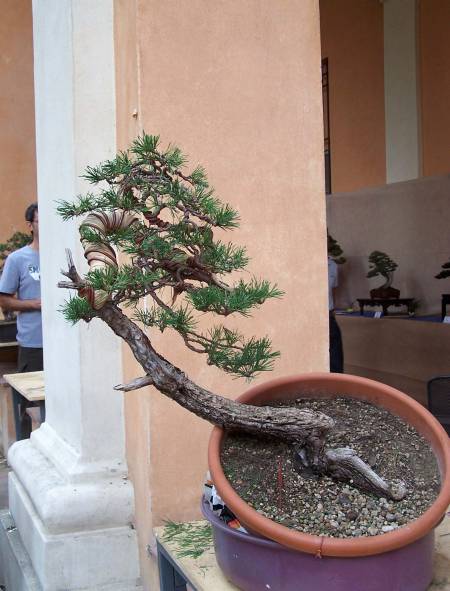
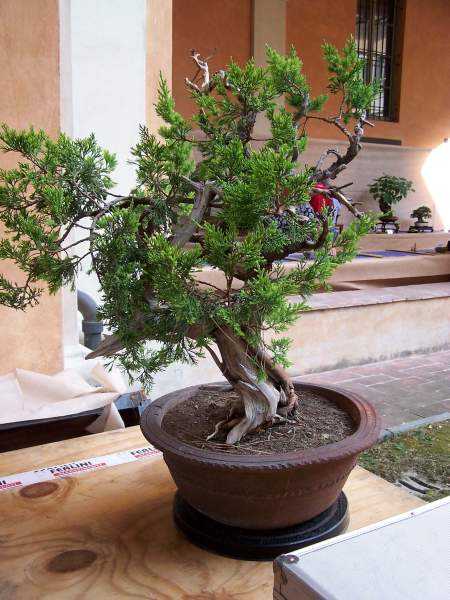
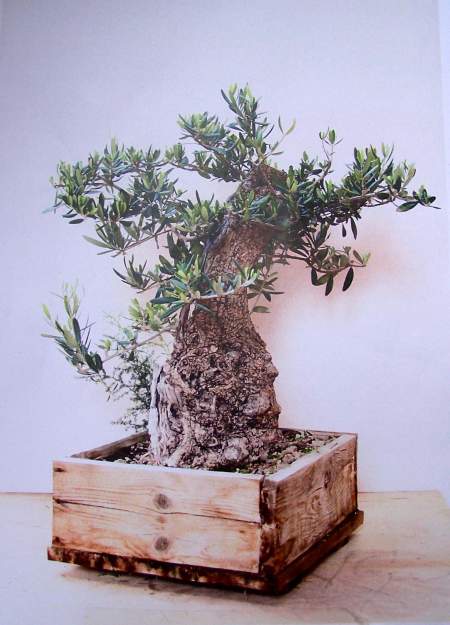
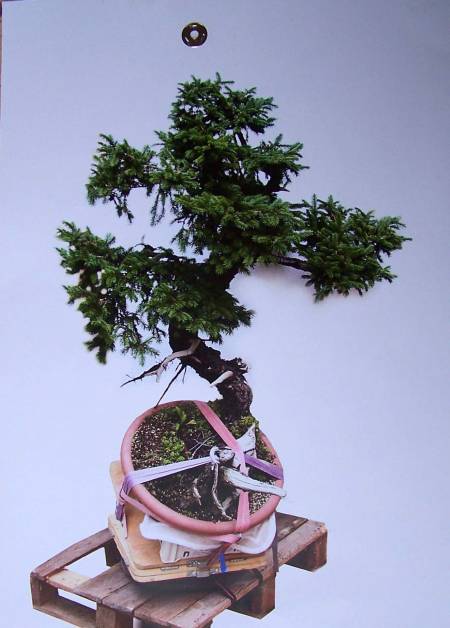
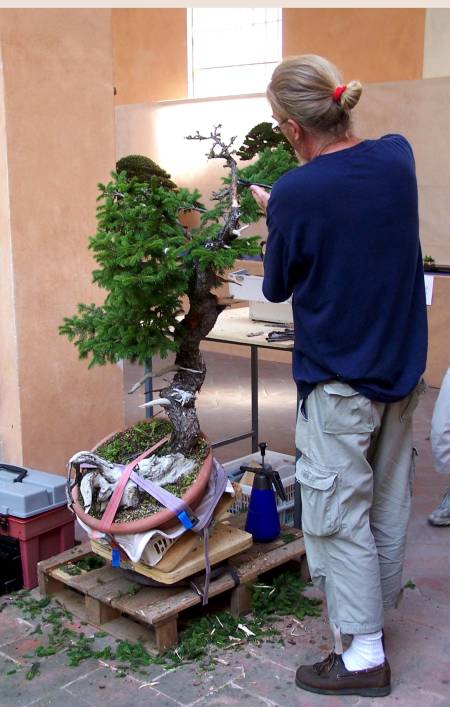
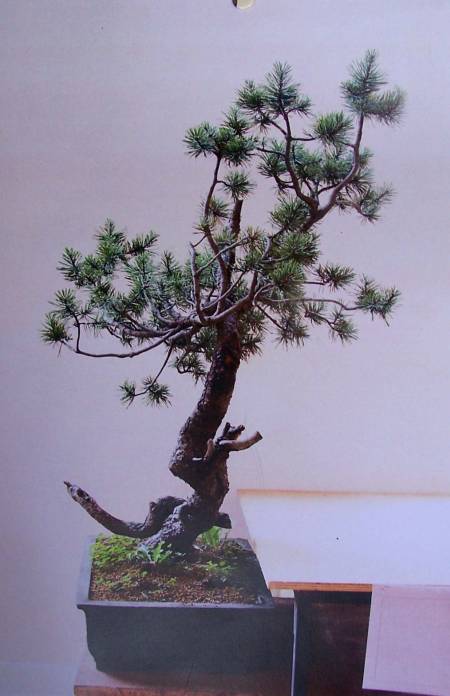
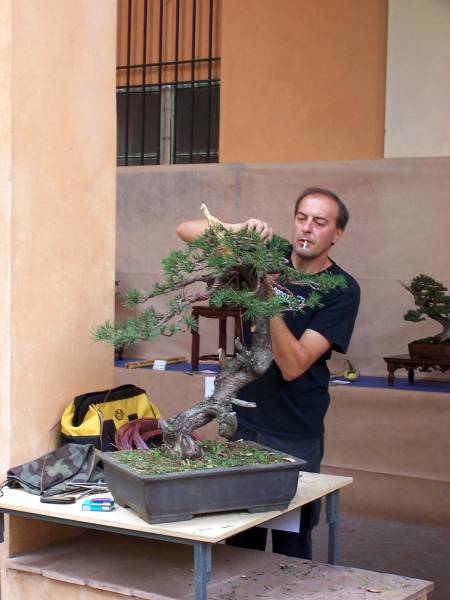
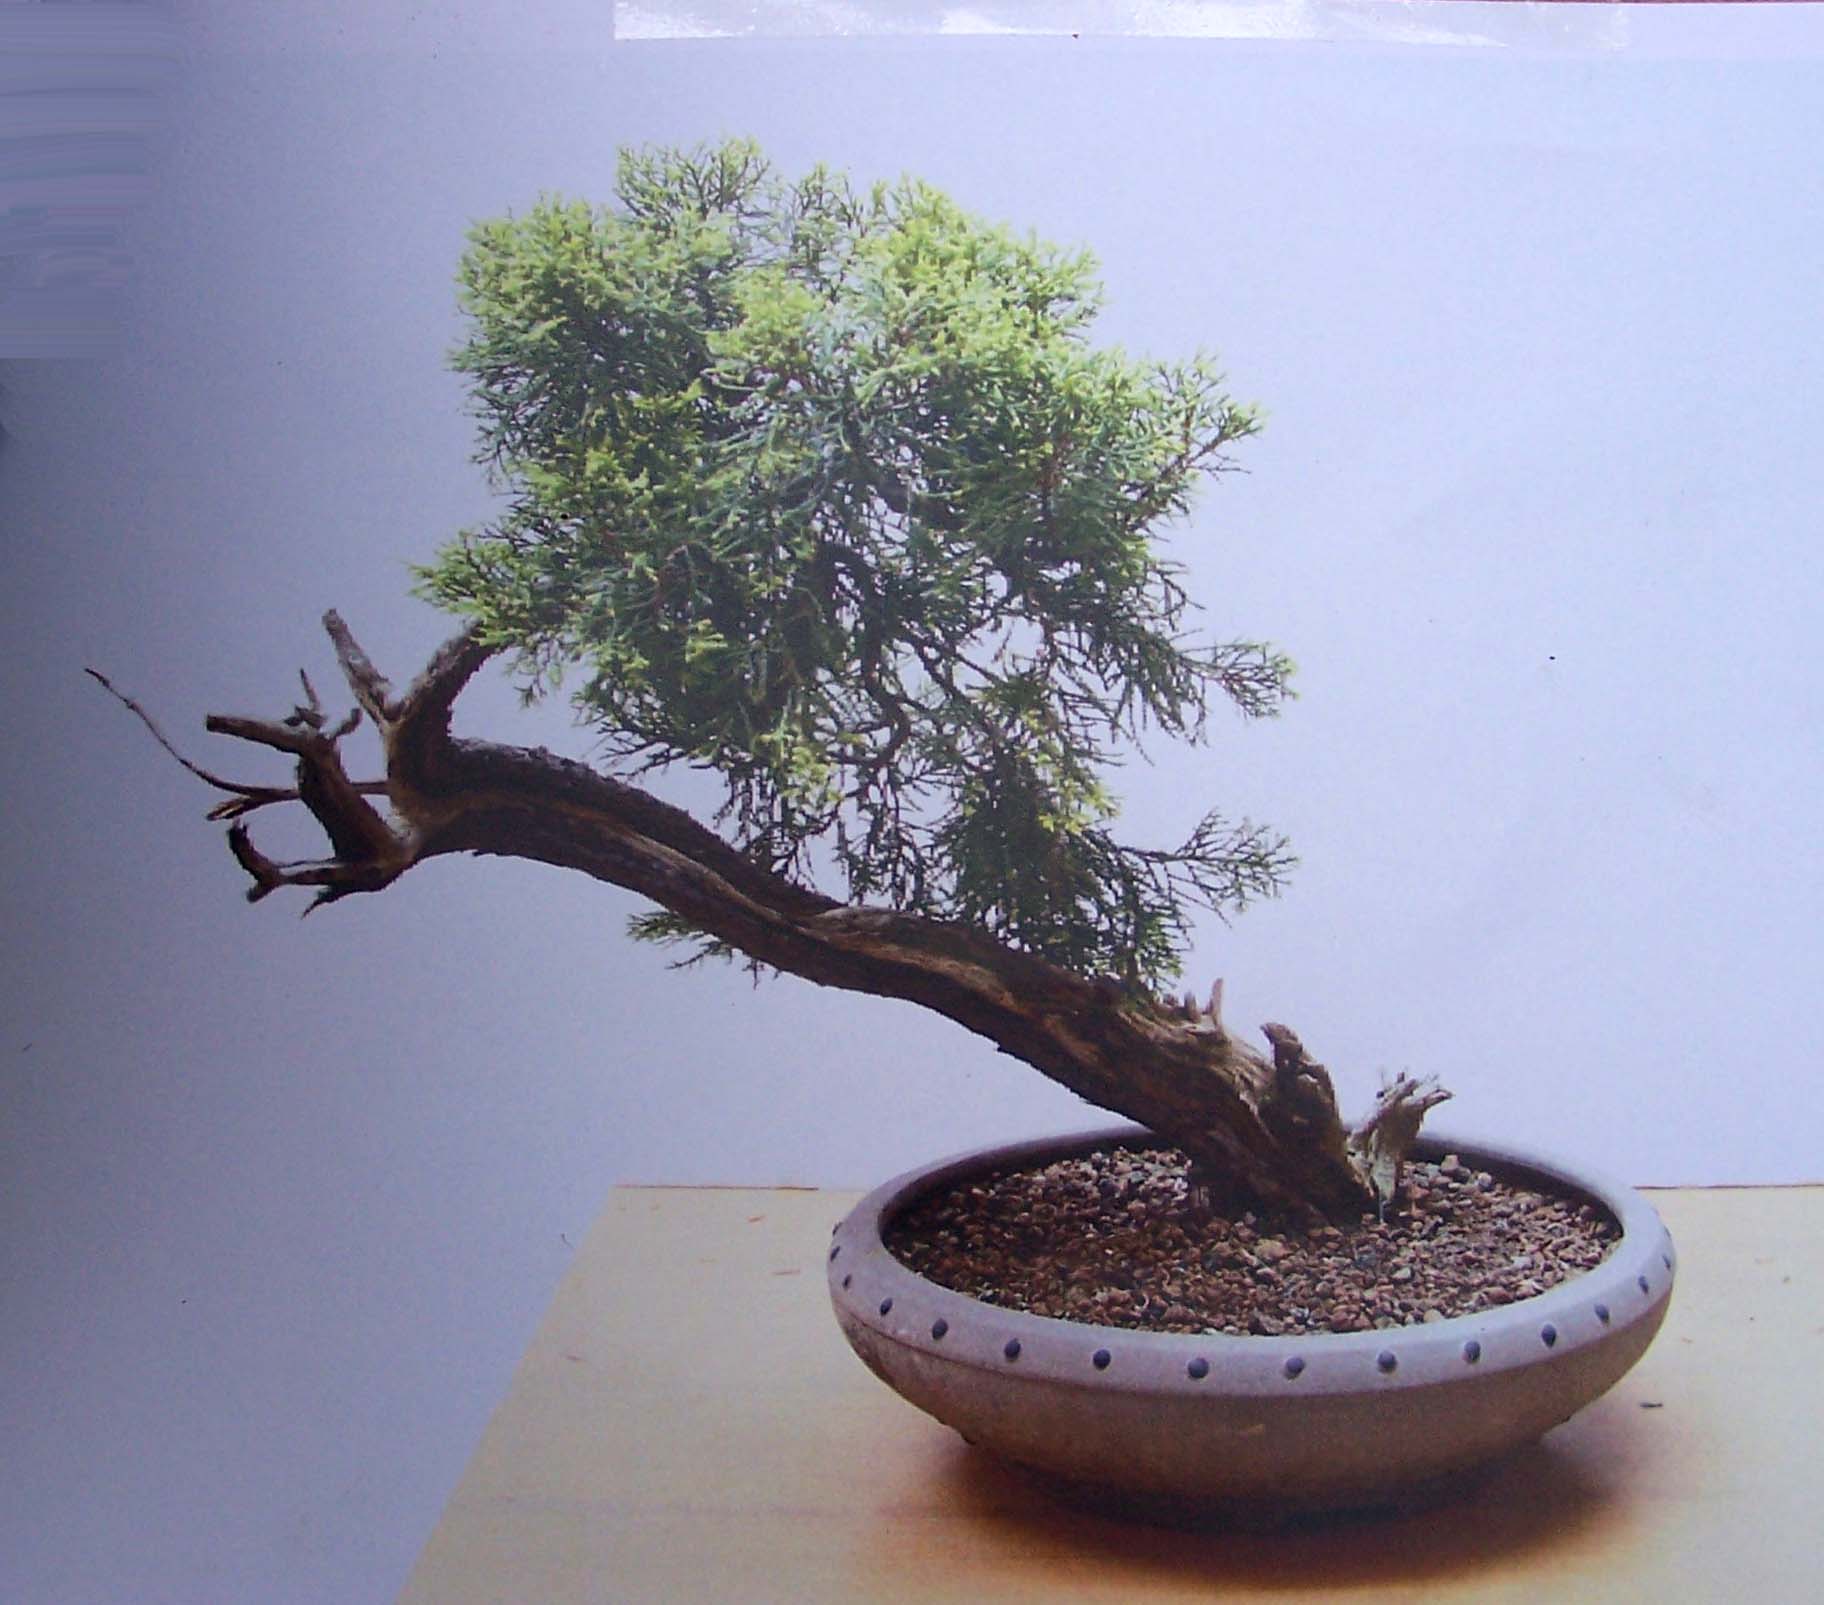
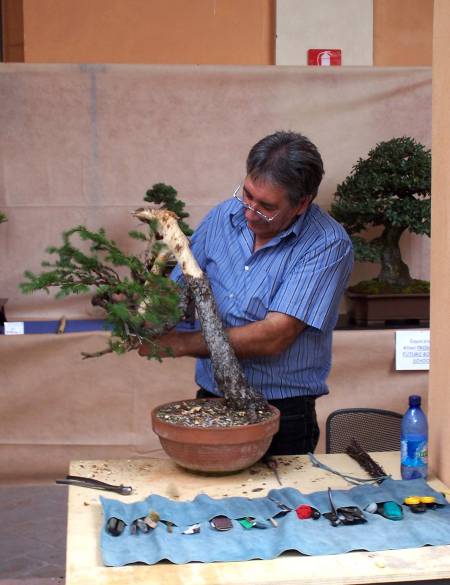
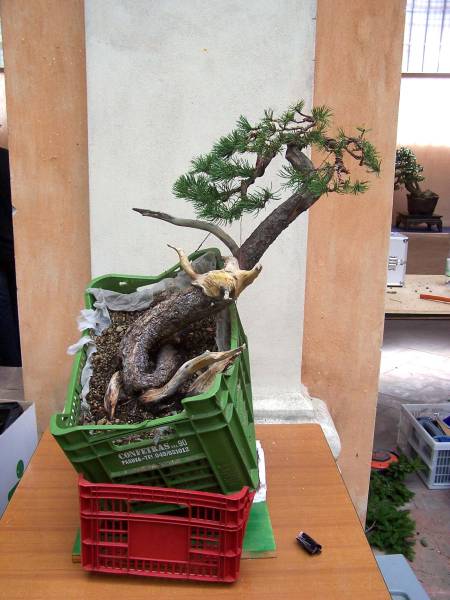
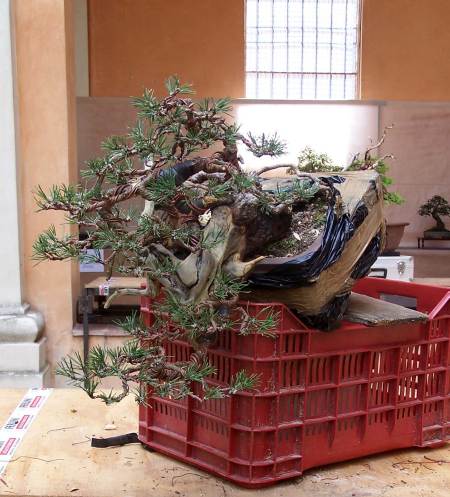
Above picture: Frontside before styling.


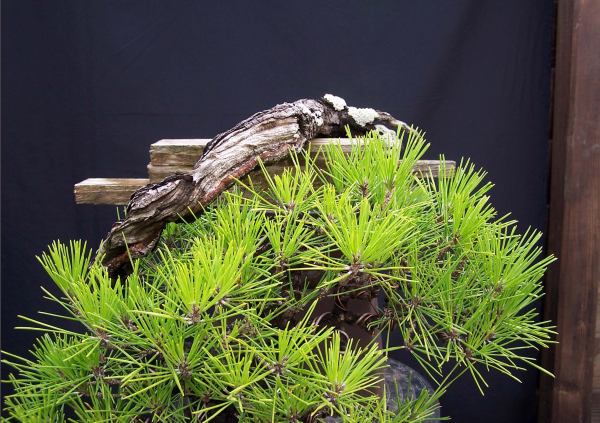
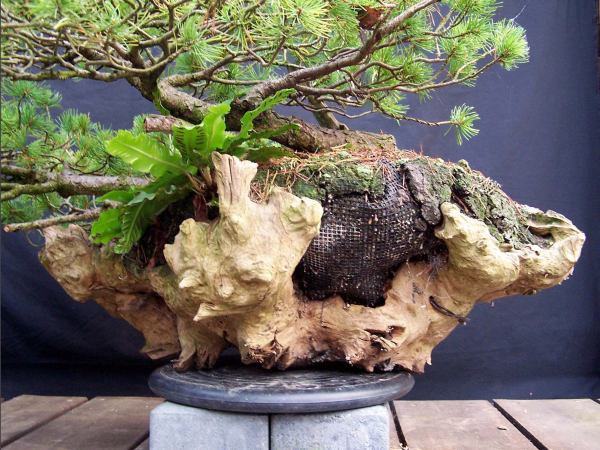
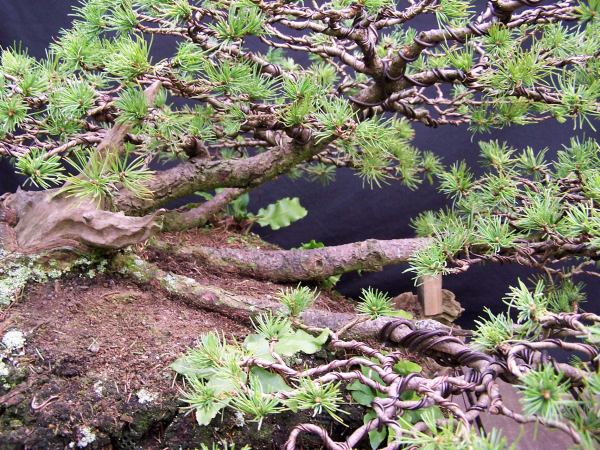
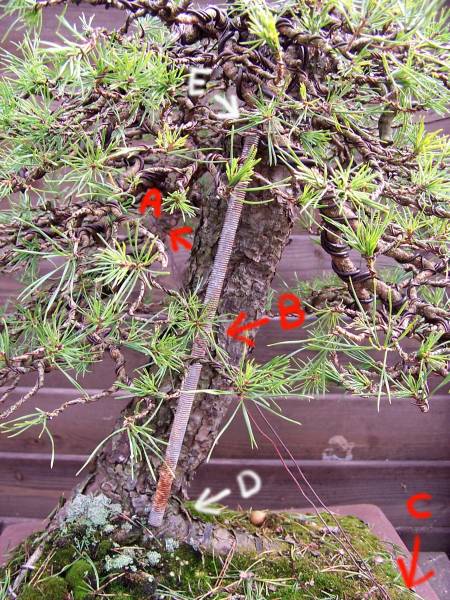
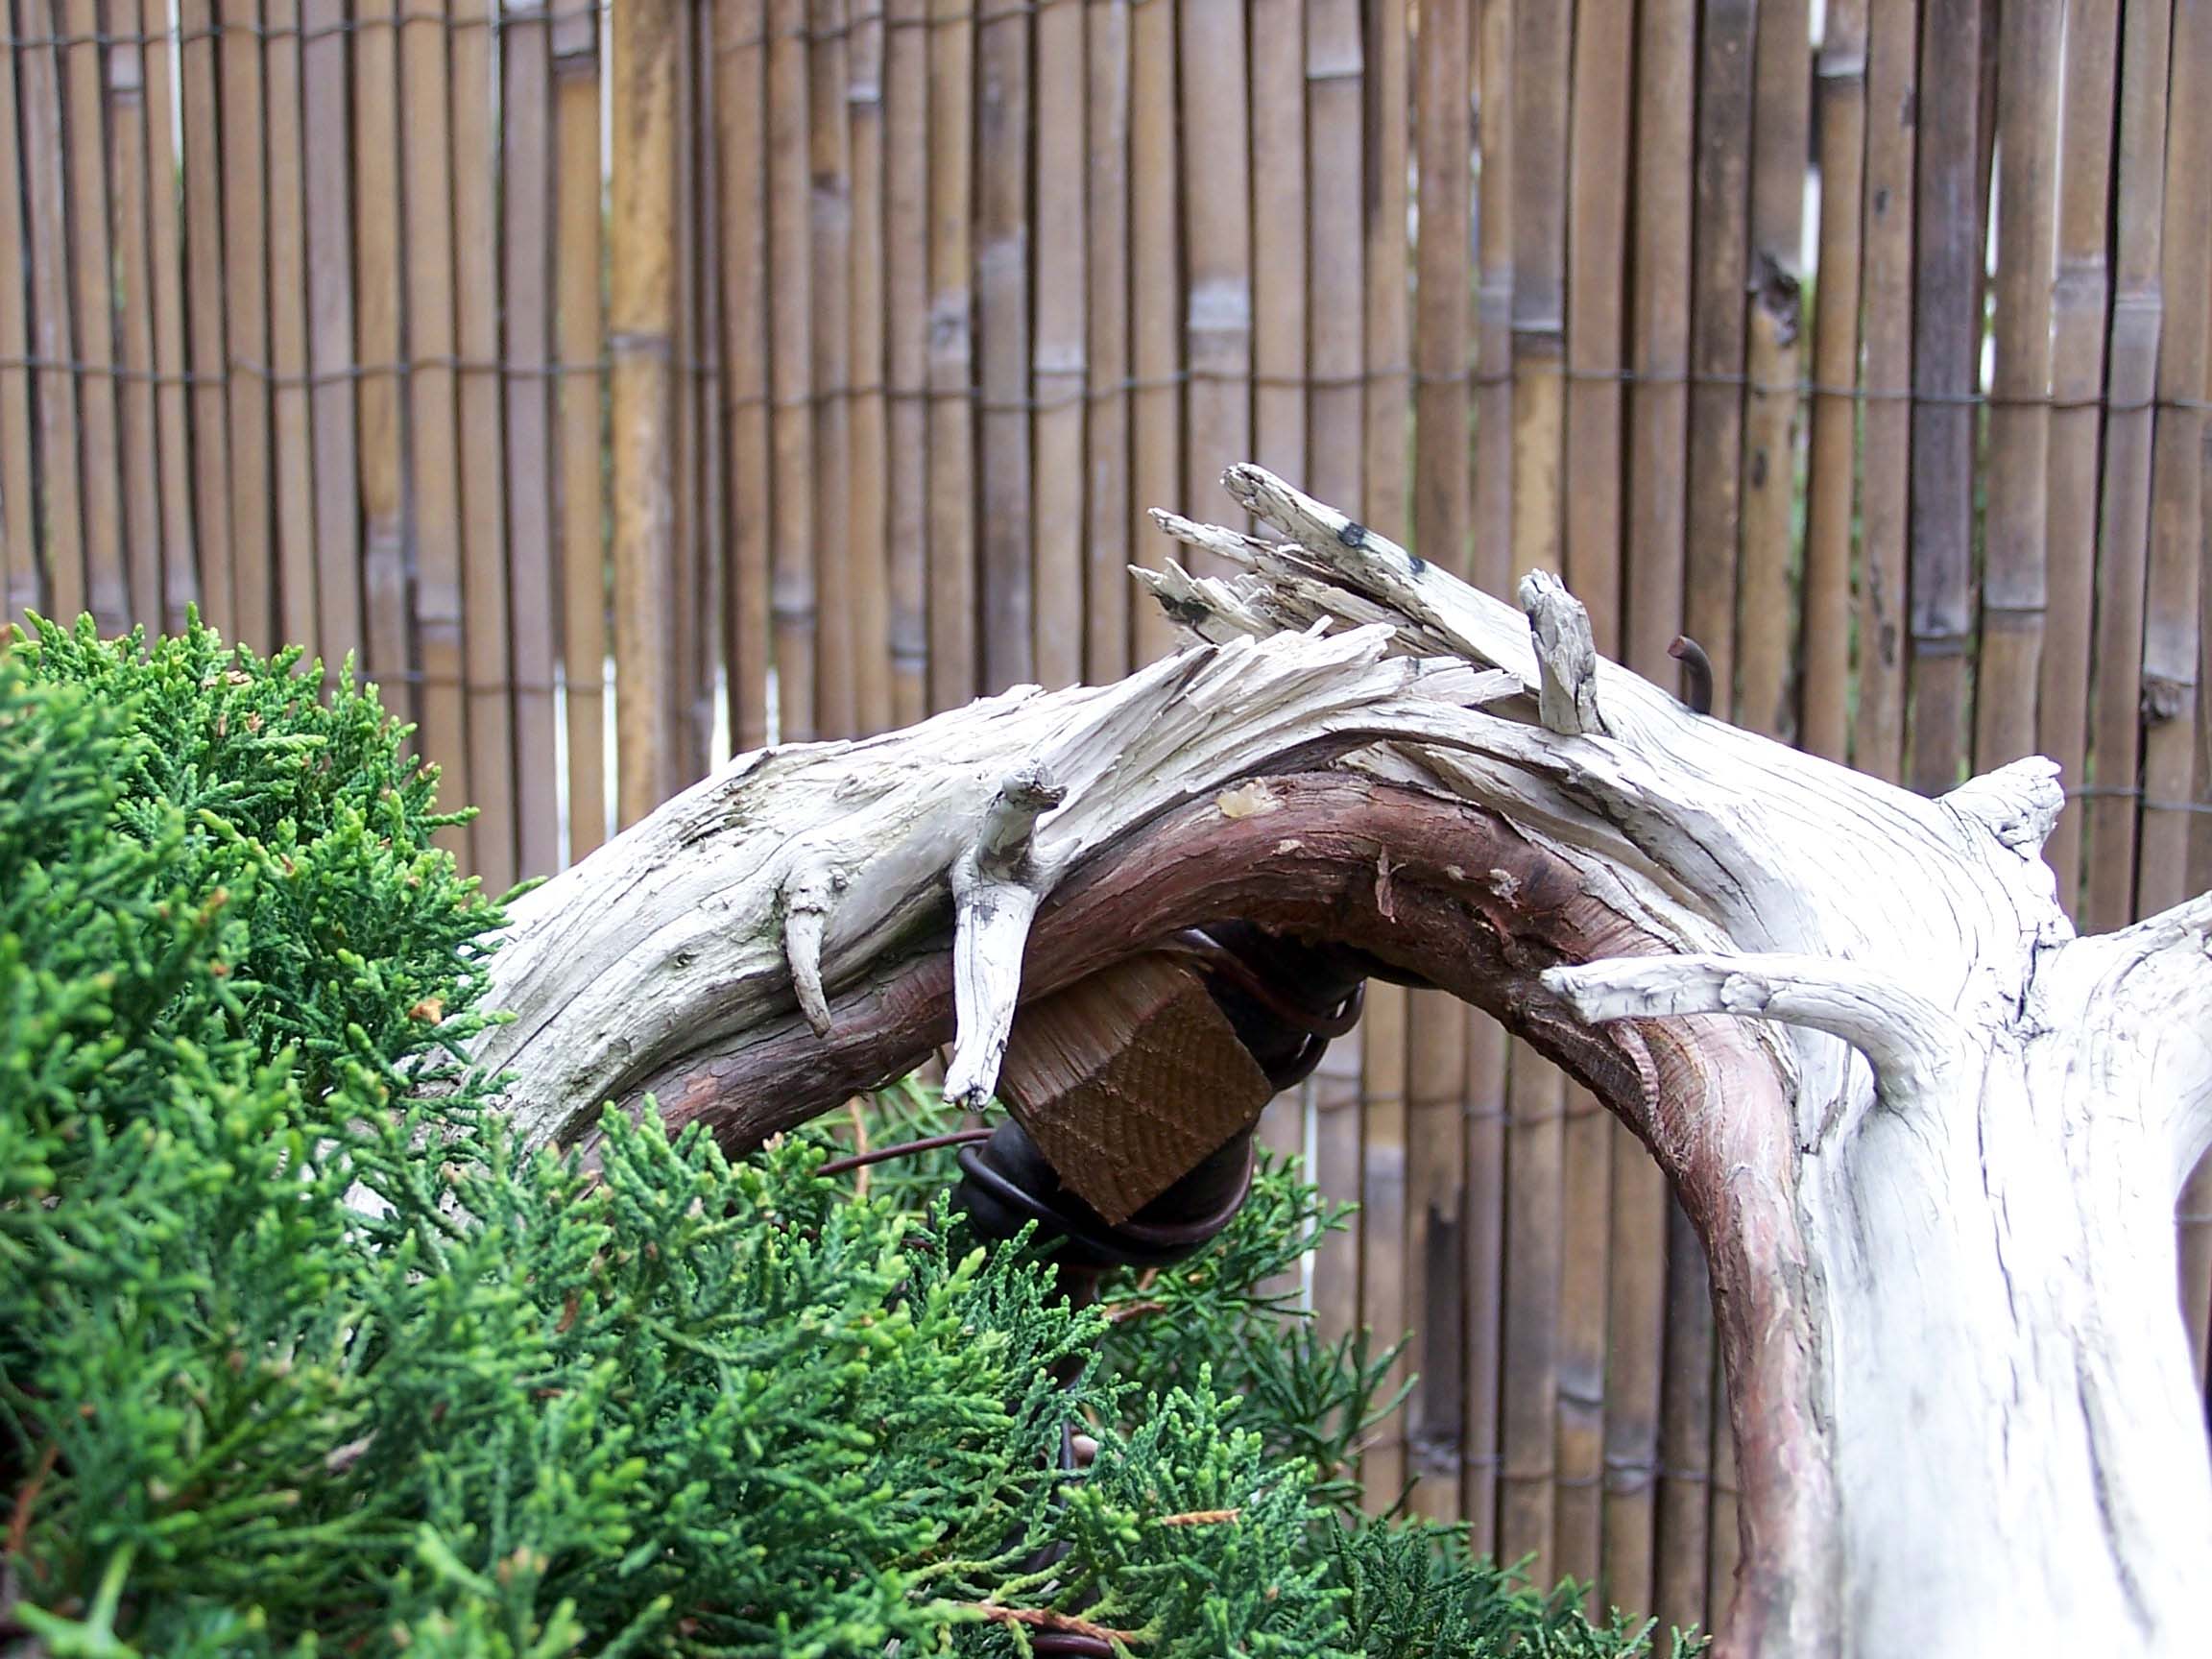
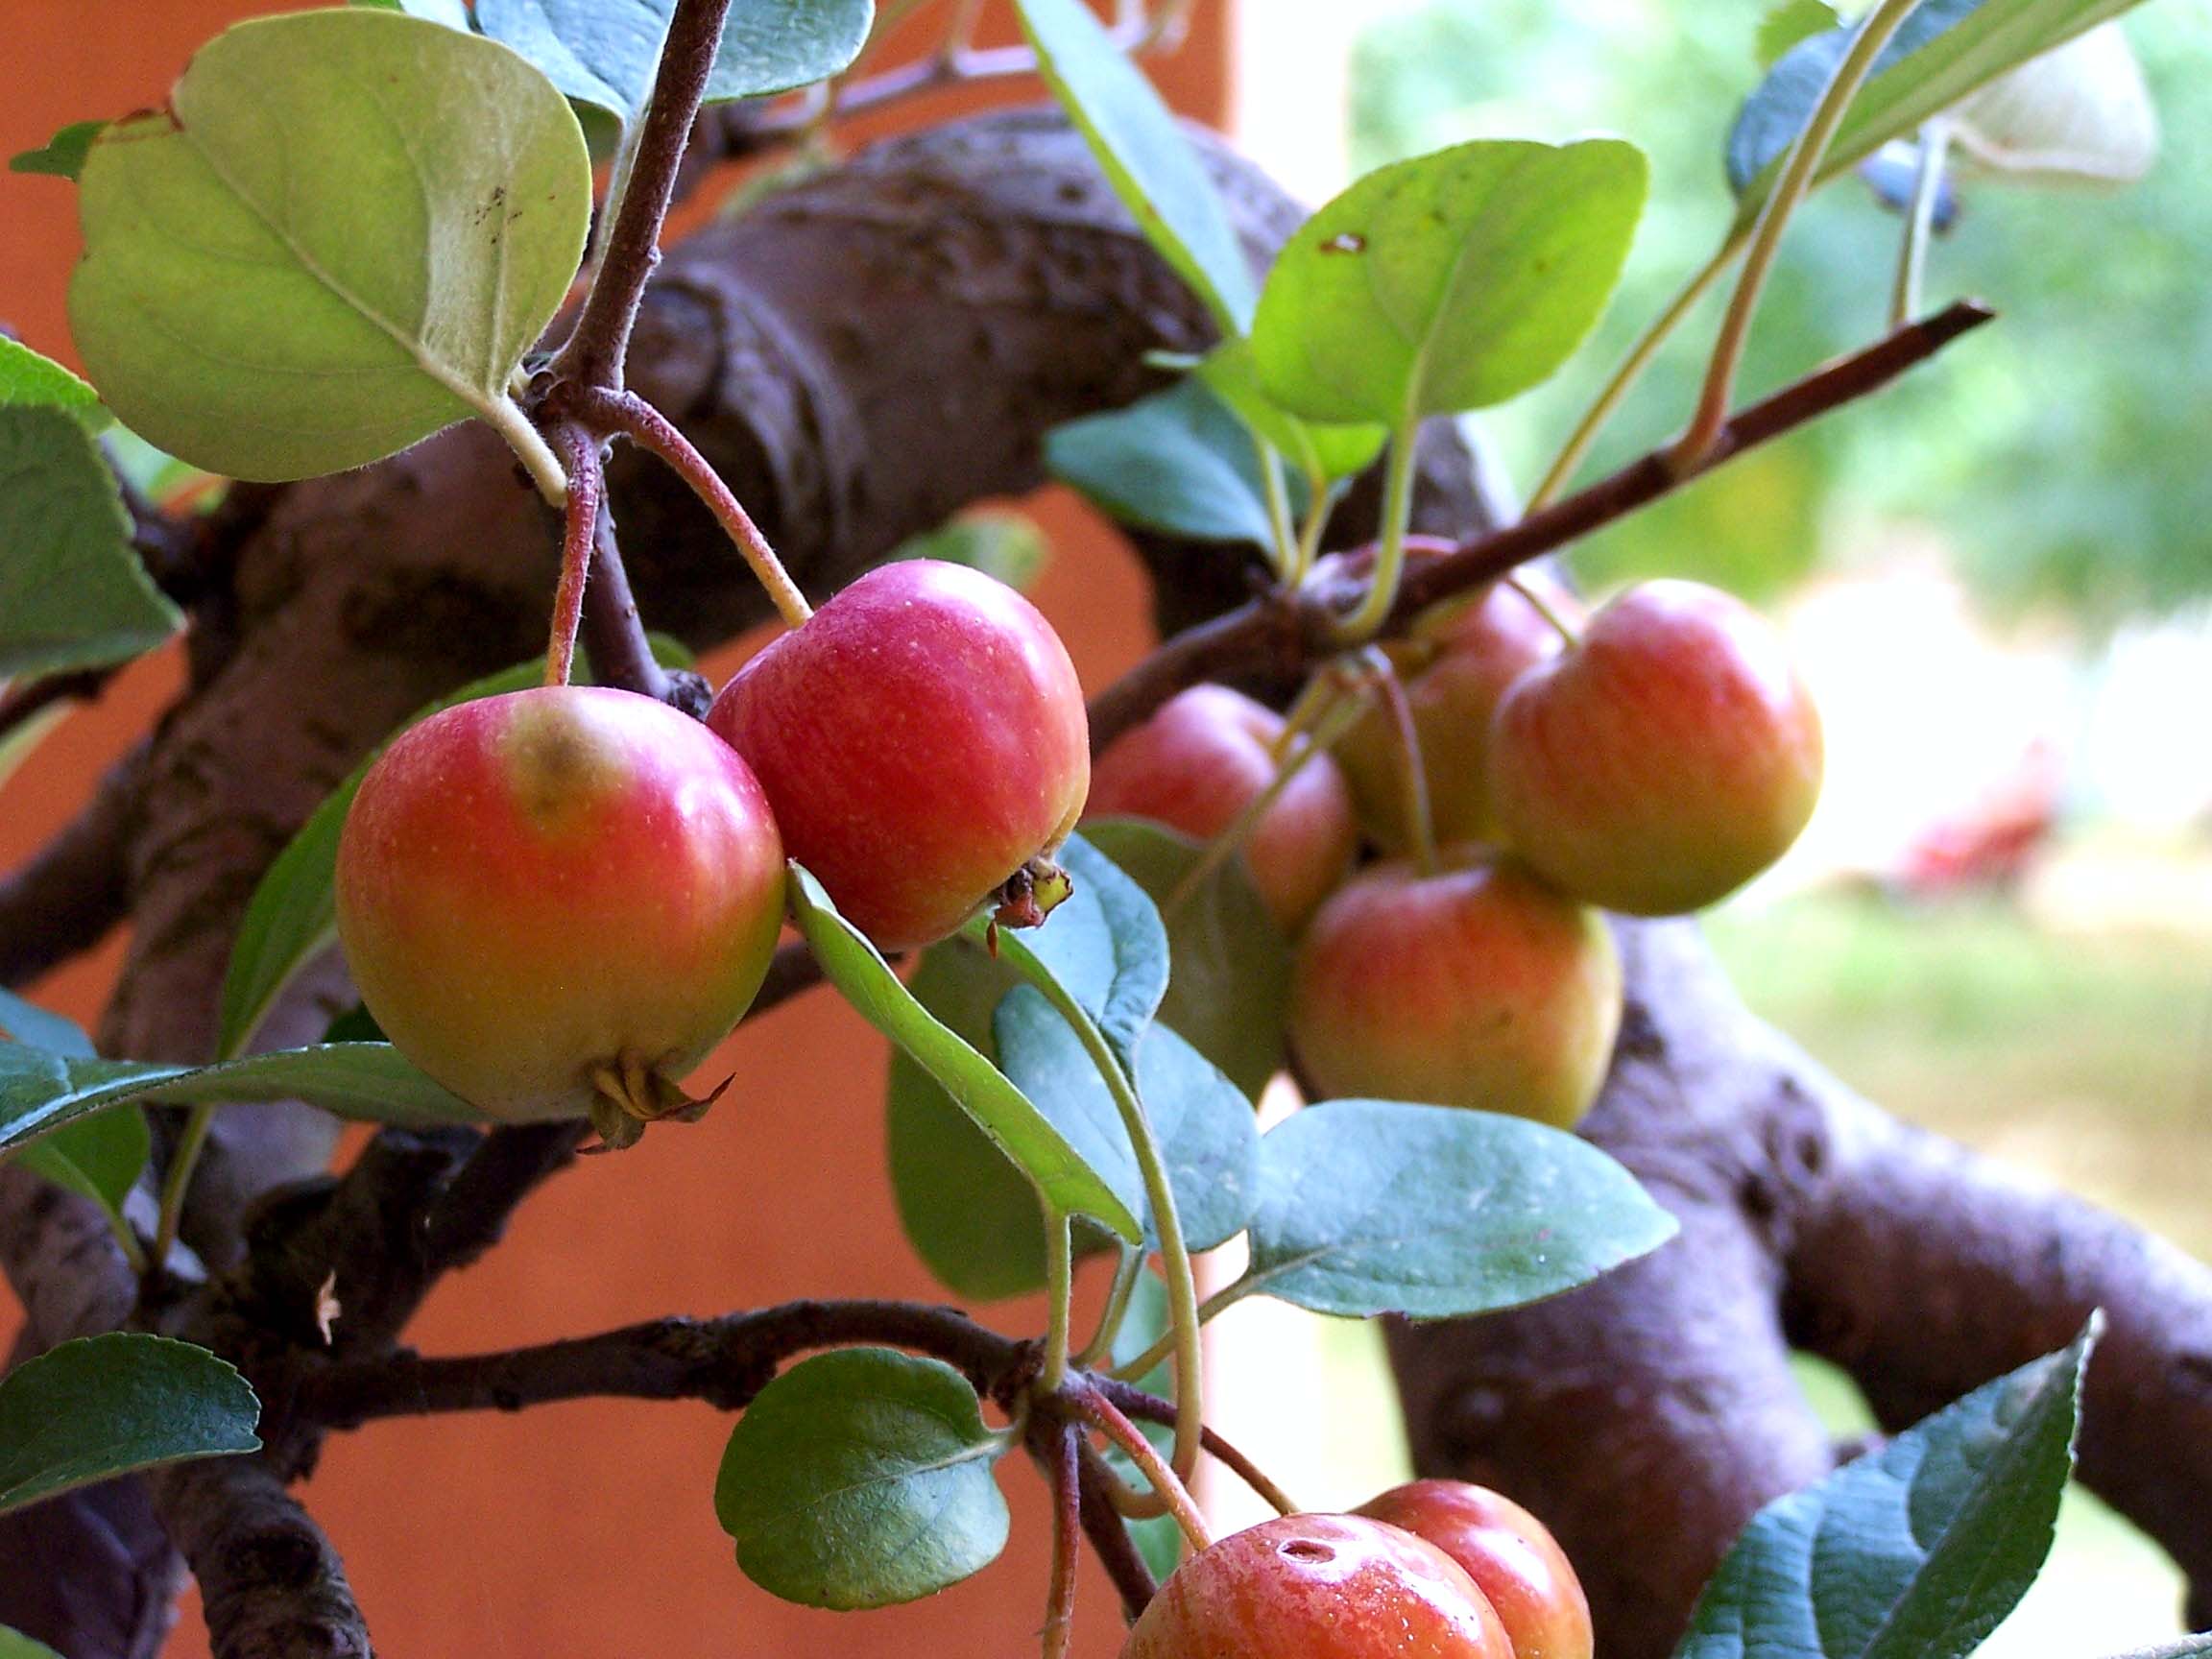
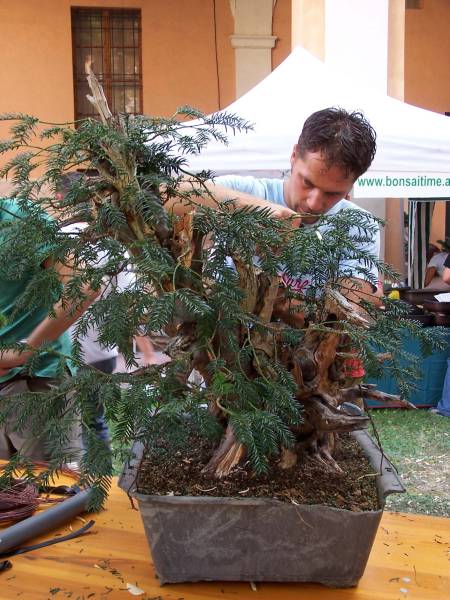
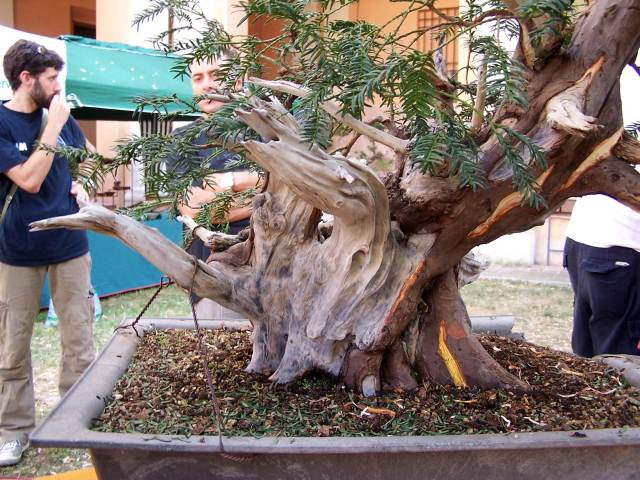
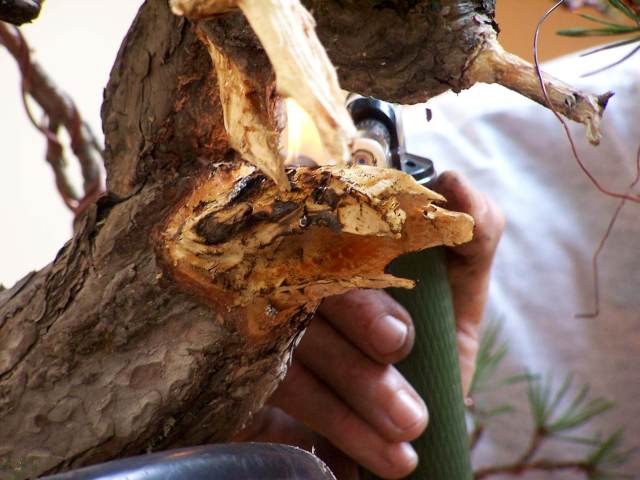
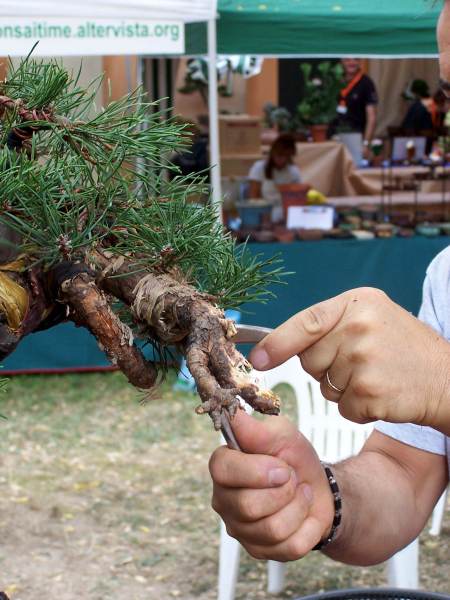
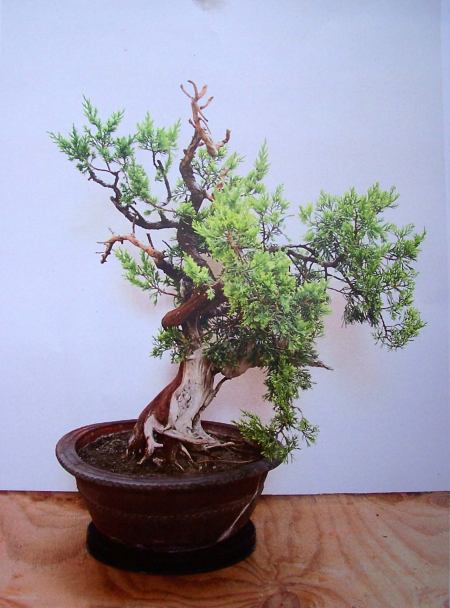
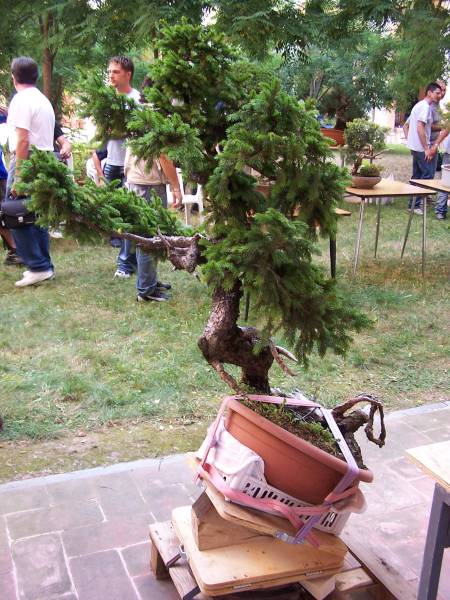
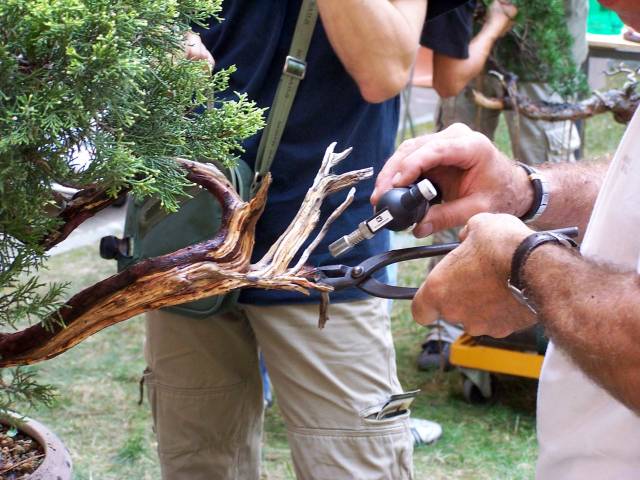
Left picture: Close up of the natural “Shari” that runs down the trunk line.

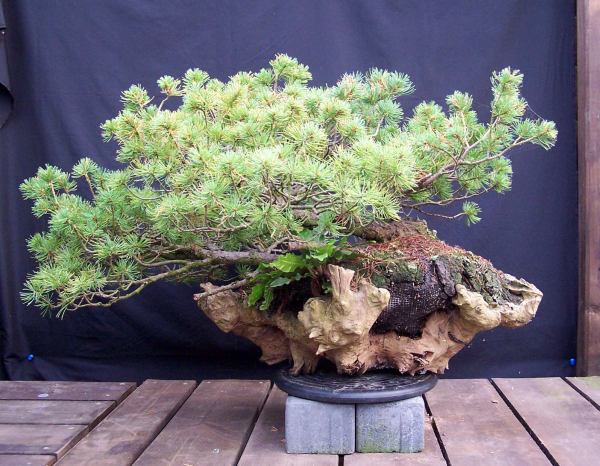
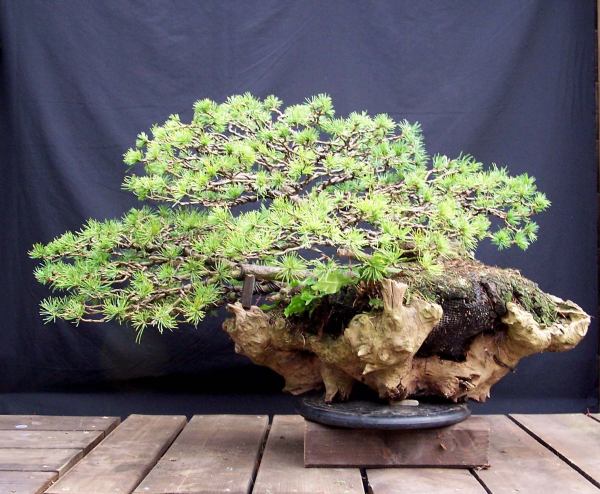
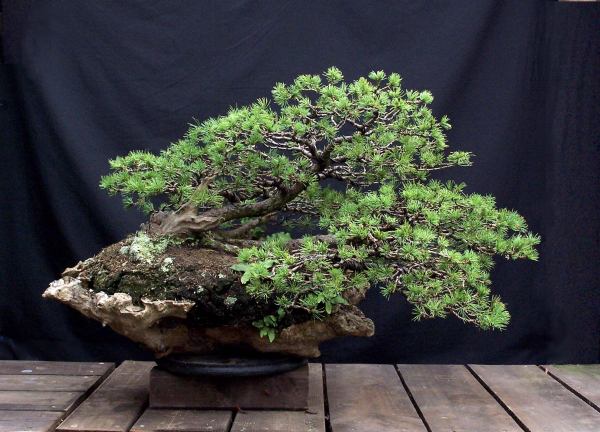
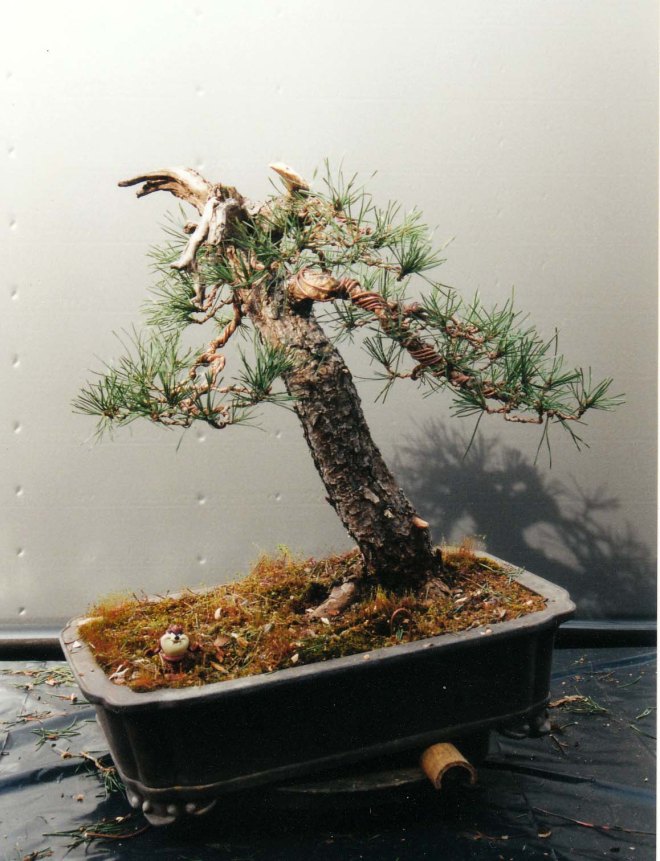
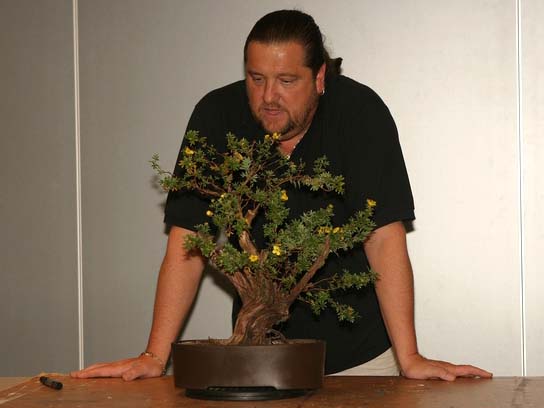
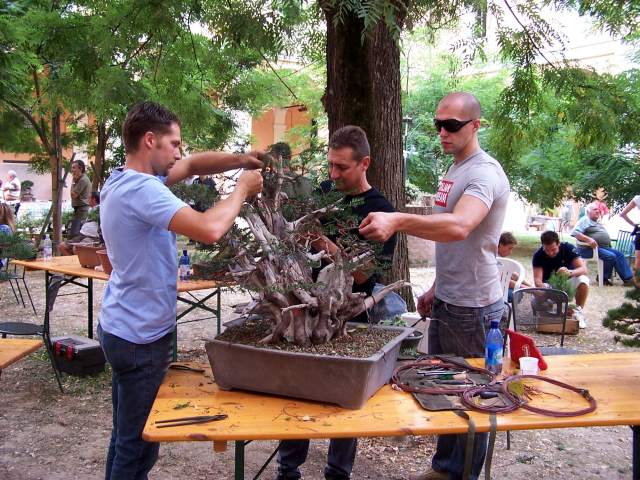
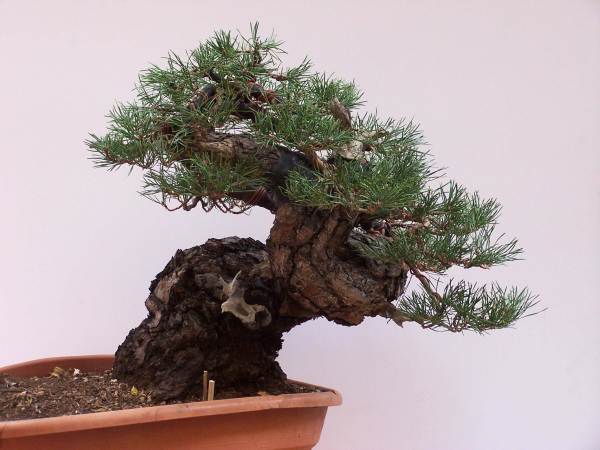
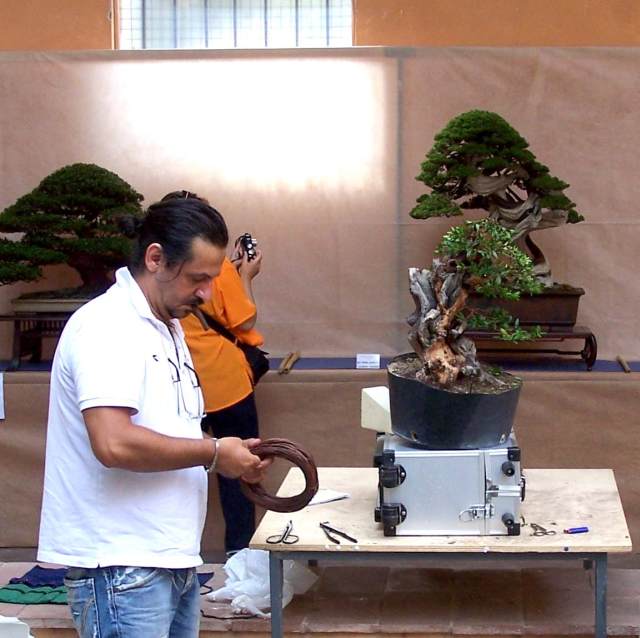
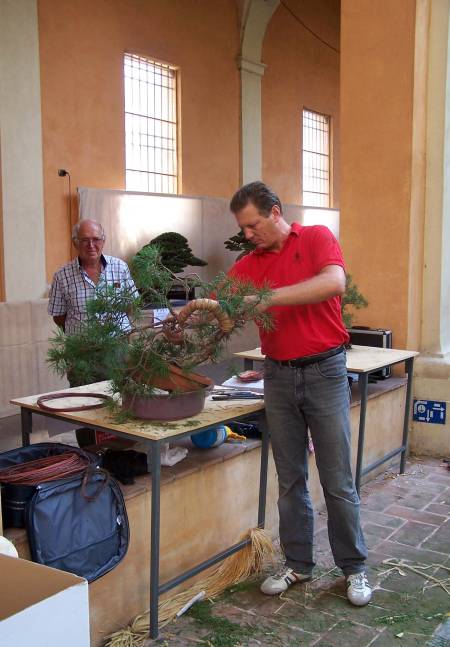
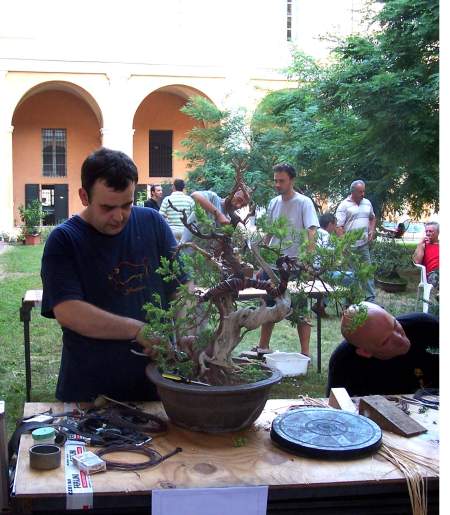
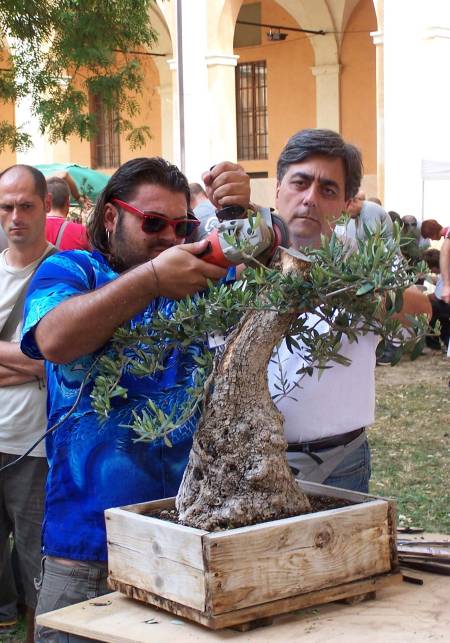
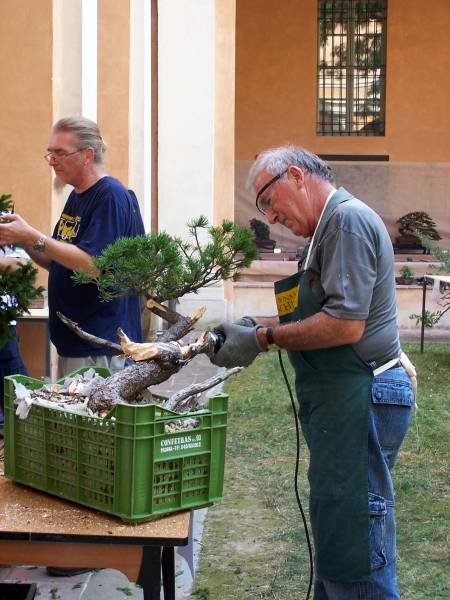
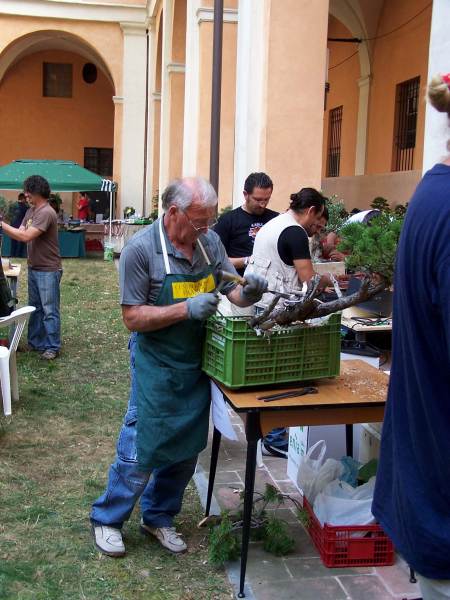
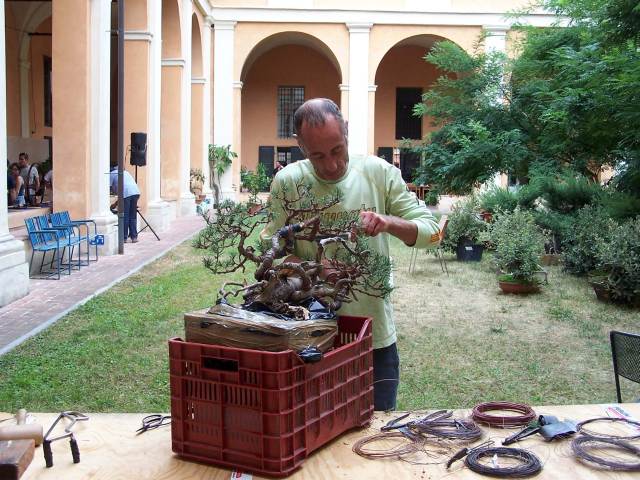
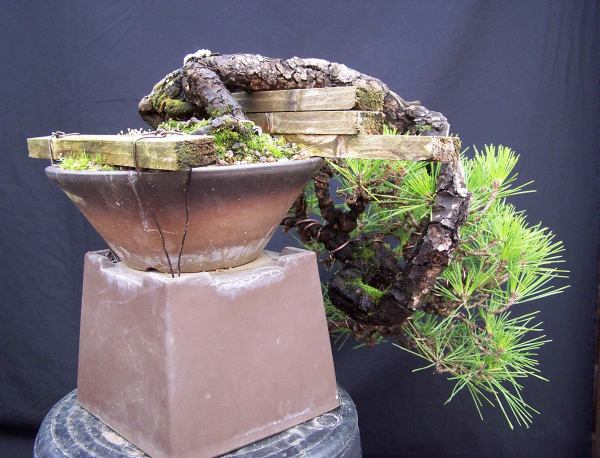
Right picture: Backside before styling. The blocks are there to hold the tree firm into place, while I am wiring it.


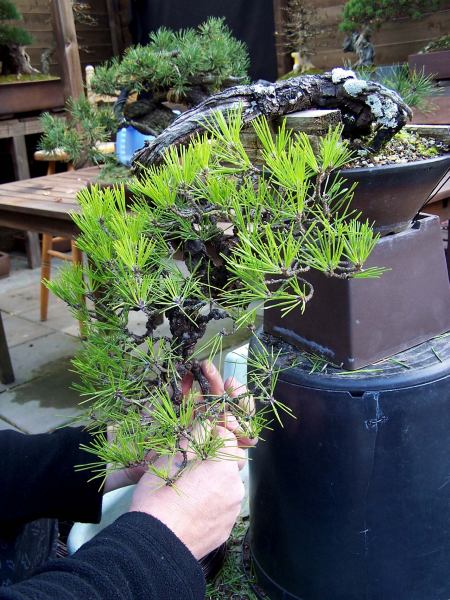
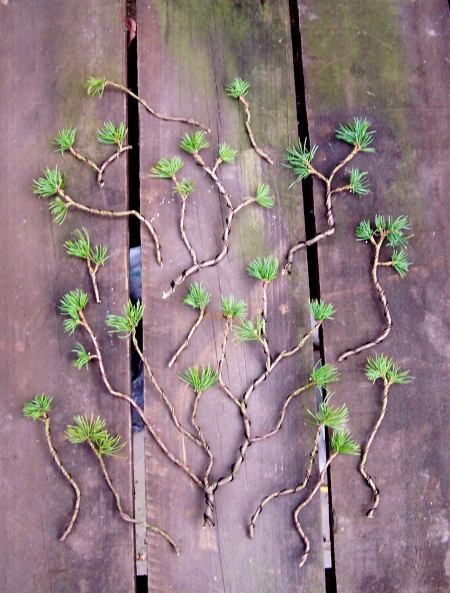
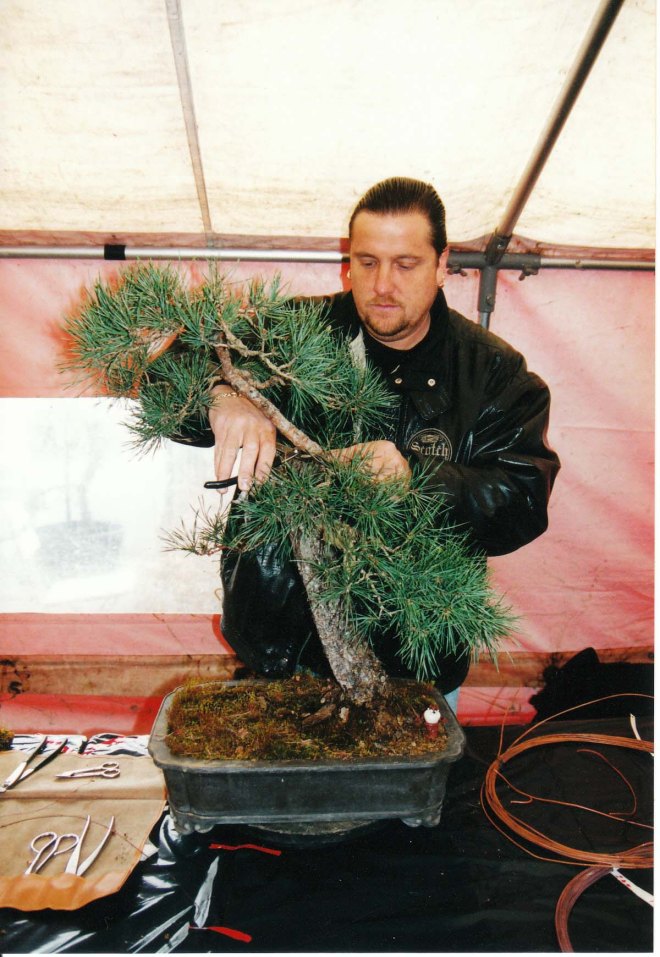
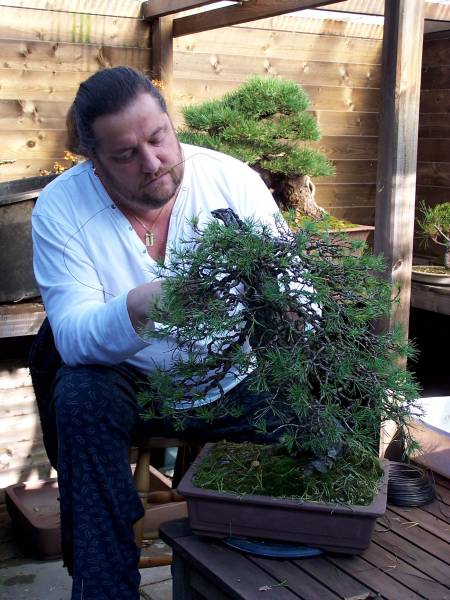
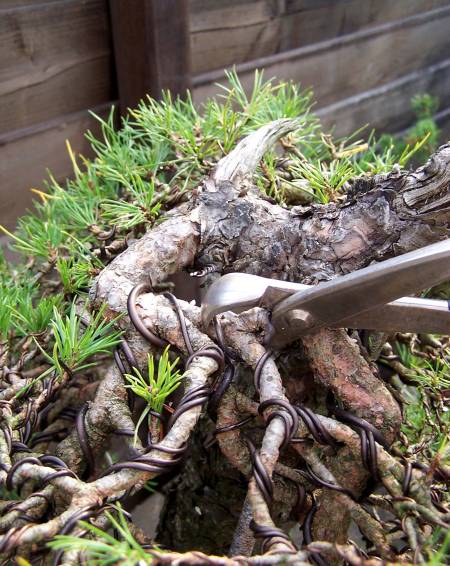
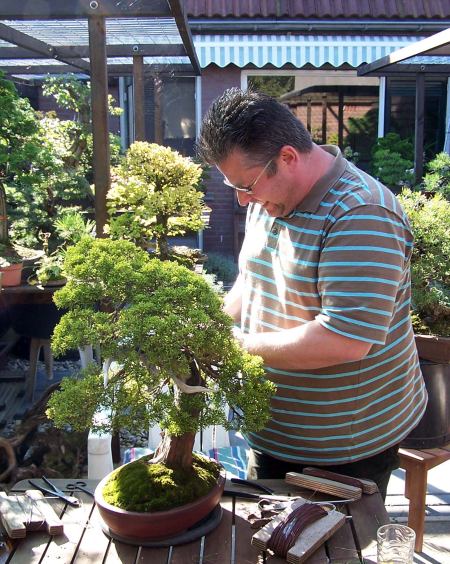
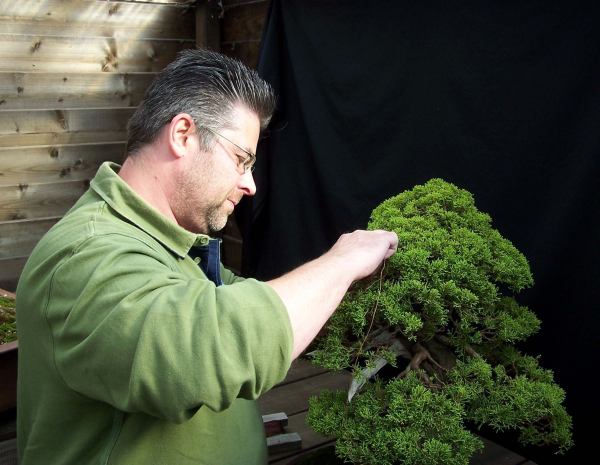
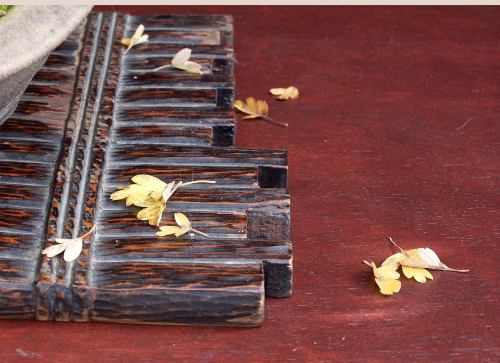
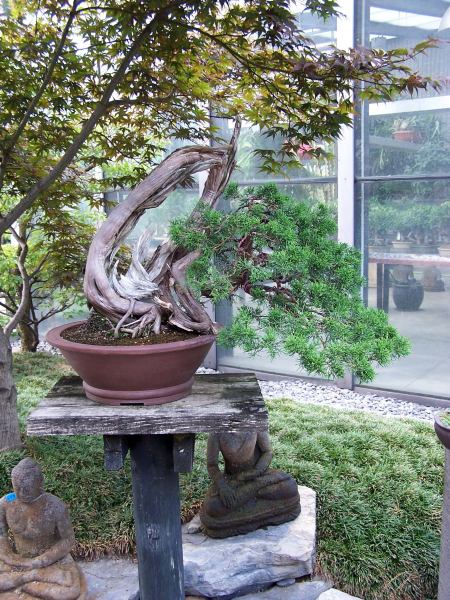
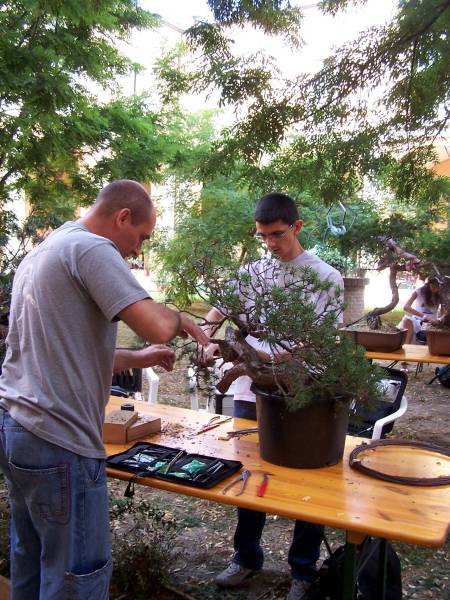
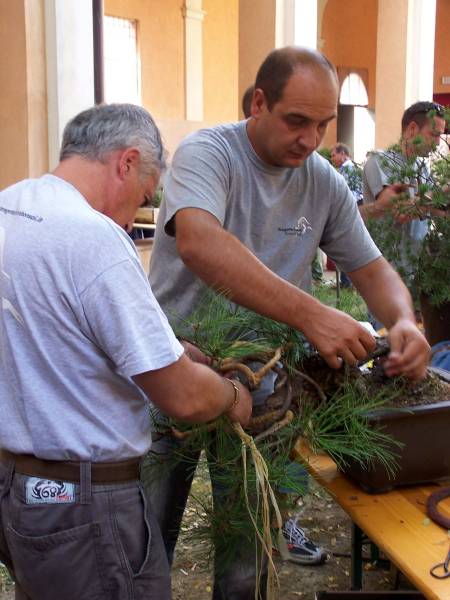
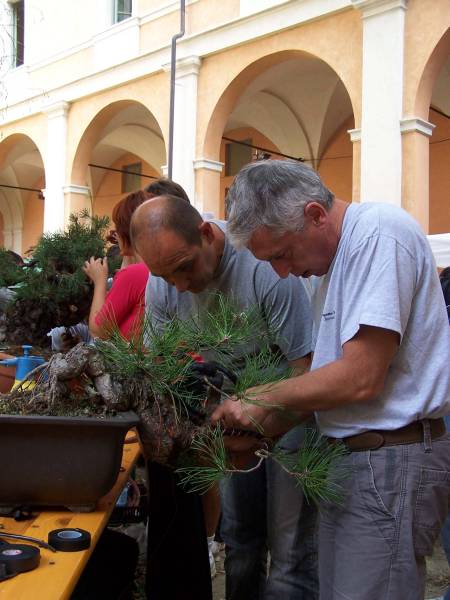
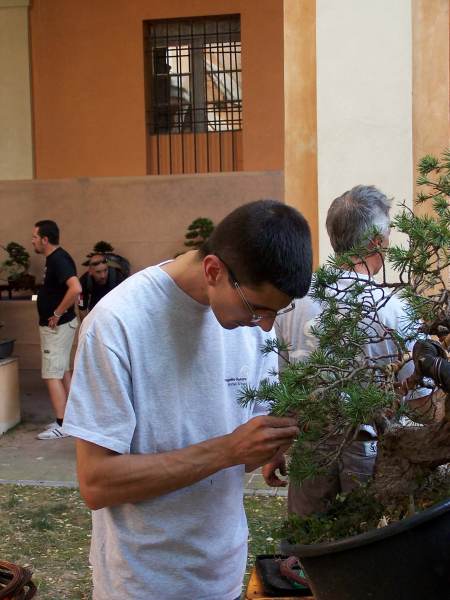
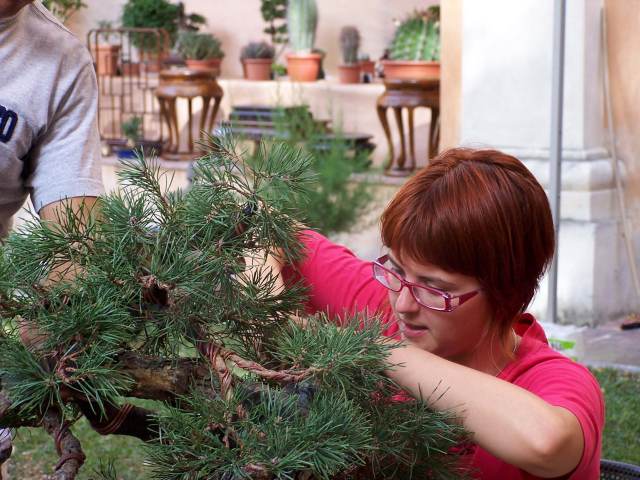
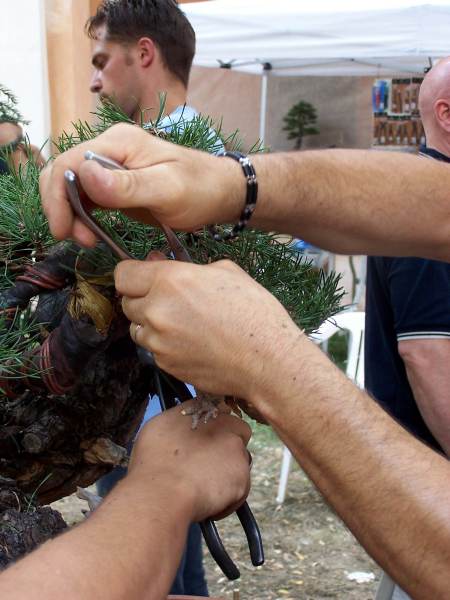
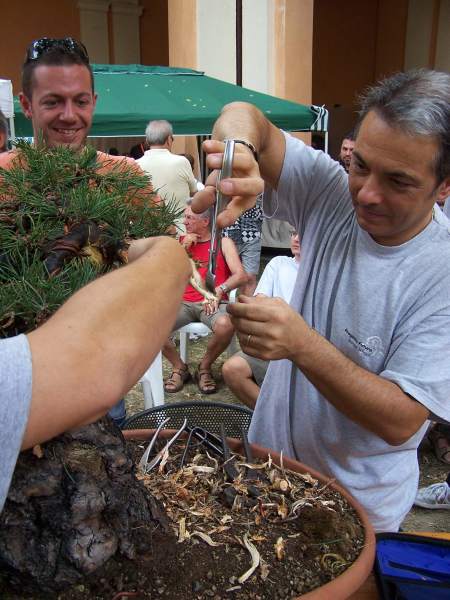
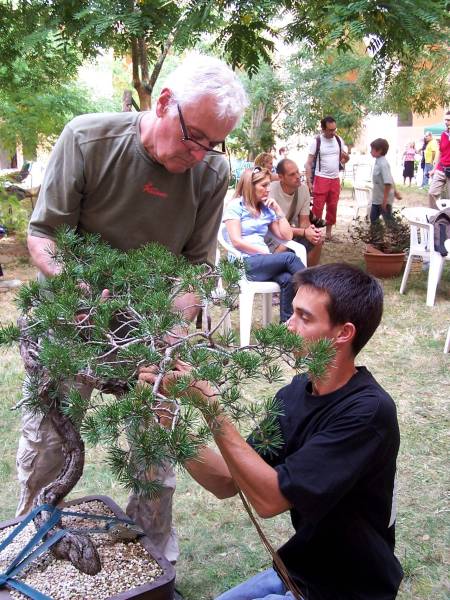
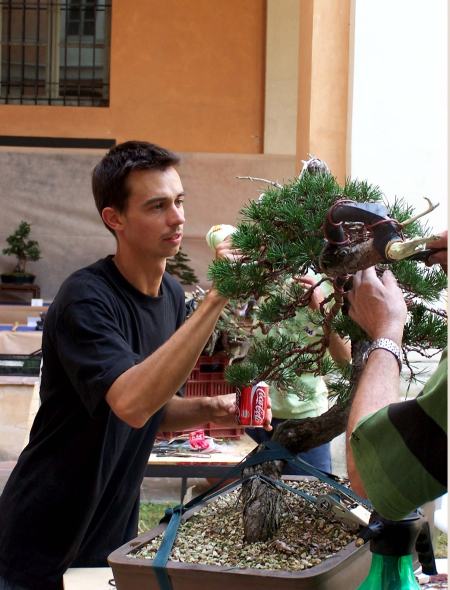
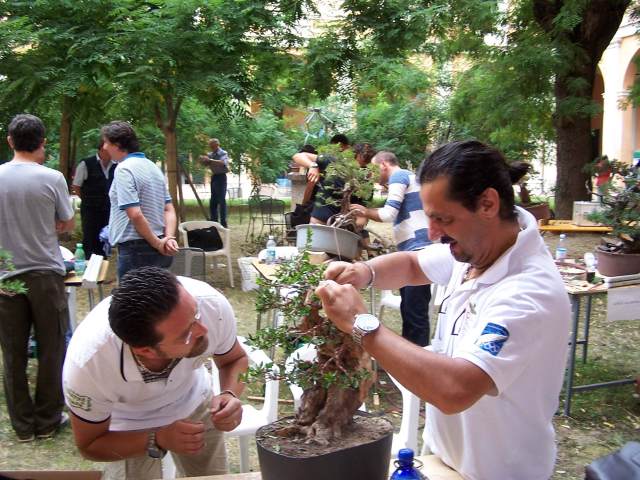
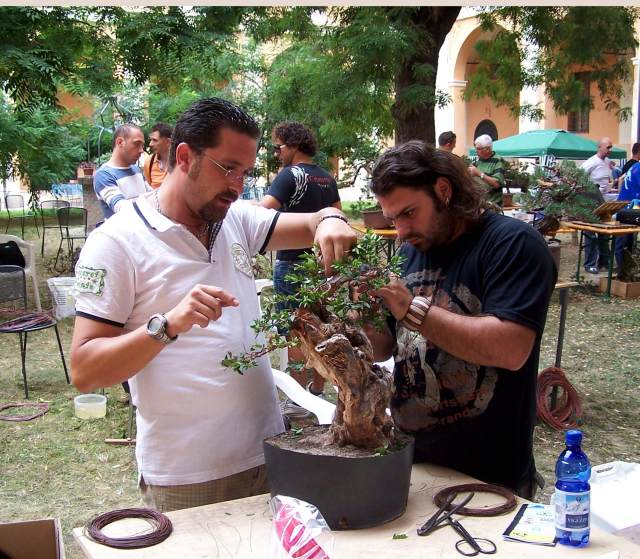
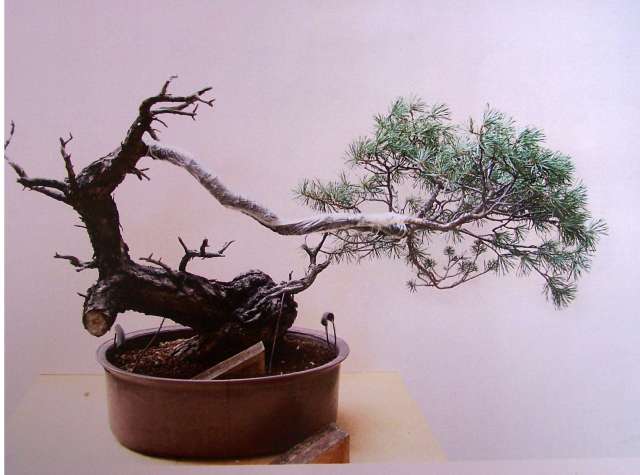
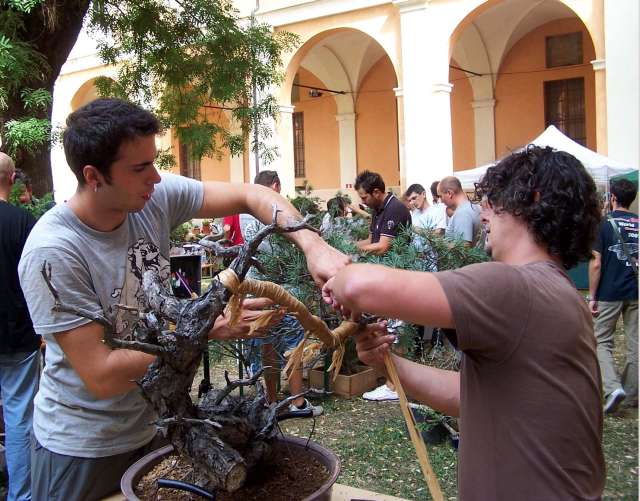
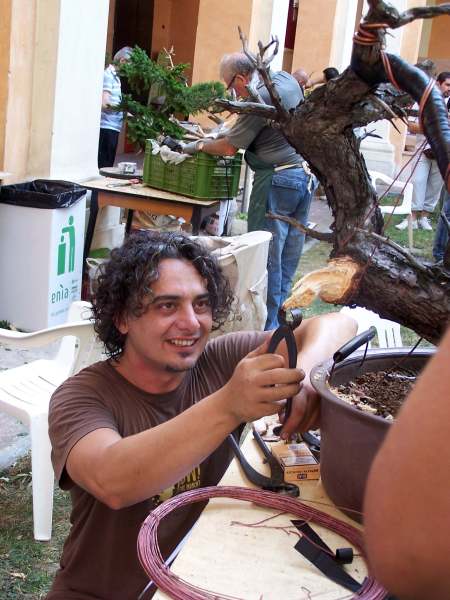
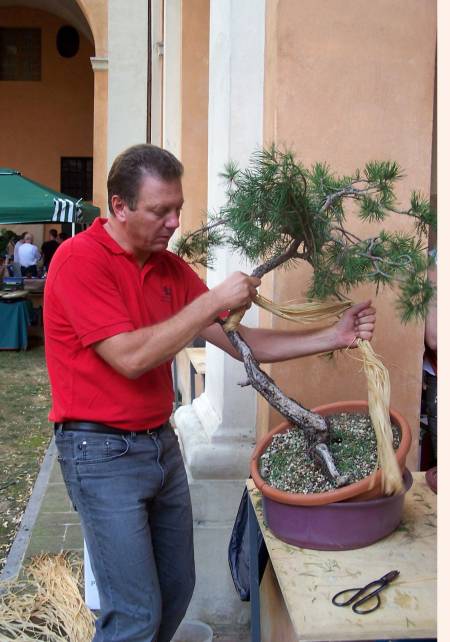
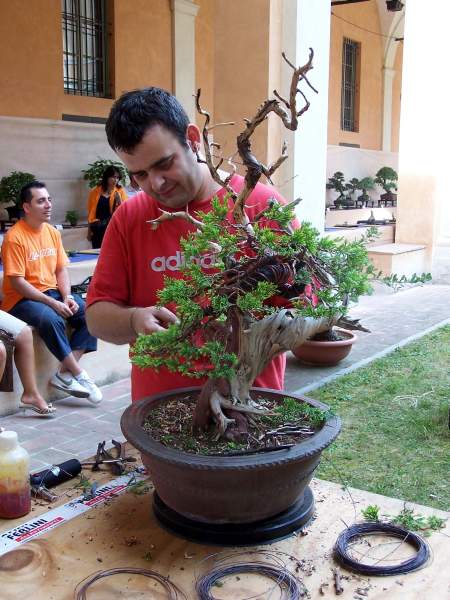
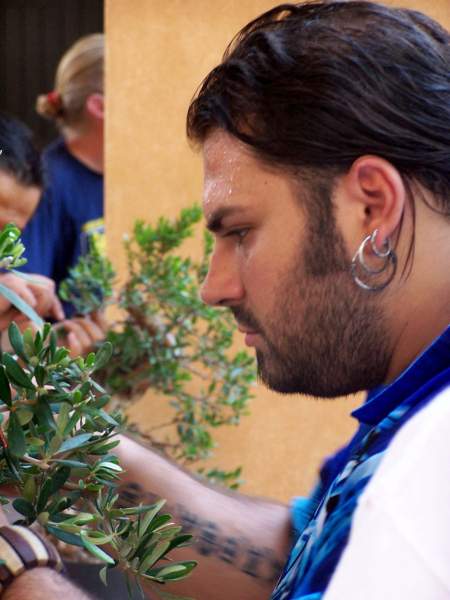
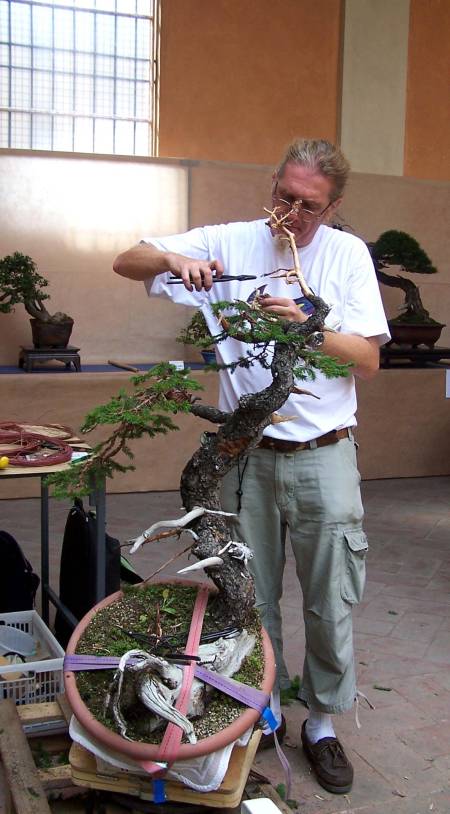
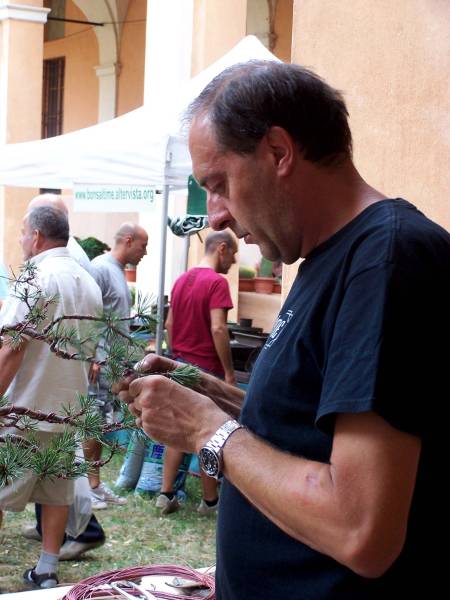
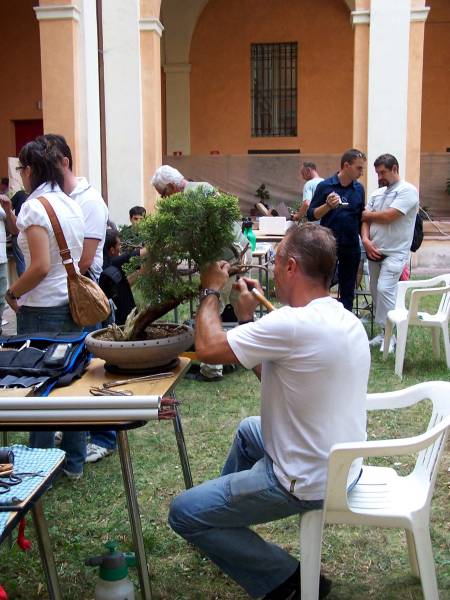
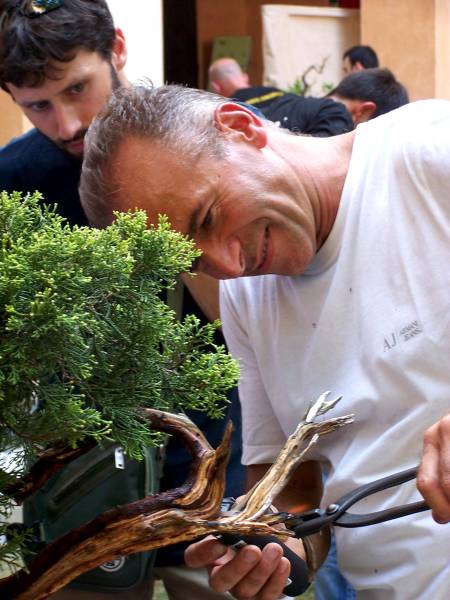
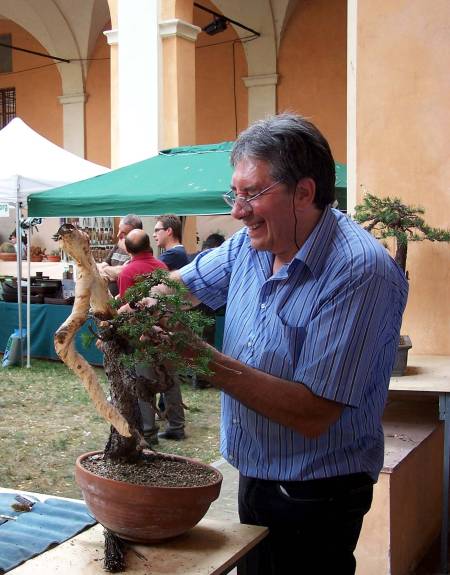
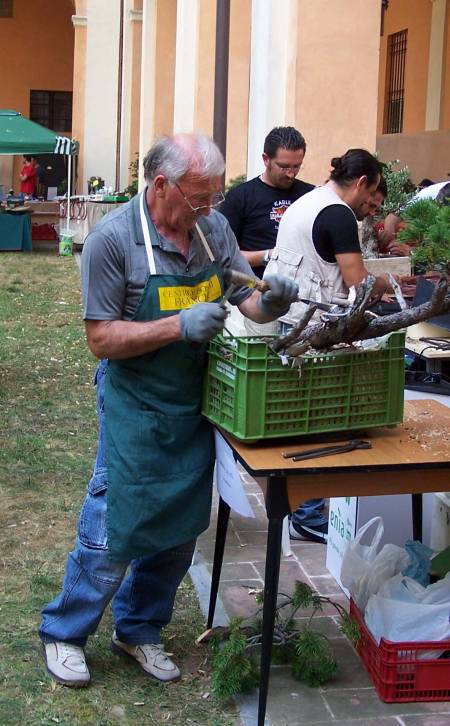
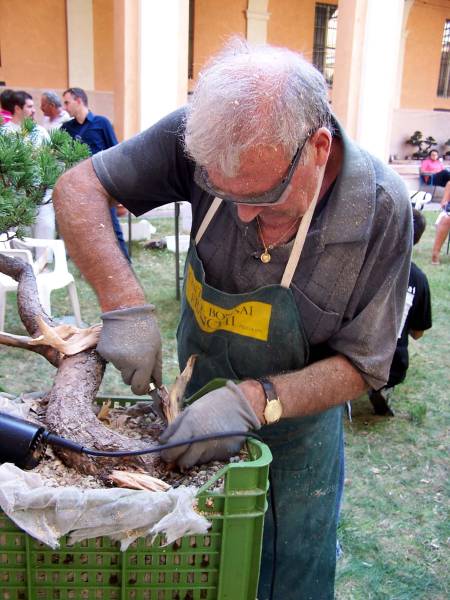
Left picture: After plucking the old needles, I carefully started to wire the branches, making sure not to damage the beautiful bark on these old branches! Because this old body armour shows the truly wild nature and spirit, that is so exclusive to a Yamadori tree. Therefore it should be protected at all cost! I try to build my design around these natural features, even the ugly ones, trying to incorporate and envisage them. I just love Yamadori!

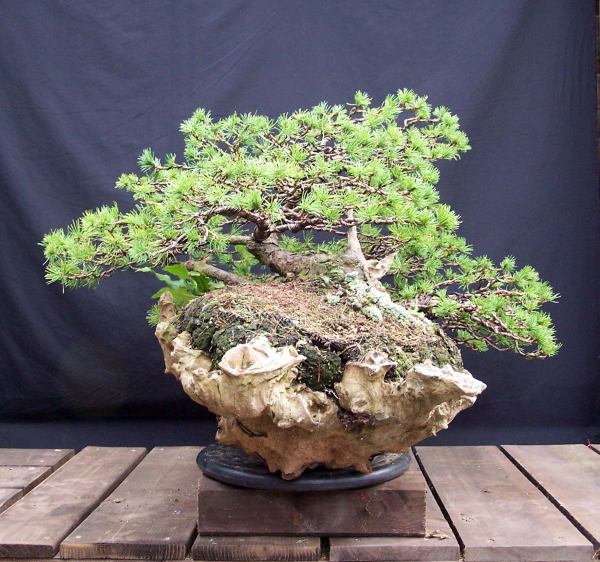
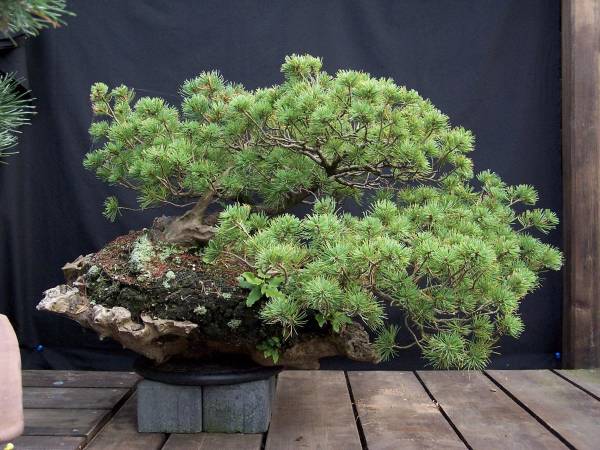
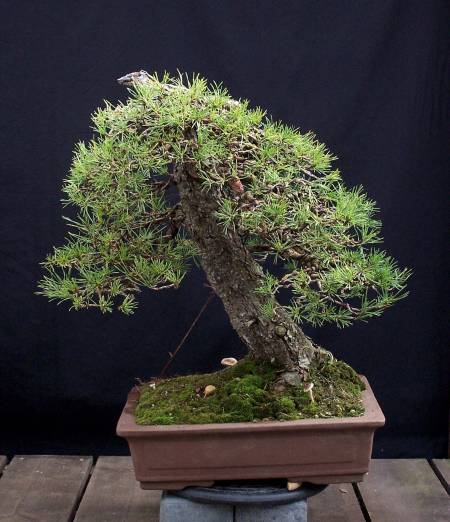
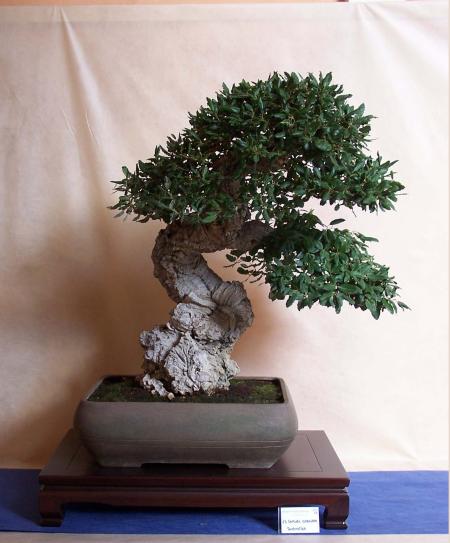
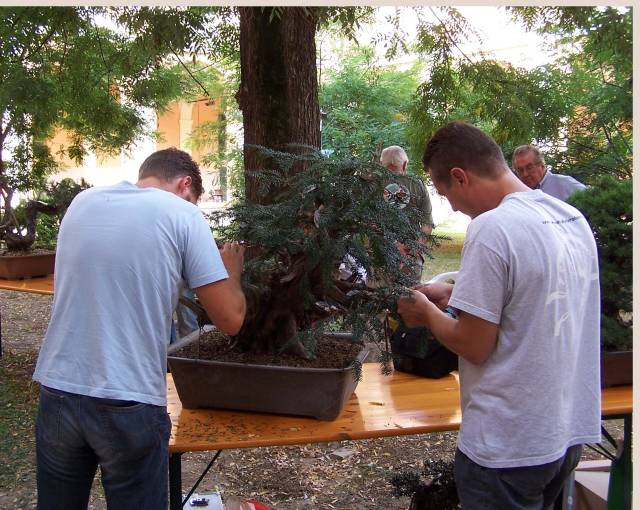
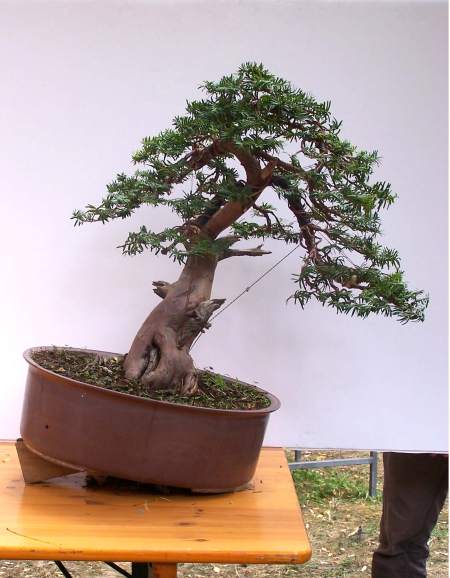
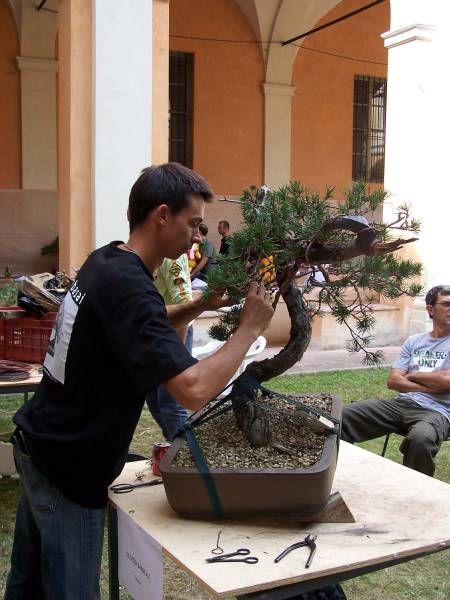
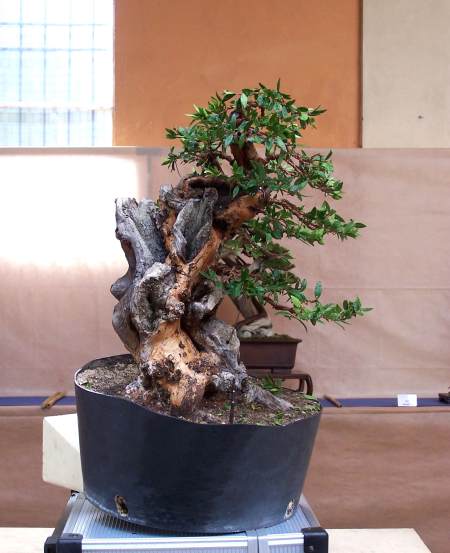
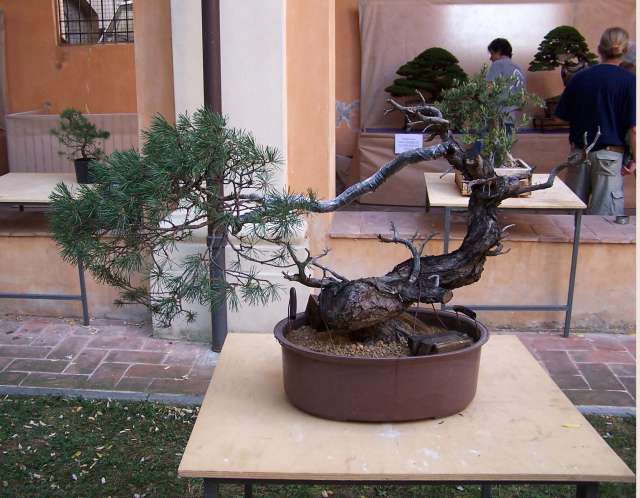
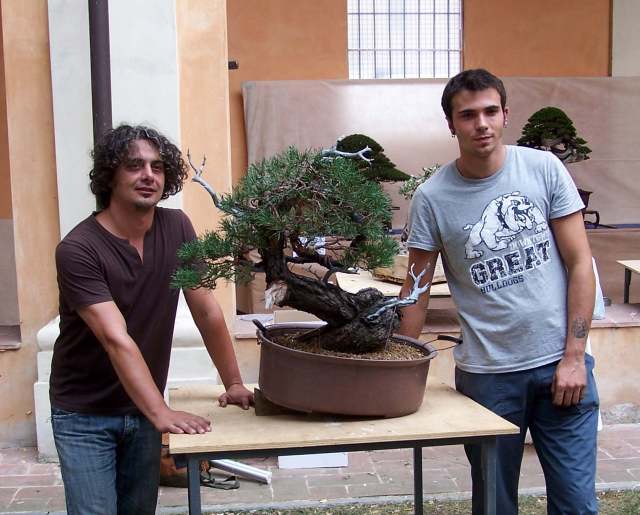
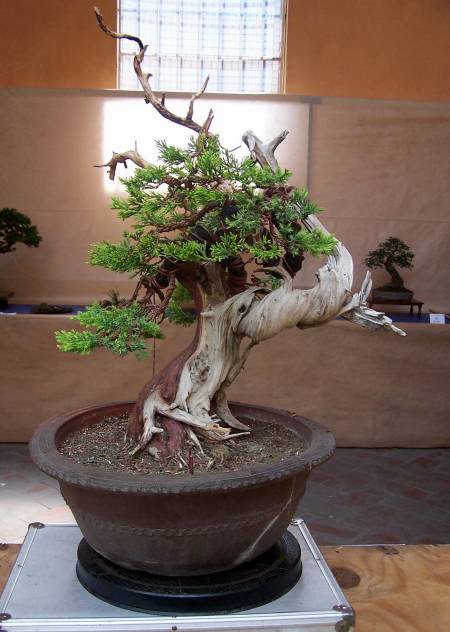
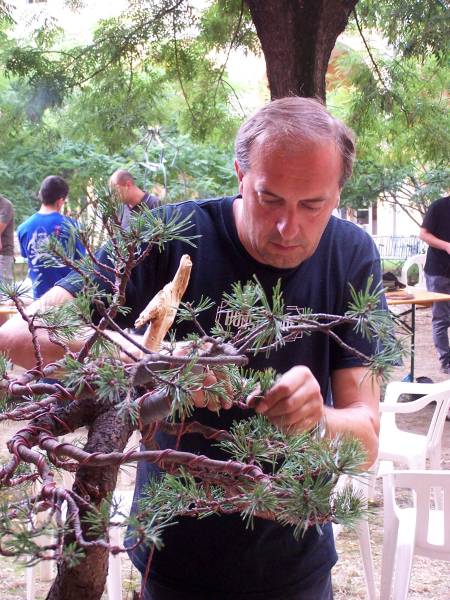
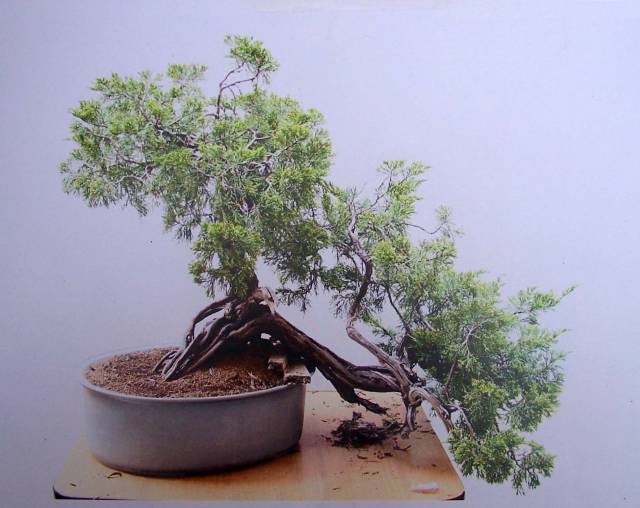
Today, in lovely sunny weather, I finished the styling of this Pine. The blocks are removed from under need the tree, so now you can actually see, the “see through” between the trunk and the soil surface. You can clearly see that this tree is just barely hanging on too the ground and live, with only some exposed and battered roots. I like the image this little tree evokes with me, trough all her struggles, she has become beautiful! I hope you like her too? 🙂

Regards,

Hans van Meer.

Info: karamottobonsai@hotmail.com

——————————————————————————————————–

RESTYLING MY JAPANESE WHITE PINE TRIPLE TRUNK.

Hi, everybody

Because of my lower back troubles, the wiring of this tree was stretched out over much of last week. I had to do most of the work sitting down, simply because I can’t stand upright for very long at one time and I just hate to work like that, it is so clumsy! But yesterday I finally could start repositioning the branches and it took me 4 hours to do. I had to rethink the way I styled the tree in the first place all those years ago, not so much the feel or image of the tree, but the way the small branches had to be placed. Japanese With Pines hardly bud back on old wood in my climate and so most of the smaller branches had grown out a bit too long to style the tree as compact as I prefer to do in my styling. I could have made the image of the foliage pads more dense, bud that would have meant that I have to curl and twirl the branches to bring them closer in, and that is something I will always try to avoid in my designs. I planted this (then 5 trunks) Pine on this piece of petrified wood to create a coastal rock image, somewhat in the middle of a more classical Japanese style and the once I used to see and play on as a child on the French Riviera during our vacation there. The outcome of that demonstration, back then, was pretty compact because the foliage pads could be build up in the traditional way, making the tree look full, in the more traditional way. But now, with the usable foliage growing much further away from the main branches, I had to rethink my design and try to get a more or less same feeling, but build in a different way. This time around the tree would look much more open, more like the battered Pines that I have seen growing along the coasts and the beaches in southern Europe, showing more open space between the small branches that now play an intricate part of the design, instead of covering them up with dense foliage layers. This way of placing the thin long branches reminds me of some of the techniques that the Japanese artists use to style literati Japanese White and especially Red Pines, were the open light branch structure becomes the main focal point of the image of the tree.

                                                 Below: Front before styling.

                                                Below: Left side before styling.

Below: Detail of the backside before styling. You can see the mesh that holds all the ground into place because all the Kato (river muck) has fallen off from this side, this Kato will be replaced later and will then be covered with moss.

                                            Below: Backside before styling.

                          Below: Wiring, sitting down like this, takes forever.

                                   Below: The cascading front branch wired.

                             Below: Too long branches were removed as well.

Below: Useless long branches with hardly any foliage on them were removed.

Below: Here the basic shape is brought in to that same centre front cascading branch.

                                             Below: And some more shape.

Below: And the other branches are being slowly brought into their desired position.

Below: Close up of the two branches that rest on the ground, like the one I remember did, on those coastal Pines from my childhood. A piece of wood is just to raise the one in the back to create depth.

      Below: Left side after styling. And the same goes for this view of the tree.

Below: Right side after styling. In this view of the tree, you can appreciate the dept/distance between the front branch and the back branch. 


The picture above: So this is how the tree looks after this long restyling. But sadly, because of the poor lighting conditions when this picture was made, it appears to have not much depth to it from this front side! It looks Rather flat and without much separation between the different layers of foliage. As soon as the rest of the work is don and the lightning is better, I will make some new once to show the end result a bit better! Now the (bottom) sides, were the ground has fallen off, needs to be re-plastered with fresh Cato (Japanese clay) and powdered Akadama mixed in water. After this messy job is don, It will be covered, like the rest of the ground surface, with all kinds of mosses. But that is a nice job for later this winter! first, as long as the weather permits it to work outside for a long period of time, I will wire another tree that needs to be restyled.

Hope you like it so far?

Hans van Meer.

Info: karamottobonsai@hotmail.com

——————————————————————————

——————————————————————————————————————-


My first styling job of this season: A “Pinus sylvestris” Yamadori from Sweden.

Hi, everybody,

Last week we had a spell of lovely weather, so although my back is making it hard to work for very long, I enjoyed every minute I worked on this old Yamadori, Sylvestris Pine!

Below: I scanned a before and after photograph, they were shot during the demo I did on this same Pine in Denmark in May 2000, together with the rest of the “former “Tsunami” gang. This tree was a few years earlier styled by Farrand Bloch.

                                          Below: After that demonstration.

              And here are some pictures I made of the styling work today.

Below: Because of my lower back problems I had to sit a lot during the wiring, something I normally never do. But he, the sun was shining so who is complaining!

Below: Branches that took many years to grow, had to be sacrificed, to open up the dens foliage mass a bit more.

Below: for many years this tree had been, more or less, allowed to grow freely and received nothing more than a sunny spot and a lot of T.L.C. During that time, my work was mostly focused on getting more and better ramification and foliage in the right places. Because of all this time-consuming work, I was now able to cut off some badly placed thick branches and replace them with the better placed new branches with foliage closer to the trunk. Making the tree more compact, but less full.

Below: (here the tree is seen from the back) The frond branch (A) needed to be pulled backwards considerably, but because I did not want to damage the old bark, I could not put heavy wiring on it to do the job. So I needed to use a copper wire to pull the thick branch backwards, but there was no place where I could secure the copper wire too! The only place, with the right angle, to pool the branch back from, was the corner of the pot (C). But that meant that the beautiful old bark of the trunk would get damaged by the wire at point (B) and that should be avoided at all cost, even on the backside of the tree! So I placed a long piece of metal along the back side of the tree that only makes contact with the bark at point (D) and (E), but it protects the bark from damaging at point (B). Sometimes you have to be inventive, to be creative! 🙂

                  Below: Finished ( for now) front side, after 8 years of work. 

                      Below: Backside. Notice the “Komodo dragon” on top  🙂

Much more work needs to be done in the future to get the tree to were I want it to be, but for now, I am pleased with the result. The tree received heavy doses of fertilizer in the later part of this growing season, to promote strong growth for next season. Most of the then hopefully strongly grown new candles, will be removed next year to promote back budding so that the tree can fill out the new canopies I created during this styling session. Yet another step in the life of this tree on its way to becoming a Bonsai.

Cheers

Hans van Meer.


Info: karamottobonsai@hotmail.com

————————————————————————————————–

MY STUDENT “ED VAN DER REEK” HARD AT WORK ON HIS “ITOIGAWA” JUNIPER.

Hi, everybody,

I would like to share some pictures I shot of my student Ed van der Reek, who has, spread over the last couple of weeks, been hard at work in my garden styling his “Itoigawa” Juniper that he bought from me some time ago. Ed is fun to share with, the little Knowles I have of Bonsai. His great progression, humour and enthusiasm are a great inspiration to me. And the much-improved image of his Bonsai is getting better and better. He made some brave decisions on this one!

If he now could only stop drinking all my Coffey, things would be just great!


Updates will follow!

Cheers,

Hans van Meer.

Info: karamottobonsai@hotmail.com

———————————————————————————————


MY LITERATI “HAWTHORN” IN BRIGHT AUTUM COLOURS.

Hi everybody,

today I spend most of, probably one of the last real sunny days, shooting pictures of my Hawthorn (Crataegus monogyna) Literati. The tree is in early full Fall colours this year and the leafs seem to reflect the sun in bright yellow light.

I used a standard Kodak easy share camera on a tripod, on ISO 200, between f 3.6 and f 5.0, and between 1/125 and 1/250 to get this intense yellow reflection from the foliage. Direct sunlight, that hits the tree from the right, was filtered and 2 reflecting white hard boards were use to reflect light on the Bonsai. One from the left side and the other one from below/front of the tree. An umbrella above the camera to avoid direct sunlight hitting my lens and then I shoot more than a hundred pictures! The intensity of the bright yellow reflection seemed to increase every minute, as the sun moved through the sky. I love making pictures like this, that show the contrast between the rough old bark and the soft lines of the yellow leaves. I hope you like them too?!

Regards,

Hans van Meer.

                                           It sure was a nice day, today!

Cheers,

Hans van Meer.

Info: karamottobonsai@hotmail.com

—————————————————————————————–

MY MASTERCLASS IN LEERSUM (HOLLAND)

Hi, everybody,

Last Wednesday I had the pleasure to give a masterclass in Leersum (Holland).  Every year they organize 4 to 6 of these masterclasses led by skilled teachers like Mark Noelanders, Hotsumi Terakawa, Carlos van der Vaart and Teunis Jan Klein to name a few. During that evening they discuss the trees that the club members brought along. In this way, they almost get one on one answers or advice about training technique, styling advice and maintenance. I enjoyed my self that evening, although I lost my voice from talking all evening! I found this to be a great way to share my knowledge with the bonsai enthusiast that attended that evening! I thank them for their trust!

Here are some images that Hans Khoe shot during that evening, thank you for that Hans!

                                     Below: Making a design for this little Pine.

       Below: I love to convey my ideas or design suggestion trough drawings.


Next stop: BURRS (UK)! YES!!!!

Hans van Meer.

Info: karamottobonsai@hotmail.com

—————————————————————————————————


Some Lazy Sunday Work On A Acer Buergerianum.

Hi, everybody,

I did a lot of joy full Bonsai work on this unexpected Sunny Sunday afternoon. Just little things, here and there. Some cutting, some bending, some cleaning of old needles and leafs, just the fun Bonsai stuff on a perfect lazy afternoon. One of the trees I worked on today was the Acer buergerianum in the picture below. This tree is more than 12 years under my care now and during that long time, it was always one of my favourite projects that came along nicely. When I bought the tree, it had just a few little and ugly placed and deformed branches. And a lot of ugly scares from bad wound treatment! So I worked all those years towards better ramification and everything looked very promising until 3 years ago! During that winter, the tree lost 1 important branch and most of it smaller ramification! So its image was destroyed!

But with a lot of love and care, the tree recovered and today again shows a lot of healthy growth! It those needs some more small branches and finer ramification to get to the image I have in mind. But I am already very happy to see that the tree is willing to give me a second chance, it made me smile! I hope you like it?

Cheers,

Hans van Meer.

Info: karamottobonsai@hotmail.com

—————————————————————————————————

PICTURES FROM THE XVII MOSTRA NAZIONALE BONSAI_SUISEKI SHOW “GIAREDA” IN ITALY

Hi, everybody,

Last weekend, I was invited to Italy, by my dear Bonsai friend, Enrico Savini. He had asked me to be the judge of the annual demonstrator’s competition during the XVII edition of the MOSTRA NAZIONALE BONSAI-SUISEKI “GIAREDA” event. And of course I sad yes!

Enrico Savini, Mauro Stemberger and Ivo Saporiti, were this year’s organizers of this important event and I think that they and the many volunteers that helped, did an amazing job!!!! This show proved once more, that the Italian Bonsai scene is very alive and full of New and old top talent! And the Bonsai….well some of them were breathtakingly beautiful!

Early on Thursday the 5Th, I made the short plane trip to Milan, were on arrival I was reunited with my old “BURRS” friend Ivo, in which house I was (A well-fed) guest. 😉

On the rest of that first day, we managed to visit “Picci Bonsai” and Nippon-en bonsai in Milan, before we had a nice meal and then it was off to bed!

Next day we had to get up really early to make it in time to the event! It was 2 hours long drive that caused a lot of yawning from all of us! But after I finally arrived at the venue…no, when I walked in the wonderful setting of this venue, I was impressed, very IMPREST and very awake! This was the most perfect setting I had yet seen!

During this weekend I saw some of the best bonsai that I had ever seen, that where showed in one of the most perfect places, that I had ever seen and literally in the middle of all that Bonsai Bliss, there were more than 10 of the best Professional Bonsai teachers in Italy demonstrating their talents on amazing and sometimes very difficult, but exciting material! And it did not stop there, because there were, even more, very talented Bonsai students from the “PROGETTO FUTURO” Bonsai school, were Enrico, Mauro and Ivo are teachers, working on amazing Yamadori. Together they all were demonstrating, with great result, on some unbelievable raw material! This was really a Bonsai spectacle that I wish every Bonsai nut could see! It was pure magic for me to be amongst all this talent, Bonsai beauty, superb material and friendliness! And I hope that the pictures that I post here can evoke some of that feeling with you!

* CLICK ON PICTURE (THUMBNAILS) TO ENLARGE!

Below pictures: Ivo Saporitti garden.


Below pictures: Picci Bonsai centre (Milan) Italy.


Pictures below: NIPPON-EN Bonsai centre (Milan) Italy.


Below pictures: Impressions of the venue and the Bonsai in the exhibition.


Pictures of the 2-day demonstration, performed by the talented students of the PROGETTO FUTURE BONSAI SCHOOL.


Below pictures: Demonstrations from the pro/teachers.

Demonstration by 1st place winner: Olivier Barreau (France)


Demonstration by 2nd place price winner: Zino Rongo. (Mirtus)


Demonstration by 3rd price winner: Roberto Raspanti. (Taxus baccata)


Demonstration by 4th place winner: Alfredo Salaccione.  (Pinus sylvestris)


Demonstration by the 5th place winner: Samuel Corazza.


Demonstration by Francesco Santini.


Demonstration by: Antonio Conte.


Demonstration by: Nicola Crivelli.


Demonstration by:


Demonstration by:


Demonstration by: Donato Danisi.


Demonstration by:


Demonstration by: Armando Dal Col.


Demonstration by: Matteo Caldiero.


Demonstration by: Renzo Pooli.

Demonstration by: Paola Nastasi.


I hope you enjoyed it? If you have some nice pictures of the end result of the teacher’s demo’s, please email them to me! And please email me the missing names of the people in the demo pictures?! As you can see I don’t have all of them complete! karamotto@hotmail.com thank you!

Cheer,

Hans van Meer.

Info: karamottobonsai@hotmail.com

——————————————————————————————