
Hi, everybody,
I wanted to tackle the subject of downsizing the image of a full-size tree into a compact miniature version. Off course Bonsai is not the simple copying of trees from nature, but to understand how it works can help you to realize your own ideas. I will use an imaginary example of a 50 cm/20 Inch high Bonsai and will, later on, use two of my own Bonsai of that same hight to make things clear!
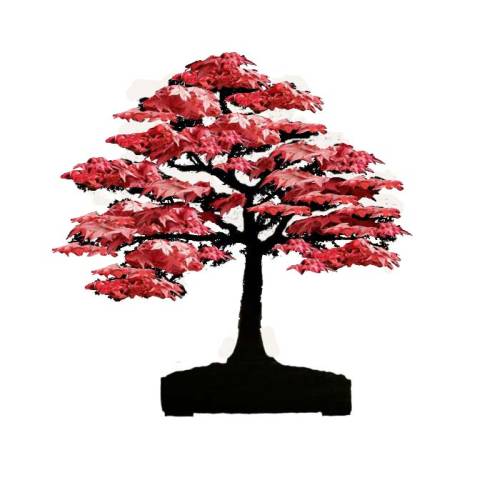
After surging the web, I have found a wonderful dark silhouette image of a tree to use as an example.
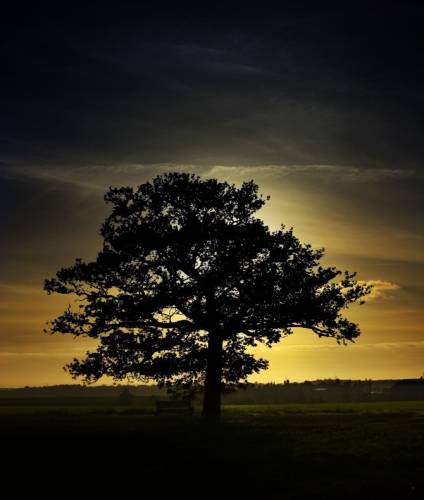
The above silhouette gives use enough info we need to recognize what it is. Even without the wooden bench underneath the tree, we can figure out how tall, big and fare away from us this tree is. So if we use these same features that give us all that info in our Bonsai, we will at least end up with the right proportion in our little tree. And that is not a bad start, believe me!
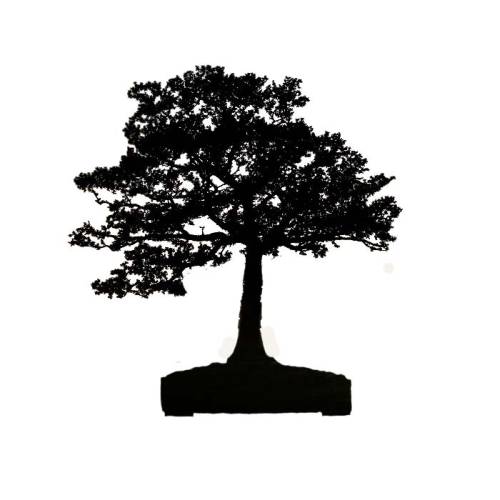
Above: So here is the silhouette of this tree more clearer to see. I have removed the two small branches that were growing low on the trunk, to make things clearer to see. And while I was at it, I planted the tree in a Bonsai pot. Looks good already, doesn’t it?
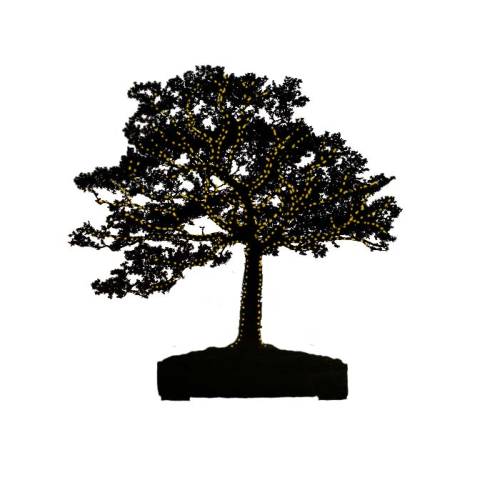
Above: The yellow dots show the outlines of the frame/skeleton of this tree. This design as Bonsai would be about 20 inch/50 cm high and material with a trunk and branches like this can easily be purchased from any Bonsai dealer that imports Acer palmatum or Ulmus but for example, a Beech or Hawthorn would do just as easily! But the amount of foliage you see here would be hard to archive with the too large foliage of most deciduous species we could use to create this image with as a Bonsai. So we should divide the messy foliage into more compact and well-outlined foliage pads. Doing this, we will create more open spaces, that clearly open up the foliage pads from each other.
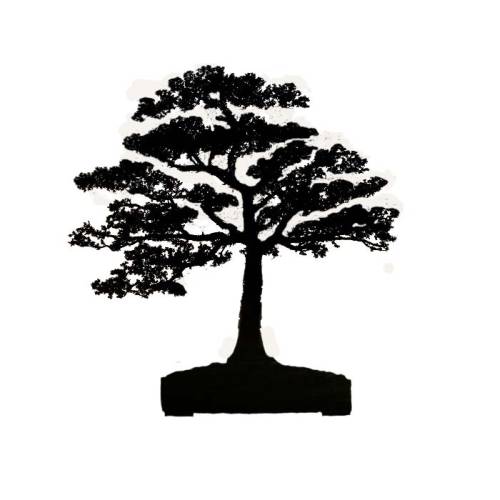
Above: Here I created some clearer open spaces between the foliage layers. It is the same image, but this time it is doable to shape it as a Bonsai. In principle, you only have to fill those outlined foliage pads with the larger leaves of the species you use to create this image.

Above: Here I filled these foliage pads with the foliage I borrowed from my own Carpinus betulus with exactly the same size as this imaginary Bonsai 50 cm/ 20 Inch. I placed the silhouette and a picture of my Carpinus next to each other and then cut and pasted the foliage onto the silhouette. So the size of this foliage in comparison to the trunk and height are accurate. So as you can see this could already be doable and believable as a Bonsai.
Above: Here I filled those foliage peds with the foliage of my same sized Acer palmatum. Again the size of the foliage is accurate. So again, doable and believable!
Even though like in most Bonsai, the leaves are monstrously big in comparison to the tree image we have created, the outlines of the trunk, branches and foliage pads are correct, making it a believable image that reminds us of the trees we see in nature. Just like the painter, who only uses a few brush strokes to paint all the foliage of a large branch, we sometimes only use a few leaves to create all the imaginary foliage of a large branch.
More tomorrow, I really have to get some sleep now! 🙂
Thanks for listening again,
Hans van Meer.
Info: karamottobonsai@hotmail.com
————————————————————————————————

Am I correct in assuming the trunk is about 3 1/4 inches in diameter?
T
LikeLike
Hi Tom,
how did you get to that diameter? I used the height of 25inch/50 cm for this tree as a example, becouse that is more or less a often used height for deciduous Bonsai. And in this height, with this trunk/branch diameter it is possible to find several species that fits this descriptions. Just like the two of my own Bonsai I was going to use the foliage from. They are about that same height as the imaginary Bonsai. So I had a image of the sillouette and one of my own Bonsai next to each other, both the same size. And than I cut and pasted the foliage on to the sillouette. So the foliage you see on the end result is more or less the right size. Off course all this is just used as a example and no exact science, I mist most off those classes! 🙂 And this is not realy about how to style a Bonsai, it is more meant to show the possibilities and importance of open spaces in Bonsai design.
I hope this answers your question?
Cheers,
Hans
LikeLike
ha ha! 20 inches high divided by 6 = 3 1/4 “.
John Naka’s ratio of trunk diameter to tree height. I was just wondering.
T
LikeLike
Sorry, I didn’t mean to get off course.
T
LikeLike
Hi Tom,
OK, now I understand how you got to those numbers HAHA 🙂 I dont want to argue with John Naka, but with those ratecios it would be hard to creat a slender deciduous tree like I use in this example. I believe it is better to rely on your feelings and eyes, than to use golden rules in designing a Bonsai. Because they only work in a perfect world and even then you would end up wih a lot of Bonsai that all have the same measurements. But thanks for the input!
Cheers,
Hans.
LikeLike
The reason I asked is I am just learning how to create a bonsai from garden center material. Not having your natural ability to “see” a potential bonsai in rough material, I have to use some basic rules of thumb for now. I am studying the work of those who i think are the best; Naka, Pall, VanMeer. Not necessarily in that order! HAHAHA!
T
LikeLike