PICTURE OF A BRIGHTLY GREAN “LARCH” BONSAI.

Hi, everybody,

Today I shot some pictures of one of my “Larch” trees. This is one of my first yamadori trees I ever designed and I am really fond of it. About 3 seasons ago, I almost lost this fragile tree. Some of its major branches were lost during a very hot Summer in a small pot! I kept those dead branches on, because, for now, they are a part of this Bonsai history! After that season, I planted the weakened Bonsai into these beautiful, but too big, Brian Allbright pot, so it could recover from its ordeal. With a lot of love and care, I managed to nurture it into the bright green health, it shows in this next picture. Even though it is only a small tree, this Bonsai shows great character and age after all these years of training it in a pot. I love the sense of almost disbalance in this tree and the feeling of depth the back branches evoke. I hope to plant it in a better pot next year. I’m so happy that this little Bonsai is healthy again! I hope you enjoy it’s colour as much as I do?! Pot by Brian Albright (UK).

Cheers,

Hans van Meer.

19-04-2009-larix-186-web

Info: karamottobonsai@hotmail.com

—————————————————————————————————-

TODAY I FINALY DARED TO REPOT MY PRECIUS JUNIPERUS COMMUNIS.

Hi, everybody,

today I finally dared to repot one of my favourite trees. It is a Juniperus communis I collected in the Austrian Alps in. This tree has such great potential, but I decided to wait to work on it until I was fully convinced there would be enough new roots to support the tree safely through the stress of repotting it! This species is hard to keep alive after collecting and I was so glad that it had recovered so well after I brought it down from its mountain to my garden. In 1995, after I was convinced the tree was doing fine, I brought it along to the U.K to give it it’s first styling session during my demo’s at the “JOY OF BONSAI” show in “Bath”. After that, I allowed the tree again to recover from it all!

Picture 1: So today, finally it is time to have a look at the condition of the roots! Because I still can’t lift anything by my self, I had to work on the floor where the tree was standing.

Picture2: First I carefully removed the soil around the outside of the plastic container, slowly working my way inwards and downward, until I uncovered some healthy roots. Just like how I prefer to collect a yamadori in nature. In this way, the root ball would stay more or less intact and I would be able to lift the much lighter tree from the ground into it, for now,  new container.

Picture3: The long roots that I left on when I collected it, were rotted away at the ends, so I could remove them now, without harming the health of the tree. There were new roots growing closer to the base of the tree now, so I would be able to plant the tree into a smaller pot!

15-4-2009-m-001-web

15-4-2009-m-012-web  15-4-2009-m-013-web

Picture 4 and 5: Here you can see the tree in his new home. It is a too large pot, but for now, it will just be fine, I need the tree to recover first!

15-4-2009-m-015-web    15-4-2009-m-019-web

Picture 6: Because the tree was doing fine in its previous soil mixture, the new pot is filed up with the same soil it was growing in before!

15-4-2009-m-020-web

Picture 7 and 8: The tree in its new home. This is the first tree I have, that really has 2 good fronts! 🙂

15-4-2009-m-022-web

15-4-2009-m-027-web

15-4-2009-m-031-web   15-4-2009-m-035-web

15-4-2009-m-034-web

More to come!

Hans van Meer.

Info: karamottobonsai@hotmail.com

———————————————————————————————–

A PICTURE OF MY SMALL BLACKTHORN IN FULL BLOOM.

Hi, everybody,

here is a picture of a small Blackthorn from my collection. It is a Yamadori from the U.K that was given to me, a few years ago, by my dear friend Terry Foster. The upper half of this trunk is fully twisted around with a Shari running along it. And there is some Jin hidden amongst all those sweat smelling flowers! Next year I will find a more suitable pot for it!

Blackthorn "Prunis spinosa".
Blackthorn “Prunus spinosa”.

Hope you like it?

Cheers,

Hans van Meer.

Info: karamottobonsai@hotmail.com

——————————————————————————————–

A PICTURE OF “XL”.

Hi, everybody,

today was a lovely Sunny day, so I decided to make a  picture of the “XL”, so I could show you how it looks at this moment with its bright green coloured new foliage. It needs a lot more branch ramification, but the basic shape is there already.

I hope you like the progress of this tree?

Cheers,

Hans van Meer.

13-4-2009-xl-026-web

                                   Info: karamottobonsai@hotmail.com

——————————————————————————————–

MY WORKSHOP AT “ISS HOGAI” IN SUNNY EMMEN (HOLLAND)!


Hi, everybody,

I met Henk Steneker, the organizer of this workshop, during the Masterclass I did last year. There he asked if I would like to give a workshop in the following year at his relative new Bonsai shop “Iss Hogai” that is based in his new house in Emmen (Holland). Well, of course, I said yes and last weekend it was time for me to make the 2 and a half hour long trip to the North East of Holland. I made it in one go and arrived right in time for a warm welcome by Henk and a cup of coffee with cake! He showed me around his large garden that is being converted to a Bonsai garden with benches for his and his club members Bonsai and a large area to work. There is a nice indoor section in his garden to work when it is cold and raining or as in this case, rather hot! His club consists of a small but very enthusiastic group of Bonsai junkies, that had a great time during this sunny day! It is good to know, that there are so many people in Holland that are willing to make that extra effort to progress in their hobby! Because I know that improvement through working on Bonsai, will make this magnificent hobby, even more, enjoyable for them!

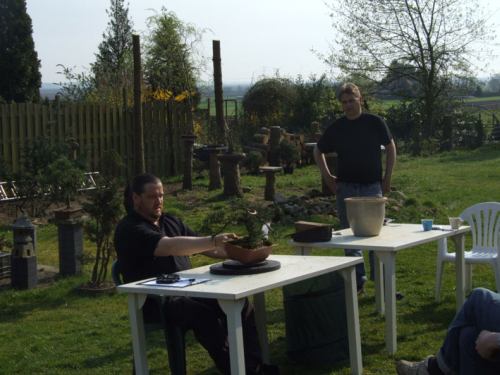
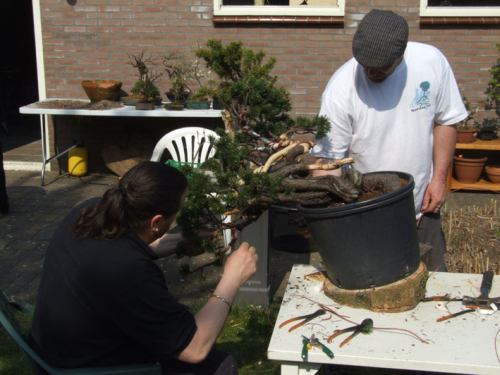
Below: First we started with discussing the trees that the students had brought along.

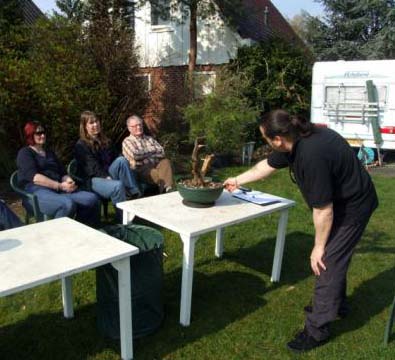
Below: One by one the unworked material, pre Bonsai or Bonsai were discussed by me.

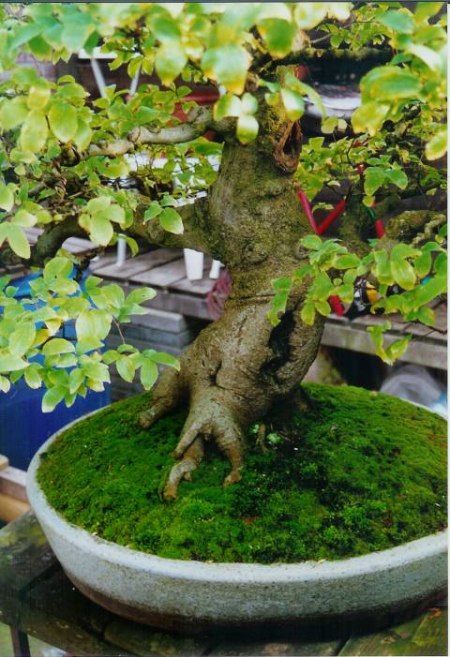
Below: Rene pulling my leg when he brought with a straight face a half-dead Ulmus to see how I would react and talked my way out of it without hurting any one’s feelings! 🙂

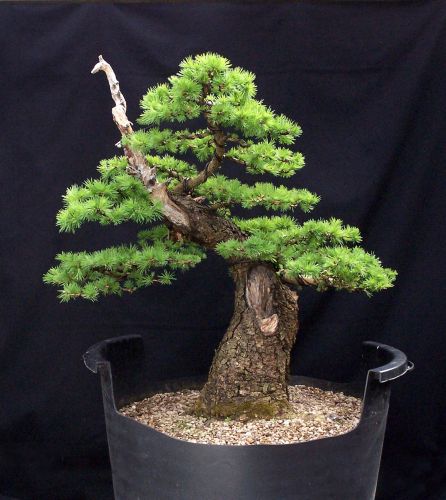
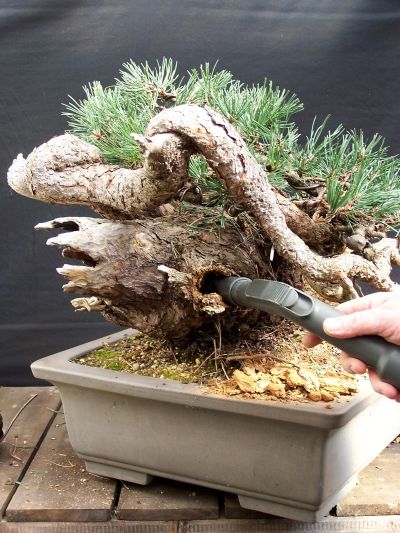
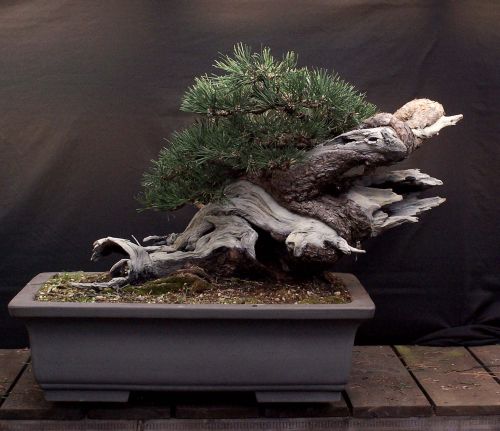
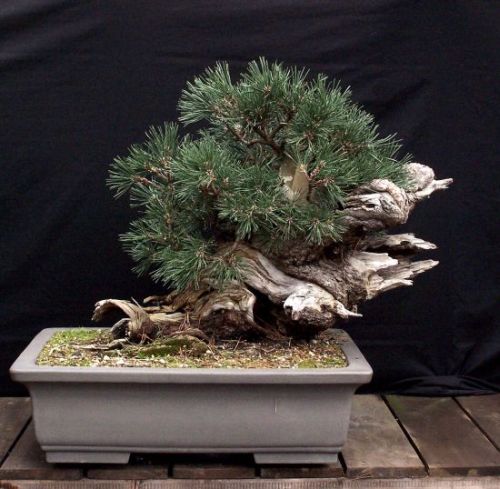
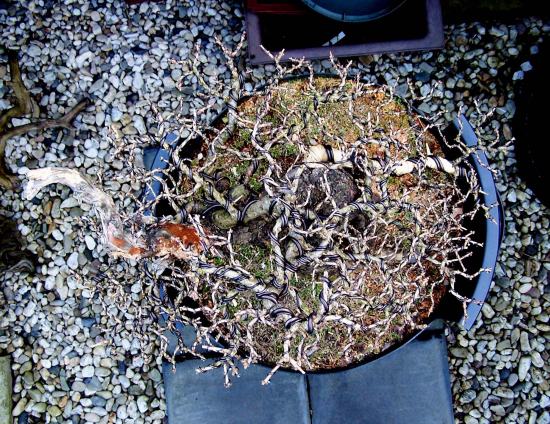
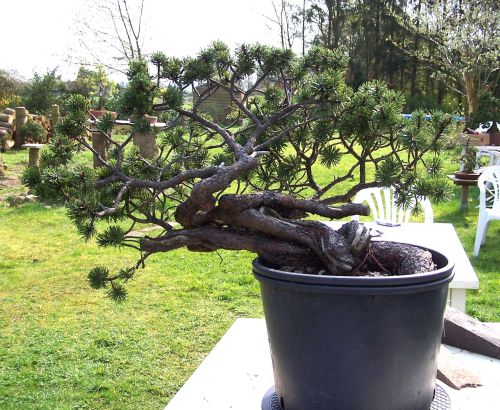
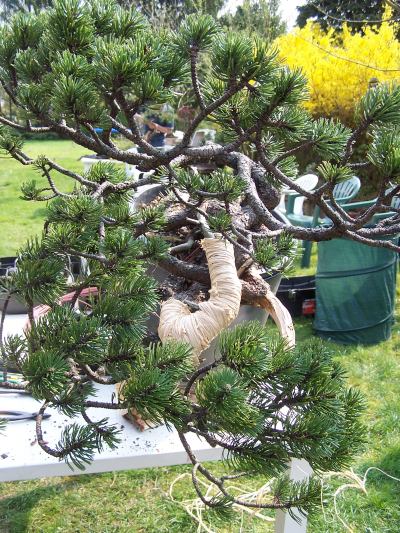
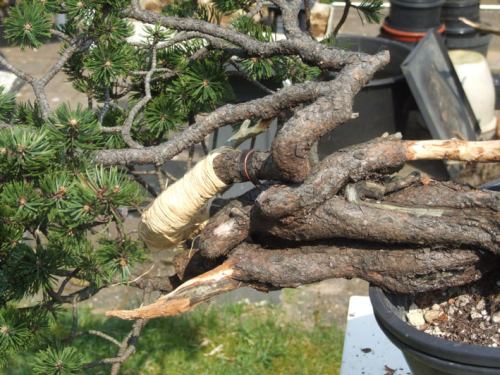
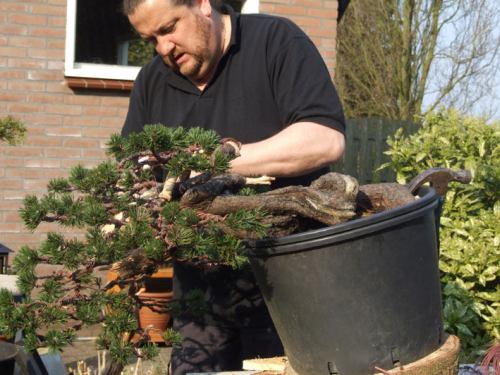
               Below: Rene’s very promising Yamadori, Mugo Pine.

A very promizing Mugo pine!

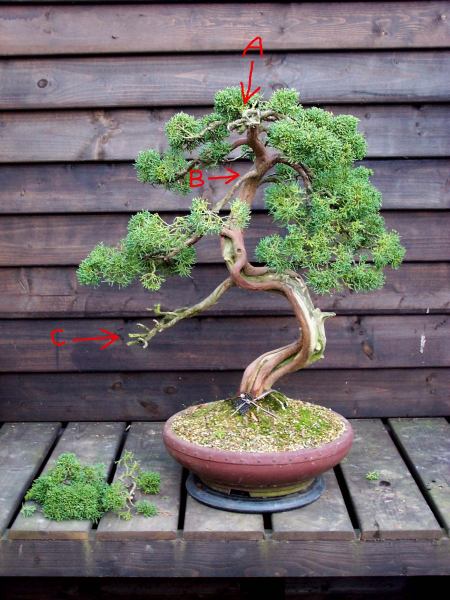
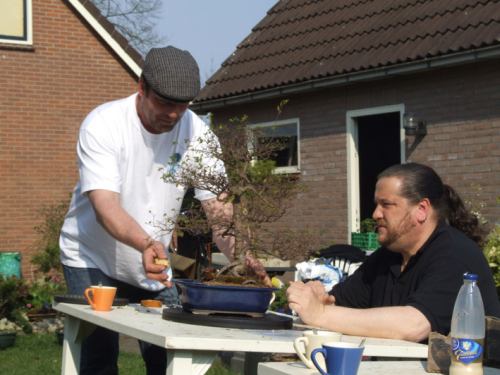
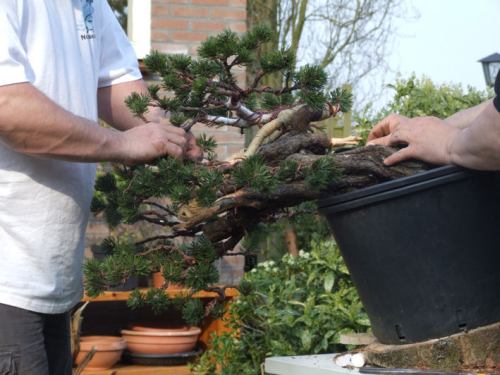
                  Below picture: discussing the trees possibilities.

                                                     Below picture: WHAT ?!


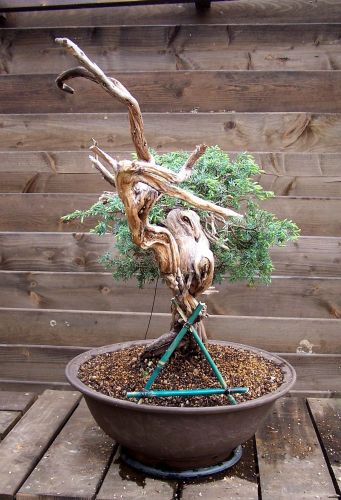
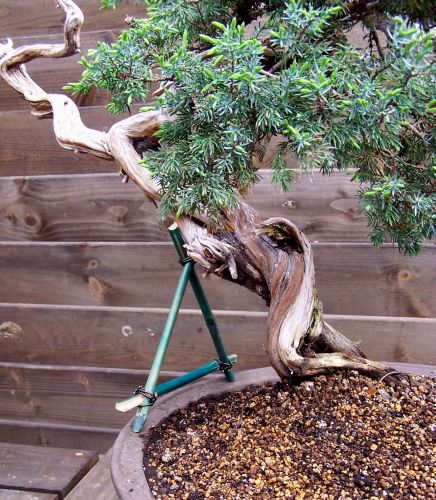
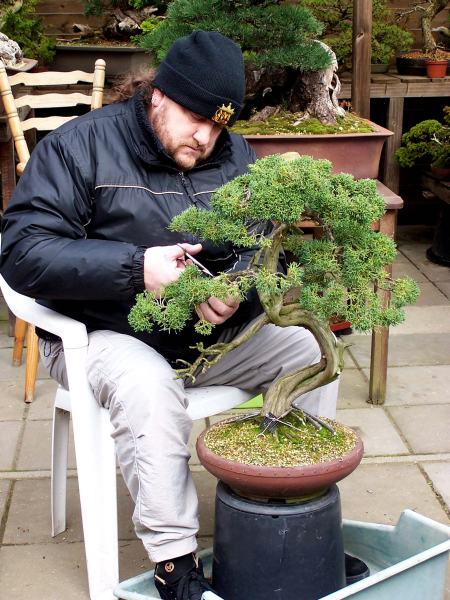
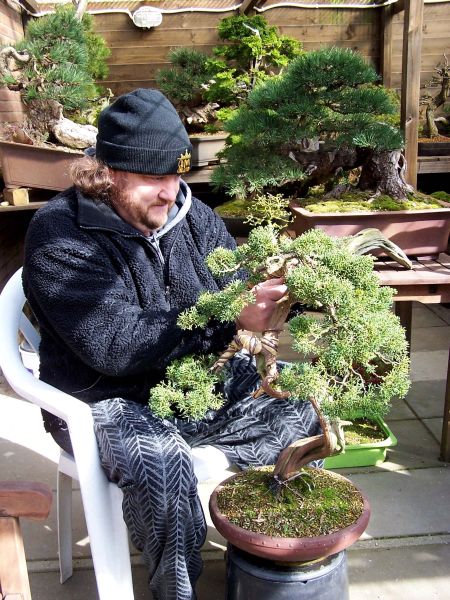
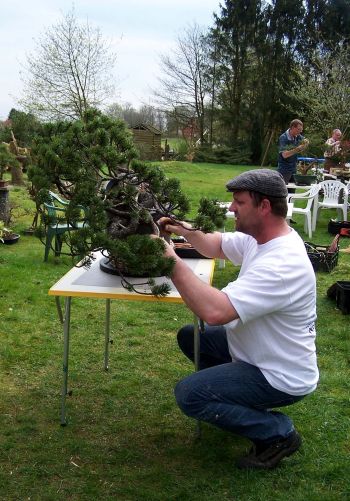
                 Above: Harry Gerdes concentrated at work on his Juniper.

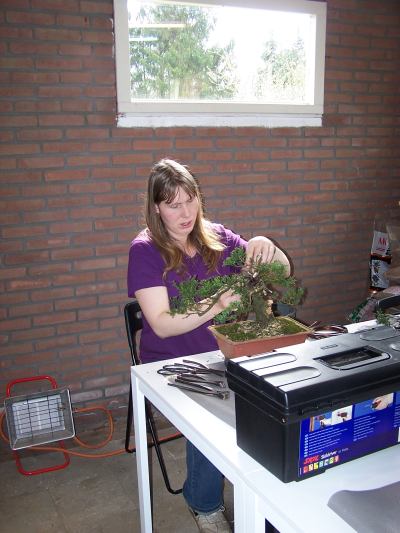
              Monique van Ommen, working indoor were it was much cooler!

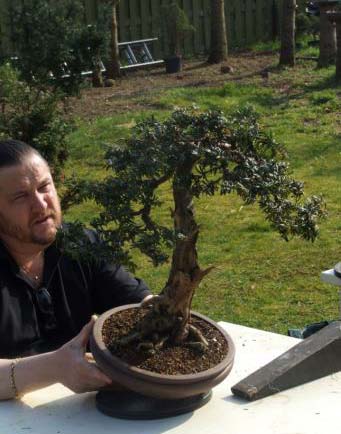
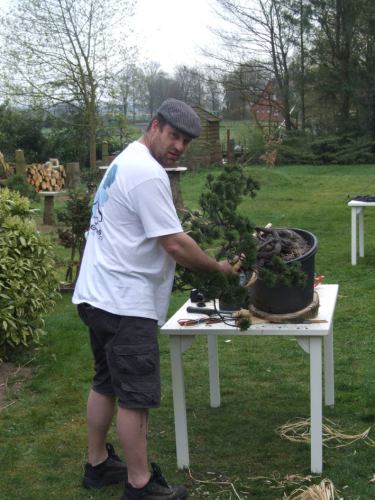
Rene Bakker was very eager to start working on his Pine. I cant blame him! 🙂

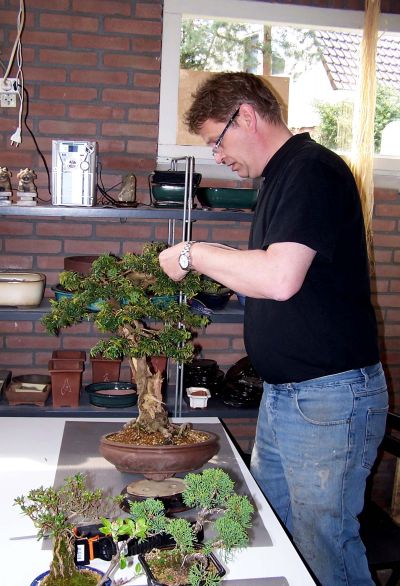
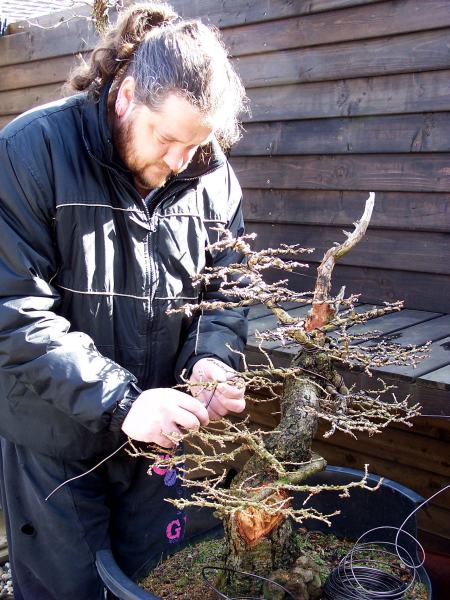
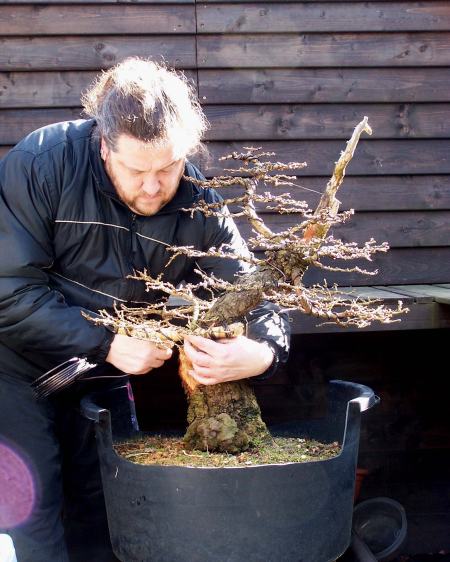
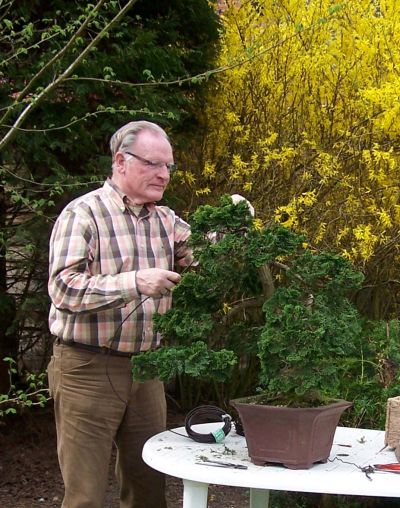
Above: Henk Steneker, founder of this club and organizer, hard at work on his “Taxus”.


Above: Anneke van Lintum, enjoying Bonsai! A picture that speaks for itself!

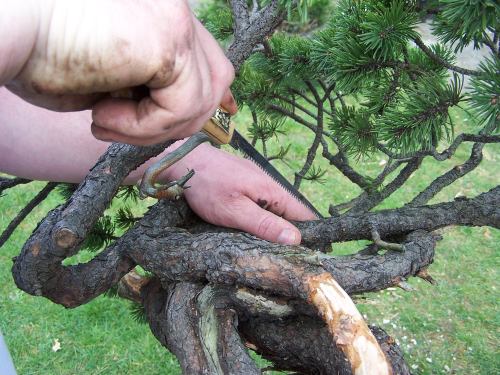
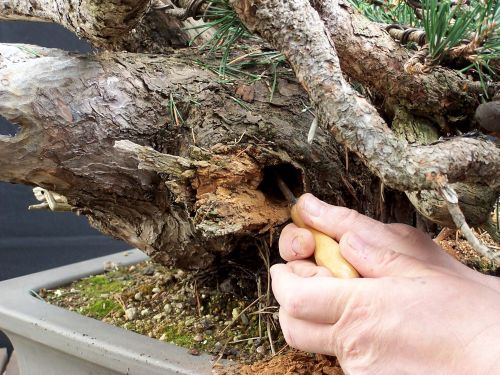
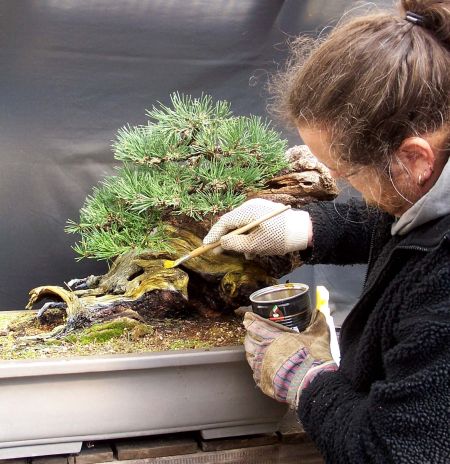
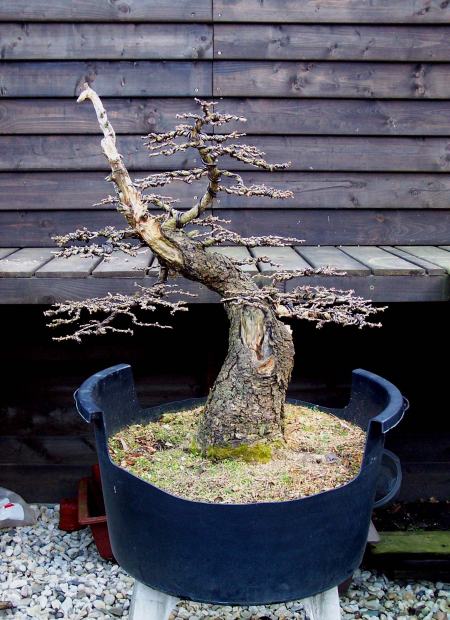
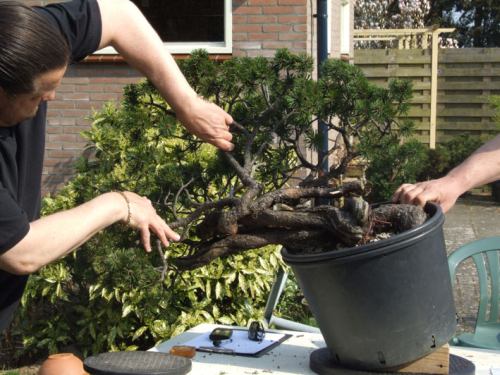
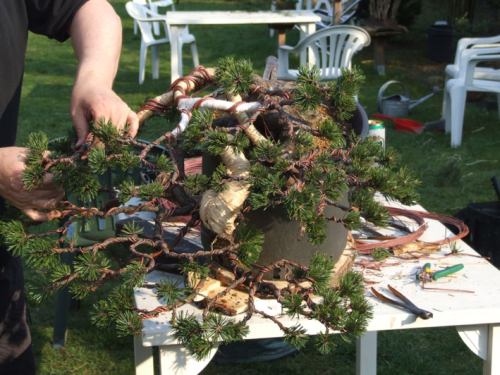
Above: Rene, bless his heart, did not hesitate to cut off and bend some major branches, after we discussed where we could go with his magnificent old “Mugo”!

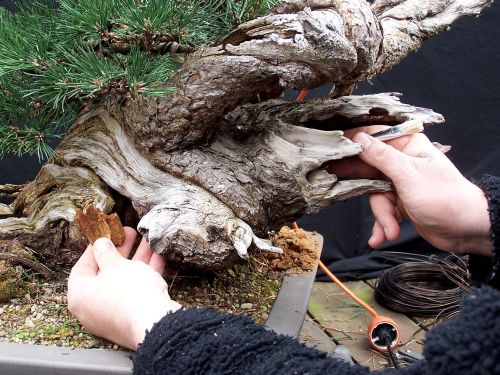
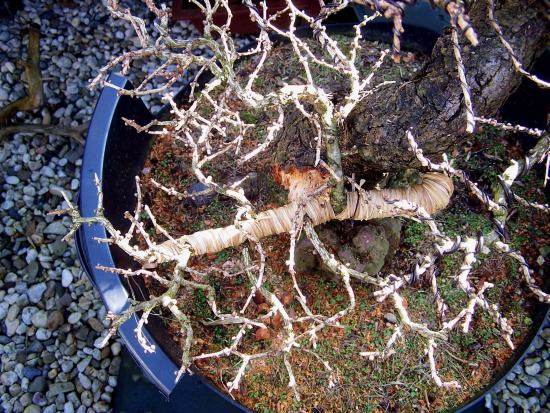
Above: Wet raffia was applied to prevent branches to break when they were severely bent.

                          Above picture: Bram de Visser working on his tree.

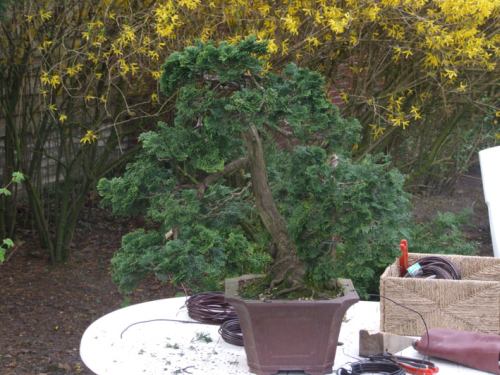
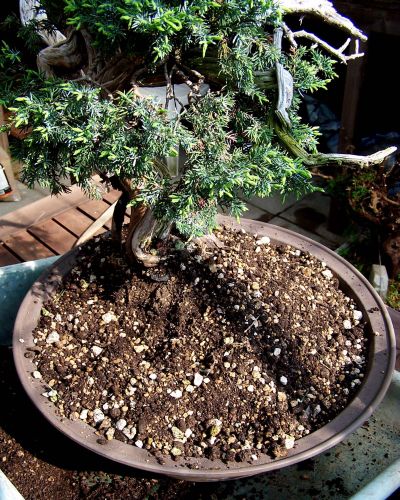
     Above picture: Bram’s “Chamaecyparis” obtusa before his work started.

                                      Above: The cut off branch is Jinned.

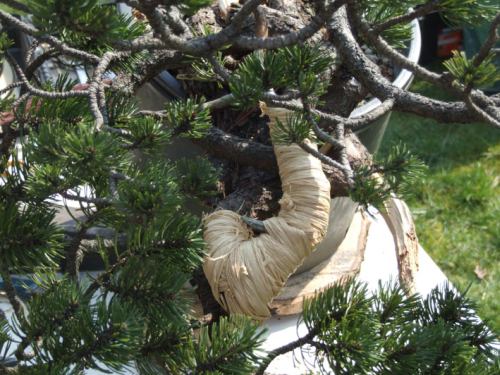
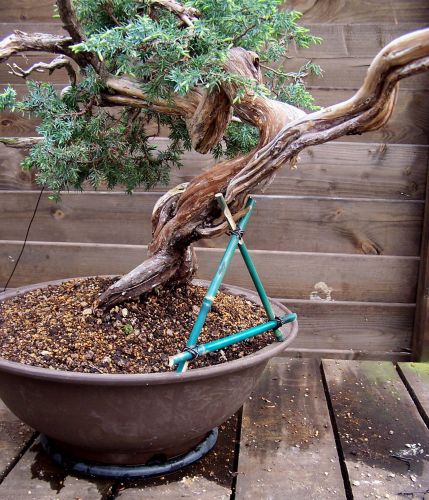
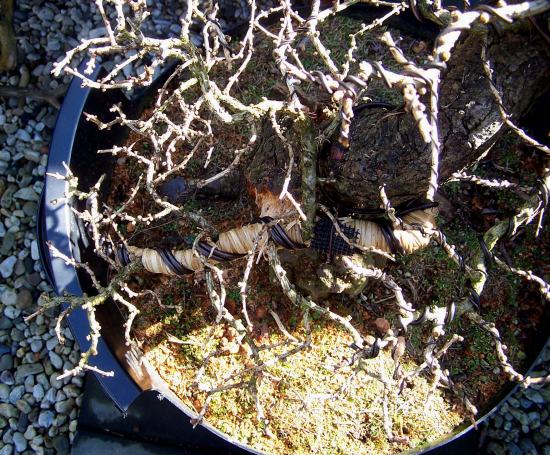
Above: The well-protected branch is slowly brought into its desired position.

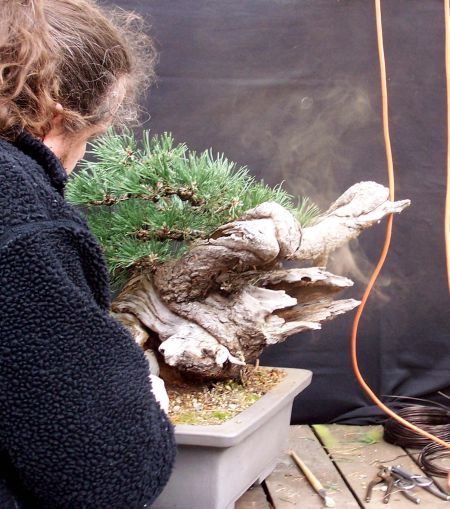
 Above: Even after all of the students were gone we went on wiring and styling…we both wanted to see this great tree finished! 😉

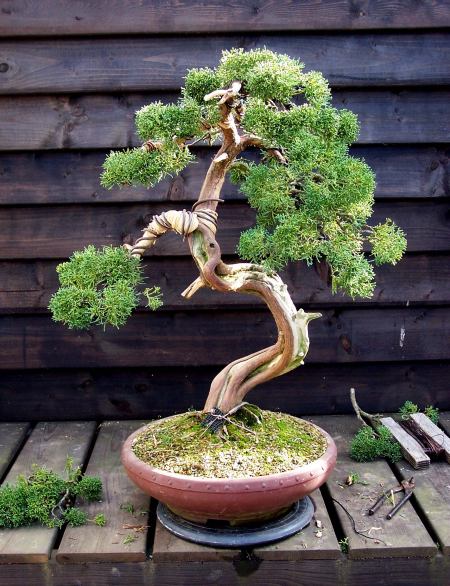
    Above: Almost everything wired and brought into its desired position.!

After a long day of bonsai work, it was nice to finish off with a promising tree like this one! And than it was time for a nice cold beer with my new Bonsai friends from up North!

Above: Bending the last branches of the top into place! After a long day of bonsai work, it was nice to finish off with a promising tree like this one! And then it was time for a nice cold beer with my new Bonsai friends from up North! And then it was off for the long trip home…tired but very happy and satisfied!

Hope you enjoy the images as much as I enjoyed this day!

Cheers,

Hans van Meer.

Info: karamottobonsai@hotmail.com

——————————————————————————————–


GROMING THE “SWAN” MY OLD MUGO PINE YAMADORI.

Hi, everybody,

here are some pictures of the deadwood work I did this afternoon. This work was mostly aimed at removing as much rotted wood from the inside of the tree. And then treating the deadwood with lime sulphur. Enjoy the pictures!

29-3-2009-085-web-hans-van-meer

29-3-2009-091-web-hans-van-meer

29-3-2009-103-web-hans-van-meer

                                 Like sucking the eye out off a moose! Hi-hi!

29-3-2009-113-web-hans-van-meer

          Poking from the right entrance and removing from the middle one!

29-3-2009-137-web-hans-van-meer

A very intimate view of the cave-like inside of the “SWAN”.  Preventing this fragile section from further decay will be my main worry in the future. As long as I can control that, the tree will outlive me by fare! 🙂

29-3-2009-156-web-hans-van-meer

When I was cleaning the inside from the hole in the middle front, the wood dust disappeared from the right side exhaust pipe, like a genie from his lamp!

29-3-2009-172-web-hans-van-meer

Although it is with pain in my heart, I do have to protect this deadwood every now and then In the future, to keep things under control. And after I had tasted, the lime sulphur I am applying here, multiple times on the deadwood of this pine, I discovered that this terrible pearly white deadwood will lose it’s unnatural glow very quickly. And I also have some Trix up my sleeve to hurry that proses a little bit more.

29-3-2009-240-web-hans-van-meer

                            Happy… happy happy! Happy….. happy happy! 🙂

Hans van Meer.

Info: karamottobonsai@hotmail.com

————————————————————————————–

—————————————————————————————————


IT TOOK ME A WILE, BUT HERE IS THE NEW “SWAN”.

Hi, everybody,

it might have taken me the better part of 2 days, but today I finished the styling of the foliage on “THE SWAN”.  The tree was placed just too high for me, to comfortably wire it and I am not able to lift a big tree like this anymore, with the state my back is in at this moment. I might only just start working on Shohin in the future. NOT! 🙂 I had to make some big decisions and a lot of branches had to be removed and replaced by the branches I had allowed to grow especially for this purpose. Just how this all was done, you can read on my website in a few days! Together with the story of the first styling of “THE SWAN”!

24-3-2009-001-web2

28-3-2008-063-web1

Well, here she is, the new “SWAN”! I am really pleased with the result so far, it is going a lot faster than I had hoped for. The whole tree has so much character and a nice flow to it, the vibrant green foliage leaning on and embracing the massive hollow trunk, with all it’s deadwood, clinging on to live on this weather battered fallen over high mountain pine. It is almost a living JING/JANG symbol I am really Hope you like it so far?

More deadwood work will follow tomorrow!

Cheers,

Hans van Meer.

Info: karamottobonsai@hotmail.com

————————————————————————————–

THOSE WERE THE DAYS! OLD PICTURES OF MY CELTIS SINENSIS NAMED “THE LION CRUSHER” (SIGH).

Hi, everybody,

I came across this picture from 1994. It is me repotting (alone) my huge Celtis chinensis. This tree "THE LION CRUSHER" was once a proud part of my growing collection those days. I loved this tree, because it was, a tree! You felt dwarfed, when you looked at it from close by. It gave me the feeling that I use to feel when I was a little child, playing under need a big tree in the forest. But I had to let it go to warmer places, it was struggling to much in my cold climate! Showing this difficult species at the "Ginkgo Award" was a highlight for me and the tree. I still miss the feel off this real tree!
I came across this picture from 1994. It is me repotting (alone) my hudge Celtis Chinensis. This tree “THE LION CRUSHER” was once a proud part of my growing collection those days. I loved this tree, because it was, a tree! You felt dwarfed when you looked at it from close by. It gave me the feeling that I use to feel when I was a little child, playing under need a big tree in the forest. But after 6 years, I had to let it go to warmer places (Frans), it was struggling too much in my cold climate! Being able to show this difficult species at the “Ginkgo Award” was a highlight for me and the tree. I still miss the feel of this real tree in my small garden!
Here is a other one. Can you tell why this tree is named "THE LION CRUSHER" ? Yes or no? Look harder!
Here is another one. Can you tell why this tree is named       “THE LION CRUSHER”? Yes or no? Look harder!

Regards,

Hans van Meer.

Info: karamottobonsai@hotmail.com

—————————————————————————-

WORKING ON MY JUNIPER!

Hi, everybody,

today I started working on one of my older trees. It is a Juniperus Chinensis import, that I bought in 1996, at “Crespy Bonsai” in Milan Italy. It is one off the few import trees I have ever bought. This tree has always been a problem child for me, one day everything was just great and the next day it just turned weak. Then I let it recover again into good health, did some mild styling or careful repotting,…and weak again. So now I am trying to style this tree again, back into a Bonsai. I hope that it doesn’t mind it to match this time.

16-3-2009-007-web

                          Above picture: The Juniper before my work began.

16-3-2009-004-web  16-3-2009-020-web

Above pictures: First all the old wire was removed. Then the live parts were cleaned with water, brushes and dish wash sponges with steel wool on one side. I stopped cleaning, as soon as I reached the red colour I was after, making real sure not to harm the sap flow of the tree! 

16-3-2009-025-web  juniperus-web1

Above pictures: You can appreciate the difference when you look at this picture of the tree after it is cleaned. Then just before dinner time, I made a quick drawing of the idea I have in mind for this Juniper. Now I only can hope for a sunny day tomorrow, so I can work on this tree again!

Next day, start cutting! A: The old top was to heavy and leaned to much forward for the design I have in mind. So it was removed, leaving some branch stumps to convert into Jin. B: this to long and thin branch is a eyesore for a long time, so it has to go! C: This long and straight Jin is totally out of place and only distracts, so it has to go!
Next day, start cutting! A: The old top was too heavy and leaned too much forward for the design I have in mind. So it was removed, leaving some branch stumps to convert into Jin. B: This too long and thin branch is an eyesore for a long time, so it has to go! C: This long and straight Jin is totally out of place and only distracts, so it has to go!

16-3-2009-049-web1  16-3-2009-053-web

Above pictures: This is the life! 🙂  The long Jin is shortened, the top is Jined, the two left branches are already carefully brought into place and there is a new top. Now some more basic wiring (only larger branches) and than I can bring everything into position!

Well, as you can see in this picture, I worked until late in the night and I must say the tree is getting along nicely! Tomorrow I only have some wiring and positioning on the two back branches to do and than I will tread the deadwood with lime sulfur to protect and whitening it again. And than the work work is don for this time. I will love this tree until it is nauseous, this growing season! And hope it will stay strong this time!I will post the pictures of the finished work tomorrow!
Well, as you can see in this picture, I worked until late in the night and I must say the tree is getting along nicely! Tomorrow I only have some wiring and positioning on the two back branches to do and then I will tread the deadwood with lime sulphur to protect and whitening it again. And then the work is done for this time. I will love this tree until it is nauseous, this growing season! And hopefully, it will stay strong this time!I will post the pictures of the finished work tomorrow!
18-3-2009: Today I finished the tree, for now that is. It was a wonderful sunny day and live was pretty good to me! I cleaned all the deadwood and than treated it with lime sulfur. The last wiring was don and than all the branches were brought into place. There was hardly any small wiring on this tree, only the larger branches were wired. I wanted to protect the growth I have on the tree as much as possible. I am pretty pleased with the result so far, only the strait and boring top section of the trunk is still a eyesore to me! But this will be solved mostly in the future, as soon as the tree tells me it is still doing fine, I will start to make a Shari on that part. This will connect, story and theme wise, the top of the tree to the bottom part. But this is for the later. When the foliage has grown some more, the top left branch will be brought more in front of that section as well! The first left branch is weak and I might decide to remove it if it those not get more vigorous this season. I calculated that possibility into this design. This tree needs a lot more work and growth, but it is on it's way to becoming a Bonsai again! I hope you like it this fare?
18-3-2009: Today I finished the tree, for now, that is. It was a wonderful sunny day and life was pretty good to me! I cleaned all the deadwood and then treated it with lime sulphur. The last wiring was don and then all the branches were brought into place. There was hardly any small wiring on this tree, only the larger branches were wired. I wanted to protect the growth I have on the tree as much as possible. I am pretty pleased with the result so far, only the straight and the boring top section of the trunk is still an eyesore to me! But this will be solved mostly in the future, as soon as the tree tells me it is still doing fine, I will start to make a Shari on that part. This will connect, story and theme wise, the top of the tree to the bottom part. But this is for the later. When the foliage has grown some more, the top left branch will be brought more in front of that section as well! The first left branch is weak and I might decide to remove it if it those not gets more vigorous this season. I calculated that possibility into this design. This tree needs a lot more work and growth, but it is on it’s way to becoming a Bonsai again! I hope you like it this fare?

 Cheers,

Hans van Meer.

Info: karamottobonsai@hotmail.com

————————————————————————————–

SOME STYLING WORK ON “X.L” MY BIG YAMADORI LARCH.

Hi, everybody,

Above pictures: The secondary branch structure is getting better on all the branches, but the straight line of the first branch on the right is bothering me. This is the only older branch on this tree and it needs a bit off help to get some gentle movement. This way it looks less boring and will fit the rest of the branch structure of this tree. Straight lines must be avoided at all times in a successful design, the stick out like a sore thumb! So I wrapped it in water soaked raffia and bent some movement in it.

I know! I'm a tree hugger!

                                       Above: I know! I’m a tree hugger!

Above pictures: It was hard to place my hands on this branch to bend it, but you can see I managed to great a gentle curve in that straight and thick branch in the end! Now it fits the rest of my branch structure. In Bonsai you have to pay attention to every little detail, even if you think no one will knottiest what you are doing. A lot of small mistakes will make a big one!

                             Above: Bird’s eye view of the branch structure.

Above; I made this picture with a backdrop to make the branches stand more out. I am really happy how the image of “X.L” is progressing. I can’t wait to see how he will look in a few weeks, when the brightly, and still very small, green needles start appearing. Then the scale of this old Larch is at it best! Maybe next year, if possible, I will plant him in a nice pot? I hope you like the progress so far?

Cheers,

Hans van Meer.