
because of some physical problems (I spare you the details) I can only work for so long in one go these days! So during the past 2 years or so I had to divide my time over the projects that needed it the most! And the (below) Prunus mahaleb Yamadori from Slovenia was and still is one of my absolute favourites to work on!
Below: 31-3-2012. Back in my garden and very late at night! I just got back from my very first solo long weekend road trip to Slovenia where I have been sightseeing and collecting with my new Slovenian friends. But I have to admit that almost all collecting and lifting was done by them for me! These amazing new friends knew of my back problems so they insisted that they would do all the hard work! The straight trunk stump on the right side of my thumb used to be almost 2 meters high and was shortened on the collecting side! The left trunk section with amazing deadwood was years later successfully air layered by me and was years later given to my dear friend Tony Tickle (GB) when he visited us here! He turned it into a rare beautiful flowering Literati Prunus Bonsai with amazing deadwood all over!
Below: Note: that there are no mature branches whatsoever on the right side of this tree! And that straight upright stump on the right side sticks out like a sore thumb!

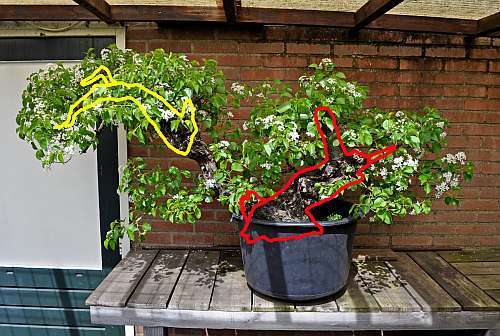
Below: 29-4-2016. 4 years later and all over full with new branches! This was made just before the left Yellow side was air layered! The right Red section is the tree of this story!
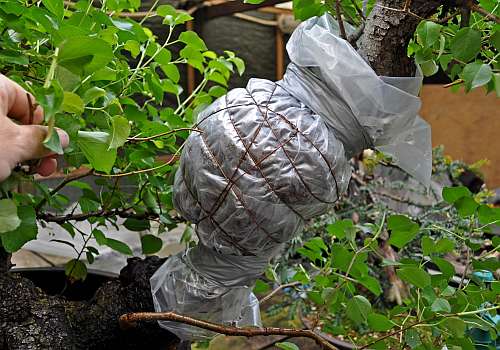
Below: A few hours later! The air layering or marcot was successfully made! And after just 3 months the new Bonsai was successfully separated from the Mother tree and planted in a prepared pot with lots of Anker points to safely tighten the tree to the pot!
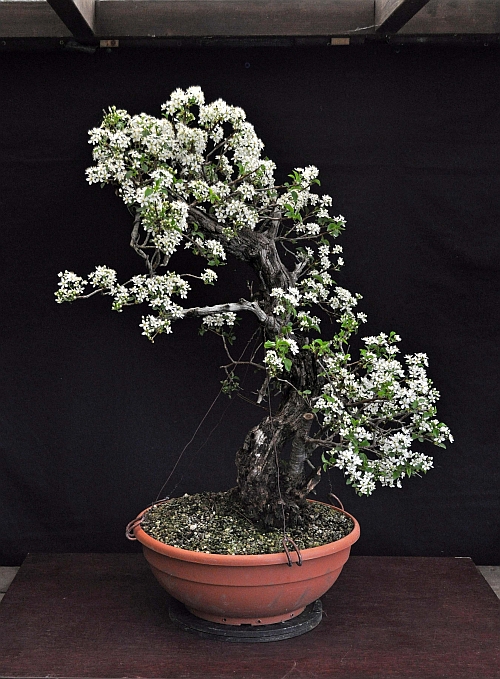
Below: This is how the air-layered section looked a few years later. These days she lives in my dear friends Tony Tickle’s (GB) Bonsai garden!
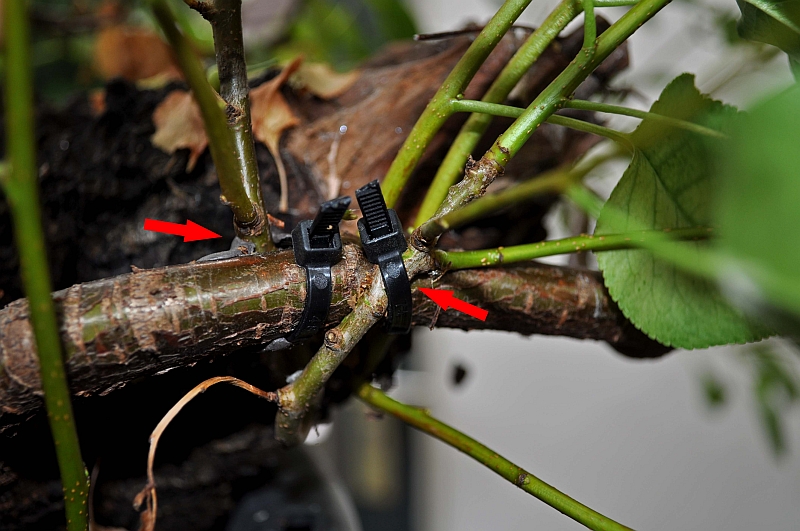
Below: After the (above) air-layered top section was successfully removed one young and tiny branch that grew on the left-over stump was allowed to lengthen and thicken until it was almost a meter long and thick enough to be shortened to the desired length. The left red arrow points at the craft that I made first on the inside of that thick branch. The right one shows the second one on the outside of that branch, which is like the first one tight down securely with the help of a tie-wrap and then the section was sealed with cut paste to prevent it from drying out!
Below: 19-4-2020. In full bloom and ramification that is getting better and better!

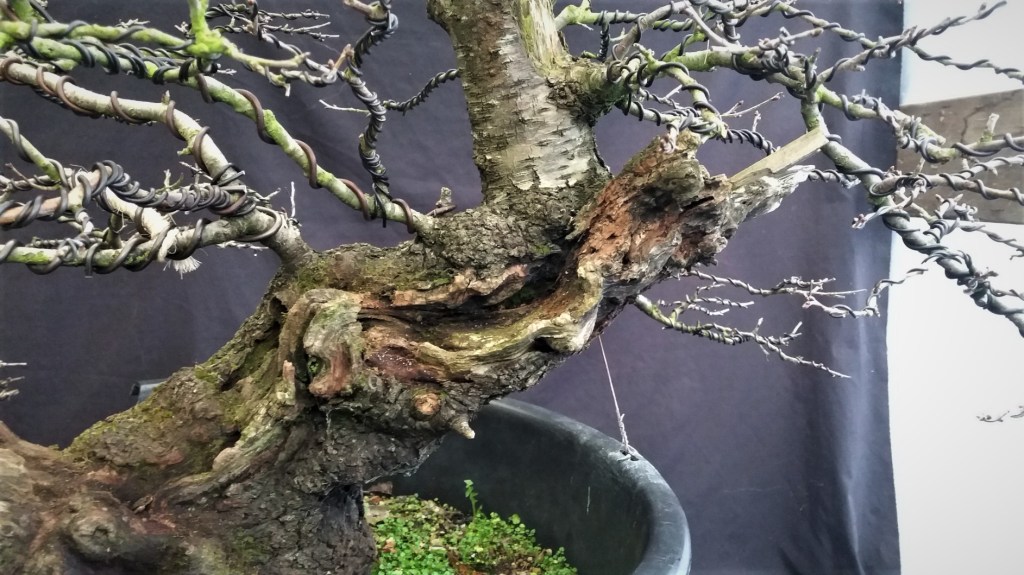
Below: 12-1-2022. Close-up picture of the natural deadwood! Besides being photographed and worked on here in my makeshift photo studio, she is also sheltered from the rain! So that all the deadwood can become dry! Then I can impregnate it to protect it from rotting away! The still-too-young bark on the upwards stump needs some more ageing of course! But who cares?! I am pretty happy so far with the fast progress of this tree…this little tree makes me happy!
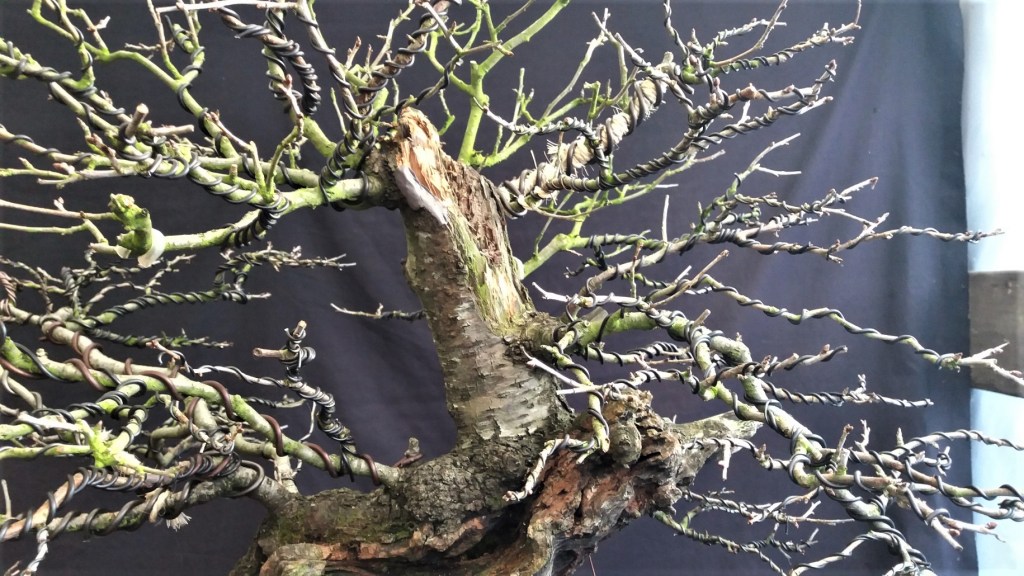
Below: Close-up of the still young top section. With all these new and fast-growing branches the still-young bark aged fast during the last couple of years. But obviously still need some more years to age! But I am considering using some tricks to fasten that progress! The deadwood was worked on some more with a hammer and chisels and the living bark on the left (top) side was cut away some more to make it look more natural. Some cut paste was applied to protect the wound!
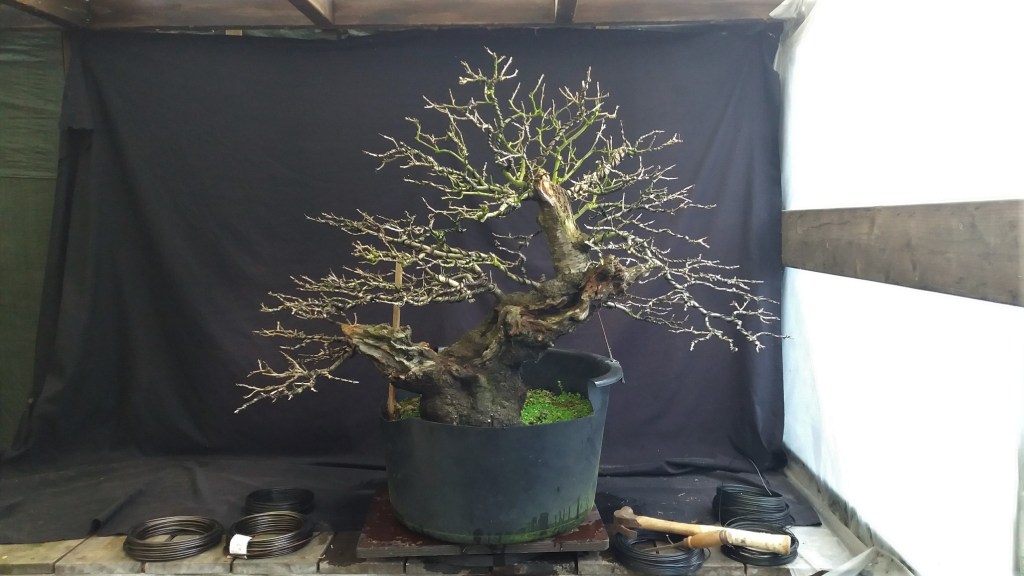
Below: 15-1-2022. Finished for now and I am pretty happy with how she looks already! And I can’t wait to see her in a nice pot and then to show her at The Trophy in Belgium! I hope you like her as much as do?!
Cheers,
Hans van Meer.

Nice Job!
LikeLike
I am glad you like it! 👍😉
Hans van Meer.
LikeLike