
Hi, everybody,
here is part II of this Taxus styling story!
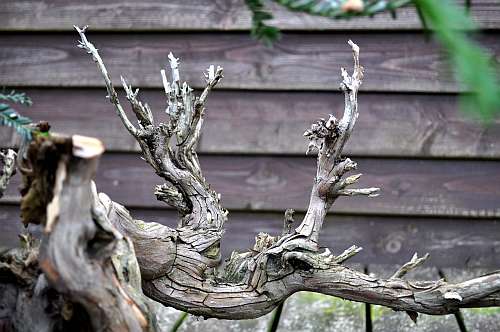
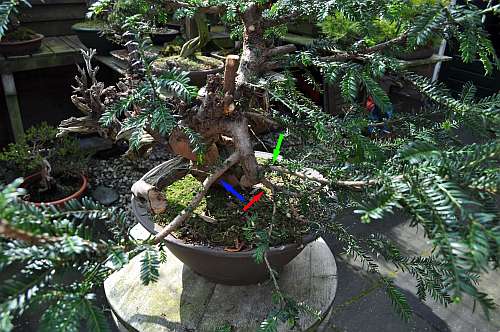
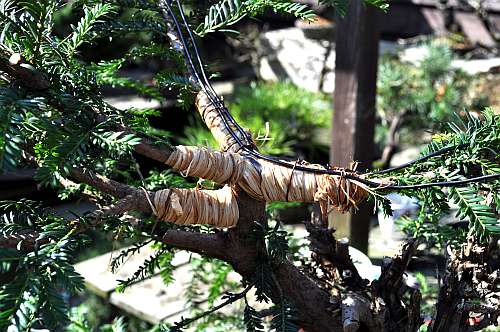
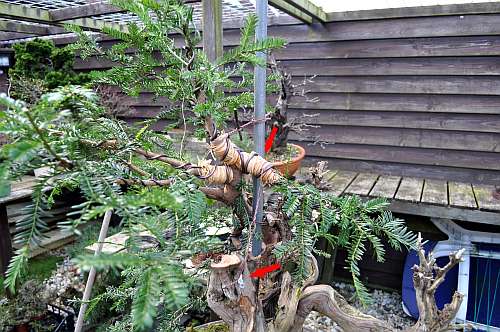
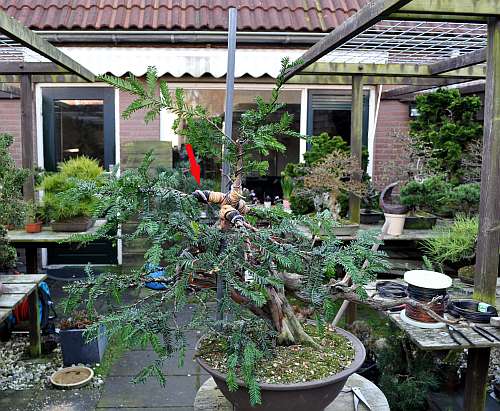
The first thing I wanted to do before I started to style the tree, is improving major large Jin on the right of the tree! It needs a whoosh flow to the right without too much visual distraction in a different direction! The especially straight angular movement away from the flow are a no-no and needs to be changed or completely removed! The straight upwards going Jin in the middle of this picture creates an almost perfect angle with the movement of long Jin to the right side and is clearly obstructing and shouting for attention when we follow the visual direction of long Jin! So it needs to be shortened considerably, but it needs to look like a force of nature had broken it off!
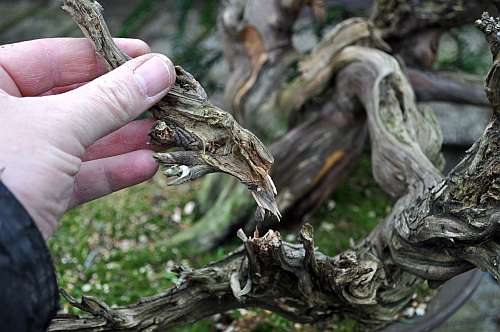
With a little-controlled force, the branch is broken off in just the right place leaving a natural-looking small stump that needs little or no more work to look completely natural!
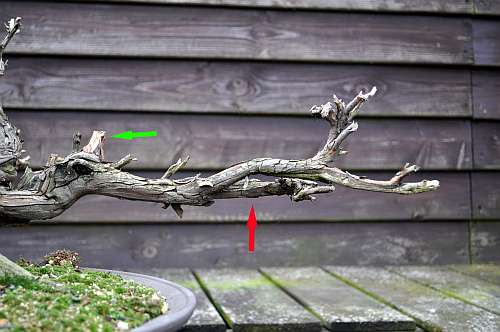
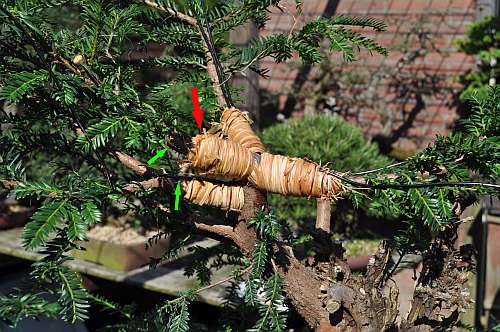
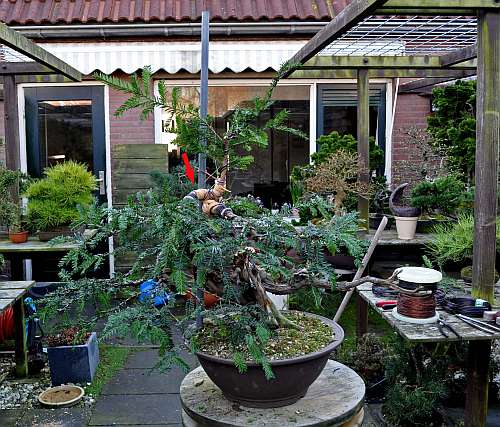
Green arrow points at the stump of the Jin that just is broken off. The red arrow points at an almost straight Jin that distracts the flow and movement of Jin just above and in front of it! So again: it needs to go!

Again this Jin is controlled and broken off by hand and again Jin breaks right off at the desired place! In the background, you can already see just how the movement of that long Jin is now more clear and more visible without any straight lines distracting it like before!

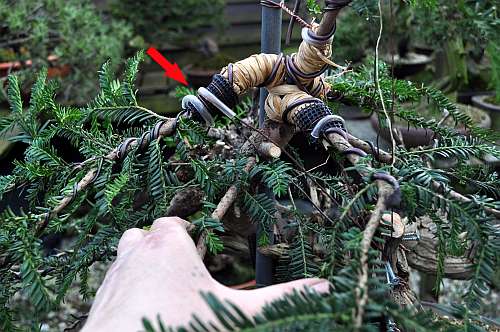
Much better all ready! But the red arrow points at a Jin that also grows upward in an angular fashion and obstructs at the tip of this long branch the eye movement, flow and natural tapering of that long Jin!

So again it is carefully broken off by hand! Leaving a stump that afterwards needs some more work with hand tools to go along even better with that last part of long Jin! That will be done when the major styling is finished!

By now that long Jin looks much better and the eye movement to the right is without any obstructions! it is starting to look like a bolt of lightning! Just like I wanted it to look! It brings visual speed to the tree and that is in my eye very exciting for the future of this tree! the red arrow points at a section on that thicker Jin section that needs improving! It is too long in some parts and there are too many small Jins sticking out from it…like tin fingers! This Jin section is not a part of that long Jin and stands on its one! It goes off in a different and those not obstruct the movement of that long Jin!

Like before the Jin that protruded straight into the air is removed by breaking it carefully off with my hand! Making that whole Jin less crowded and more open!
As you can see in this shot that Jin is now much more open and less busy! In the future when the branches are brought into their desired position and when that large, now still not worked on Shari aria is created, they might be worked on more and or shortened! But those important decisions can only be made when they can be compared with a more finished tree!
OK! Now it is time to make the final branch selections and then wire them and bring them into their desired position! First the left-hanging branch! The green arrow points at the branch that will form the left front branch. The red arrow will become the more left-orientated branch. The blue arrow points at the branch that will become the left backwards orientated branch!
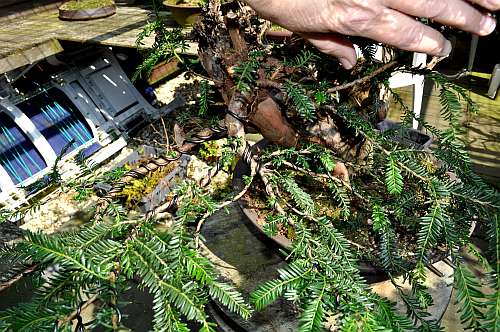
Top view of that left side hanging branch. The left thicker and the one to the right that grows from it are wired in a way that offers the best protection against breaking. Applying the wire like this with room between them covers more of the branch surface than when you apply the wire needle against each other! Although it looks messy, it was precise work to avoid damaging all the buds and young growth! The tinner branches that grow from it on the right lower side are fanned out! know it doesn’t look like much yet, but remember all branches in this first styling are still way too long (some more than 40 cm) and they will be shortened considerably when the now juvenile growth and buds on them have grown sufficiently! This first styling is not to win any beauty contest, but to bring the basic shape and direction into all the branches so that the skeleton to later work from in more detail is solid!

The red arrow points at a branch that is nicely placed but where I am still not sure of if it will be used?! that really all depends on how far the higher placed left side branch will come down?! So I leave it for now! Just above it, you can see a stump from a branch that was the same as the one below it so that could be removed earlier! The two smaller branches below the red arrow are up to now not necessary, but are left just in case! Just see how much new growth is all over them!
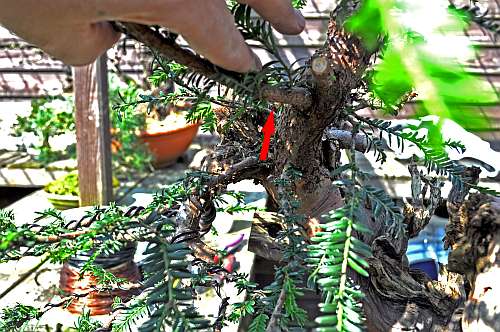
The red arrow points at that same branch, It is a nicely placed one, but it is a bit too low on the trunk and too close to the bottom left branch! Imagine it bending down to the left…it would cover that first left branch….but still I keep it just in case! Better safe than sorry!

Close-up of the top branches that were left after removing two others once earlier. The wounds are covered with cut paste to prevent dieback that could harm the 3 branches that are left! The right one of the 3 is the one that might come down far enough to take the place of the one below it in the picture, the one we have just discussed in the picture before this one! The left one in the picture will become the back branch and the one in the middle will become the top.

A layer of in-water-soaked raffia is tightly applied and held in place with little pieces of aluminium wire, this is handy when you are working alone! When this raffia dries it will shrink and protect the branches even more from breaking or cracking!
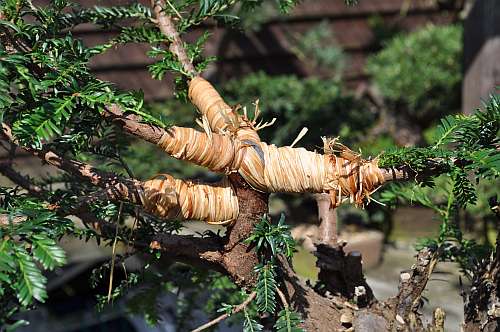
On the left, the branch below the future top is also covered with a layer of raffia. It is always handy to have enough water-soaked raffia prepared and ready so that you can work on it without having to stop in the middle because you have run out!
Then two wires are placed on top of the raffia that is also held in place with pieces of wire. This wire needs to be placed tightly onto the raffia without any space under need them! These two branches will be bent down so the wire on top will offer protection from breaking where the most stress is occurring! You might have knottiest that the wires are too long and will stick out from under the raffia?! Well, this is on purpose…they are used to wire the rest of the branch! Clever or what!? 🙂
The treetop branches have the second layer of raffia applied to them, to hold the wirer under need it as tight as possible! The red arrow points at the future top branch that will be severely bent up-wards so it needs protection from a wirer under it to protect it! That’s why a U-shaped wire is placed (green arrows) under need that branch, to protect it and the branch below it, which will bend downwards! That branch that goes downwards is here still waiting for its second layer of raffia to hold that U-shaped piece of wire tightly into place!
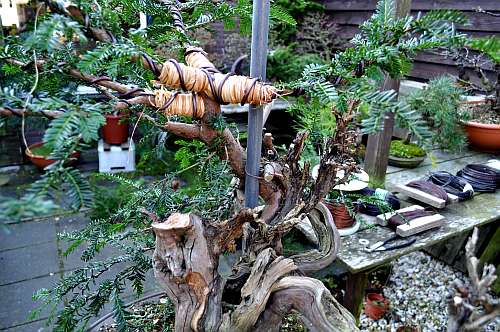
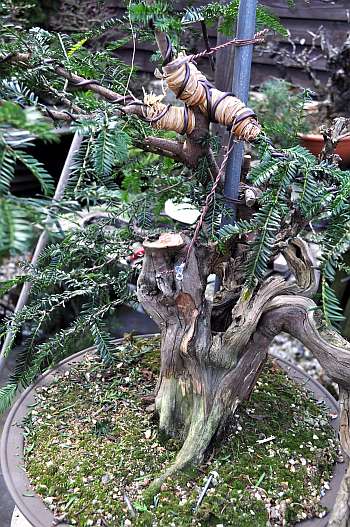
After that last layer of raffia is applied, and just one single MM aluminium wire is used to cover it! I figured that this is enough to safely bend the branches because strong copper wires will be used to hold them firmly into place! A (too long) iron pipe is inserted into the ground and secured firmly (with pieces of rubber between it) against the trunk with strong copper wire. This iron pipe will be used to bring the future top (on the left) upwards.
Here the future top is already on its way upward towards the iron pipe! This is carefully done in stages…there is no rush when doing these major bends! Especially when working alone, you are short off 2 hands! It takes some force and technique to bend and turn and tighten the wire with a nipper!
The top red arrow points at the future back branch that is brought down and to the left (in this picture) and is held down by a 3 MM copper wire that is attached to two screws that are brought into the Shari (bottom red arrow)! Just look how far it has already come down!
Close-up of the wire that is connected to the screws that hold everything into place.
That is, with intervals, more and more tightened with the help of a short piece of thick wire (like you can see on the right off the top)!
In this way, the branch is slowly and as safe as possible brought into the desired position and at the end hold in its place!
In this shot, you can also see just why in the future the large Jin on the left, where the screws are inserted, needs to be largely removed and then naturally formed! It gives the tree a reverse taper (smaller at the base and wider at the top)! It also hides the view of large Jin at the back!

The red arrow points at the top that is finally into place, just look how far it is bent upwards…amazing! the green arrow point at the top left branch that is about to be carefully bent down into its desired position! Things are so far coming along nicely! I am completely in my element again…I missed that feeling for so long! 🙂
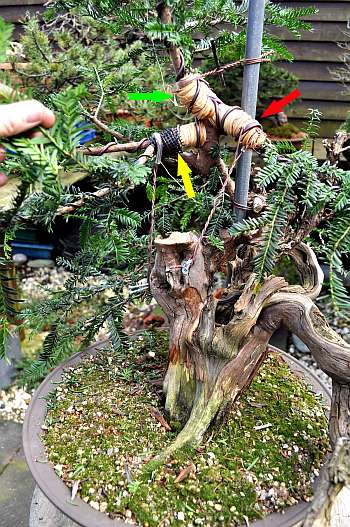
The green arrow points at the new top. The red arrow points at the back branch. The yellow arrow point at the new right hanging branch after it is in stages brought down into its new position! The green arrow points at the top that is even brought more toward the iron pipe!
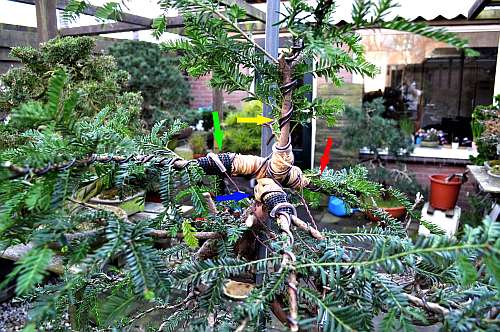
The yellow arrow point at the top is by now in its desired position, but is here still straight and therefore needs bending to create a more natural movement. The red arrow points at the back branch. the blue arrow points at the new first right side branch that also needs additional bending to create curves and the green arrow points at the left first branch that needs some more downwards bending!
The red arrow points at the first left-side branch that still needs to be brought down a considerable bit! This is done by carefully pushing it down with my left hand, while the right hand tightens the heavy copper wire! You have to be very handy when you work alone! 🙂
The red arrow points at that same left-hand first branch. Just look how far it has come down when you compare it with the picture above! It still amazes me how far you can safely bend stiff branches when you protect them with raffia and wire!
Red arrow points at the branch that is just brought down and held in its new position with the help of 2 strong copper wires! Pieces of aquarium tubs and pieces of pot screens are used to prevent the wires from cutting into the bark of the branches! This is very important and must always be done!!!

Red arrow points at the branch that was kept on with a question mark?! It could be a left branch, but it would hide the branch below it! And now the branch above it, which has just been brought down, has taken over the place of that branch in a better way…so it can be removed as well !!
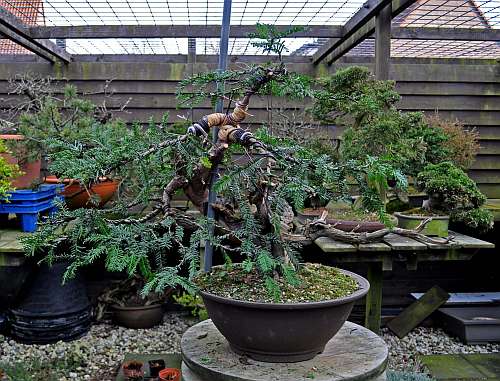
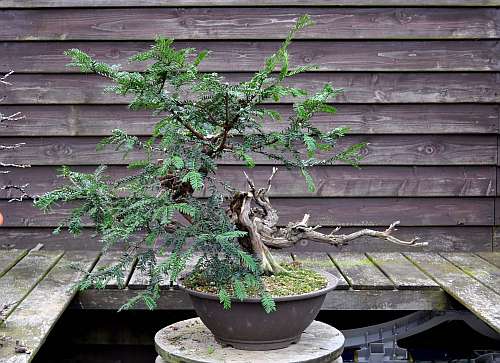
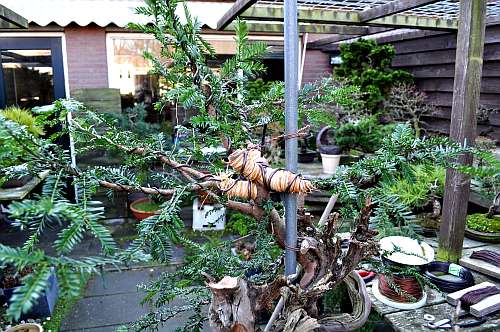
And this is, for now, the final resold after a day of work! Remember that all the branches are left way too long on purpose to protect the inner buds and small growth! This extra length with all its lush growth will work as a sucking engines to maintain the sap flow and growing power and will only be shortened as soon as I am completely sure that there is enough growth on them closer to the trunk to maintain the branches! The long top will also be shortened in the future and one of its lower-placed small branches will become the new leader and top! But again: only when there is more growth lower to maintain its health! I don’t want to lose any branches, they are all needed and health and growth are much more important now than the wild image of this very old tree!
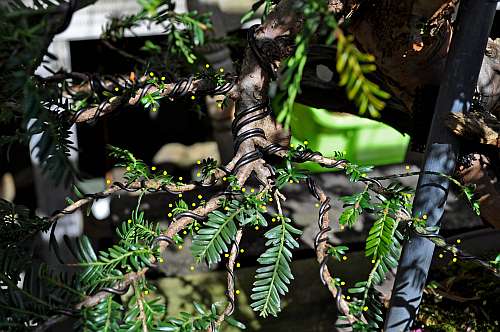
I made this picture on 5-5-2016 just to show and prove to you what I mend by tons of buds and new growth all over the insides of all the selected branches! This is a close-up of the first hanging branch on the left of the tree! I placed yellow dots next to each bud and new growth to make it more clear for you all to see! When this new growth has grown sufficiently on all the now still way too long branches, they will be all shortened considerably! Some by more than 35 cm!
I hope you enjoyed this story as much as I did making it?! I will keep you all updated on the progress of this future Bonsai and hope you come back for my other Bonsai stories and adventures?!
Cheers,
Hans van Meer
Info: karamottobonsai@hotmail.com
—————————————————————-
