Hi, everybody.
Its a bit later than was expected, but here is as promised the short version of the repotting of the “SWAN”!

Above: With a special tool the roots are separated from the sides of the pot.
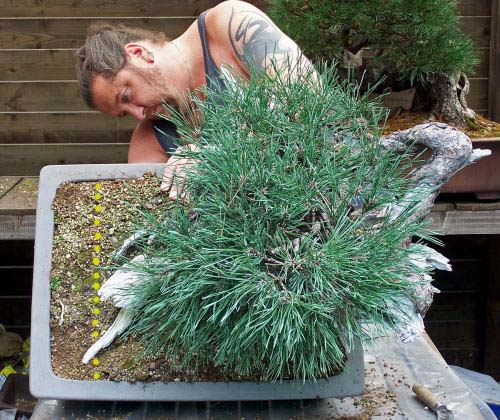
Above: The yellow line shows more or less the desired pot size. So this repotting I want to look how close I can get to that imaginary line, without harming the tree of course! During the first repotting of the “SWAN”, I had seen that most strong roots grew just from that side of the tree, so I knew that this never was going to be easy! I would soon see how ready this tree was to fit into this smaller pot. It was all very exciting, to be honest! 🙂
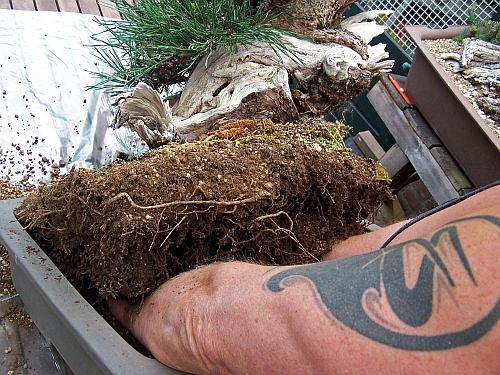
Above: looking for my keys. 🙂
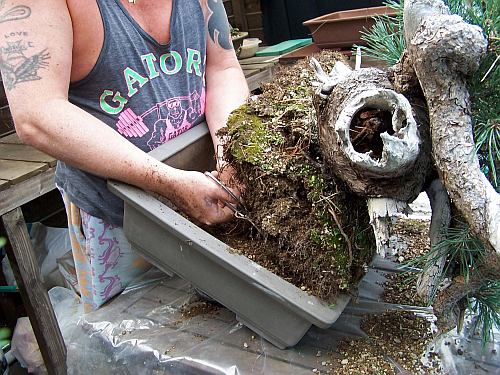
Above: Were necessary, roots were cut to free the tree from its pot.
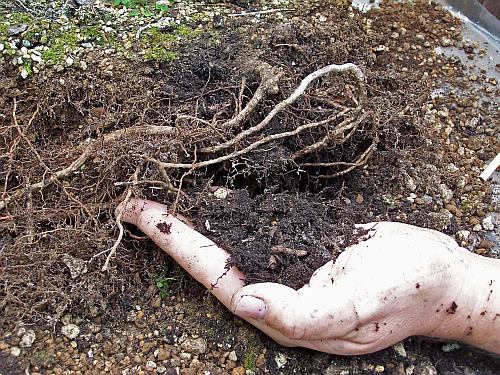
Above: This darker soil in my hand is still the original soil from the mountainside where this old Pine grew. I had to remove all of it this time, to prevent the possibility of future root rot!
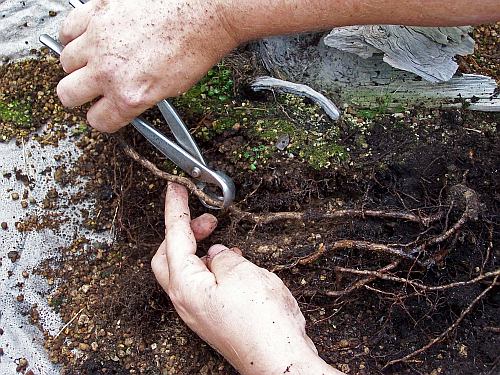
Above: Too long roots were cut back.

Above: This is a problem root! It sticks out way to far to be able to fit the tree in this smaller pot. But is too important for the health of the tree to just cut it off! So I wired it, just like you would do with a branch if you want to bend it!
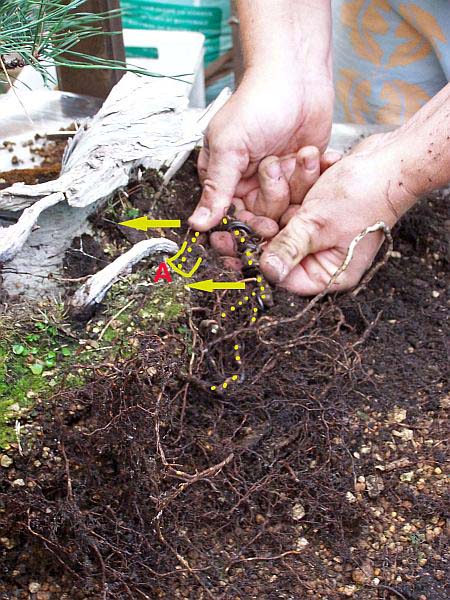
Above: (Yellow arrows) Here I am carefully bending the branch inwards towards the base of the tree. (A) shows were this thick root grows from. The yellow dots show just how much the roots were bent!
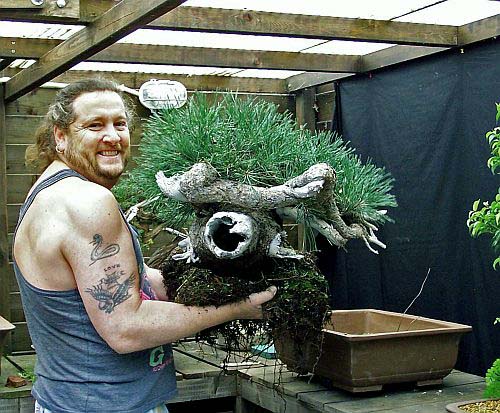
Above: Quick dear, this thing is really heavy! 🙂
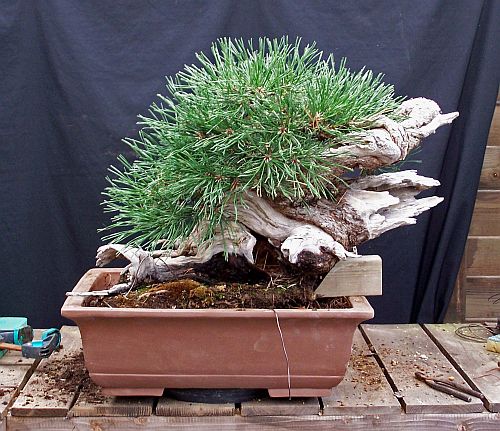
Above: Next time, if possible, the tree will be planted just that little bit more to the left side. But for now, this is as far as was safe. But even like this, the tree looks more balanced than ever before. That is what makes Bonsai designing so interesting when you start working on a tree, you have to create a future image for your Bonsai in your mind. With only that mental image, you have to make all kinds of big decisions and then you wait and work for half a century or so, to find out if the plans you made all those years ago were any good! That is what makes this art form so special to me!
The piece of wood holds the tree into its place, so I can carefully work the soil in between the roots. Making sure no air pockets are left between the roots.
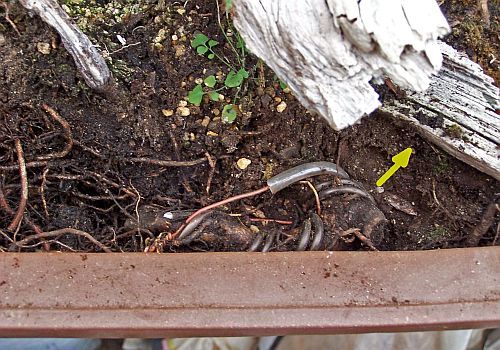
Above: Close up of how the problem root is bent. The whole tree is pushed as much as possible against the left side of the pot, This squeezes the thick root against the pot side, making it move even more inwards (yellow arrow).
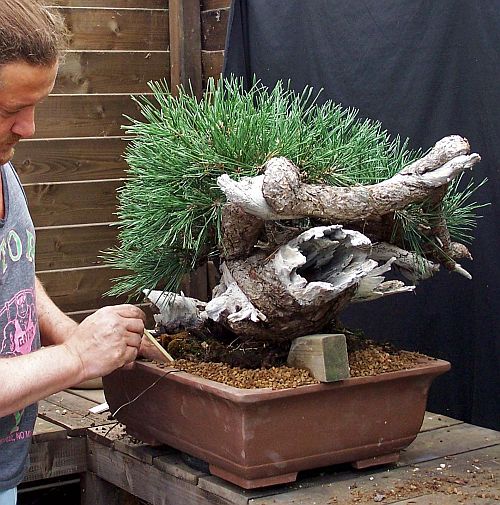
Above: Working the soil in between every root, with a chopstick. It took ages, but it is a to important task to rush!
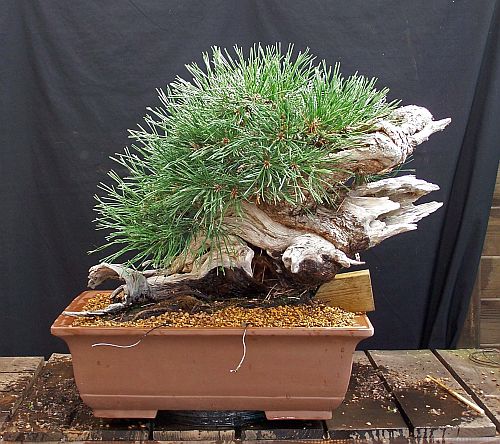
Above: The “SWAN” in his new (temporary) pot. It was watered until the water that runs out of the pot was clear. The wires that you see hanging out of the pot were there to secure the tree. but they were not necessary and will be removed.
I have to admit that I am over the moon with this result. The tree is now already planted more to the left than I had hoped for before I started! If I can manage to planed it about 2,5 cm/1 inch more to the left in the next repotting it would just be perfect! The wooden block will stay there until I know for sure that the tree can hold this position by itself.
In a few days the complete story of this repotting, with much more pics, will be posted on my Karamotto website. So if you like it, go check it out in a few days time.
Tomorrow I will post the pictures of the other big Pine repotting I did on this same day.
Hope you like how much the tree has changed already?
Cheers,
Hans van Meer.
Info: karamottobonsai@hotmail.com
———————————————————————————————

WOW!
LikeLike
Congrats she is a beaut
LikeLike
Thanks guy’s! I am glad you like it this far!
Cheers,
Hans van Meer.
LikeLike
Wonderful Hans. Enjoyed your post on The Swan
All the best
Andy
LikeLike
Well done, Hans! very interesting post. Your originality in styling a tree is what I really admire.
Shaukat
LikeLike
Again WOW! Great looking tree. Congrats…
LikeLike
I am glad you like my work and stories, it makes me work just that little bid harder!
Thanks,
Hans van meer.
LikeLike